Welcome to this month’s “Restoring an Original.” We’re taking a look at a one-of-a-kind PRS that was custom-built for Neal Schon. I was one of the lucky ones who saw Journey out on tour this year. It was a superb concert! The vocals, instrumentation, sound and lights could not have been better—they rocked the Target Center here in Minneapolis.
Diagnosis PRS Serial Number: 2 64682; “Custom Built For Neil Schon, Paul Reed Smith” written in gold ink on the back of the headstock.
 With the headstock snapped clean off, I knew immediately that we weren’t going to be doing one of our standard headstock reglue procedures. It had a Floyd Rose locking nut with two holes drilled through the neck for the reinforcing chassis bolts to pass through. One would think that two holes going through the mahogany neck would make it vulnerable there, but this break was after the holes on the headstock side. In addition, a part of the restoration was going to be installing much lighter tuning machines. These nice, A-grade Schallers were very heavy for the size of the headstock—perhaps a contributing factor in the break.
It was very important to maintain the integrity of this PRS guitar. We needed to complete these repairs without removing Mr. Smith’s gold-colored writing on the back, and we needed to keep the mahogany neck looking natural, with the least amount of scarring. Grafting in reinforcement cheeks (removing a small amount of material from either side of the headstock joint and replacing it with small sections of mahogany carved to fit perfectly) was going to be too intrusive, and I certainly didn’t want to spray a blotch of solid color “cover up” to hide what was underneath. It was critical to keep the details of this area looking original, which would require “feathering in” the much-needed repair for this instrument to resonate with its glorious sweet tone once again.
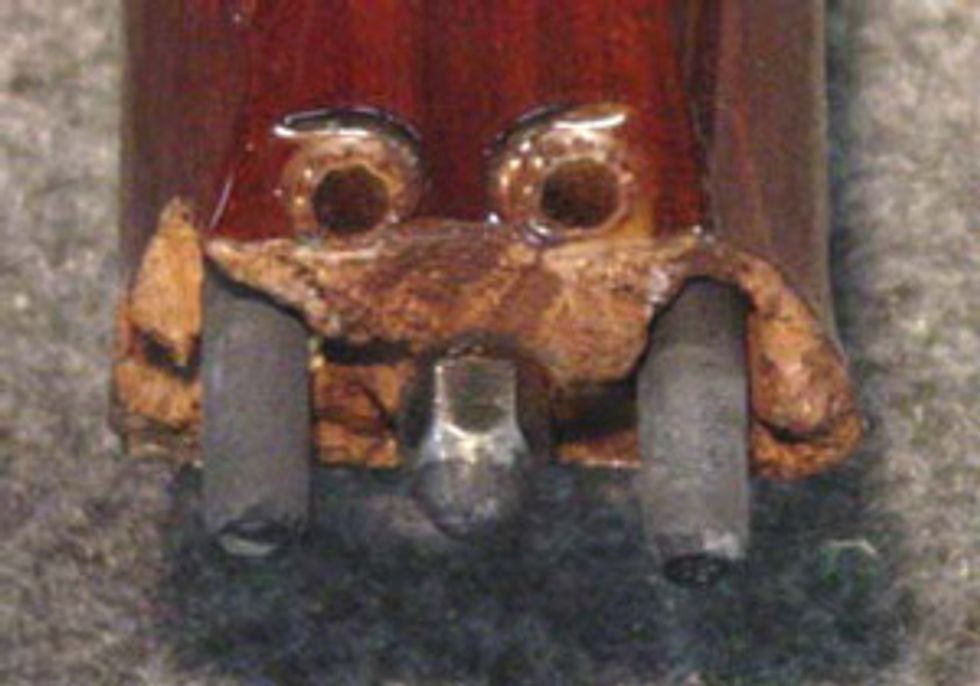
Procedure The first and most important challenge was going to be attaching the headstock back to the neck and securing its original strength. I considered some form of dowel pinning. The material size and substance was going to be key in pulling off this restoration. After testing density, strength, and tonal characteristics of different materials, I decided to use 1/4”-diameter carbon fiber rod.
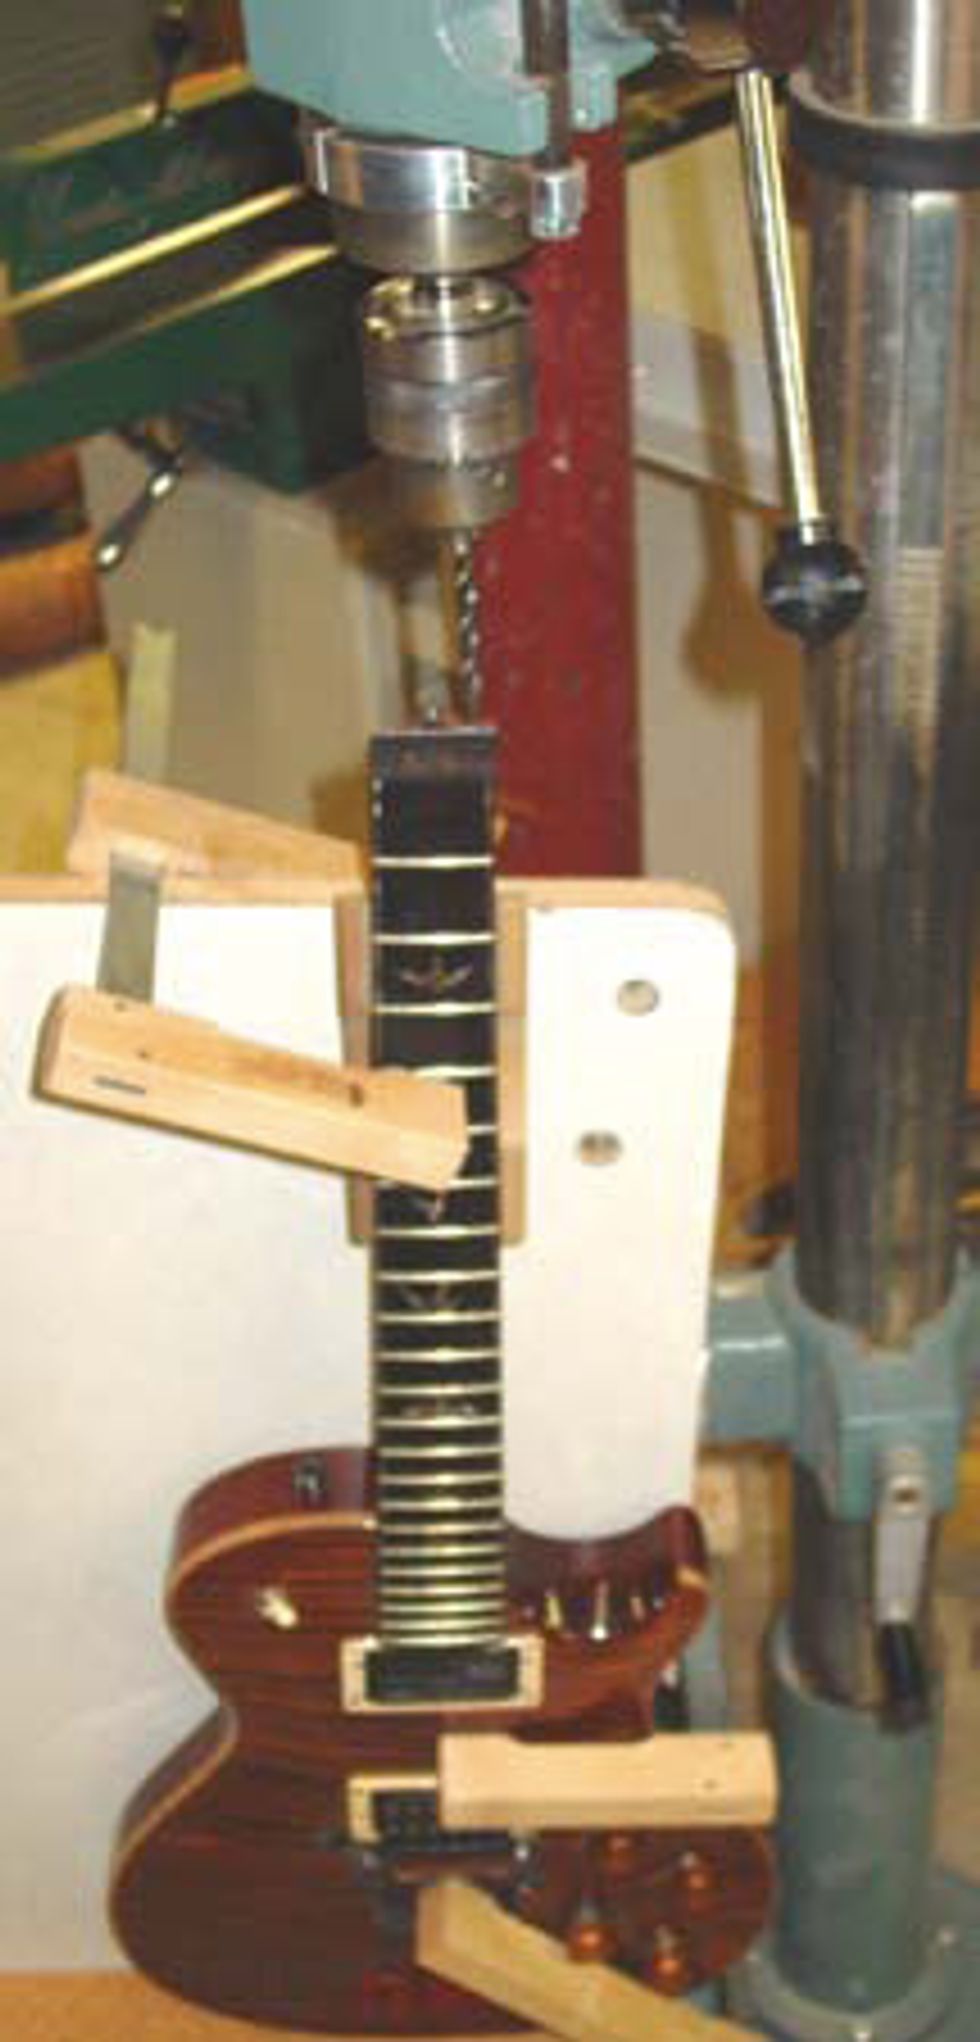
For this procedure I cut two 1” sections, making carbon fiber pins with all ends slightly beveled for easy installation. They were inserted into the predrilled 1/4” holes on the neck side. The body was mounted vertically to the drill press and jigged up using Stewart MacDonalds Cam Clamps (item numbers 3721 and 3723). Everything needed to be measured and center-punched before using brad point drill bits to drill the holes for the reinforcement pins around the truss rod and the Floyd Rose nut mounting holes.
 I used a lower grade vise for clamping in the headstock and drilling out the two 1/4” pinholes. This was very important, as I needed to address the ten-degree pitched headstock. For you repairers and luthiers looking for a new and improved shop vise, StewMac’s Angle Vise (item number 1820) offers a nice solution for this kind of work, with 4”x1-1/2” jaws opening to 4” and tilting from -10 to 120 degrees.
Ready, Set, Go! Once everything was dry assembled, making sure everything fit well together and according to plan, we were ready to mix our medium cure two-part epoxy glue. (Please don’t try this at home with an expensive collectable guitar!) The medium cure epoxy was chosen not only for adhesion, but for gap filler. Once the epoxy was mixed, I lightly applied the glue to both sections of wood and around the carbon fiber pins. One of my concerns was the glue oozing into the truss rod and not positioning itself as a gap filler once clamped up, so I monitored the glue by the touch of my hands, feeling for the increased warmth on the underside of the glue cup and by stirring and feeling for the increase in viscosity. The difference in temperature and moisture can really increase or decrease the time that the epoxy starts to kick, so I needed to be ready to put the sections together at exactly the right time or the repercussions would be disastrous.
The glue was beginning to kick, warming up with a slight thickening. The headstock was inserted into the neck and neck pins with a vertically adjusted 50” grip clamp holding everything tightly into place. The picture of the glued-on headstock shows you the appearance of the crack before drop filling with finish touchup. It’s looking great at this point, so the finish touchup is only going to make the repair less visible. Sean at PRS confirmed that the finish was an undercoat of polyester followed with an acrylic urethane topcoat. We’ll apply the same formulation to address the finish separation.
John Brown
John Brown, of Brown's Guitar Factory, is the inventor of the Fretted/Less bass. He owns and operates a full guitar manufacturing and repair/restoration facility, which is staffed by a team of talented luthiers. He is also the designer of guitar making/repair tools and accessories that are used today by instrument builders throughout the world. brownsguitarfactory.com info@brownsguitarfactory.com
Diagnosis PRS Serial Number: 2 64682; “Custom Built For Neil Schon, Paul Reed Smith” written in gold ink on the back of the headstock.
 With the headstock snapped clean off, I knew immediately that we weren’t going to be doing one of our standard headstock reglue procedures. It had a Floyd Rose locking nut with two holes drilled through the neck for the reinforcing chassis bolts to pass through. One would think that two holes going through the mahogany neck would make it vulnerable there, but this break was after the holes on the headstock side. In addition, a part of the restoration was going to be installing much lighter tuning machines. These nice, A-grade Schallers were very heavy for the size of the headstock—perhaps a contributing factor in the break.
It was very important to maintain the integrity of this PRS guitar. We needed to complete these repairs without removing Mr. Smith’s gold-colored writing on the back, and we needed to keep the mahogany neck looking natural, with the least amount of scarring. Grafting in reinforcement cheeks (removing a small amount of material from either side of the headstock joint and replacing it with small sections of mahogany carved to fit perfectly) was going to be too intrusive, and I certainly didn’t want to spray a blotch of solid color “cover up” to hide what was underneath. It was critical to keep the details of this area looking original, which would require “feathering in” the much-needed repair for this instrument to resonate with its glorious sweet tone once again.
Procedure The first and most important challenge was going to be attaching the headstock back to the neck and securing its original strength. I considered some form of dowel pinning. The material size and substance was going to be key in pulling off this restoration. After testing density, strength, and tonal characteristics of different materials, I decided to use 1/4”-diameter carbon fiber rod.
For this procedure I cut two 1” sections, making carbon fiber pins with all ends slightly beveled for easy installation. They were inserted into the predrilled 1/4” holes on the neck side. The body was mounted vertically to the drill press and jigged up using Stewart MacDonalds Cam Clamps (item numbers 3721 and 3723). Everything needed to be measured and center-punched before using brad point drill bits to drill the holes for the reinforcement pins around the truss rod and the Floyd Rose nut mounting holes.
 I used a lower grade vise for clamping in the headstock and drilling out the two 1/4” pinholes. This was very important, as I needed to address the ten-degree pitched headstock. For you repairers and luthiers looking for a new and improved shop vise, StewMac’s Angle Vise (item number 1820) offers a nice solution for this kind of work, with 4”x1-1/2” jaws opening to 4” and tilting from -10 to 120 degrees.
Ready, Set, Go! Once everything was dry assembled, making sure everything fit well together and according to plan, we were ready to mix our medium cure two-part epoxy glue. (Please don’t try this at home with an expensive collectable guitar!) The medium cure epoxy was chosen not only for adhesion, but for gap filler. Once the epoxy was mixed, I lightly applied the glue to both sections of wood and around the carbon fiber pins. One of my concerns was the glue oozing into the truss rod and not positioning itself as a gap filler once clamped up, so I monitored the glue by the touch of my hands, feeling for the increased warmth on the underside of the glue cup and by stirring and feeling for the increase in viscosity. The difference in temperature and moisture can really increase or decrease the time that the epoxy starts to kick, so I needed to be ready to put the sections together at exactly the right time or the repercussions would be disastrous.
The glue was beginning to kick, warming up with a slight thickening. The headstock was inserted into the neck and neck pins with a vertically adjusted 50” grip clamp holding everything tightly into place. The picture of the glued-on headstock shows you the appearance of the crack before drop filling with finish touchup. It’s looking great at this point, so the finish touchup is only going to make the repair less visible. Sean at PRS confirmed that the finish was an undercoat of polyester followed with an acrylic urethane topcoat. We’ll apply the same formulation to address the finish separation.
John Brown
John Brown, of Brown's Guitar Factory, is the inventor of the Fretted/Less bass. He owns and operates a full guitar manufacturing and repair/restoration facility, which is staffed by a team of talented luthiers. He is also the designer of guitar making/repair tools and accessories that are used today by instrument builders throughout the world. brownsguitarfactory.com info@brownsguitarfactory.com