If you are really into guitar
modding, there is no way
around learning how switches
work. So this month let's
explore the basics.
Two types of switches are
commonly used for guitar mods.
One is a potentiometer with
a switch—a push/pull, push/
push, or the Fender S-1—and
the other is a common toggle,
which is available in different
sizes, shapes, and configurations.
When adding a switch to a passive
circuit, you don't have to
worry about voltage and power
ratings—all that matters is that
switch will fit your guitar!
Though switches come in
various configurations, they
all have a single purpose—to
turn a signal on or off. Many
variations are available, but we'll
concentrate on the four most
common guitar switches: SPST
on/off, SPDT on/on, DPDT
on/on, and DPDT on/on/on.
The first two letters of these
names indicate the number of
poles, while the last two letters
are the number of throws. So
a SPST (aka 1PST or 1P1T)
means single-pole/single-throw, a
SPDT (1PDT or 1P2T) means
single-pole/double-throw, and
DPDT (2PDT or 2P2T) means
double-pole/double-throw. There
are many more configurations,
including 3PDT devices used for
true-bypass switching in effects,
and Fender's 4PDT S-1 switch.
Found on push/pull or push/push
pots, the DPDT on/on switch
is by far the most common, and
mini toggles are available in an
endless number of variations.
Let's take a closer look at what's
known as the switching matrix.
A switch's poles are like separate
channels that aren't connected
until you add a jumper wire
between them. A SPST or SPDT
switch has only one of these channels,
while a DPDT switch has
two. Likewise, 3PDT and 4PDT
switches have three and four
channels, respectively. A switch's
throws are simply the different
sides of a switch. For example,
a DPDT on/on switch has two
channels (poles) with three lugs
on each channel. Engaging the
switch turns on one side or the
other. When one signal is turned
on, the other is turned off.
An SPST switch has only one
channel (pole) with two lugs. It's
the archetypal on/off switch for
simple projects like replacing a
5-way switch with three on/off
switches. In one switching position,
the two lugs are connected,
while in the other they're disconnected.
Below is a visual representation
of the SPST switch.
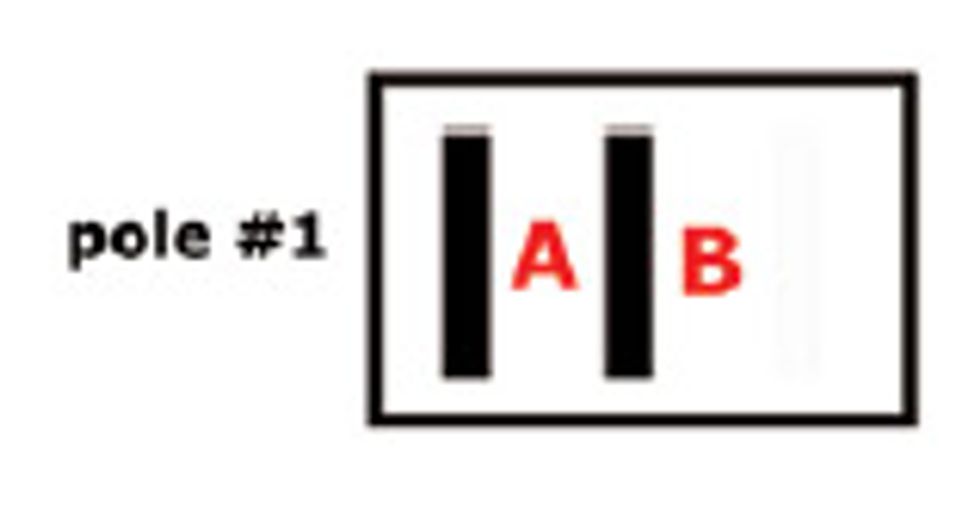
In one position, lug A and
lug B are not connected (that is,
the circuit is open). In the other,
both lugs are connected (the circuit
is closed). To use our seven-sound
mod as an example: In
one switching position, both lugs
are not connected, so the neck
pickup connected to the switch
is not engaged. In the other position,
both lugs are connected and
the neck pickup is engaged.
This is a great opportunity to
start working with a digital multimeter
(DMM). Track down an
inexpensive DMM and make sure
it has a continuity function, preferably
with an audible connection
indicator. You can then trace how
switches work by connecting the
individual lugs to your DMM
and seeing which are connected,
and then switching to the other
position and taking the same
measurement again. The beep that
sounds when you've made a connection
is a great help when you're
taking these measurements.
A SPDT (1PDT or 1P2T)
on/on switch also has only one
channel (pole), but offers three
lugs instead of two. This switch
also works for the seven-sound
mod (if you leave one lug unconnected)
or for the cap-switching
mod. Below you'll see what's
going on in this type of switch.
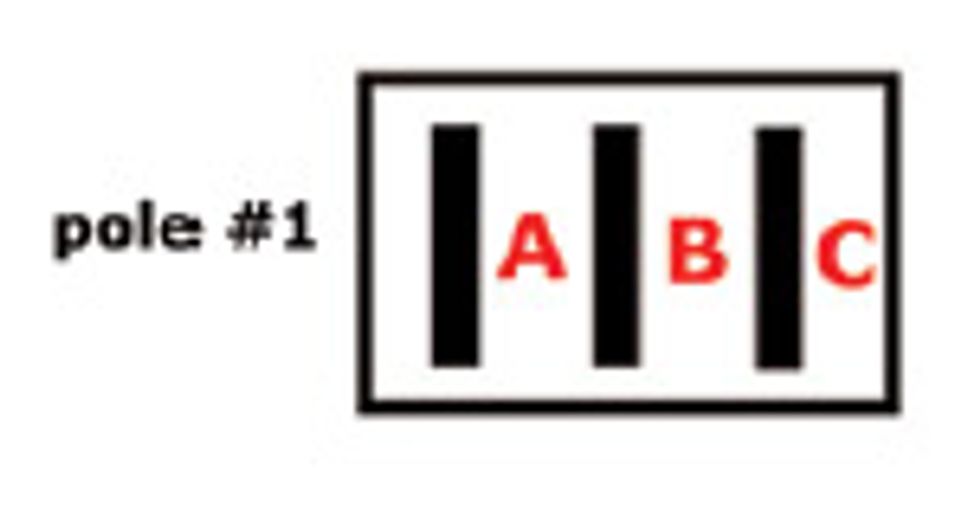
In one position, lugs A and
B are connected (this is throw
1), while in the other position
lugs B and C are connected
(throw 2). So lug B is the common
output of this switch,
while lugs A and C are inputs.
A DPDT (2PDT or 2P2T)
on/on switch has two channels
(poles), each having three lugs.
This is like having two SPDT
switches in one. It's the standard
configuration for most push/
pull or push/push pots, and you
can use it for almost all mods,
including the seven-sound mod
(if you leave one pole unconnected),
coil-splitting a humbucker,
out-of-phase mods (by adding
some jumper wires from pole 1
to pole 2), a direct-through mod,
and countless others. Let's see
what's going on here.
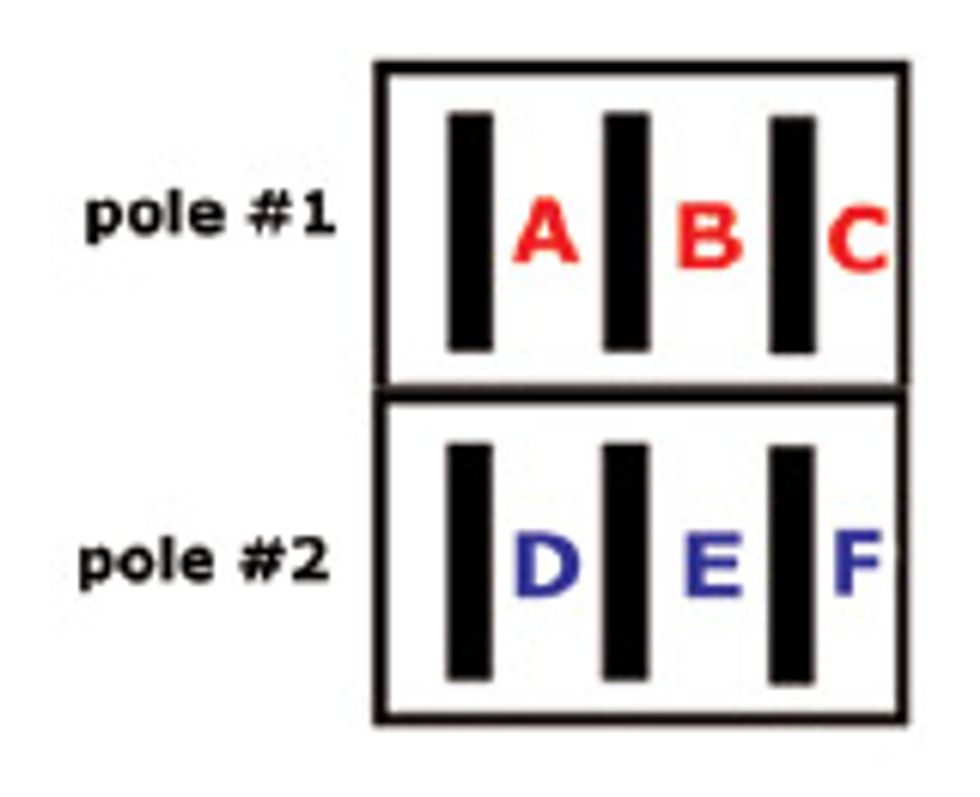
In one switching position,
lugs B and C of pole 1 and lugs
E and F of pole 2 are connected
(throw 1). In the other position,
lugs A and B of pole 1 and D
and E of pole 2 are connected
(throw 2). It's exactly like a
SPDT switch, but with two
poles instead of one.
Finally, we come to a very
special but important type of
switch: the DPDT (2PDT
or 2P2T) on/on/on. Larry
DiMarzio made this switch
famous in the '80s, and this is
the device to use when you have
a four-conductor humbucker
and want to take full advantage
of all its wiring possibilities.
It's still a 2PDT switch with
two channels (poles) sporting
three lugs each, but in
comparison to a DPDT on/on
switch with only two switching
positions, the DPDT on/on/
on switch has three positions.
This is often called a “centeron"
switch, because it has a
third position in the middle
between the common left and
right positions.
Although the DPDT on/
on/on switch has the same
number of poles and lugs as our
previous DPDT on/on switch
(which means the illustrations
for these switches look identical),
this version has an additional
switch position.
In switching position 1 (left
throw), lugs B and C of pole 1
and lugs E and F of pole 2 are
connected. In position 2 (center
throw), lugs A and B of pole 1
and lugs E and F of pole 2 are
connected. Finally, in position
3 (right throw), lugs A and B of
pole 1 and lugs D and E of pole
2 are connected.
This switch facilitates three
sounds from a four-conductor
humbucker: both coils in series
(standard humbucking mode),
both coils in parallel (sounds
similar to a single-coil, but in a
hum-cancelling configuration),
and a true single-coil mode.
All right—that's it. I know
this is very dry, but it's worth
investing some hours to understand
switching basics.
See you next month—and
keep on modding!

Dirk Wacker lives in
Germany and is fascinated
by anything related to old
Fender guitars and amps.
He plays country, rockabilly,
and surf music in two
bands, works regularly as a
session musician for a local studio, and writes
for several guitar mags. He's also a hardcore
guitar and amp DIY-er who runs an extensive
website—singlecoil.com—on the subject.