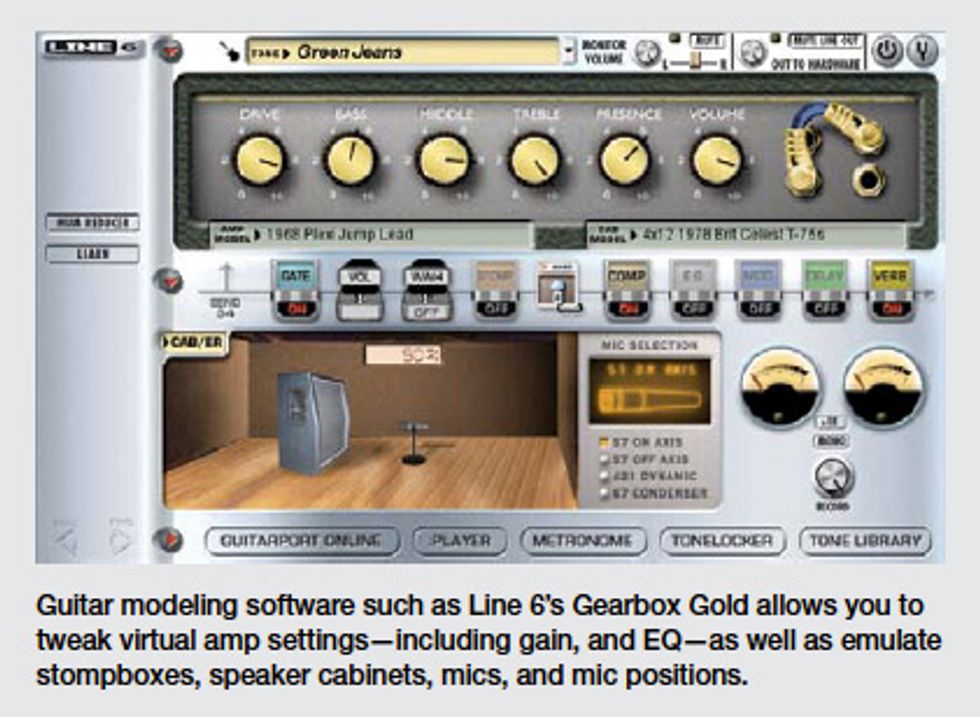
The fact is that modeling software has improved by leaps and bounds in recent years and—in many real-world situations—it can sound even better and be a more suitable choice than traditional amplification.
“Your tone will always
be better when you’re
pushing air with real amps
and speakers.”
“That digital stuff doesn’t
sound as good as the real thing.”
When people start making
these kinds of statements, I
immediately assume that they
haven’t taken the time to learn
the software or that they are
basing their comment on an
experience they had many years
ago with a piece of software
when the software-modeling
world was still in its infancy.
The fact is that modeling software
has improved by leaps and
bounds in recent years and—in
many real-world situations—it
can sound even better and be a
more suitable choice than traditional
amplification.

For instance, let’s say you’re on tour and the whole band is using in-ear monitors. With direct software, you can keep your tone 100-percent consistent from show to show. Worn out tubes, lazy speakers, and tone-altering surges and sags caused from inconsistent venue power are all removed from the picture when you go direct. Also, audio afflictions, such as singers trying to get you to point your amp in a different direction or soundmen telling you to turn down because your amp is bleeding into the vocal mics, magically evaporate from the stage when you use modeling software. These are huge advantages.
So how can you get the best tone out of your modeling program? Whenever I use any modeling software, I always try to make sure I’m hearing with my ears and not my eyes. For instance, the Vox amp in the software may not always be the best starting place for getting the truest Vox-like tone. That chimey London grit you’re looking for might actually come from a Fender amp model through a Marshall cabinet, so don’t rule out any choices until you’ve given them a thorough listen. The best way to make your own great sounding presets within your modeling software is to do it the same way the modeling professionals do it, which is to compare your modeled tone with a real amp tone and tweak until you can’t tell the difference between the two sounds.
The basic idea works like this: Set up three tracks in your Pro Tools session. (I’m using Pro Tools to illustrate the process, but other recording software will work the same way.) Name one track “DI,” the second “Amp,” and the third track “Model.” Go out of your guitar into a DI box. The signal from this DI device goes straight to the computer and gets routed to the track called “DI.”
Next, run a signal out of the DI box’s Thru jack into the front of your amp. Mic up your amp and dial up the best tone you can. Arm both tracks—“DI” and “Amp”— and record a minute or two of your playing. At this point, you’ll already have your reference tone (“Amp”) recorded and you can start reamping your “DI” track thru your modeling software.
The advantage here is that your hands are free to try different cabinets, amps, and microphones, and to adjust other EQ parameters while the computer plays your DI track back through the modeling software for you. Also, this allows you to really focus on listening without having to play. Once you think you’re in the right tonal ballpark, bus your “DI” track, which should be going through the modeling software, to the “Model” track. Now, A/B the “Model” and “Amp” tracks and see how similar they are tonally.
Make the necessary adjustments and keep comparing and tweaking until you have reached sonic uniformity between the two sounds. This process is also beneficial because it can help you become more knowledgeable about other aspects of your guitar tone beyond amps, guitars, and pedals. Being able to simulate different mic models and positions at the click of a mouse is a great way to start getting a general idea of how certain mics and mic placements will affect your final tone.
Along with being a way to have a portable live rig, my direct setup is a great way to do eSessions in my hotel room while I’m on the road. A producer can email me a stereo mix of a song he’s working on and all I have to do is drag the stereo mix into a Pro Tools session, set up a couple of guitar tracks, fire up the modeling program, and start playing. I don’t have to worry about disturbing neighboring hotel guests or dealing with the hassle of capturing my amp’s tone with a bunch of outboard gear and mics. Yes, we’re all accustomed to the tone of our favorite amp, but which rig is more convenient and appropriate to take out of the trailer and haul up to your hotel room so you can work on tracks late at night? Would this be your 100-watt half-stack in bulky roadcases or your six-pound laptop?
It’s fascinating to see how companies create modeled tones. Go to wavesgtr.com and watch The Making of GTR3 video to get an in-depth look at how amp models are captured using real amps, microphones, and cabinets. There are several companies making great programs, so do some research and figure out which one best suits your sonic needs and budget. Once you get a grip on the basic functionality of the software, you’ll have a whole new world of programmable guitar tones at your disposal.
If you haven’t already done so, I encourage you to investigate the world of digital modeling. Rather than choose a side and become an analog or digital purist, I believe it makes more sense to know how to get the most out of classic analog gear and be well-educated on how to navigate cutting-edge digital technology.
