 | |
|
- They may be all you have room for, or can afford, if you’re just starting out.
- They give you a really intimate, organic understanding of the structure and behavior of wood fibers – which can give you experience to help you avoid large-scale errors (such as tearing
- For some tasks, there is simply no better tool than the one you have in your hand
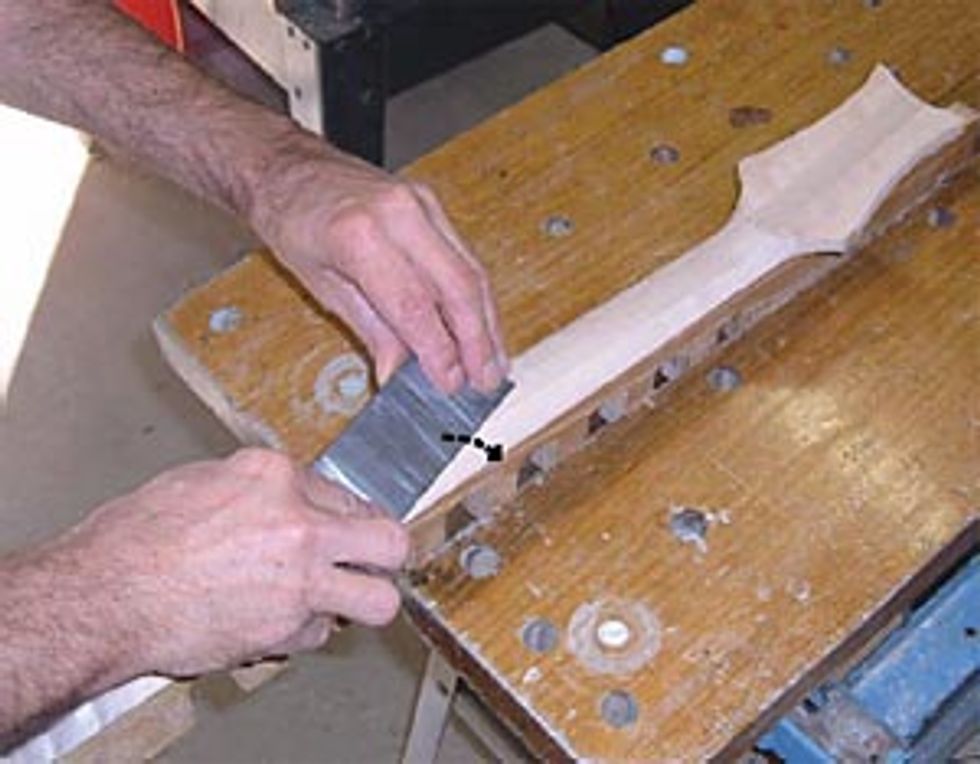
Wood magazines and books will give you instructions on using and sharpening a scraper, and it’s good advice for general woodworking. However I usually stop at “stoning,” and don’t proceed with “turning the hook” or “burnishing.” The scraper requires stoning pretty frequently when I use it, but it has only taken seven years to wear away over an inch of metal. I think the hardness of my materials and the technique I use depend more on a fine square edge than a burnished hook. The technique involves pushing or pulling the scraper nearly flat across the surface, using the leading edge to get a very fine, continuous shaving cut. A hooked edge – the traditional scraper edge – won’t cut in that direction. It will if you stand the scraper higher on its trailing edge to hog away more material, but I use a separate tool for that kind of carving.
 | |
|
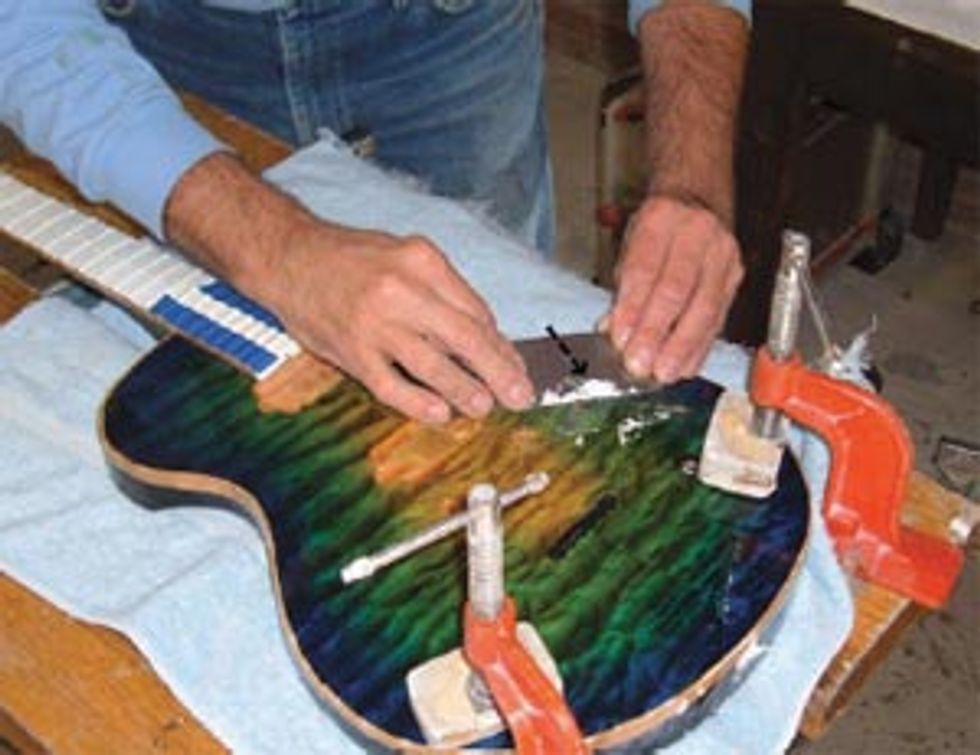
The second photo shows the same technique on a clearcoat finish. This won’t work well on softer coatings like nitro, as it tends to grab and pull the paint off, but on hard stuff like polyester it is a great way to level runs, edge build, orange peel and drop fills without having to worry about sanding through.
It is essential to use both hands when scraping like this – you can’t control the tool with only one hand. So you need to find a way to hold your work firmly… perhaps in a future column!
Jeffrey Earle T.
Jeffrey Earle T. handbuilds JET Guitars in North Carolina, USA.
jetguitars.com