The experience of recording yourself and others at home is a varied and revealing process. You will feel the gamut of human emotions, from bliss one day to soul-crushing defeat the next. But recording at home has many benefits. The two best are: You’re on your own time and you can experiment endlessly. However, that’s also the downside!
I’m going to cover what I believe are the 10 biggest mistakes that budding recording guitarists make cutting tracks at home, and along the way I’ll offer insight and advice as to how you can make better-sounding recordings using proven techniques. I will also recommend some excellent gear—hardware and software—that will aid you in your productions, mixes, and overall efficiency.
Most likely, and regardless of your particular genre(s), you’re trying to make your home recordings sound as close as possible to your favorite records. You want that vibe, that tone, that production, that mix—in short, that sound.
However, the majority of truly successful and influential records have been, and still are, recorded at professional studios by professional engineers and producers, using the best gear in the world. This isn’t saying that you can’t have a No. 1 hit by recording at home. You certainly can! It’s my hope that this article, and my monthly PG column Recording Dojo, will inspire you to experiment and help you get your best recordings yet.
The good news is, home recording has blossomed over the past 20 years. Exponential increases in computer processing power, software, and other areas of technology have given us the ability to develop new instruments and model classic gear, rooms, mics, amps, and almost everything in between.
With all that said, let’s look at the 10 biggest mistakes guitarists commonly make in their home studios.
1. Not treating rooms.
This is an immensely deep subject (trust me on this), often widely misunderstood, and probably the biggest mistake most home-recording guitarists make. Simply put, when a sound is activated in a space, the resultant waves are reflected and absorbed to varying degrees before fading back into silence. Controlling and balancing them is the challenge.
The dimensions of your room, the wall and floor surfaces, and the objects inside it effect its inherent acoustic properties. You might not even notice that you could possibly have several sets of acoustic nodes (aka standing waves) at varying frequencies in your room.
A couple things to remember: The human ear is capable of hearing from 20 Hz to 20 kHz. The higher the frequency, the more directional the sound. Think of that laser pen you use to freak cats out—highly directional. The lower the frequency, the more omnidirectional the sound becomes. How many times have you heard low bass rumble from another movie theater while you’re waiting for your film to start?
Try this: Walk around the entire perimeter of your room and clap loudly. Listen for pings, buzzes, flutter tones, or a really quick delay. Next, do an internet search for “slow frequency sweep.” It should be a sine wave from 20 Hz to 20 kHz that moves slowly. Sit in your mix position and play that wave through your monitors. As it sweeps, you’ll start to hear certain frequencies jump out and others almost disappear. Do the sweep several times and take extensive notes for each and every frequency that dips or gets louder. Bass frequencies like to pool in the corners of the room, and if you hear them get louder, you’ll need to make or invest in some bass traps. There is a tremendous amount of DIY literature out there, and companies like Auralex and Primacoustic make various budget-friendly kits that will aid you immensely in tuning your room.

Even a modest selection of guitars allows you to cover a variety of core tones in home recordings.
2. Using the wrong guitar or amp.
The next thing to consider is what guitars you need for recording. For example, if you really want that Led Zeppelin sound, or some authentic country twang, you’ll need a trusty Telecaster, not a Les Paul. Or, at the very least, a guitar with single-coil pickup options and not just humbuckers. If Steve Vai or EVH is your hero, you’ll need those humbuckers along with a locking trem to nail those dive bombs and pyrotechnics. Going for more of a Tony Rice bluegrass thing? A dreadnought acoustic guitar is your best choice, while a tasty OM-size guitar easily suits more of a fingerstyle approach.
The same goes for amps. I believe the majority of guitar amps can be reduced to three basic points of inspiration: Vox (for that chime and sizzle), Fender (for clarity and grit), and Marshall (for a punchy, saturated grind). Many modern boutique builders like Dr. Z, Matchless, Carr, Bogner, and Friedman started from these classic amp designs and added their own wonderful tweaks to make something new and inspiring.
3. Being cheap.
Remember, cheaper doesn’t equal better. Do yourself a favor and buy the best gear you can afford, really learn how to use it, and always upgrade until you get exactly what you really want. Figure out how much gear (hardware and software) you need for the type of recordings you want to do. Are you just recording solo acoustic music? Or do you need to be able to handle multiple musicians and layer tracks for a full band sound, or create even bigger productions like film, TV, and digital gaming scores?
4. Using one mic for everything.
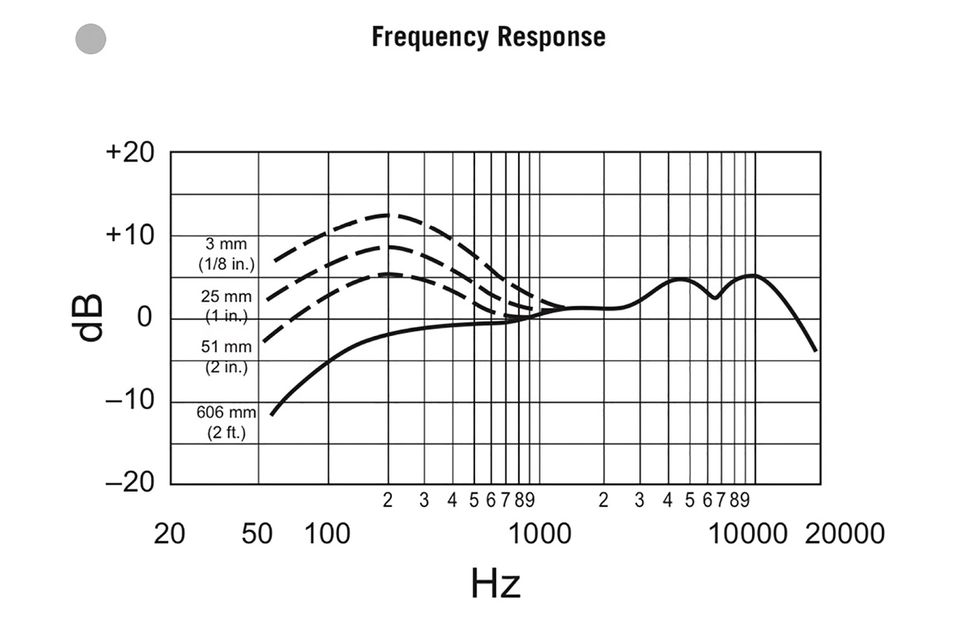
Have a look at the graph above. This is the frequency graph for a very well-known vocal mic—the Shure Beta 58. Besides the gentle bass roll off from 900 Hz to 50 Hz, you’ll notice that there’s a boost beginning at 1 kHz and two big 5 dB boosts that center at 4.5 kHz and 9.5 kHz.
This is a bright mic, and very flattering on vocals. However, if you use this same mic on many different instruments (acoustic and electric guitars, piano, drum overheads, and horns, for example), you’ll end up with a huge buildup of these same frequencies across your mix and it won’t sound good. It’s like using too much salt on a multi-course meal. Pretty soon, it’s all you can taste. Could you fix it with EQ? Sure, but it would be tedious, and not because you need EQ, but because you’re trying to fix the problem of using a very bright mic on every instrument.
What you need is variety. If you only have one mic, really study its frequency response and make sure you experiment with different mic positions. This will help until you start a mic locker.
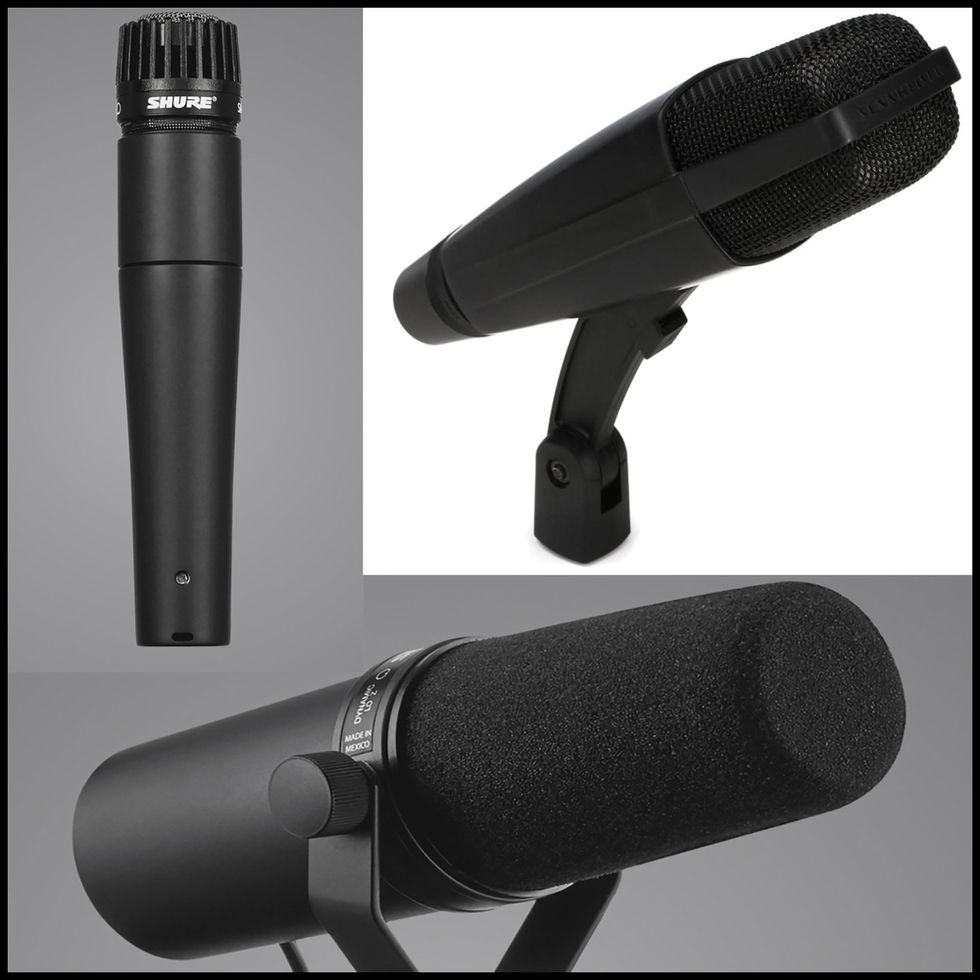
The foundation for a good beginning mic locker (left to right): the Shure SM57, Sennheiser 421, and the Shure SM7B.
How to build a mic locker? My advice is to begin with mics that have been used on countless sessions. My three favorites are the Shure SM57 ($99 street), Sennheiser MD 421 ($379 street), and Shure SM7B ($399 street). You can conquer the audio realm with these three mics if you really learn how to use them.
The SM57 is bomb-proof and has been used on more electric guitars and snare drums than any other mic in history. The Sennheiser 421 is a Swiss Army knife of a mic with a 5-position bass roll-off switch. It’s a mainstay on electric guitar cabs, and rack and floor toms, and sounds great on vocals as well. SM7Bs are highly versatile and have a long history as great vocal mics—Michael Jackson’s Thriller, for a start. They also sound great on acoustic guitars, bass amps, horns, and more. Begin with this trifecta and you’ll use them forever.
5. Not examining DAW options.
All digital audio workstations are created equal, right? Not really. Before you make a choice, do some research and figure out which one will work best for you.
Some DAWS are stand-alone programs that you buy outright or pay an annual fee to stay current. Other DAWs come free and bundled with their maker’s proprietary hardware. Also, some DAWs are increasingly popular in electronic, sequenced, and loop-based related workflows (FL Studio, Reason, Maschine, Ableton Live, etc.), while others focus more on recording audio.
Right now, the industry standard is Avid’s Pro Tools, but there are many excellent alternatives (Logic, Cubase, Studio One). Most of these DAWs come with their own collections of virtual instruments for you to get started making full productions.
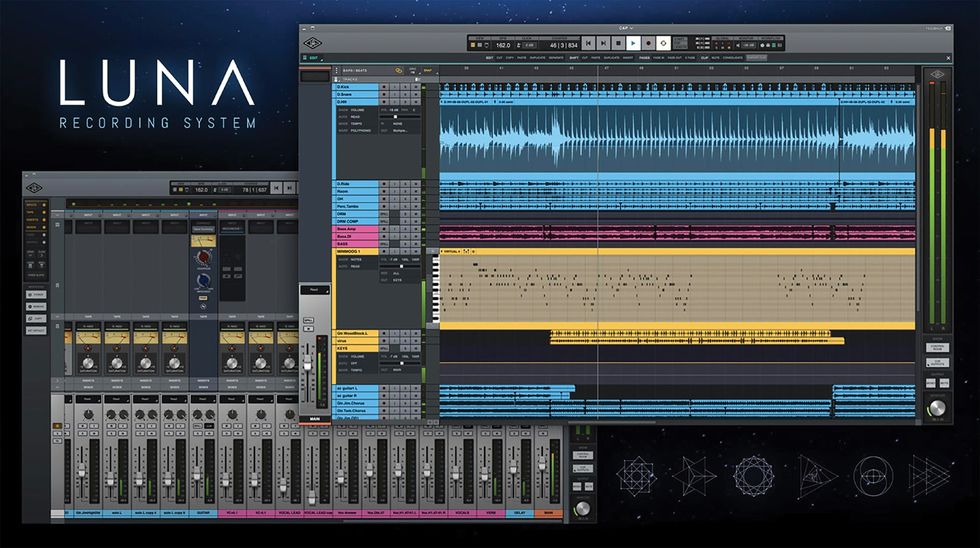
Currently, the one I’m really excited about is Universal Audio’s LUNA. It comes free with the purchase of UA’s Apollo X interface and offers built-in virtual instruments, outstanding plug-ins of classic outboard gear, and mic pres. You can also track with them at near zero latency, and UA has cleverly designed LUNA for those of us who have spent a lot of time memorizing Pro Tools shortcut key commands. You can use most of them in LUNA to do exactly the same functions.
6. Ignoring virtual instruments and sample libraries.
Now that you’ve decided on a DAW, it’s time to jump into the big world of sample libraries and virtual instruments. Unless you’re only recording solo guitar, you could take your music and productions to the next level with third-party, software-based instruments that will integrate inside your DAW. There are a lot of options, but don’t be intimidated. Which one to choose depends on your budget. I’m going to list the big ones, which I use daily.
If this is all new to you, perhaps the best way to get started is with Native Instruments Komplete Start. It’s free, and if you want to expand your collection, you can upgrade in increments all the way up to Komplete 12 Ultimate ($1,199 street).
There are also specialty libraries that focus on one instrument family. Toontrack’s EZdrummer 2 ($249 street) or its big brother Superior Drummer 3 ($399 street) are essential to making great drum tracks—especially with acoustic kits. They also offer EZkeys and the newly released EZbass. Arturia makes amazing recreations of just about every classic synth ever made. These software instruments can be purchased separately ($150–$199 street) or all 25 come in one collection ($499 street). Other companies to put on your radar are Spitfire Audio, who specialize in symphonic instruments, and Spectrasonics, the makers of Trilian (virtual bass), Omnisphere (synths), and Keyscape (yep, keyboards). There are hundreds of other great companies out there making excellent products, so keep your eyes and ears open.
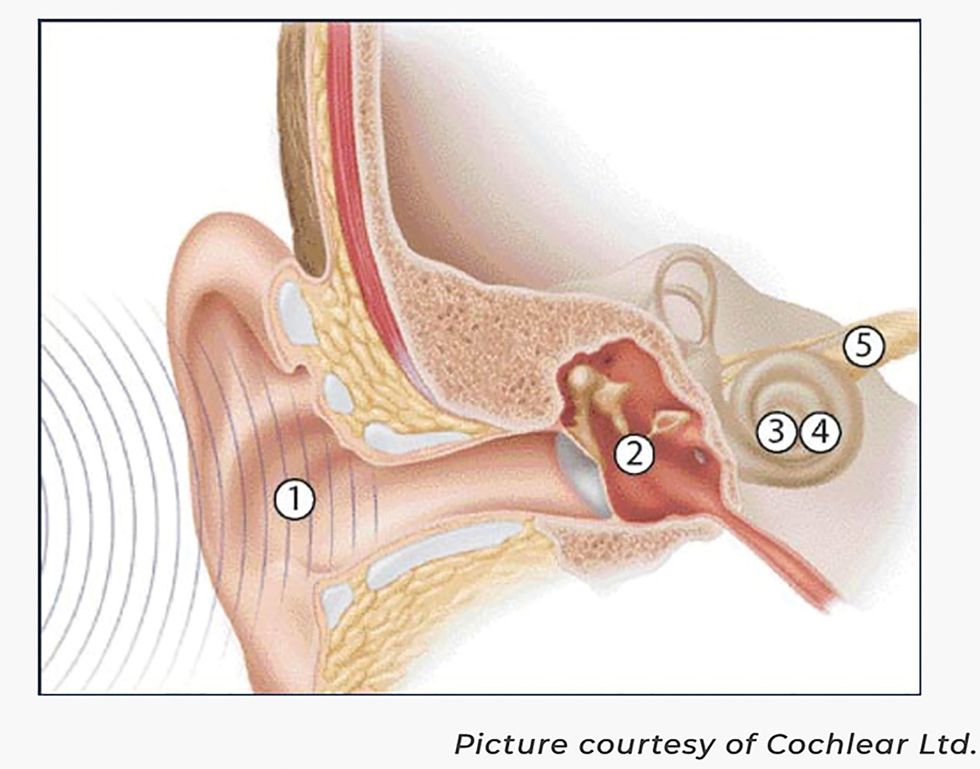
Follow the numbers in the paragraph above to trace the flow of sound through the human ear. Courtesy of Cochlear Ltd.
7. Mixing too loud and too long.
Okay, using the advice I’ve given you in the past six examples as your guide, you’ve laid down some killer tracks and are now ready to mix. How do you make your mixes better? The remainder of the article is devoted to shedding new light on that very thing.
Let’s start with overall volume. Your hearing is your best asset, and it should be zealously protected. Plotted in the diagram below, here’s how the hearing process works: Sound waves are gathered by the outer ear (pinna) and funneled down the ear canal to the ear drum (No. 1). As the eardrum vibrates, three tiny bones in the middle ear are set into motion (No. 2). This motion causes the fluid in the inner ear (cochlea) to move (No. 3). The hair cells in the cochlea change the movement into electrical pulses (No. 4) which are transmitted to the auditory nerve (No. 5) and on to the brain, where it’s interpreted as sound.
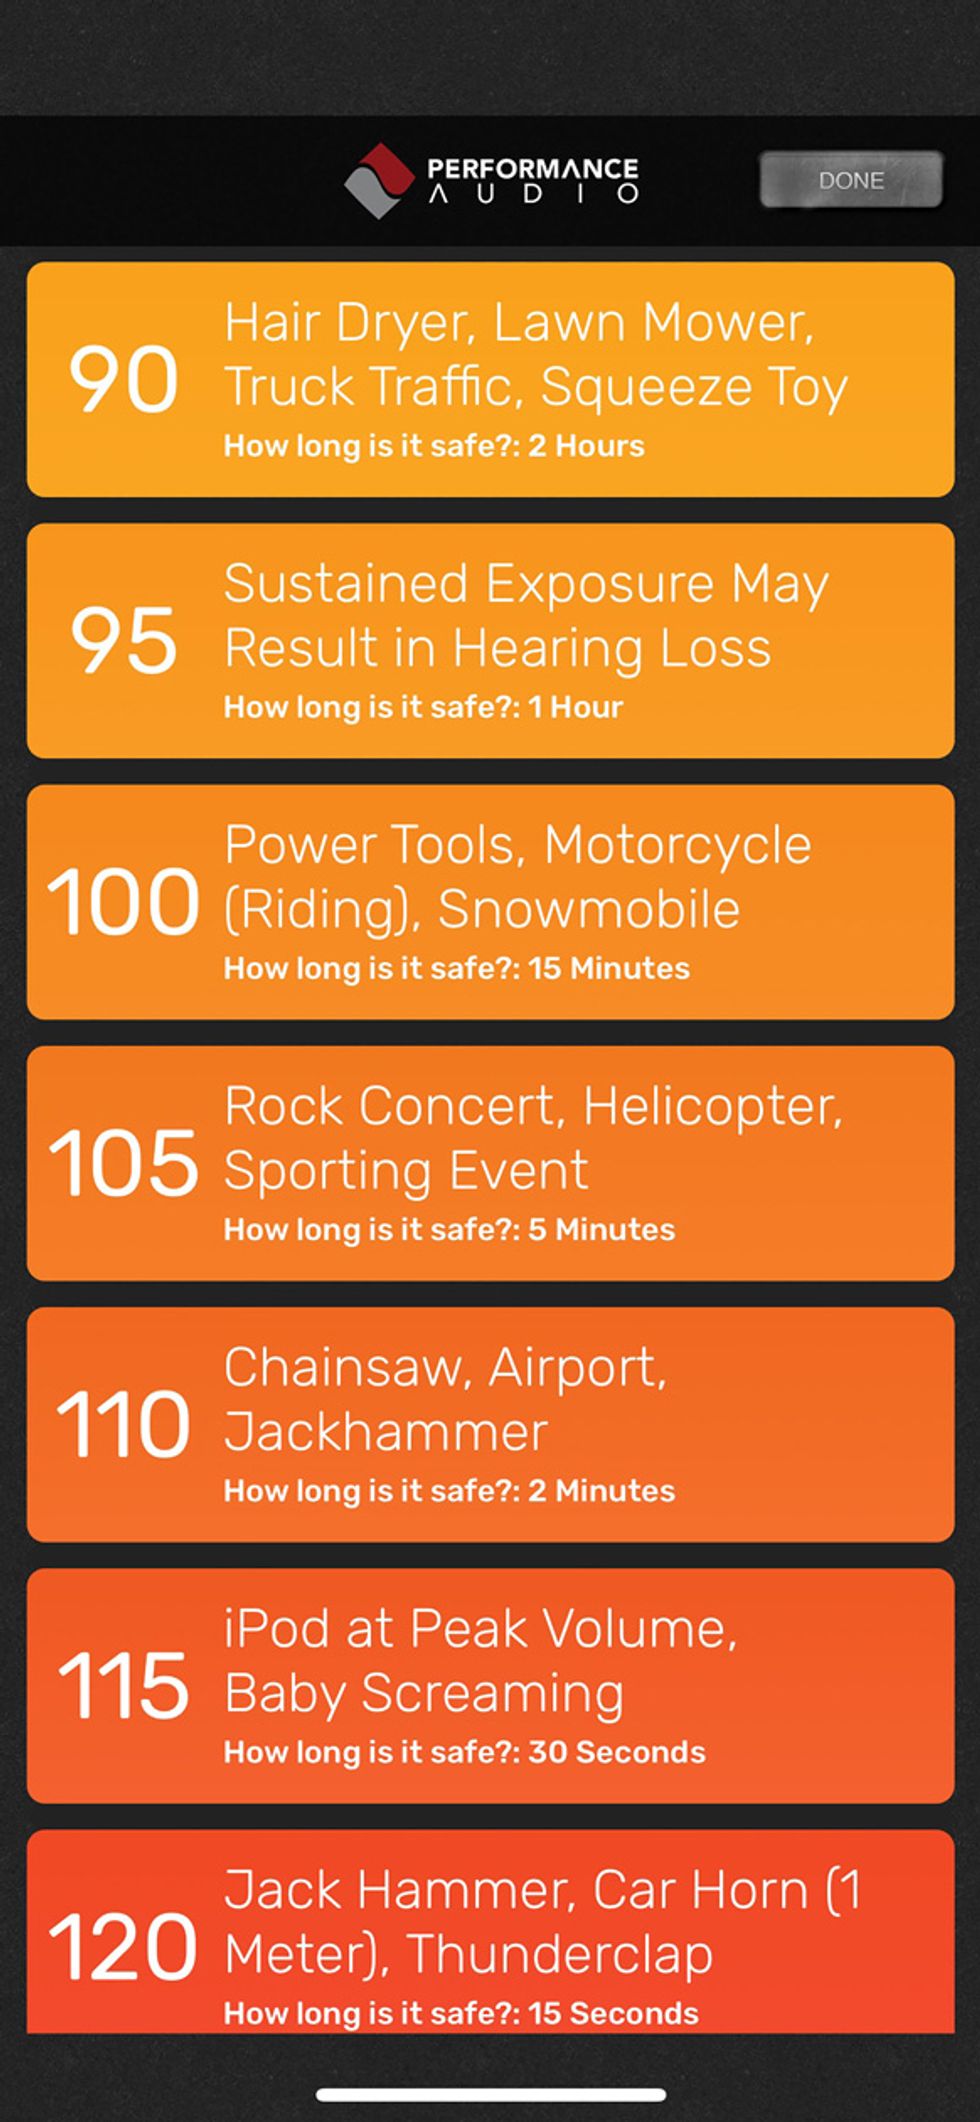
The handy sonic reference points on Decibel Meter Pro range from hair dryer to jackhammer.
The human ear judges sound volume (dB level) on a relative scale over time. Decibel meters are designed to measure that volume level, and there are several dB meter apps available for your smartphone. The one I like is Decibel Meter Pro (available in Apple’s App Store, with similar apps for android users in Google Play). It comes with an average, peak, and max dB meter. It also has a handy reference guide of volume levels.
I usually mix at between 80 to 85 dB, with short intervals in the 95 to 100 dB range. Be sure to take breaks and allow your ears to reset. On mixes where I powered through for four or five hours straight, only stopping for a restroom break or food, almost every time I came back (after five to 10 minutes), I realized that my ears were tired and what I thought was a good mix was actually horrible. Not a pleasant feeling. Don’t fall into that trap. Take breaks, keep a healthy and consistent volume level, and crank it up louder only on occasion.
8. Neglecting your plug-ins.
So many plug-ins, so little time. There are fantastic plug-ins on the market. They are ubiquitous and I use them all the time here at my home base, Blackbird Studio in Nashville. My go-to plug-ins (and the ones I see used over and over again by fellow producers and engineers) are from Universal Audio, Waves, FabFilter, Soundtoys, and iZotope. All of these companies offer individual plug-ins, mini-bundles, and large bundles so you can scale up as needed without breaking the bank.
Many of these companies make signature series artist presets to accompany their plug-ins, and there are lists of choices for every major instrument. Typically, an artist preset models a musician’s particular signal chain (mic pre, EQ, compressor, reverb, delay, etc.). However, the user interface graphic is often streamlined to just a few choices and controls, and those are sometimes quizzically labeled things like “magic,” “spice,” and “attitude.” It’s very tempting to quickly call up a preset and move on. But keep in mind that those presets are merely a starting point and not meant to magically fix your track with the press of a button.
For example, an artist’s “lead guitar fix” preset really applies to whatever they were recording that particular day and how it was sitting in the mix. You don’t know what his or her situation was or the gear used, and that preset certainly has no idea of your situation, or your gear, etc. Use your ears and tweak settings until you find that sweet spot. The upshot: Be careful with relying on generic presets without adjusting anything. One size does not fit all.
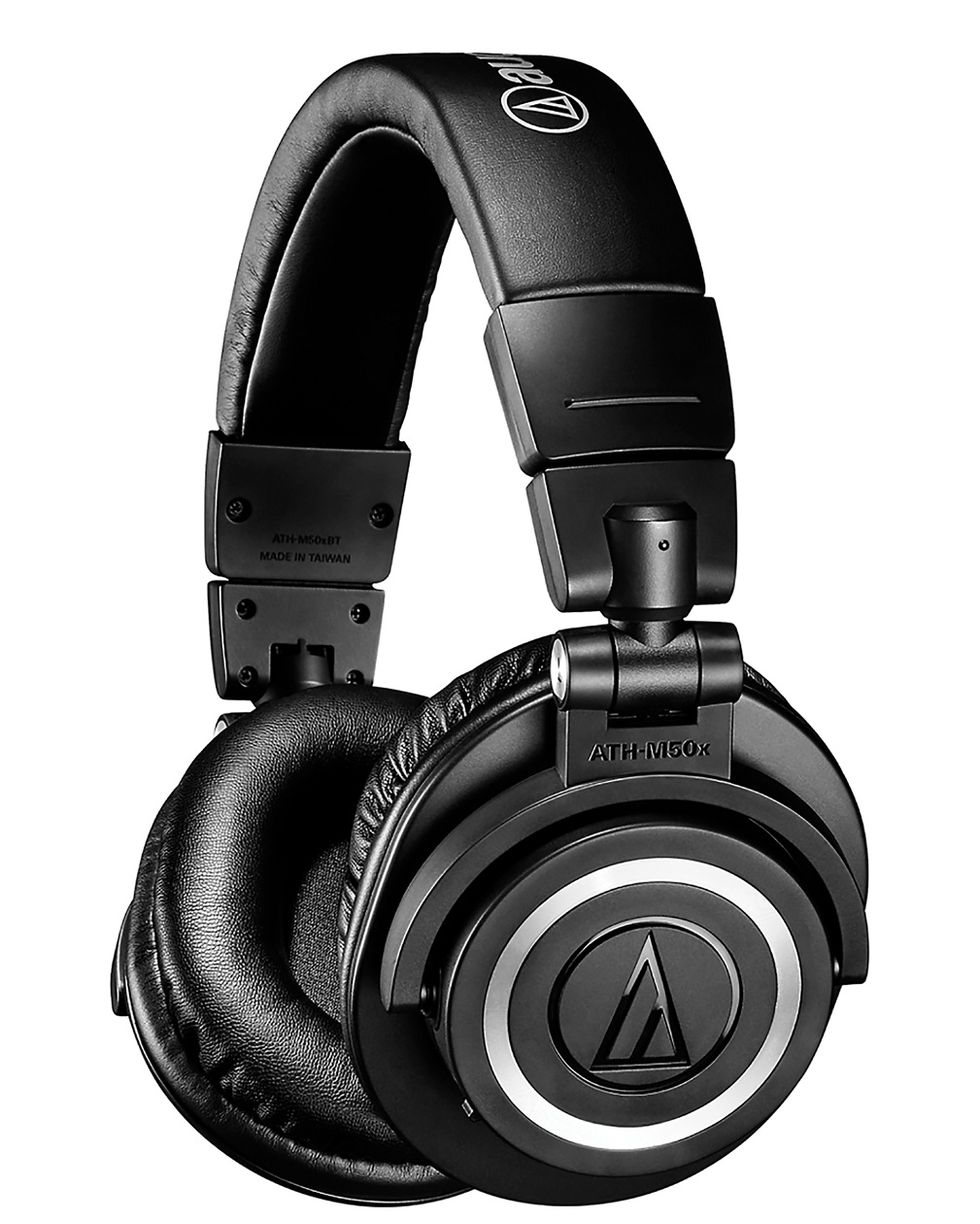
One of Bryan Clark’s favorite headphones for the studio is the closed-back Audio-Technica ATH-M50x.
9. Lack of reliable monitors.
How are you hearing your recordings and mixes? Headphones? Monitors? Hopefully you’re doing both. If you’ve ever done any research into professional monitors, you’ll remember the sticker shock of pricing a pair! Most revered companies (Neumann, ADAM, Focal, etc.,) offer mid-line entry points that are usually less than $1,500 for a pair of near-field desktop monitors. But even if your budget is limited, you can find respectable performance in more affordable options such as the KRK Rokit 5 G4 ($179 street each), Mackie MR524 ($169 street each), and Yamaha HS5 ($199 street each). If you’re in the market for a pair, go down to your local pro shop and listen to several different brands and models, or—even better—bring them home to demo if you can.
Remember that monitors are just like microphones—quite literally. They are voiced, and you’ll want to pay attention to their frequency graphs. Choose the pair that sounds the best to you and not necessarily the pair that has the flattest frequency response. Some are slightly hyped in the lows and highs and dipped in the middle, like the classic Genelec 1031As, while others are the inverse of that, like Yamaha NS10s.
But remember mistake No.1—not treating rooms? Here’s where not tuning your room will come back and bite you with a vengeance! In an untuned room, you’ll never hear your monitors accurately.
If you can’t afford monitors, headphones are a viable alternative. In some cases, they are better! Why? They offer the same listening experience no matter where you are in your room. You can hear small details at lower dB levels than with monitors. They’re lightweight, portable, and much cheaper.
There are two varieties to choose from: open-backed and closed-backed. Closed-backed headphones offer more isolation and less distraction in noisy environments. This is handy if you’re recording and monitoring your recordings in the same room. Open-backed ’phones generally offer more of a sense of space and air. Like monitors, choose the pair that sounds best to you, while being mindful of the frequency graph. And whatever you choose, really get to know them. My two favorites by far are Audio-Technica’s ATH-M50x ($149 street) and the Sennheiser HD 650 ($499 street). I carry them wherever I go—especially when I’m recording or mixing in a new environment.
10. No reference tracks.
Our last foible deals with the mistake of not listening to reference tracks as you mix. If you want your mix to sound like “Paperback Writer,” import that track into your session as a stereo file and come back to it occasionally as you mix. You’ll be surprised how helpful this will be when you start adjusting EQ, compression, reverbs, and delays. Take a tip from George Martin … and all of the other great engineers and producers whose work you reference.
Now it’s time to put all this information into your workflow. I hope you found this article useful and it has stirred your creativity. Onwards and upwards!
Essential Gear for Recording at Home
Putting together a home studio? Here’s a list of gear to get you started based on my experience and suggestions from colleagues and current students. This isn’t definitive. What you buy should be based on your budget and your production and genre preferences.I divided these recommendations into three categories: minimal, advanced, and next level. So they can also be used as a guide to upgrade your studio over time. Note that, throughout the lists, the mics build on each other, and they’re all mics that you will use forever. There are plenty of mics priced between $1,000 and $2,500, from many different manufacturers, and most of them are really solid. The recommended software instruments follow the same idea—building up a great collection over time. And, of course, keep cables, stands, and other accessories in mind as you go.
Minimal:
- Room treatment: Auralex 2" Studiofoam Wedgie 1'x1' 24 pack ($145 street)
- Audio interface: Focusrite Scarlett 8i6 3rd Gen ($299 street)
- DAW: Logic ($199 street)
- Mics: Shure SM57 ($99 street), Shure SM7B ($399 street), Sennheiser MD 421 ($379 street)
- Software instruments: Kontakt Komplete Start (free with Kontakt sampling platform), Toontrack EZdrummer 2 ($249) and EZkeys ($149 street)
- Monitors: JBL 308P MkII ($249 each, street)
Advanced:
- Room treatment: Auralex 2'x4' ProPanel - Sandstone (four, at $163 street each)
- Audio interface: Universal Audio Apollo X4 12x18 Thunderbolt 3 with UAD DSP ($1,799 street)
- DAW: Universal Audio LUNA (free with Apollo)
- Mics: Royer R-121 ($1,295 street), Mojave MA-300 ($1,399 street), Peluso 22 47 SE ($1,999 street)
- Software instruments: Toontrack Superior Drummer 3 ($399 street), Arturia V Collection 7 ($499 street), Native Instruments Komplete Ultimate 12 ($1,199 street)
- Monitors: Neumann KH 120 ($1,399 per pair, street)
Next Level:
- Room treatment: Auralex ProPanel ProKit1 for rooms 12'x12' or larger ($1,530 street)
- Audio interface: Universal Apollo X16 18x20 Thunderbolt 3 with UAD DSP ($3,499 street)
- DAW: Avid Pro Tools ($599 street)
- Mics: Neumann U67 ($6,995 street), AKG C414 XLII ($1,099 street), Coles 4038 ($1,365)
- Software instruments: Spectrasonics Omnisphere 2 ($479 street), Keyscape ($379 street), and Trilian ($279 street), Spitfire Audio BBC Symphony Orchestra Professional ($999 street), Universal Audio UAD Ultimate 8 ($2,499 street)
- Monitors: ATC SCM25A ($7,990 per pair, street)
- KRK Expands Its Classic Line of Studio Monitors - Premier Guitar ›
- Welcome to My Home Atelier - Premier Guitar ›
- Are Your Tracks Ready for a Pro Mix? - Premier Guitar ›
- How to Use Sidechaining as a Production Technique on Your Home Recordings - Premier Guitar ›
- Why You Add a Laptop to Your Live Guitar Rig - Premier Guitar ›