I’m thrilled to do this project for Premier Guitar—I’m always happy to destroy a guitar for a good cause! But first, I would like to explain why you’d want to modify a guitar like this in the first place. I’ve played on prepared guitars for more than 10 years, and they work great in a studio environment. But onstage it’s a nightmare when you try to recreate the sounds you recorded—they’re never the same. In 2001, I started building instruments of my own design in order to solve the inaccuracies of instant preparations. This has evolved over the last 12 years, and at this point I have created 40 or 50 different types of stringed instruments. For this project, I’m using ideas from some of my earlier designs, and I’m doing it in such a way that anybody who is a bit handy with tools can do the same thing with a guitar of their choosing.
Note from the Editors
Here at Premier Guitar headquarters, we recently got the book Nice Noise, which details loads of interesting instrument modifications and tools for “prepared guitar” (basically, ways of getting interesting sounds with stuff from your junk drawer). With our makeover-themed issue in the works, we were intrigued when we flipped to the more radical second half, where experimental instrument builders Yuri Landman (from the Netherlands) and Bart Hopkin (San Francisco) highlight scores of modified guitars and custom instruments—many of them so unusual that they hardly resemble a guitar.
While the look of these instruments, as well as the avant-garde music that’s often associated with prepared techniques, might lead you to believe they’re only for, well, weirdos, Landman’s client roster proves otherwise. He’s built instruments for Sonic Youth’s Lee Ranaldo, as well as members of radio-friendly bands such as the Go! Team, Enon, and Micachu and the Shapes.
Inspired by the intriguing pictures, we invited Landman to walk us through one of the projects in Nice Noise—one that’s a bit out-there but one that we thought might still appeal to adventurous Premier Guitar readers. Here, Landman gives us a step-by-step guide to the transformation of an unsuspecting 6-string. once you’ve read the tale, enter to win the guitar at premierguitar.com.
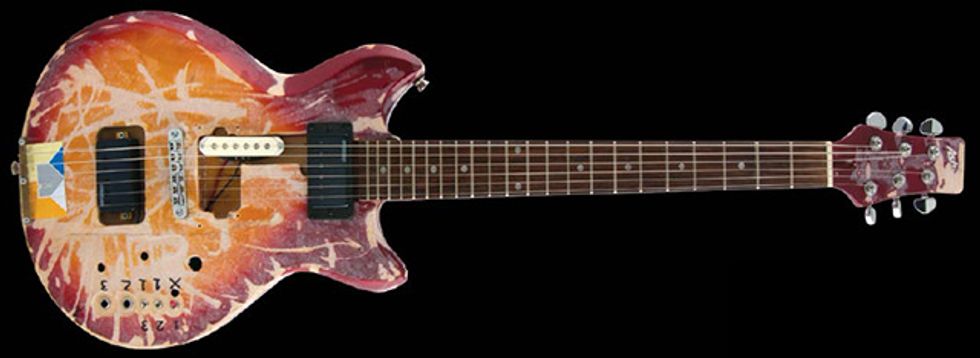
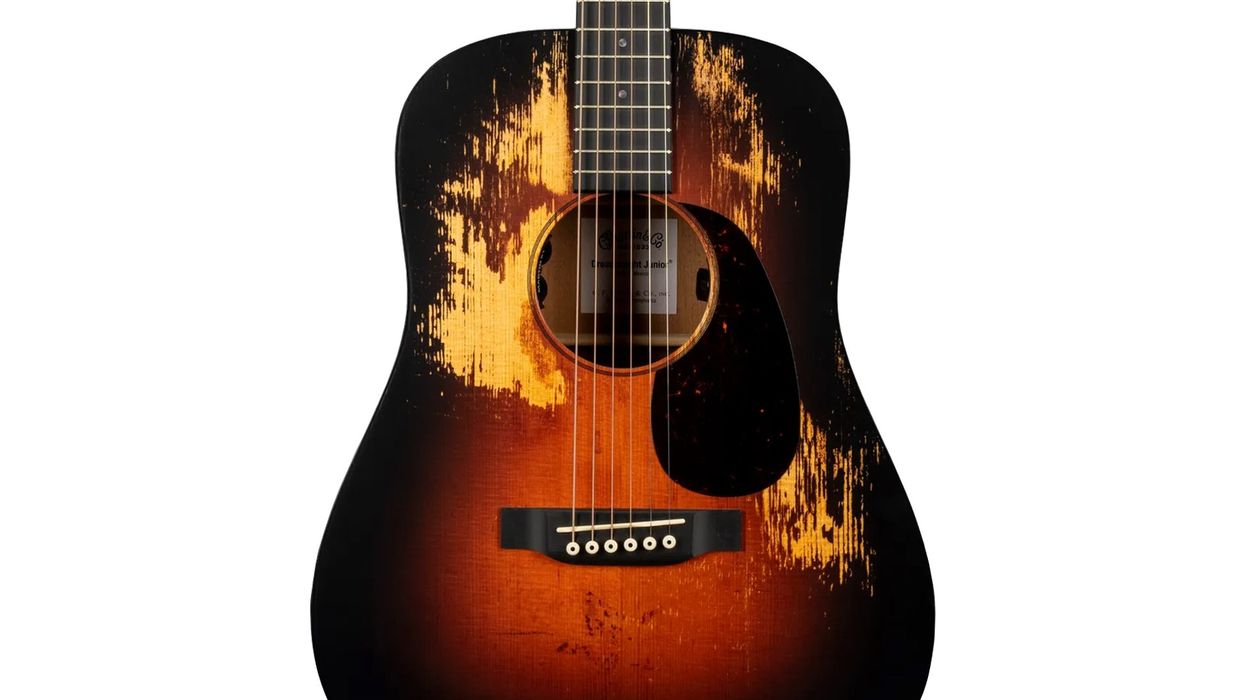
The final product is a fittingly
scuffed-up experimental axe with a
rotated E-string pickup, a behind-the-
bridge playing area with its own
pickup, and three 1/4" outputs.
The Vision
This instrument has two main modifications, and each has its own 1/4" output—in addition to the original output. you’ll notice in the photos that
the guitar has a rotated single-coil pickup. This allows you to route the 6th string to a separate amp—one with ideal rhythm-guitar tones—to
fake the sound of a second guitarist playing power chords. it may even inspire you to kick the second guitarist out of your band. you think I'm
joking, but here are some of the benefits of this artificial “second guitarist”:
• She/he always plays perfectly in sync with your part.
• She/he is always perfectly in tune with your guitar.
• She/he isn’t bored onstage when she/he has to skip a verse
to give the song breathing room or sit out for a song to yield a
more dynamic set.
• She/he doesn’t argue about being asked to play a simple part
(or other “artistic differences”).
• She/he isn’t always playing when you want
her/him to shut up and listen to your explanations
or requests during rehearsals.
• She/he doesn’t take a cut of profits from merch
sales and concert fees.
• She/he doesn’t steal your food, beer, bed, and
groupies while you’re on tour.
The other mod you’ve no doubt noticed is the relocation of the bridge pickup to a new cavity that’s been routed behind the Tune-o-matic-style bridge, as well as the creation of a playable area behind the bridge—like on Fender Jaguars and Jazzmasters, and a bunch of other ’60s guitars that seemed to be searching for the best tremolo system for surf music. Many experimentally minded guitarists (including Sonic Youth’s Lee Ranaldo and Thurston Moore) prefer these guitars, and this playable area behind the bridge is part of the reason.
Our behind-the-bridge “playground” will allow you to play ethereal sounds reminiscent of a Turkish violin (or other timbres in Eastern music), and send them via an independent output to their own amp or effects processor. I often strum this area with a backhanded technique, alternating between picking in front of and behind the bridge—tung-tung ting-ting tung-tung ting-ting. You also get very interesting and complex shared overtones when you alternate between playing behind-the-bridge notes and the open strings, as well as notes fingered at the 5th, 7th, and 12th frets. And you can expand the possibilities here with altered tunings that allow you to decide which notes are on frets that accentuate the rich overtones and reverberant qualities.
With its neck pickup still in the original location (and wired to its own output), the guitar can function as a normal electric guitar and as an experimental instrument.
Listen: This track is recorded with just one instrument and in a one take. So both sounds come out of this instrument at the same time. Output 1 is the signal coming from the normal pickup and is connected to Amp 1, Output 2 is the signal from the pickup in the tail piece of the instrument and is connected to Amp 2. The odd reverb overtone sound is caused by this pickup/output. No reverb or delay is used on this recording, on distortion on Amp 1.
The strings have a Baritone set up tuned in A.
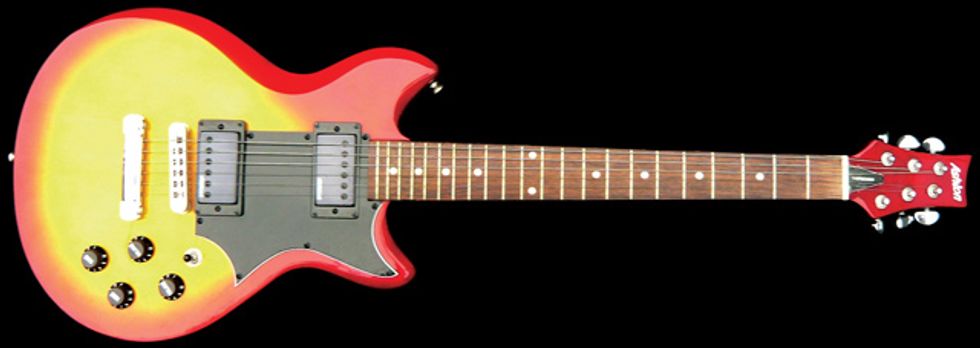
The guinea pig—a $119,
budget-brand double-cutaway.
The Guinea
Pig Guitar
To facilitate these two mods, I
bought a cheap, brand-new €89
(approximately $119) Ashton
guitar with dual humbuckers.
The reason I bought a Gibson-style
guitar is that a Strat-style
guitar has a big cavity for the
tremolo system. Since I wanted
to route out the body to put
a pickup behind the bridge, I
didn’t want to have to fill in a
cavity if it falls within the area
I might need to mount the
bridge. In my experience, this
guitar style is just easier to work
with on this mod.
Before you balk at the fact that we’ve kept the cheap original pickups from this budget brand, you should know that I didn’t even plug in and listen to the guitar before buying it. It sounds crazy, but basically I don’t care that much about the quality of the wood and materials with projects like this. Remember—we’re not trying to create a guitar that sounds perfect by traditional notions of good guitar tone. We’re experimenting! Because of that, we want a guitar that sounds as unearthly as possible—and any cheap guitar can do quite a good job in that regard.
Other than having enough wood to work with behind the bridge, there was one other important aspect I checked before buying the guitar. I asked for a ruler and measured how much area was available behind the bridge—I wanted enough room to enable the new behind-the- bridge playing area to sound notes two octaves above each open string. It turned out that the budget axe just barely had enough space. Its 25" scale put each open-string’s octave 12.5" up the neck (at the 12th fret), but because it only has 22 frets, the second octave isn’t on the fretboard—it’s 6.25" north of the bridge. That meant I needed 6.25" of string length behind the bridge, too. (Note: If your guitar has a scale other than 25", you’ll need to adjust your behind-the-bridge measurements accordingly.)
With regard to electronics, I prefer to keep things as simple as possible with my projects: I never include tone knobs, because most amps and effects processors already have plenty of equalization capability (and, again, we’re experimenting here). I also regard the volume knob as useless, because these instruments are intended to be played loud or not at all. So I use on/off switches instead of potentiometers. It’s zero or one—very digital. You are, of course, free to deviate and experiment in whatever way you wish.
This instrument has three outputs and three on/off switches. What’s that—you say you don’t have three amps? Well, you might someday! But don’t worry, while you’re saving up, I’ve made it so that you can use all the features with one or two amps. How? Two of the three switches are 3-way, on/ off/on switches, while the other is an on/off. This enables you to cluster the pickups to one or two outputs instead of three.
Scuffing, Routing,
and Assembling
Now that you’re convinced
these mods are a must, I’ll guide
you through the process, step
by step:
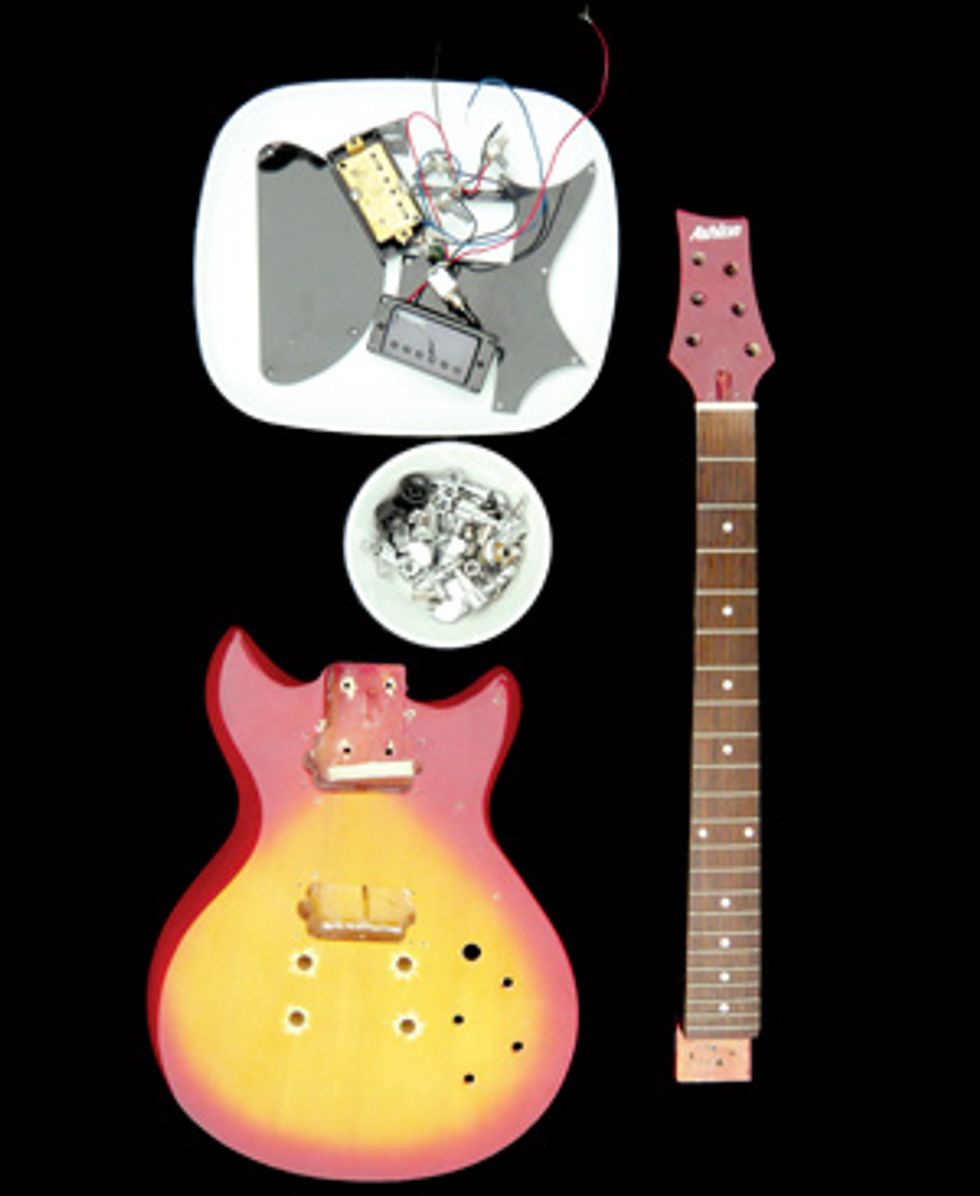
Photo 1. Before doing any modifications, disassemble the guitar.
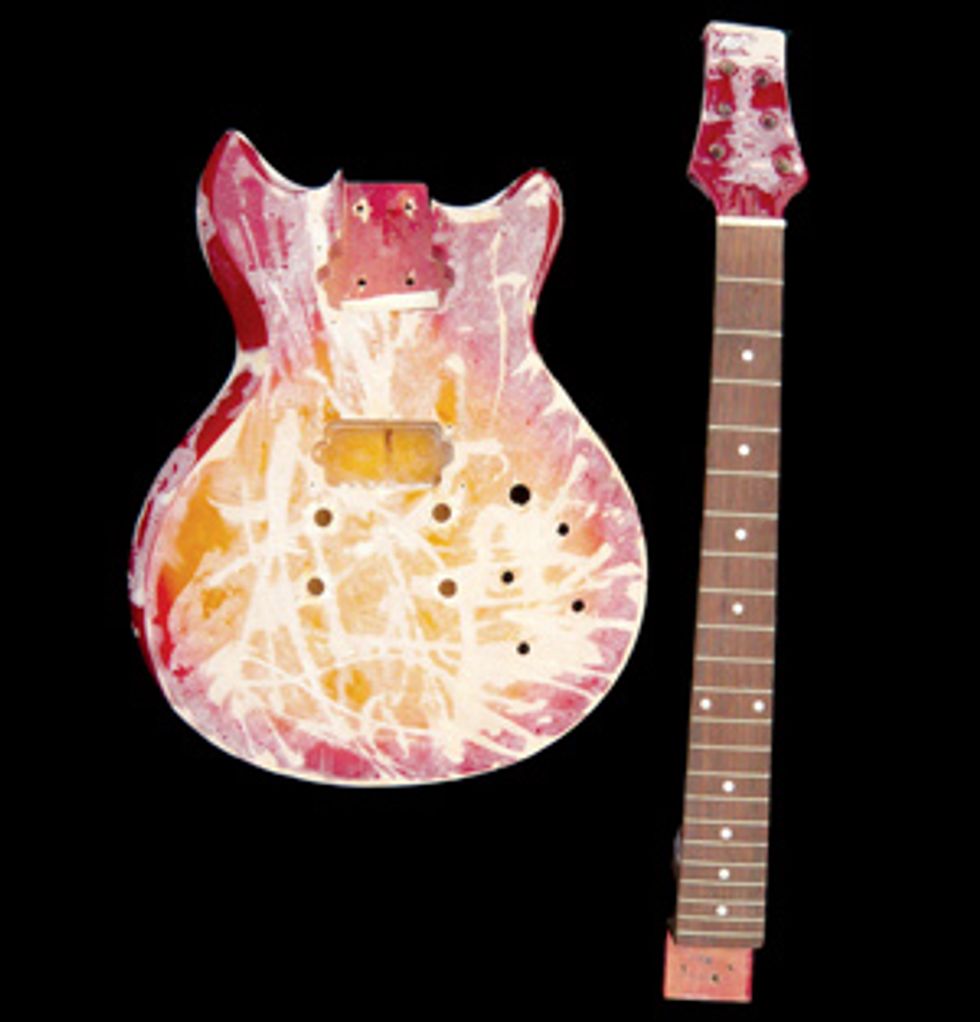
Photo 2. Five minutes with a band polisher yields a fitting look for the avant axe.
1 Disassemble the guitar. And I mean completely. (Photo 1).
2 Mess up the body. Okay, this part is optional, but think about it—do you really want an experimental guitar to look all shiny and stuffy? I’m a strong proponent of functionalism. Form follows function. I dislike sunburst finishes and any other kind of useless decoration, considering it kitsch. It makes guitars look like a jukebox! Therefore I trash the polish with a band polisher. After five minutes we’ve got a messed-up body (Photo 2).
3 Route (or drill) holes for the new pickups. Out of 3/4" thick plywood (or medium- density fiberboard), cut out a block that’s a little less than 1/2" wider on the treble and bass side than the size of the pickups you’ll be installing. Then, clamp your new router template on the guitar’s body and trace around it with your router. (Here, I’ve centered the behind-the bridge cavity about 1 1/2" from the bridge.) Then, unclamp the template and remove the remaining material in the center of the newly created channel (Photo 3). If you don’t own a router, you can create a guerilla-style route with a series of drilled holes. It won’t look pretty, but then again, well, y’know....
The size of your route, as well as your guitar’s exact pickup configuration, will affect the size of the cavity for your rotated pickup. For our single-coil, I routed a channel linking the neck humbucker’s cavity with the original bridge-pickup cavity. It’s approximately 1 3/16" wide and the same depth as the existing cavities.
Note: If you aren’t experienced with potentially dangerous power tools such as routers and band polishers, have a qualified guitar tech or carpenter do these jobs. Otherwise, be sure to wear goggles and take other prudent safety measures.
4 Connect the ground wire. Every guitar has a ground wire preventing undesired noise when you touch the strings. Originally, our guitar’s ground was connected to the tailpiece that we’re no longer using. Because we’re adding a new tailpiece near the edge of the guitar’s top (close to the strap button), the simplest solution is to connect the ground to the bridge. Drill a 1/8" hole from the new pickup cavity to the control cavity. Then strip one end of a piece of wire that can reach from the closest Tune-o-matic bridge-post hole and into the control cavity. When you put the bridge back in and string the guitar, the wire will connect to the metal and ground the strings. We’ll worry about the other end of the wire later, when we’re working on the rest of the electronics.
5 Reassemble the guitar. If you opted not to mess up your guitar (as directed in step 2), the only thing you’ll need to do here is relocate the bridge pickup from its original position to the new cavity behind the bridge, and then install your rotated pickup. Route their wires through the appropriate holes to the control cavity, and then screw them into the body using either a small pencil spring or a rubber bushing (I used small surgical tubing) around the mounting screw to help raise and lower the pickup, as well as keep it steady.
If you were truly avant garde and messed up your guitar, now’s the time to replace the tuning pegs, neck, strap buttons, and everything (except the bridge pickup) to its original position. Pat yourself on the back for your bravery and adventurousness.
6 Mount your tailpiece. Because we needed the previously mentioned 6.25" of space for our behind-the-nut playing area, our guitar’s original tailpiece is no longer of use to us with this guitar. Its mounting studs are so large that installing them on the Ashton wouldn’t leave enough wood for a secure mounting. If your guitar leaves adequate space (approximately an inch or two of wood between the studs and the guitar’s edge), then you can use your Tune-o-matic’s tailpiece. Otherwise, like me, you’ll need to make a new string mounting. To do so, cut a 1/4" x 1/4" x 3 5/16" piece of brass and drill three 1/8" holes (one at each end, and one in the middle) for the top mounting screws, as well as six 9/64" holes for the strings. If your guitar also has a 25" scale, be sure to screw the piece of brass as close as possible to the point that will give you 6.25" of string length behind the bridge (Photo 4).
7 Install the new electronics. Each of our three pickups will be connected to one switch. On our guitar, I’ve numbered the toggles and jacks on the body (Photo 5). The numbers next to the switches indicate which output the signal will go to (the “X” next to the neck-pickup’s red-tipped 2-way knob indicates the off position).
Because you may not have three amps (or may not want to always use them with your cool new guitar), it’s handy to be able to switch the new pickup and the relocated pickup (which I sometimes call the “tail” pickup) to the same output as the neck pickup (which is wired to the original jack). The rotated pickup is connected to the middle on/off/on toggle, while the relocated pickup is connected to the jack closest to the new output jacks. However, I highly recommend you try using multiple amps and different types of effects for each signal path. You can get some pretty magical, wild, and beautiful sounds by using different tones and timbres, as well as by separating them in your performance space or mix. It’s a whole new world to discover!
The Tools
• Phillips-head screwdriver
• Electric screwdriver
• 40-watt soldering iron
• Lineman’s pliers
• Wire stripper
• Drill press or powered hand drill
• Angle grinder OR hacksaw
• Band polisher for scuffing the body to match
the experimental sonic vibe (optional)
The Parts
• Spare pickup
• Two on/off/on mini toggles
• One on/off mini toggle
• Two 1/4" jacks
• 4"–6" length of insulated wire
• 1/4" x 1/4" x 3 5/16" piece of brass
• Three 1"–1 1/4" wood screws
• Four pickup-mounting wood screws
• Four pencil springs or rubber bushings (for
pickup mounting)
Photo 6 shows the internal wiring. I’ve taken output jack 1 (at top) out of its slot so you can see how I connected the pickups to multiple outputs. Our guitar’s two original pickups have only one combined wire, with the positive lead being the inner portion and the negative being the sleeve. The thick red wire is from the neck pickup, and its core is wired to the middle pole of toggle 1 (far left). The thick black wire is from the rotated pickup. Its core is wired to the middle pole of toggle 2 (middle). The ground wires from all three pickups, as well as the bridge ground wire (the small gray lead that disappears behind the red wire and into the hole we drilled in step 4) and the ground lugs (the inner lug) from outputs 1 and 3 are grounded to the innermost lug of output jack 2. The blue wire is from the tail pickup, and its core is soldered to the middle pole of toggle 3 (right).
Moving back to toggle 1, the topmost lug, along with the bottom lugs of toggles 2 and 3, are wired to the positive outer lug of output jack 1. Meanwhile, the topmost lug of toggle 2 is wired to the positive lug of output 2, and the topmost lug of toggle 3 is wired to the positive lug of output 3.
8 String it up and go crazy! Certain brands of strings may be too short now that you’ve got a larger playing area, so you may have to do some research once you know which guitar you’ll be working with. I used D’Addarios for this guitar, but you may have to try a few different brands.
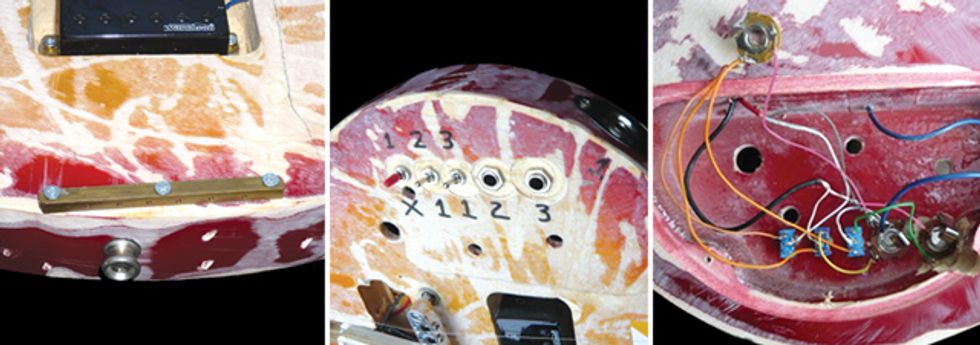
LEFT: Photo 4. The new brass tailpiece. MIDDLE: Photo 5. The toggles and output jacks. RIGHT: Photo 6. The wiring.
En Garde!
I’ve made more impressive-looking
guitars in the past,
and so have many others—including the late, great Hans
Reichel, who made extraordinary
guitars with remarkable
behind-the-bridge systems.
But these particular mods are
a relatively affordable and easy
(this project took me about
two hours) way to start down
the path of experimentalism
for adventurous guitarists.
Although they look weird,
they can add a new sonic
dimension to music of all
types—not just avant-garde,
out-there stuff. I hope these
rude guitar modifications
inspire you to explore the wild
world of sound research!