“I’m 18, and I like it.” —Alice Cooper
In 1965 Marshall unleashed the first 100-watt head, the biggest, loudest guitar amp to date. At the same time, the company went small, unveiling three 18-watt combos that looked like scaled-down editions of the JTM-45, Marshall’s earlier flagship model. The 100-watt amps were instant hits, forever changing—if not defining—the sound of classic rock guitar. Meanwhile, many of those mini-Marshalls languished in music shops, collecting dust. Guitarists barely noticed when the 18-watt line expired two years later.
Nearly half a century later, things are different. In that era of primitive PAs and monitors, you needed a monster amp to fill the auditorium. You could never rock the Fillmore with a dinky 18-watter! Today, of course, you can rock the Fillmore with an iPhone and an amp simulator app. So while a market for Magnum-sized amps remains, we’re likelier to choose our ideal wattage for tonal reasons than for sheer volume.
Meanwhile, guitarists gradually realized that those old 18-watters delivered exquisite rock tones. When the boutique amp scene blossomed in the ’90s, builders often drew inspiration from these feisty little combos. Interest snowballed thanks to the 18watt.com site, whose members reverse-engineered the originals and pooled resources to source parts. And now, thanks to the current DIY craze, the 18-watt clone has become one of the most popular amp projects, with multiple manufacturers offering complete kits. Today’s 18-watt fan can choose between boutique spinoffs, DIY kits inspired by the originals, and handwired Marshall reissues starting at $2,499.
For this article, I tackled two projects: Mojotone’s British 18 Watt Style 1x12 Combo Amplifier Kit ($952), and Tube Depot’s Classic British 18W Tube Guitar Amp Kit 1x12 ($849). We’ll look at the parts, discuss the build experience, and evaluate the final results. But first, a few words about the magic of these mini-monsters.
Eighteen watts of fury. Fans of the 18-watt celebrate its simplicity, portability, and surprisingly virile volume. But the amp’s most oft-cited attribute is its ability to deliver big British tones at relatively modest levels. The frequently heard claim that the 18-watt provides plexi-like tones at bedroom volumes isn’t quite true—its dual EL84 tubes yield a sound quite distinct from their larger cousins with their KT66s and EL34s. The 18-watt’s tone stack is simpler—each channel has only a single simple tone control. Also, much of that classic plexi color has to do with the distinctive phase cancellation produced by closed-back 4x12 cabinets. You don’t get that effect from a single speaker in an open-backed cab.
Still, you’d never mistake the tones of the 18-watt for those of the comparably sized Vox AC15 or Fender Deluxe. The 18-watt doesn’t provide Fender’s focused shimmer or Vox’s electrifying crackle, but its big, bold distortion tones are guaranteed to flutter the hearts of classic rock fans. Its less overdriven tones are great too, though they’re seldom completely clean—this is an amp that wants to shift into overdrive, and even its low-gain tones have a fair amount of “hair.” Cascading the amp’s dual channels with a jumper cable—sort of a proto-Mesa/Boogie effect—unlocks additional cool colors. The amp even boasts a distinctive tremolo circuit with a thick, deep throb.
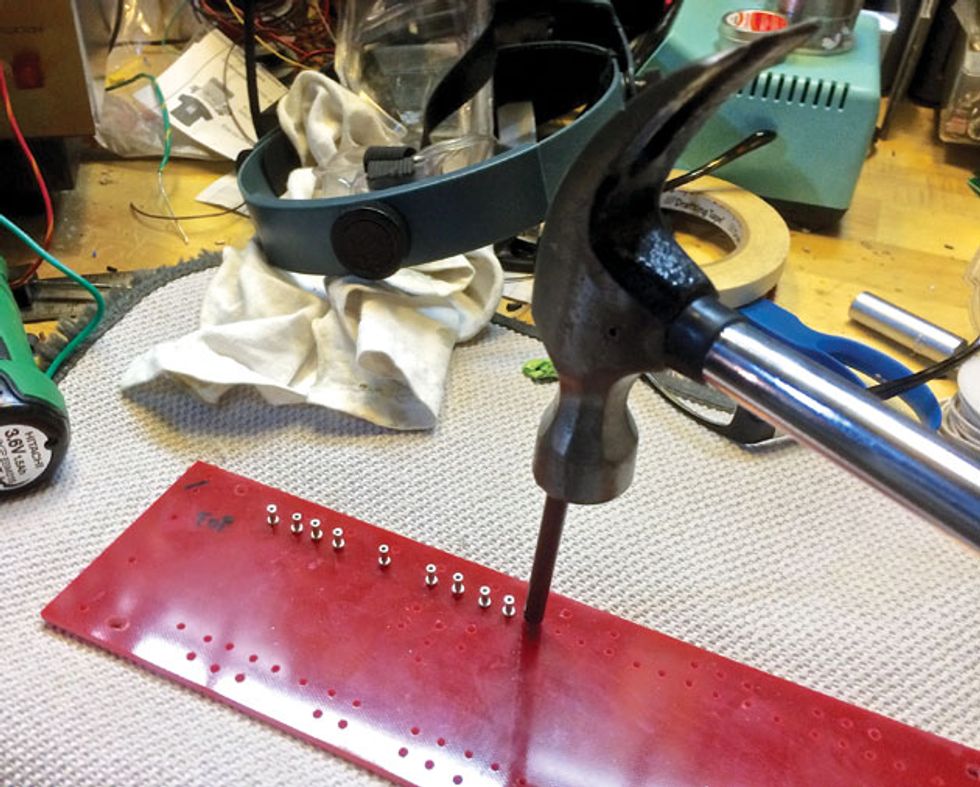
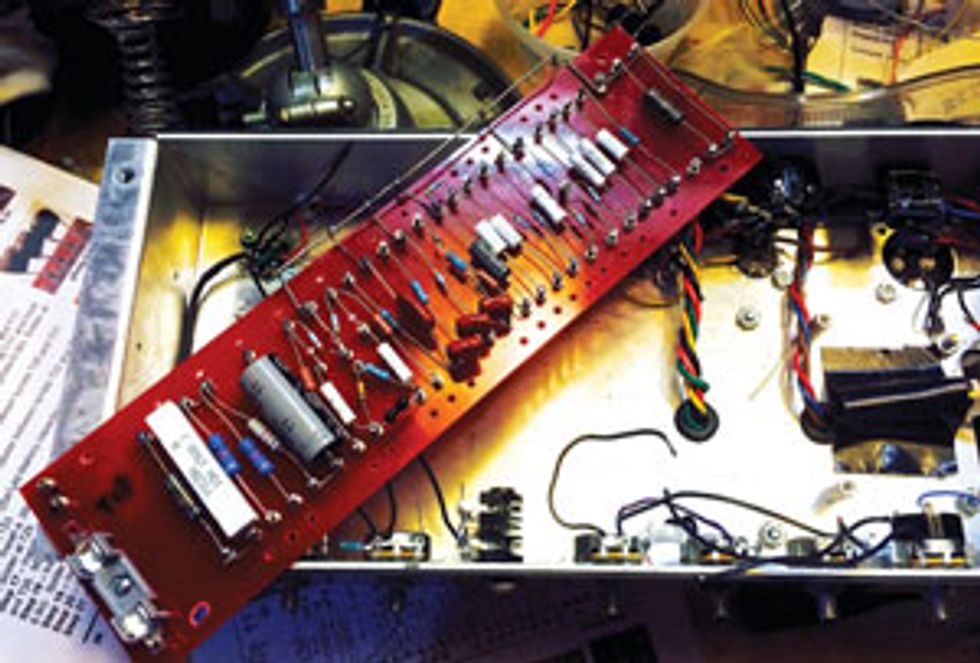
Tube Depot’s kit includes the parts, templates, and tools to build a turret board from scratch.
There are some 18-watt naysayers, who rightly point out that model lacks the bass impact of a larger amp. Others bemoan a lack of brilliance, though I certainly don’t find the model lacking in highs. But at the risk of oversimplifying, those who a) love the British big-amp sound of the ’60s and b) seek it in a sensibly sized package are likely to adore the 18-watt. Mind you, it’s on the loud side for a home amp, at least if you crank it (and cranking it is sort of the whole point). In fact, it’s got enough volume for many gigs, or at least ones without super-loud drummers.
About the kits. Both kits here are inspired by the 1x12 version of the 18-watt. Like many kit vendors, Mojotone and Tube Depot offer multiple versions of the product, priced according to which parts are included, since some DIYers prefer to provide their own cabs, tubes, speakers, and/or transformers. I built the complete kits, which come with everything you need except a workbench and tools.
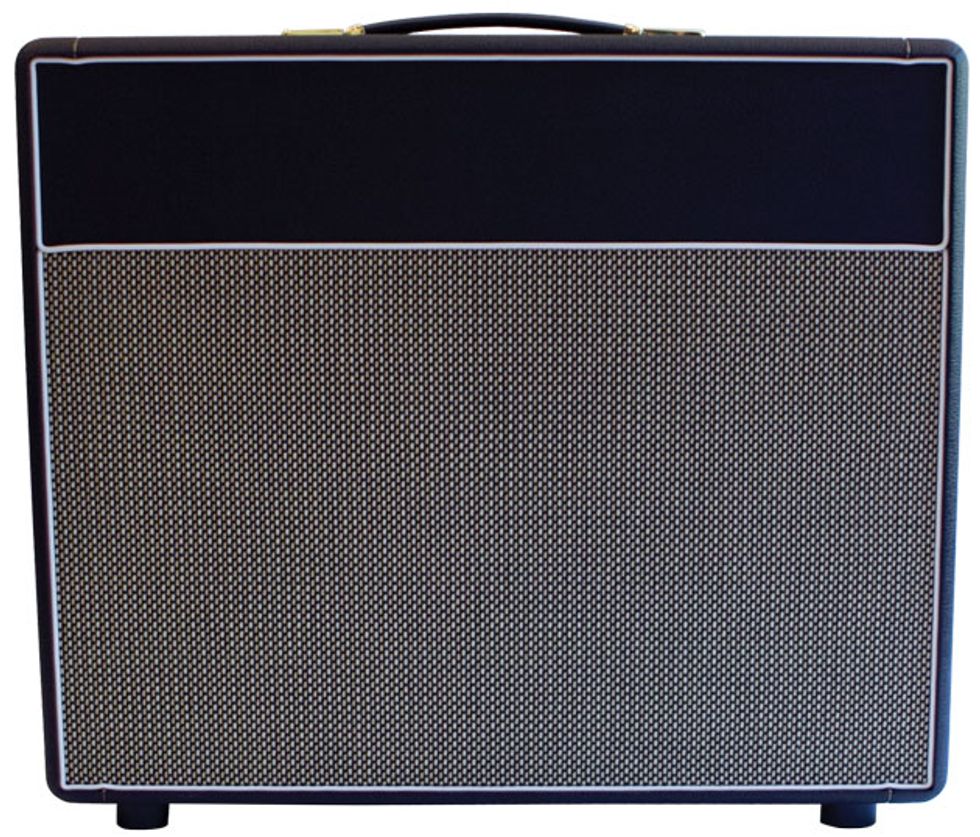
Both kits stick closely to the ’60s schematic (though their board components are laid out differently). They boast stout, solid-wood cabinets and rugged external hardware. (Actually, the two kits are nearly identical in those regards.) Both kits include a full complement of JJ tubes (two EL84 power tubes, three 12AX7/ECC83 preamp tubes, and a EZ81 rectifier). Both use high-quality pots and switches, but employ modern plastic tube sockets and closed plastic jacks. But beyond that, the parts, build experiences, and sonic results differ.
Working with fragile and finicky tube sockets can be challenging for soldering novices.
Before You Build …
Some questions to consider before attempting an amp build:Not for noobs? Anyone with average intelligence and properly functioning hands, eyes, and ears can build an amp from a kit—but it’s a lot easier if you have some electronics experience. If you’re just getting started with soldering, schematics, and the like, consider a relatively simple project, like a fuzz pedal kit from the likes of BYOC, Mod Kits, Mammoth, or General Guitar Gadgets. There’s no better way to learn the basics, and when—um—the smoke clears, you’ll have some nice new stompboxes. And remember: While it’s all too easy to hurt yourself with tools while building pedals, low DC voltages mean you’re unlikely to electrocute yourself. With AC power, you run a genuine risk of painful, or even fatal, shocks. Take safety guidelines seriously.
Know your motivation. Are you building an amp to save money? To learn how amps work? For a few fun hours at the workbench? Your motive can steer you toward your ideal project. Consider the kits reviewed here: The Mojotone project includes a ready-to-solder turret board to house the passive circuitry, while the Tube Depot project requires you to make your own turret board. You must mark and drill each hole and pound in each tiny turret. Does that sound like a good time or a royal pain? Choose accordingly.
Download docs in advance. Most kit companies post schematics, wiring diagrams, and build instructions (if any)online.Download and review them in advance to minimize nasty surprises.
A clean, well-lighted place for solder fumes. You need decent tools to complete these kits.Not just screwdrivers, pliers, and wire cutters, but an electric drill and a set of bits. A high-quality, adjustable-temperature soldering station such as a Weller or Hakko helps immensely. It’s definitely worth spending the $75 or so, especially if there might be more DIY projects in your future. A ventilated, well-lighted workspace is also crucial. Also, count on everything taking longer than intended, so don’t start building at your kitchen table if you plan to eat there this week.
Help on the horizon? DIY kit vendors rarely offer meaningful tech support. Some companies have online forums where you may find good advice, but plan for the worst, and don’t count on unpaid support. Do you have any friends with electronics skills? Do something nice for them now so you can hit them up for help later. Do you have a favorite amp tech? Ask in advance whether they’d be willing to help if you get stuck. If you hire good help at an hourly rate, you can learn volumes and still emerge with a great amp at about half the cost of a premade one.
Pick your parts? Most amp kits include high-quality parts. Still, you may want to upgrade to ultra-premium parts. Most companies offer stripped-down versions of their kits for those planning to provide their own tubes, transformers, speakers, and/or cabinets. (If you don’t see such options on the website, ask.) There’s a lot to be said for the convenience of one-stop shopping, but if you’re a devotee of audiophile transformers, rare NOS tubes, or a speaker type not offered by the vendor, consider an “incomplete” kit. On the other hand, you might not want to blow your budget on fancy parts for your first build—you may need the experience of several builds to create your dream amp.
Patience, patience. Chances are something will go wrong during your build. With so many parts per kit, there’s much room for mishap. Your kit might show up minus a small part, or you might lose one, so prepare for the possibility of waiting for replacements. The same goes for parts you damage yourself—and sadly, it’s all too easy to snap a fine wire or melt a plastic tube socket. Don’t build when you’re stressed or rushed. Don’t count on your new amp being ready for Saturday’s gig. And if you find yourself wanting to break things intentionally, put down that soldering iron and step away from the workbench!
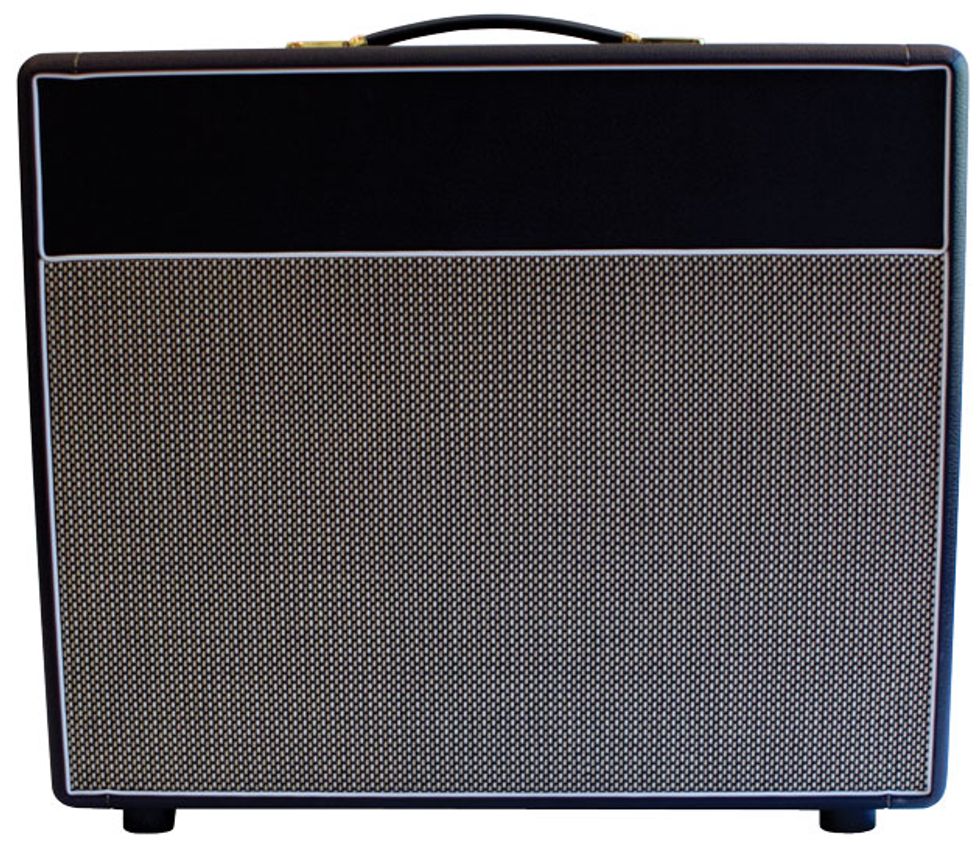
Mojotone British 18 Watt Style 1x12 Combo Amplifier kit
The parts. Mojotone stocks their kit with premium, retro-style parts. The all-important power and output transformers are high-quality custom-spec Heyboers. Most other parts bear the Mojotone brand, and the company prefers not to disclose the individual manufacturers. But the large-format capacitors and chubby carbon-composite resistors appear period-authentic and gratifyingly “mojo,” as is the vintage-style cloth-insulated push-back wire. The Mojotone-branded speaker is a Celestion Vintage 30 sound-alike. The kit includes a two-button footswitch in a high-quality metal enclosure for activating the trem circuit and toggling between low and fast speed ranges.The build. Most amp kits are light on documentation, and the Mojotone kit is no exception—all you get is a schematic, a wiring diagram, and a parts list. (You can download them for free from the Mojotone site.) Like other kit vendors, Mojotone does not provide unlimited, on-call support. (According to Mojotone’s Andrew Simmons, “Mojotone is available for technical support via phone or e-mail, although e-mail is preferred. We do expect potential kit builders to able to read and understand the wiring diagrams and schematics before attempting to build an amp kit.”)
This kit definitely demands some tech expertise. Example: The wiring diagram doesn’t depict all the tube-socket connections, but includes a note reading “Heater wiring omitted from drawing for clarity.” My hunch is, if you don’t know what that means or have access to someone who does, this project may be a bit advanced for you. (The heaters, by the way, are the elements in tubes that supply the current.) On the plus side, all the small parts are organized in a pair of compartmented boxes, perfect for workbench assembly. All parts are identified on the inside of the box lid, and labels include such helpful details as color codes to verify resistor values. It’s a thoughtful, builder-friendly detail.
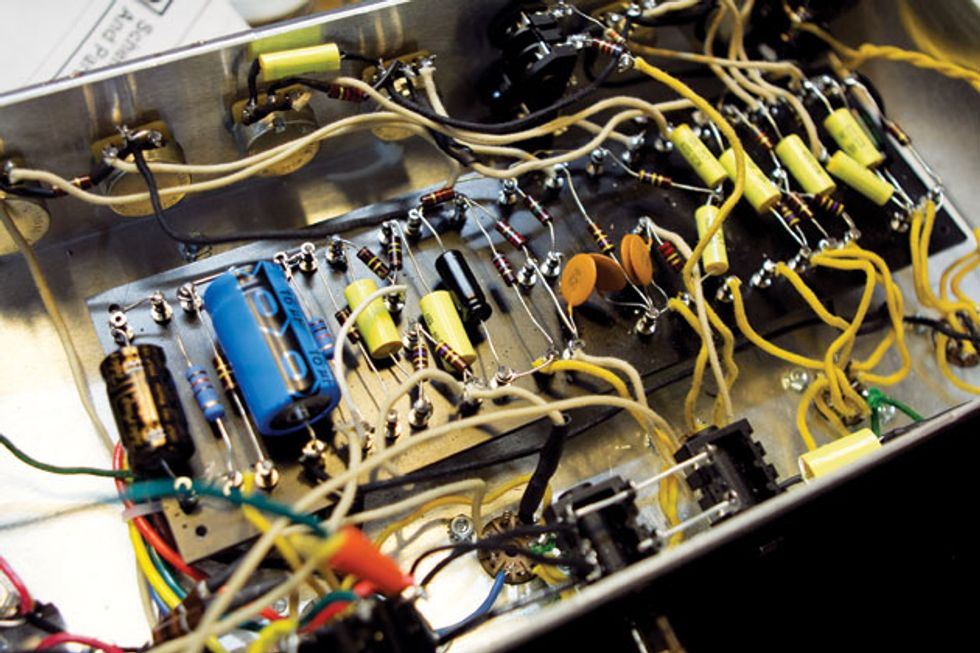
Mojotone stocks their 18-watt kit with vintage-style parts, including carbon-composite resistors, large-format capacitors, and cloth-insulated wire.
Most of the caps and resistor reside on a turret board, though a dozen or so passive components attach directly to pots or tube-socket terminals. Mojotone includes a premade turret board. Components are logically laid out, though some solder points are tricky, with as many as five connections meeting on a single turret. Possible trouble spots for DIY novices include the finicky tube sockets. Those tiny metal terminals have a tendency to pop out of their sockets, and the plastic bases melt all too easily. These probably won’t be problems if you work quickly and confidently, but if wiring errors force you to rework the connections repeatedly, you may find yourself ordering a few extra sockets. The jack connections can also be challenging. There’s no documentation on mounting the chassis in the cab or installing the speaker, though it’s pretty easy to figure out. Minor drilling is required.
It took me about a day to assemble the kit. (For perspective, I’ve built more stompboxes than I can count, but I’ve only made half a dozen amps, all from kits.) The normal channel sounded great from the get-go, but I encountered wiring problems with the trem circuit. I tried to pinpoint the errors on my own, but failed—I needed help from an amp tech. (Nothing wrong with the kit—the errors were mine alone.) In the end, it took almost as long to troubleshoot the amp as to build it—not a rare DIY occurrence. An expert builder could probably tackle the project in five hours or so—and get everything right the first time.
Ratings
Pros:
Superb mid-’60s Marshall tones in a small package. Top-shelf retro-style parts.
Cons:
Minimal documentation.
Tones:![]()
Ease of Use:![]()
Build/Design:![]()
Value:![]()
Street:
$952
Mojotone British 18 Watt Style 1x12 Combo Amplifier kit
mojotone.com
The result. Building an amp is an intense experience. By the time you’ve completed a successful build, the project is your baby. Who doesn’t love their own baby?
But even allowing for such subjectivity, the completed amp is a knockout. The hardware feels substantial. (How substantial things are inside depends on you.) The tone and feel are comparable to what you’d encounter in a boutique 18-watt selling for over two grand.
The tones are faithful to original ’60s sound. You get strong power amp distortion at relatively low levels, creating the impression of a larger, louder amp. The highs sizzle with excitement, but never get nasty. As on the original, lows are modest—this amp type probably won’t suit metal players, or anyone else seeking substantial bass wallop. (Out of curiosity, I tried the amp through a closed-back cabinet. Naturally, there was a bit more bass impact, but the sound lost some of its unique character.)
The way distortion accumulates as you raise the volume feels a bit Vox-like (no surprise, since most Voxes use the same EL84 power tubes). But despite the EL84s and open cab, you probably won’t mistake the sound for that of a Vox. Even with the volume maxed, notes and chords retain impact, definition, and high-end animation. (In fact, one of the most fun ways to use the amp is to floor the controls and regulate the output via your guitar’s volume and tone knobs.)
The clean tones are wonderful too. They’re far from Fender-like, but they have an airy shimmer you don’t always associate with big British amps. The single-band tone control is a delight, with usable sounds throughout its range. This amp sounds good no matter how you set the controls.
Tube Depot Classic British 18W Tube Guitar Amp Kit 1x12
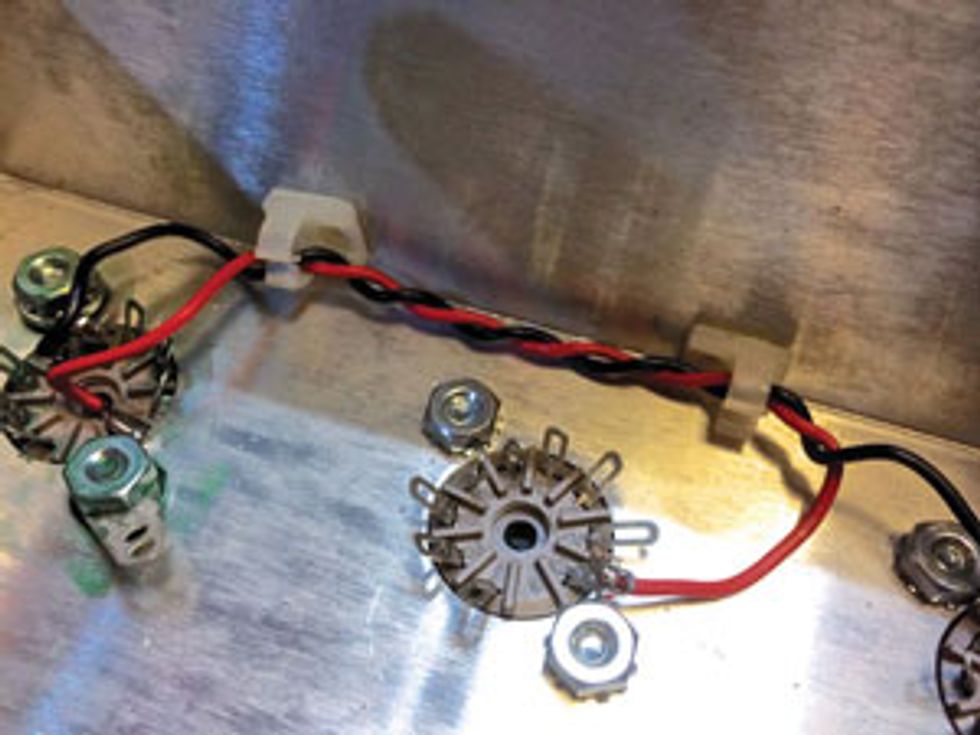
The parts. Tube Depot stocks their kit with quality parts, though they use many modern components. The capacitors match the original values, but in a smaller footprint. The higher-wattage resistors are carbon composite, but most are of modern metal film. The power and output transformers are from ClassicTone. The speaker is a British-voiced Weber 1230. The amp includes a footswitch jack for activating the tremolo, but no switch is included. (Two-speed trem switching is available as an optional mod.) The small parts arrive in dozens of little plastic bags. Tube Depot provides shielding tape, insulation material, and other performance-enhancers rarely included with kits. The modern, PVC-insulated wire comes in multiple colors, which helps clarify things while following the build instructions.
The build. Tube Depot amp kits stand head and shoulders above the competition in one key area: documentation. While other kits offer at most a schematic, a wiring diagram, and a few pages of build guidelines, this one includes a 52-page, full-color assembly manual. It’s one of the clearest and most comprehensive instruction guides I’ve encountered, with every step explained and illustrated. Take it from someone who’s done a lot of guitar-tech writing: These instructions represent an enormous effort on the part of Robert Hull of myamptech.com, who created them for Tube Depot. If you suspect you need detailed, step-by-step guidance to complete a successful build, this one feature may be enough to sway your purchase decision. You can download the docs for free from the Tube Depot site. (Hull also created a YouTube video summarizing the build process.)
This wasn’t my first amp build, but thanks to Hull’s instruction, it was my best. Hull doesn't merely explain what goes where—his guide is chock-full of useful tips covering everything from the most efficient assembly sequence to the fine points of “lead dress” (the fancy term for tidy, efficient wiring that doesn’t look like a rat’s nest). The circuit is intelligently laid out, with most passive components secured to the turret board, and relatively few awkward solder points and wire runs.
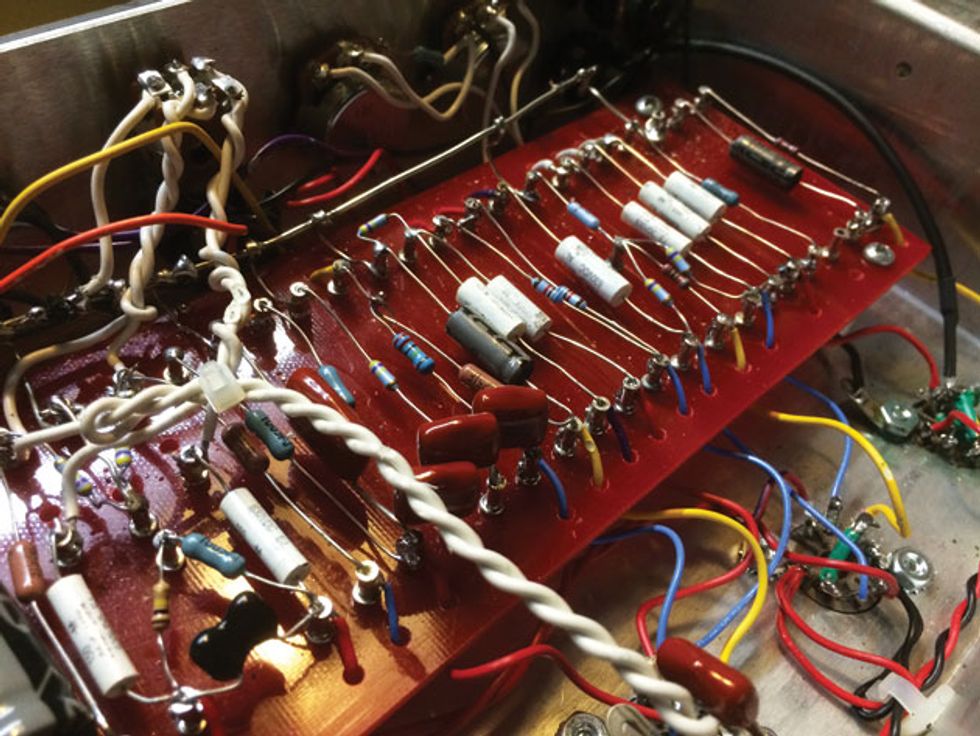
The Tube Depot kit employs modern parts, such as metal-film resistors, small-format capacitors, and color-coded, PCV-insulated wire.
For better or worse, though, this is a labor-intensive build. For example, you must assemble your own turret board before mounting the components, as opposed to some other kits, which provide prefab turret board. Here you must tape a template to the fiberglass base plate, drill each turret hole, and then press-fit each turret into place using a hammer and an included tamping tool. If you want to learn new skills and have fun at the workbench, you’ll probably dig the process. (I certainly did!) But if you just want an inexpensive amp in a hurry, you may prefer a kit with more pre-assembled components.
The amp took me two days to build—longer than expected, but mainly due to the fact that I was learning and practicing new build techniques and auditioning the optional mods covered in the documentation. It was time well spent, and when I finally fired up the amp, everything worked perfectly. Believe me—that’s not how things usually go on my workbench!
The results. The Tube Depot 18-watt amp looks great and sounds good. It delivers the expected hallmarks of 18-watt tone: intense overdrive at relatively low levels, lots of treble excitement, and a simple yet singularly effective single-band tone circuit. The response is exceedingly dynamic, cleaning up nicely as you roll back your guitar volume. Typically for an 18-watt, the amp doesn’t exactly move the earth with its lows, though the Weber speaker sounds full and satisfying.
Ratings
Pros:
Peerless assembly manual, including many cool mod options.
Cons:
Some parts might benefit from upgrades.
Tones:![]()
Ease of Use:![]()
Build/Design:![]()
Value:![]()
Street:
$849
Tube Depot Classic British 18W Tube Guitar Amp Kit 1x12
tubedepot.com
I incorporated two suggested mods: a post-phase-invertor master volume control (with a pot replacing one of the four input jacks), and a post-phase-invertor tone-cut circuit pilfered from the Vox AC30 (with a pot replacing one of the speaker out jacks). Both work great: The master volume provides surprisingly good high-gain sounds at low levels, while the tone-cut is tuned just right for nixing nasty overtones when playing at maximum gain. I recommend both mods for any 18-watt build.
The verdict. I had a fantastic experience building both kits—or more accurately, two fantastic but different experiences. Which experience is best for you depends on your DIY motives.
I prefer the Mojotone’s sound. There’s more of a bell-like quality to the clean tones, and when you pour on the gain, everything resonates a bit more sweetly, with fewer harsh and chaotic overtones. It doesn’t emit more low end per se, but the fundamental frequencies seem weightier. I dig this taut, focused character.
This is a subjective call, however, so judge for yourself: I recorded the audio examples for both amps through the same signal chain minutes apart, and even used a ReAmp to route identical performances through both amps. (If you’re reading this in print, check out the online version of this article, which includes audio.) The Royer R-121 ribbon mic is situated in the same position for each amp. I even tried swapping tube sets between amps, and auditioning each amp through the other’s cabinet and speakers, neither of which altered my impressions.
I attribute the sonic differences to internal components—but attempting to pinpoint which component is responsible for what is the sort of thing that launches flame wars on amp sites. Mojotone goes the extra mile to provide their namesake mojo parts, though I’ll remain skeptical that cloth-covered wire, carbon-comp resistors, or large-format caps have perceptible effects on an amp’s tone until I encounter repeatable audio evidence proving it. But most folks agree that transformers affect an amp’s tone in a big way. My hunch is that I simply prefer the sound of the custom Heyboers in the Mojotone to Tube Depot’s ClassicTones. (For what it’s worth, the Mojotone transformers cost twice as much. Conversely, the Weber speaker in the Tube Depot amp costs twice as much as the Mojotone speaker, though I like the sounds of both speakers about equally.) I’d love to hear the Tube Depot kit with upgraded transformers.
Meanwhile, stellar documentation makes the Tube Depot kit the superior learning and building experience. The techniques included here will improve not only your 18-watt build, but also any future amp projects. (They certainly helped me build the Mojotone kit!)
My time with these kits has only deepened my regard for this 49-year-old design. Not many amps impart such a strong sense of time and place. An 18-watt can really make you feel like you’re playing a 1966 London studio session. By all accounts, Eric Clapton used a JTM-45 on his Bluesbreakers session, but to be honest, these 18-watts took me closer to that iconic squawk than most JTM-45s I’ve played. (I’d harbored doubts about Clapton’s claim that he didn’t use a Rangemaster treble booster on those dates for the simple reason that it sounds like a frickin’ Rangemaster! But for the first time, I can imagine how a particularly fiery Marshall combo and lively, unpotted PAF pickups could conspire to produce that tone.)
The 18-watt is no chameleon—it’s a singular circuit with a singular point of view, one applicable to most non-metal rock styles. It may have taken the guitar community decades to give this amp its due, but hey—better late than never!
Thanks to Robert Hull of myamptech.com and Kirkwood Rough of Upstairs Amps for spotting my build mistakes and protecting me from fire and electrocution.
Mod Mania
Even if your kit’s documentation doesn’t cover mods, you can still research and incorporate them. Here are a few popular mods for 18-watt amps.The EF86 mod. You can substitute an EF86 preamp tubes for one of the 18-watt’s 12AX7/ECC83 tubes. It’s not a direct swap—the EF86 is a pentode, not a triode, so it requires a different socket and different wiring. The EF86 appeared in some early Vox models and in their boutique descendants. Seeking something fresh, I tried the EF86 a few years ago in my first 18-watt build, Ceriatone’s 18W TMB EF86 kit. It’s a fine kit that turned out well, and the EF86 did indeed lend an effervescent, Vox-like quality. But I wouldn't wish that godforsaken tube on my worst enemy.
I should have believed what I read online: the EF86 is almost comically microphonic. I spent a small fortune on replacement tubes and tube-damping gizmos to get a remotely studio-worthy amp, and it’s still too noisy for many applications. (An EF86 might work better in a head-only model, where it’s not inches from a loud, vibrating speaker.) Proceed with caution.
The TMB mod. The original 18-watt amps had only a single tone control per channel: a low-pass filter to roll off highs. One popular option is to replace the single-band tone control with treble/middle/bass (TMB) controls voiced like those on the larger Marshall amps of the ’60s. I went that route on my Ceriatone build, and the tone section sounded fine—but did I need the extra controls? Probably not. While the ability to prune highs is essential, the 18-watt doesn’t exactly suffer from an excess of bass, so I found little reason to manipulate the lows. The mids tend to sound fab as-is. The single tone control is simpler—and more fun.
Master volume mods. Original Marshall 18-watt amps have no master volume or gain controls—just a single volume control per channel. A master volume can be a nice addition, especially if installed after the phase invertor, as described in Tube Depot’s 18-watt assembly manual. That way, distorted tones lose relatively little impact as you dial down your volume.
Rectifier replacements. A tube rectifier is “the vintage way,” yet many players prefer the faster, punchier response of a solid-state rectifier. You can also split the difference by replacing the default EZ81 with a GZ34, which tends to exhibit less tube “sag,” though it requires different wiring and an octal tube socket. Tube Depot’s 18-watt documentation covers such options, including a tube/solid-state toggle.
Dual tremolo-speed mod. Mojotone’s 18-watt kit includes a two-button footswitch for activating tremolo and toggling between two modulation rates. You can add this dual-rate mod to any 18-watt build following the directions in Tube Depot’s 18-watt documentation.
Tone-cut control. You can add a pot/cap pair after the phase invertor as a low-pass filter, siphoning off highs. This can be helpful for high-gain tones that get nasty on top due to particularly hot or bright pickups.