|
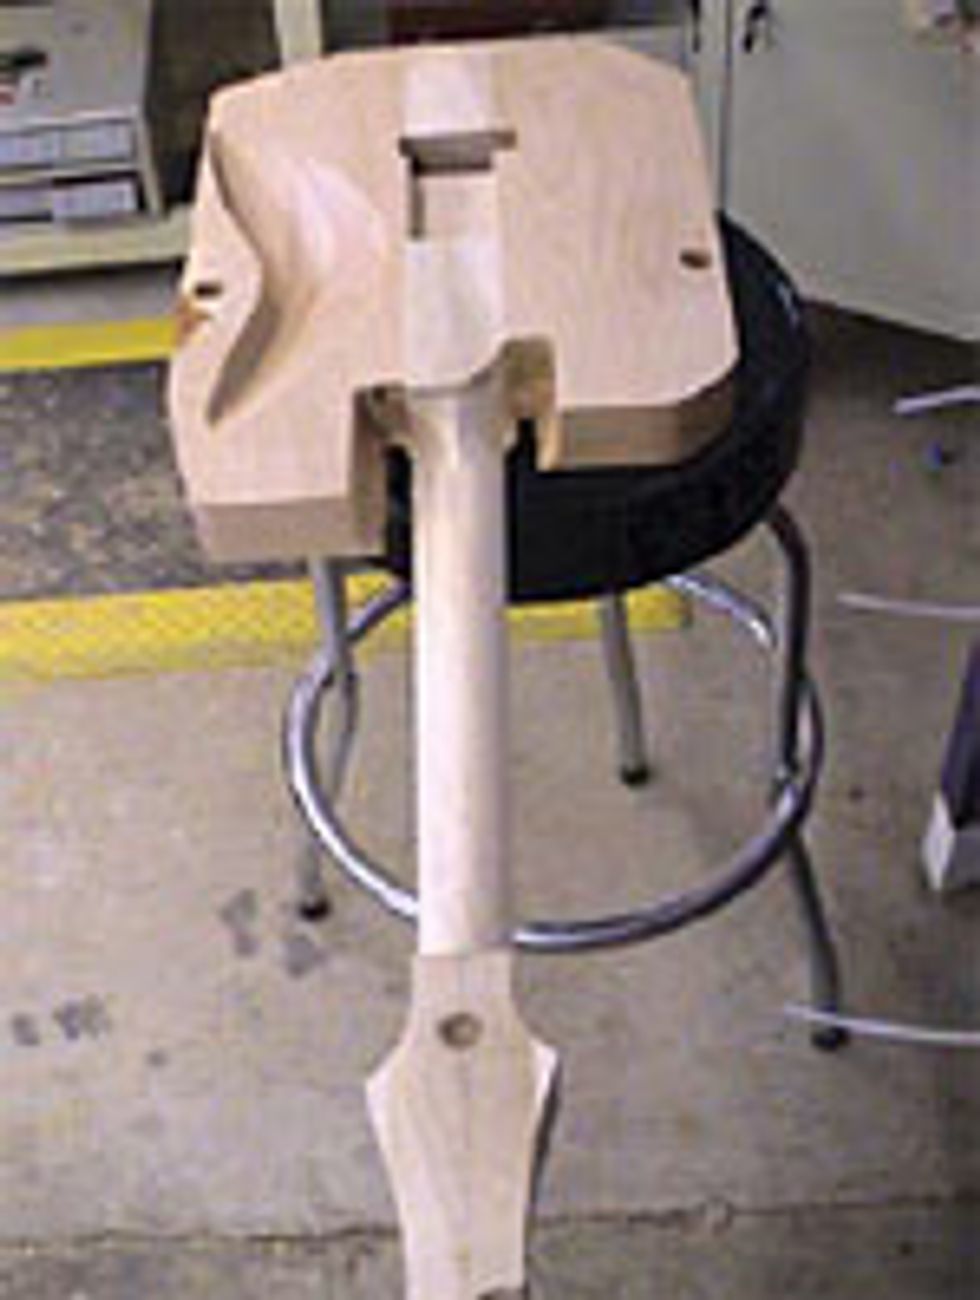
Things start moving quickly at this point as we see the guitar really starting to form. We are going to be flipping the guitar face down – this is where our tooling holes help align everything for the routing operations. We lose access to the third tooling hole on the rear of the headstock while upside down, but by recessing the fretboard into the fixture it helps keep everything lined-up during machining.
Tummy Contour and Neck Shape
This is the single, longest running machine program for me, taking approximately 30 minutes to cut the tummy contour and the neck shape using a 5/8” ball nose cutter. If you’re doing this manually you can rough-in the tummy contour by slicing it on a bandsaw while attached to an angled jig. The jig is simple – two flat boards, two hinges, an angle adjustment and then lock it in place. Trace your final tummy contour shape from the rear and side view and saw as close to the lines as you are able. With a little finesse, you can also sand the final shape into the contour with a spindle or edge sander by employing the same angle jig.
Routing the rear tremolo cavity is all that is left, so we can flip it back over for the home strech. This is performed using a 1/2” end mill to route the spring cavity and the deeper tremolo block cavity.

|
Now we put our first fixture back on to complete the control cavity, pickup routes, input jack, top tremolo route and the body perimeter, all using a 1/2” end mill. We currently have all three of our tooling holes in use during this operation until the body shape is completely cut out. If routing manually, a hand-held plunge router using 1/2” router bits with 1/2” bearings will do the job nicely for pickups, controls and tremolo routes. A standard table router (hand-held router mounted upside down in a stand or tabletop) is great for routing body shapes. If you have a pin router, you’re loving life and can sail through many of these operations like a human CNC with better quality cuts than hand routers and bearing cutters.

|
There are a few steps to finalizing the headstock. First is drilling our tuners. We have a flat surface on the rear of the headstock, but we also have the 12 degree headstock pitch to deal with. We already have a center mark for our tuner locations from earlier, so we will drill using a 25/64” brad point drill bit to a minimum depth of .750” for a set of locking Sperzel tuners. For this we need to have an angled fixture to get our headstock square to the drill bit, so we have a 12 degree ramp pinned in place on the table; just slide the guitar around to drill all six tuners.
Next we move over to the bandsaw, place the face of the headstock against the fence and resaw our headstock to a thickness of .700”, cutting from the tip of the head to about an inch shy of the nut. Once complete, we freehand the final excess material as it slopes into the neck’s back shape with the bandsaw.
Then it’s back to the CNC – I use a jig that has a relief cut for both the front and rear of the headstock so the head self-aligns easily. For the first operation, place the headstock face down and fly cut the rear to a final thickness of .580” using a 2” diameter fly cutter. The headstock thickness could also be fly cut manually on a drill press with a Wagner Safe- T Planer.
Finally, we flip the headstock around – face up – and route the pocket to drop in our gold pearl b3 logo using a .031” end mill. Any headstock inlays could be routed using a Dremel tool with router base.
Next month we’ll get to all the final hand operations as we get this baby ready for the paint department.
Gene Baker
Any questions or comments visit
www.finetunedinstruments.com
www.meangene.org
email me at b3gene@verizon.net
Fine Tuned Instruments LLC, home of his “b3” instruments.