fender telecaster deluxe loop feedback potted pickups acoustic sound tone microphonic energy danelectro step supplies

Nip microphonic pickups in the bud and dispose of those smelly gift candles in one fell swoop.

Buck Owens once asked Roy Clarke on TV’s Hee Haw, “Hey Roy, what’s the difference between a guitar and a git-tar?” Without skipping a beat, Clarke delivered the punch line: “Oh, about four hunnerd dollars!” At the time, the inside joke underscored the ocean of difference between cheap mass-produced instruments and hand-built masterpieces. But the line has become increasingly blurred in recent years as higher-quality instruments flow from places like Mexico, Korea, and China.

We stumbled upon great tone in a new Mexican-built Fender Telecaster Deluxe at a big-box store for $549. The playability and punch of this instrument was outstanding—in fact, we had a hard time selecting from two identical Teles that day. Nevertheless, in the ruckus of the store environment, with 13-year-olds battling for sweep-picking supremacy through 100-watt stacks, it was not immediately evident that this guitar had a problem with microphonic pickups. Back home, with the amp’s master volume nudged anywhere past 3, the Tele squealed like a stuck pig. We’re not talking the creamy, dreamy feedback Hendrix got while playing the national anthem; we’re talking the ice-pick-through-the-ear kind.

Buying new pickups and having them installed would make this guitar cost as much, in the end, as the US-built instrument it resembles. Groan! If this happens to you, there is something else you can do about it: pot your own pickups. Potting pickups with wax has been going on for a long time, and was originally intended to attenuate feedback—loose coil windings that vibrate in sympathy with acoustic sound will induce that acoustic sound into the amplified signal and create a feedback loop.

But potted pickups also have a tone all their own. It turns out that some of that microphonic energy does contribute in a subtle way to the sound of a pickup, irrespective of its tendency to feedback. Encase the pickup windings in wax, and the sound takes on more characteristics of the wood, with a rounder, fuller tone. Not that we’re saying the wax-potted tone is “better.” Tone is subjective. (Try potting a Danelectro pickup some day. You’ll singlehandedly destroy all of its mojo at one fell swoop!)

Potting a pickup is half science, and half art. With a recording date looming, we didn’t have time to earn degrees in either, but we did have a handful of aromatic gift candles and an old sauce pot that we’d just as soon do without. The worst-case scenario, short of burning down the house: a few lost hours, and the indignity of buying some new pickups? Other than the screeching feedback, these pickups sounded fine, and were worth saving.

The entire operation—removing and disassembling the pickups, soaking them in hot wax, putting everything back together— took about three hours, including extra time for cooling the hot pickups and taking photos. Much to our amazement, it worked exactly as we’d hoped, with one small hitch: the chrome-plated pickup covers are also microphonic. (Doh!) We had to go back and remove the pickup covers, inserting some flat rubber pieces (cut from a wide rubber band) between the pickup and the cover, to completely quell all the feedback. This Mexican-built Tele can now scream through the amp without a trace of microphone squeal. The tone is fat and well-burnished, the way a humbucker-equipped Telecaster Deluxe should sound.

Stuff You’ll Need
Potting your own pickups isn’t very high on the difficulty scale, but you’ll need some basic tools:
- Set of jeweler’s screwdrivers
- Soldering iron
- Rosin-core solder
- Needle-nose pliers
- Wire cutters/strippers
- Razor blade
- Desoldering bulb
- Heat-shrink insulation
- Old sauce pan
- Old candles

Get started...


Step 1

Before potting your pickups in wax, you’ll have to take them out. To do as little damage as possible, we decided to cut them midway—instead of desoldering the pickup leads at the controls— and splice them back together afterwards. It’s a lot simpler. Make sure you tag everything. When reinstalling, don’t take the shortcut, merely twisting the wires together. Solder every wire together, and use heat-shrink wrap to seal the joints.


Step 2
Under the skin, the Fender Telecaster Deluxe humbucker looks like any other: two coil bobbins side by side, screwed to a base plate with magnets sandwiched in between. To take off the cover, you’ll need to break two small solder joints holding the cover to the base plate. Notice the wax-impregnated felt strip that Fender jams between the bobbins and the pickup cover. Ironically, this is to kill microphonic feedback. We took this out carefully, noting the wrap, so we could put it back later.


Step 3
Carefully unscrew the bobbins one at a time from the pickup base plate, making sure not to break the coil wires that run from the bobbin to the base plate. Carefully unwrap the fabric ribbon that protects the coils, and set it aside for safe keeping—you’ll need it later. The ribbon is covered with a sticky adhesive, and it will want to yank at the thin wire coils, so proceed slowly. Snap the coil wire at any time, and it’s game over.


Step 4
After unscrewing the bobbins individually and removing their protective ribbons, screw them back on the pickup backing plates, sans the felt strip. If you haven’t broken any coil windings, congratulations. Note how Fender used a different wire stock on each pickup; the neck pickup has a shiny, clear insulation, and the bridge pickup has a dark red insulation.


Step 5

Finally, a good use for smelly gift candles! While the wife isn’t looking, gather up two or three of these from around the house, and melt them down in an old saucepan. Keep a close eye; it will only take a few minutes for them to melt. Once they’re melted, you’ll want to get underway ASAP, before the wax gets too hot and starts stinking up the house. Someone somewhere will swear we need beeswax from a rare breed of Tibetan honeybee, but this is supposed to be for fun, dig?


Step 6
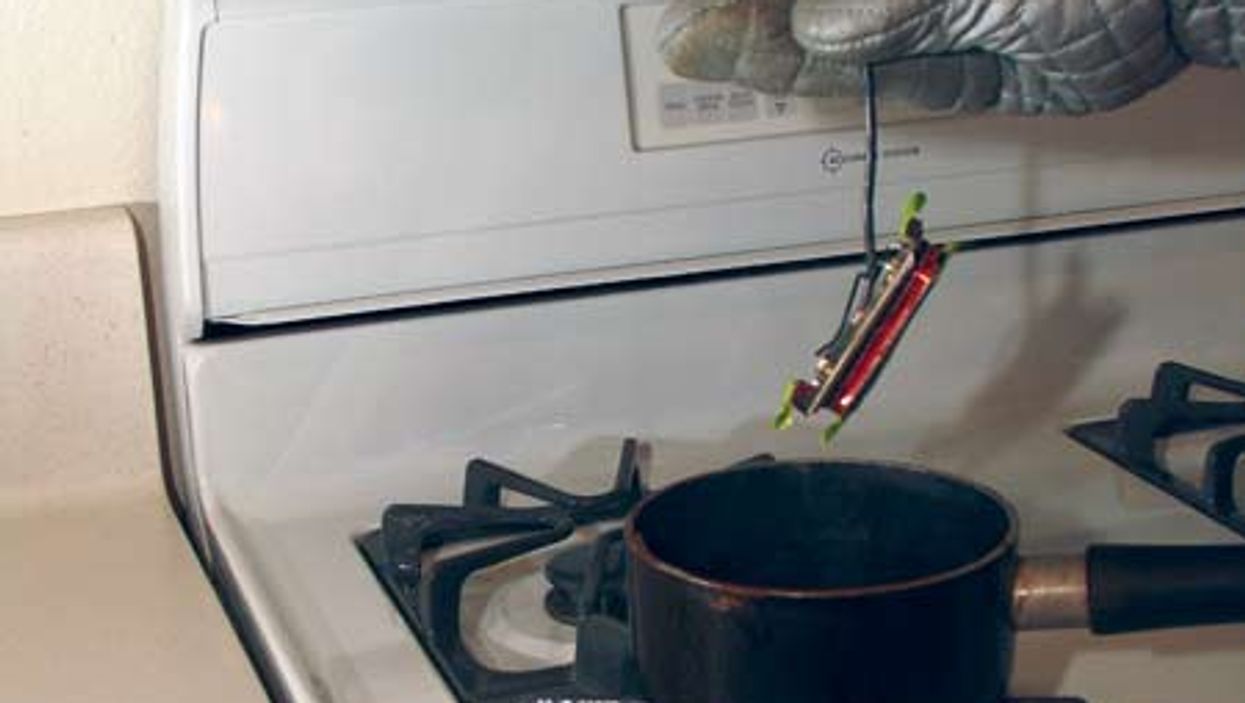
Using an oven mitt, lower the pickup into the hot wax, and let it soak for between one and two minutes (note the watch on the counter). We held the pickup by the wire pigtail, and the outer insulation almost melted through where it was pinched on the backing plate by the strain relief tab. We were okay this time, but next time we’ll probably use a pair of pliers to hold the pickup. Have a cooling plate ready, so you don’t get wax drops all over your kitchen counter. It takes a long time—about a half hour—for these puppies to cool down. The masking tape we put on top of the bobbins to keep the wax off lasted about 10 seconds in the pot. In the end it didn’t matter, so don’t even bother covering anything.


Step 7
The last thing to do before re-installing the pickups is to unscrew the bobbins and re-wrap them with the protective ribbon. Before screwing the second bobbin back on the backing plate, jam the wax-impregnated felt damper back between the bobbins. As you tighten the second bobbin to the baseplate, it will pinch it in place. Place the chrome cover back over the pickup and solder it back in place. You may want to add some dampening material, like a thin piece of rubber, between the cover and the pickup to help reduce microphonics from the cover.