Do you ever get frustrated trying to find the correct wrench or hex key to adjust your guitar’s truss rod? Well, you’re not alone! I have at least 20 different wrenches and hex keys dedicated to adjusting guitar necks (Photo 1), but I still run across that one guitar that requires a tool I don’t have. There are so many different tools designed for adjusting truss rods that it’s nearly impossible to have them all.
Many manufacturers include a truss rod tool when you buy one of their guitars. However, not all do, so you may need to purchase the appropriate tool. This is also true if you buy a used guitar missing its original tool.
Sometimes you can buy the correct tool at a home improvement store, but often you need to acquire it directly from the manufacturer, or from a luthier supply shop like Allparts Music, Stewart-MacDonald, Luthiers Mercantile, or the Luthier Tools page on the Martin Guitar website.
But before you go hunting, take a moment to acquaint yourself with some possible tools and how they’re used. Your truss rod’s nut type determines the tool you’ll need. It may be a hex key, nut driver, screwdriver, box wrench, or miniature screwdriver. Let’s look at each category.
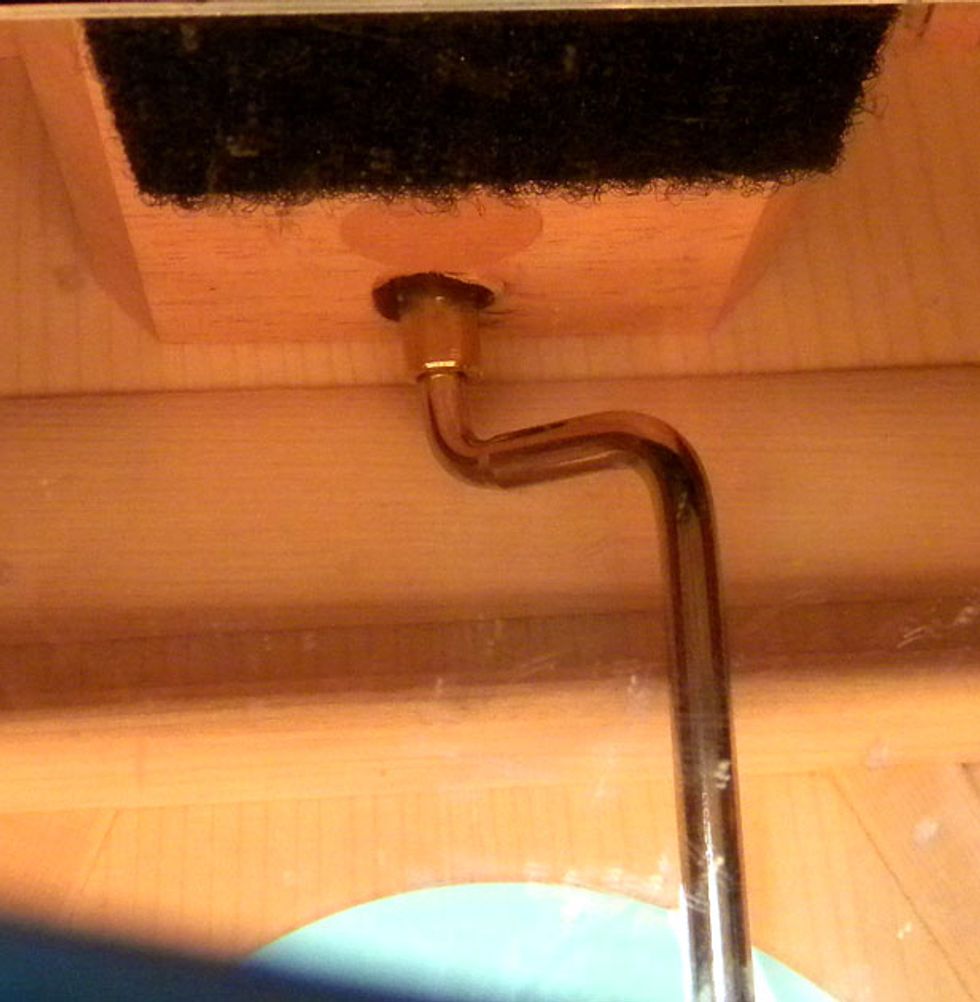
Photo 2
Hex key. Some manufacturers, including Larrivée and Collings, use a long, bent hex key to adjust the truss rod. These builders don’t drill a hole through the cross strut brace (glued under the top between the soundhole and neck block), and the curved key lets you reach around the brace to engage the truss rod located in the neck block (Photo 2).
Other brands, such as Martin and Ovation, use a long hex key bent at a 90-degree angle. Takamine, Alvarez, Hamer, and modern Fenders use short 90-degree hex keys. The access point for some of these guitars is located inside the soundhole, while others adjust at the headstock. Like Martin, Takamine drills a small hole through the cross strut brace to provide soundhole access to the truss rod nut using a right-angle tool. The size of the hex key varies from brand to brand, with some as small as 1/8" and others as big as 5 mm.
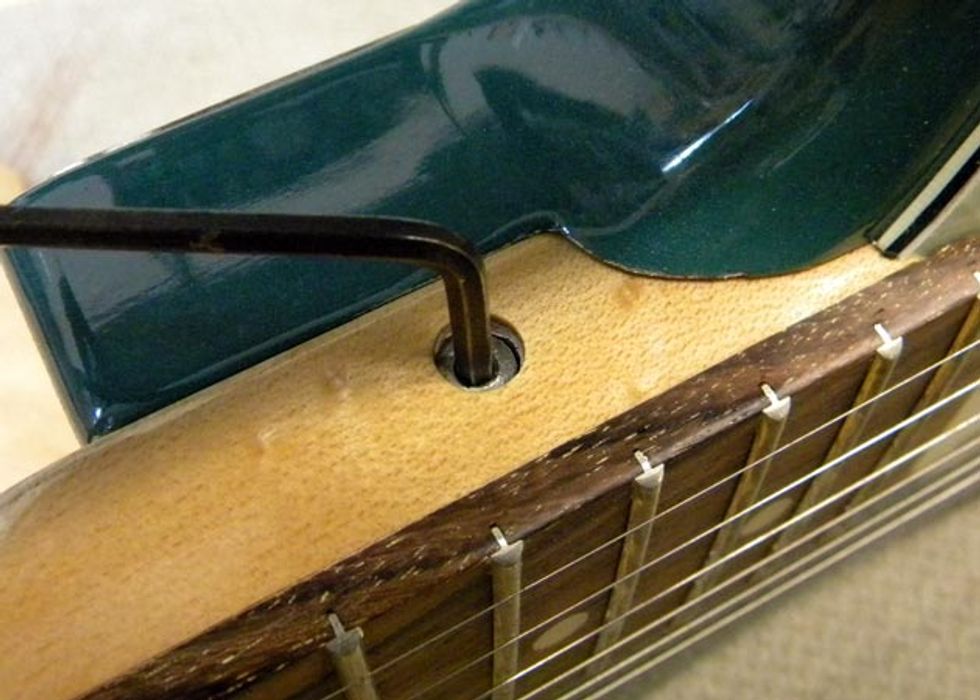
Photo 3
Some instruments, including certain G’Zan models, have a side adjustment nut (Photo 3). This allows you to adjust the truss rod nut from the treble side of the heel—very convenient!
Remember, the guitar may need either a standard or a metric hex key, so check with the manufacturer to determine the right size. A snug fit is important for complete control over the amount of force needed to make an adjustment.
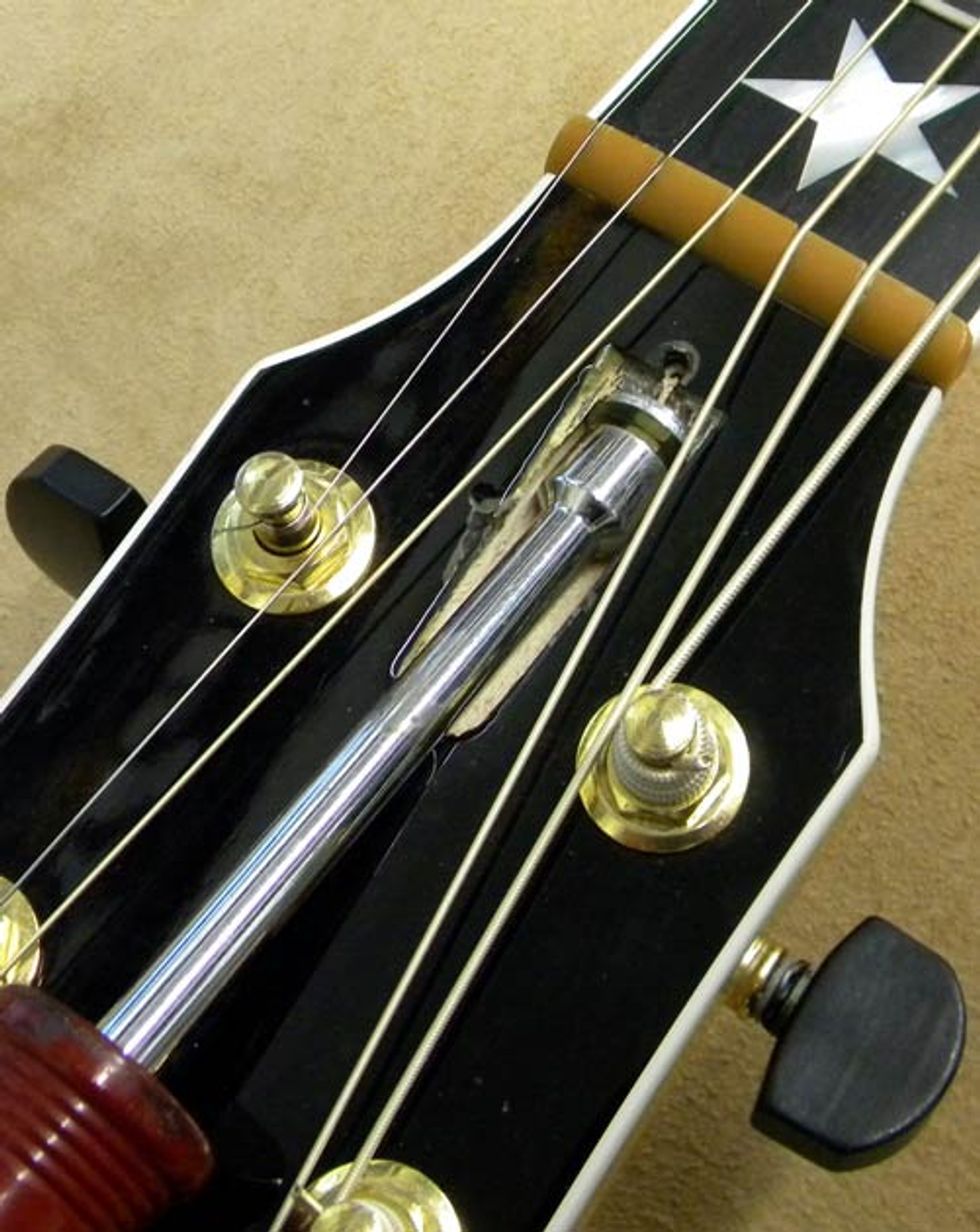
Photo 4
Nut driver. Taylor, Gibson, and Santa Cruz require a nut driver to adjust the truss rod on most of their guitars. These drivers measure from 1/4" to 5/16", and the access point is usually at the headstock (Photo 4).
Occasionally I run into an older acoustic that uses a nut driver, but with the access point inside the soundhole and the nut flush to the neck block. That’s when things can get interesting. You have to remove or loosen the strings before adjusting the truss rod. This can be difficult if the cross strut brace is in the way. You have to hold the nut driver at an angle or find a small box wrench (see below) that fits the nut.
Box wrench. This is basically a thin-walled, deep-well socket attached to a thin metal rod at a 90-degree angle. I’ve used this type of wrench on many different brands, including Rickenbacker, Charvel, Kramer, and Guild. Box wrenches come in both standard and metric, and can range in size from 1/4" to 8 mm.
Box wrenches and nut drivers can be interchangeable for adjusting a truss rod. A box wrench can fit in places where a typical nut driver won’t. Sometimes it’s easier to use a box wrench instead of a nut driver, depending on the pitch or angle of the headstock, assuming the access point is at the headstock. But that’s not always the case: For example, to adjust the truss rod on a Baby Taylor, you have to access it through the soundhole. For this, Taylor provides a long box wrench.
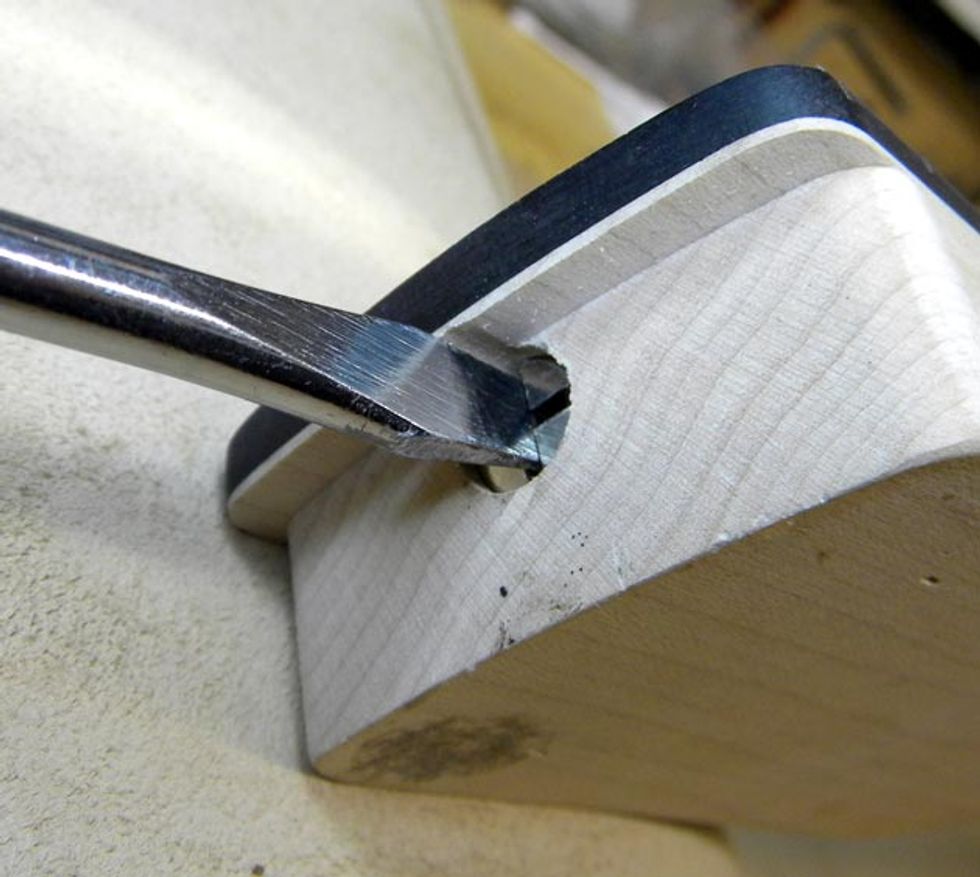
Photo 5
Screwdriver. Most vintage and vintage reissue electric guitars with bolt-on necks require either a flathead or a Phillips head screwdriver to adjust the truss rod. To safely adjust the neck, you have to unbolt it from the body (Photo 5). Some people try to adjust this type of neck by simply loosening it and not removing it completely from the body, but this isn’t advisable because the potential for damaging the pickguard or neck pickup is too great.
Always remember to loosen the strings before you remove the neck bolts, otherwise tension from the strings can bend the bolts. Make sure you use the correct size of screwdriver to avoid damaging the nut by rounding it slots.
With this old-school design, the adjustment process is pretty much trial and error. After you adjust the truss rod, you need to bolt the neck back on, retune, and measure the neck relief. Despite having done this thousands of times, I often have to repeat the process again and again to get the relief just right. Be patient.
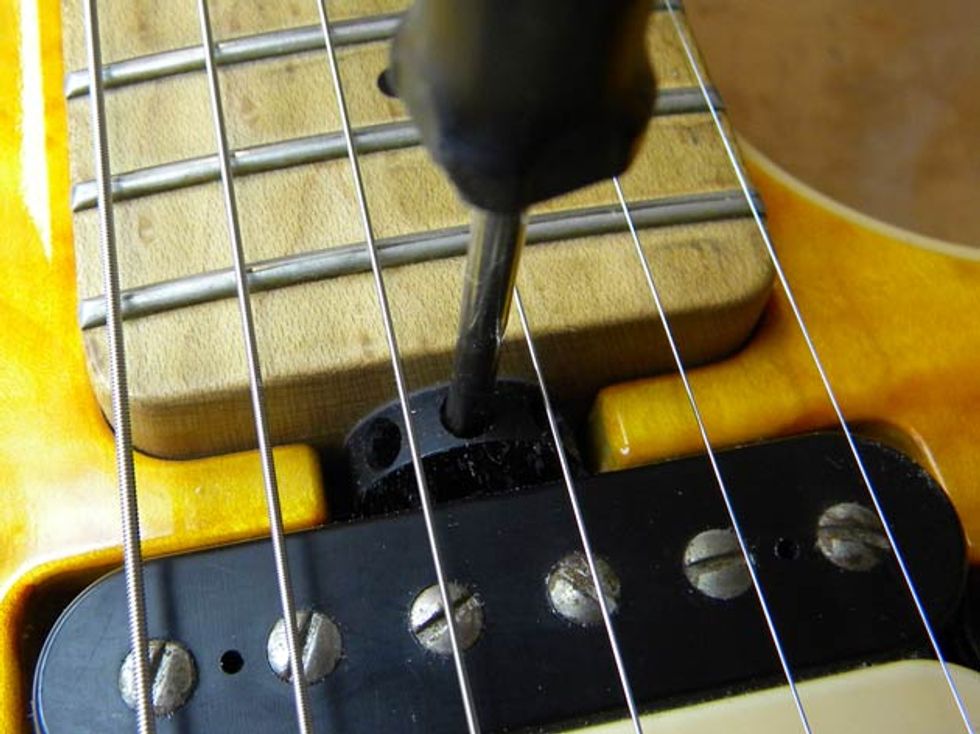
Photo 6
Miniature screwdriver. Some guitars have a “spoke wheel” truss rod nut (Photo 6). I’ve seen these on Music Man, Sadowsky, and Esoterik guitars. It’s a brilliant idea that makes it very easy to adjust a truss rod. Simply insert a small metal rod or a miniature screwdriver into one of the exposed holes and rotate the wheel right to tighten or left to loosen.
Once you’re equipped with the right tool, you’ll be ready to adjust the neck for optimum relief. For details on this procedure, read my January 2013 column “Time for a Neck Adjustment?” at premierguitar.com.