A step-by-step guide to transforming a template single-coil import into a humbucker-equipped firebreather with neck-and-bridge-pickup coil-splitting.
Modding a guitar yourself doesn’t need to be scary. Even if you don’t have any experience working on your instrument, taking things step by step can yield some amazing results.
What you’ll need for this project:
Parts and Supplies
- Three Seymour Duncan JB Jr. pickups
- Pure Tone Multi-Contact Output Jack
- .022MFD orange drop capacitor
- Two 500k CTS potentiometers
- One push-pull pot DPDT on/on switch assembly
- 60/40 rosin core solder
- 22 AWG non-shielded PVC-insulated circuit wire
- Heat shrink tubing
- Small zip ties
- Guitar string set
Tools
- Soldering Station
- Small clippers
- Small round-nosed pliers
- Phillips screwdriver
- 1/2" nut driver
- Strip of painter's or masking tape
- A small jar with a lid
For example, I’m going to show you how a hardtail Squier Bullet Strat, which you can pick up for less than $200 street, can be transformed into a more versatile tone machine by non-invasively replacing its stock single-coil pickups with humbuckers and installing a push-pull pot for coil-splitting the neck and the bridge pickups—where many of the sweet sounds live. While I’m at it, I’ll explain how to install a more durable and efficient jack. Even a beginner can conceivably do all of this over a weekend, and the result will be a very playable guitar with a wide selection of sounds that you can enjoy for many years.
One thing I’ll ask you to do first is brush up on your soldering skills. Unless you’re already on top of those, you should check out “Soldering 101: A Step-by-Step Guide” at premierguitar.com. If you don’t have a good soldering iron—one that’s got controllable temperature settings and speedy thermal recovery—you should get one. I prefer to use a Hakko Soldering Station ($115 street) with digital readouts, and keep the temperature set at 750 degrees Fahrenheit. Here it is, in Photo 1.
Photo 1
Keep in mind that any iron you use should be at least 40 to 60 watts or it will not get the solder or metal points hot enough. (Twenty-five-watt irons are common, but don’t use them for this job. They are for delicate circuit-board soldering and not point-to-point work.)
I also recommend Kester 60/40 rosin core solder, which is 60 percent tin and 40 percent lead, in .062" thickness. It’s perfect for electronics. (Note: Wear a face mask, like an N95, or work in a very well-ventilated area when soldering.)From Single-Coils to Humbuckers
The first step occurs before the guitar reaches the workbench. We ordered three Seymour Duncan JB Jr. Strat pickups ($99 each), in Photo 2, which are single-coil-slot-sized humbuckers that, after being swapped in, will bump the upper mids and overall output the Squier Bullet Strat produces considerably.
Photo 2
For this mod, you’ll also need two 500k pots (we chose the CTS brand), and one 500k push-pull pot/DPDT switch—all easy to find online and displayed along with the clippers and pliers needed for this project in Photo 3.
Photo 3
Now, let’s get to started!
1) Detune the guitar to avoid flying-string accidents. Then, using a small wire cutter, clip the strings and remove them from the guitar. Remove the pickguard screws to release the pickguard. Put the screws in a small jar with a lid and put them aside, clear of the work area. You don’t want to be on your hands and knees looking for these later.
As you lift the pickguard, you’ll need to slide it slightly out from around the neck to pull it clear. Then, turn the pickguard over so you can see the wiring harness for the electronics.
2) Next, you’ll want to clip the ground wire that runs from the bridge to the volume pot (this wire looks like it’s coming out of the body of the guitar), as well as the white output-jack ground wire, which runs between the volume pot and an output-jack lug or pin—the small horn-like protrusion from the jack designed to accept wires. Then, clip the red, or “hot,” wire, which carries the signal to the output jack, from the center pin of the volume pot. Now, the pickguard is separated from the guitar and can be placed on an open, convenient spot on your workbench, for the next steps.
3) It’s time to strip the pickguard. After clipping the wires that run from the pickups to the volume pot casing switch, you’ll need to unscrew the pickups from the pickguard and pop them out.
Then, remove the screws—which go into your jar—on the 5-position pickup selector switch and gently remove its plastic top by pulling up on it. Now, you can pull the 5-way switch out of the bottom of the pickguard and save it for the rewiring process. You could leave the 5-way in place instead, but removing it gives you more space to work on the rest of the pickguard electronics assembly.
To remove the pots, gently pull up on the knobs and they will lift off the face of the pickguard. If they resist, consider using a cereal spoon to pry the dials up, and perhaps place a thin piece of cloth, like part of a t-shirt, under the spoon to keep the pickguard scratch-free. This method is less hazardous to the pickguard than using a flathead screwdriver.
Next, unscrew the nuts on the front of the pickguard that hold the pot assemblies in place. (They were revealed after you lifted the dials up.) You’ll probably need a pair of pliers to loosen them a bit, but, again, be careful not to scratch the pickguard. Turn the pickguard over again and clip the wires from the pots, which—reminder—we’re replacing, so don’t worry about saving them. (Standard CTS pots sell for about $7—cheap.) Then, the pots should pop right out. In Photo 4, from a bit later in the process, the pots, DPDT switch, and pickups have already been reinserted, but you can use this photo to view the nuts around the tone and volume control spindles.
Photo 4
4) Now, it’s easy to install the JB Jr.’s on the pickguard. Simply pop them through the pickup slots and screw them in place. Make sure the top of the letters reading “Seymour Duncan” face the neck for all three pickups, as in Photo 4. Use two small zip ties to keep all three four-conductor wires from the pickups together, and a piece of painter’s tape to temporarily hold the loose ends of those wires to the pickguard after the pickups are screwed in tight, to prevent the pickup wires from getting in your way as you work on other steps.
5) Time to install the new pots in the volume and first tone control positions, and then to install the push-pull DPDT switch in the tone control position closest to the guitar’s heel—the one farthest from the strings. While 250k pots are good for single-coil pickups, we’re using the 500k pots that are best for humbuckers here. And don’t forget the 5-way switch!
Let’s start by placing both pots and the push-pull in their places, sliding the shafts through the pickguard openings, and then screwing down the nuts to hold them in place—essentially reversing the process we used to remove the originals. (The 1/2" nut driver that you’ll use for the jack replacement we’ll do next also works for screwing down the nuts.)
Likewise, to reinstall the 5-way pickup selector, simply find your two screws and reverse how you removed it.
6) Basic Strat-style wiring—mostly—is the next step. A good standard Strat wiring guide, like the one on the Seymour Duncan website, may be a helpful visual aid. Wire the volume and tone pots to the switch exactly as on the diagram.
Duncan’s JB Jr.’s come with about 10 inches of four-conductor circuit wire already attached. Strip off about 3" of that wire’s outer casing. Then, you’ll see red, white, black, green, and ground wires. Peel about 1/2" of casing from the tips of each of those smaller, color-coded wires.
For the neck pickup, the green and bare wire are tied together and attached to ground—soldered to the top of the middle (tone) pot. You can see the secured pickup leads, ground soldering location, and overall layout in Photo 5.Photo 5
The red and white go to the center right pin (looking from the smooth rear of the push-pull pot) of the on/on DPDT switch atop the push-pull pot. The black wire goes to the corresponding pin on the 5-way switch—the third lug from the front. (Reminder: Always tin your solder points!) You can get a good look at the DPDT and push-pull pot assembly in Photo 6.
Photo 6
For the middle pickup, the red and white wire are soldered together and bent back over the lead wire. You should use a piece of heat shrink tubing to mask it off. (Heat shrink tubing for guitar and bass wiring can be purchased via a number of online sources.) The green and bare wires also go to ground atop the tone pot, and the black wire goes to the number two lug on the 5-way switch.
And finally, the bridge pickup. The green and bare are tied together and, once again, soldered to ground on the top of the tone pot, while the red and white go to the left middle pin on the DPDT switch atop the push-pull pot, and the black wire goes to the corresponding pin—the front slot—on the 5-way switch. That provides coil-splitting, activated for the neck and bridge pickups, by pulling the rearmost knob up.
7) Let’s do one more thing while we’re here to beef up the tone. Let’s put a .022MFD orange drop capacitor in the tone control’s setup, which will roll off less treble frequencies than a higher value capacitor as the tone knob is turned down. The cap can rest atop the center (tone) pot, and let’s solder one of its bare wires to the back of the same pot’s casing for grounding. We’ll take the other wire and shield it with shrink tubing, and solder it to the outside pin on the tone pot. In Photo 7, you can see the completed wiring for the control set.
Photo 7
8) There’s one more control set wiring move.
The bottom lugs of the push-pull DPDT switch are both jumped to ground. This is what makes the coil-splitting possible, by selecting the ground wire or allowing it to go to output. (Use 22 AWG non-shielded PVC-insulated circuit wire for incidental wiring work like this.)
Then, reattach the red output wire from the output jack to the center pin of the volume pot. Follow that with reattaching the bridge ground wire and output-jack ground wire to the back of the volume pot casing.
(Or, you can wait and do these steps later if you are also doing the jack replacement.) Photo 8 displays all of our handiwork!
Photo 8
9) Lastly, replace the pickguard back onto the guitar with the screws you’ve saved and plug the guitar in to test the connections before screwing it back on. Done!
DIY: Replacing Strat Single-Coils with Stacked Humbuckers
Swapping the Output Jack
Our next job is replacing the standard 1/4" jack that lives behind the chrome boat-style output receptacle with a Pure Tone Multi-Contact Output Jack. It has four points of contact, versus the OEM’s two, and dual tension grounds to hug the cable sleeve in place from both sides, providing more reliable performance and better tone.
1) Start by removing the two jack-plate screws, and then remove the output-jack nut with a 1/2" nut driver. Carefully pull out the jack and boat assembly, (Photo 9) and snip the lead wires—the red is hot output and the white is ground—close to the jack, leaving plenty of wire from the guitar’s harness to work with. Strip the leads of those protruding wires about 1/4", for soldering later.
Photo 9
2) Grab your 60/40 rosin core solder and bring your soldering iron up to 750 degrees. While the iron’s heating up, slide some heat-shrink tubing down the output and ground wires. And when the soldering iron is at temperature, tin the wire leads and pins on the Pure Tone replacement jack.
3) Next, solder the hot (red) output and ground (white) wires to the two pins on the jack, being tinned in this photo (Photo 10).
Photo 10
When you’re done, slide the heat-shrink tubing that you slid onto the wire earlier over the pins and solder points. Then, heat the tubing with either a heat gun, hair dryer, or lighter (Photo 11) to make them shrink.
Photo 11
4) Finally, reattach the new output jack to the jack plate with a locking washer underneath, tighten the output-jack nut with the 1/2" nut driver, and reattach the jack plate to the body with the original jack-plate screws, as in Photo 12.
Photo 12
And now you’re ready to plug in and play!
DIY: How to Wire a Guitar Output Jack
Day #2 is here with another chance to win! Enter inside for your chance to WIN an LR Baggs Align Series Session. Hurry, you've only got one day to enter!
Enter here but see details about the prize below.
Stompboxtober 2023 Day 2 - LR BaggsLR Baggs Align Session Acoustic Saturation/Compressor/EQ Pedal
Inspired by the LR Baggs Handcrafted Video Sessions and our experience in some of Nashville’s great studios, the Align Session brings our signature studio sound to your live rig. Session circuitry enhances your acoustic pickup and imparts the rich sonic character that you’d expect from an experienced audio engineer using some of the world’s finest studio gear. We’ve captured this studio magic and put it into a compact, easy-to-use acoustic pedal that will transform your live sound. |
This diagram clearly illustrates Dirk Wacker's wiring mod for this month.
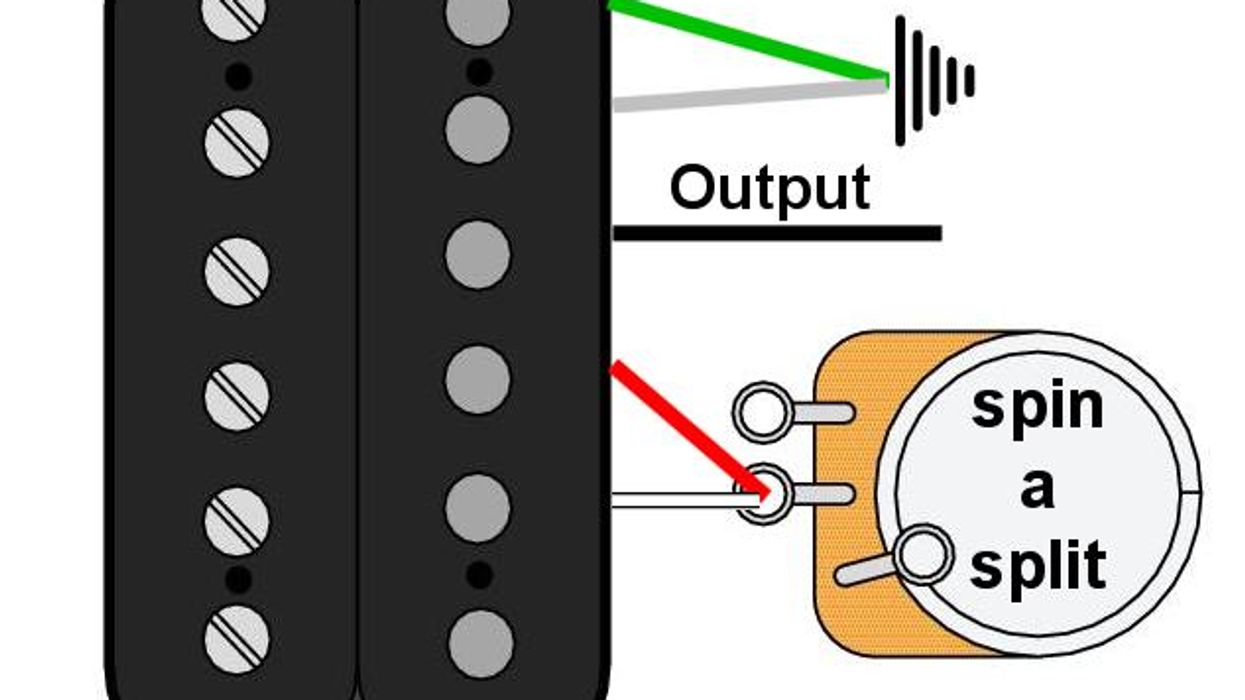
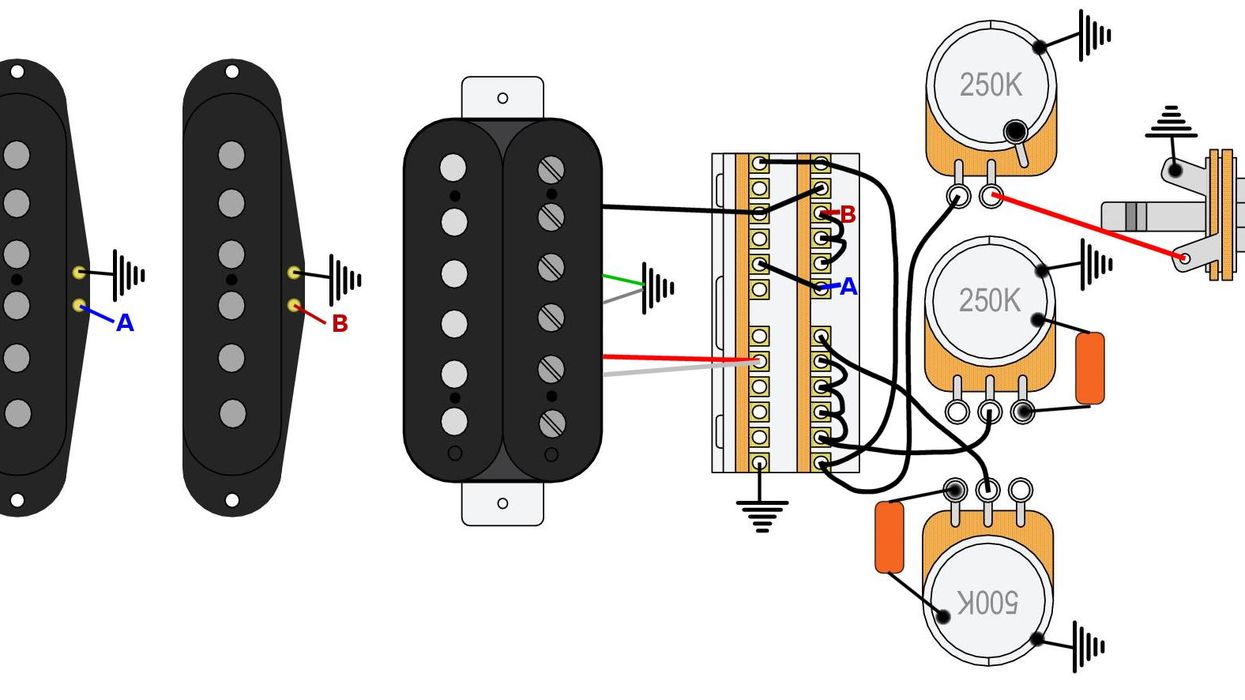
If you want the maximum tones out of an HSS-configured guitar, here’s how to wire the switching and eliminate two pet peeves from a basic auto-split wiring.
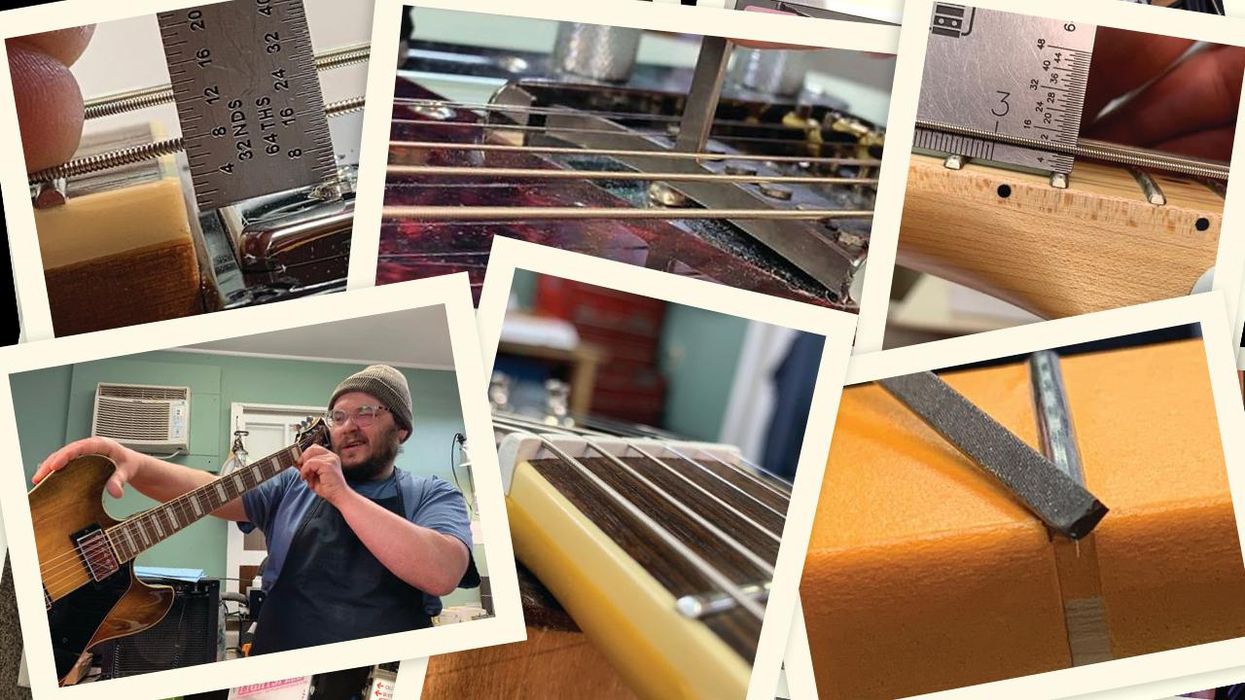
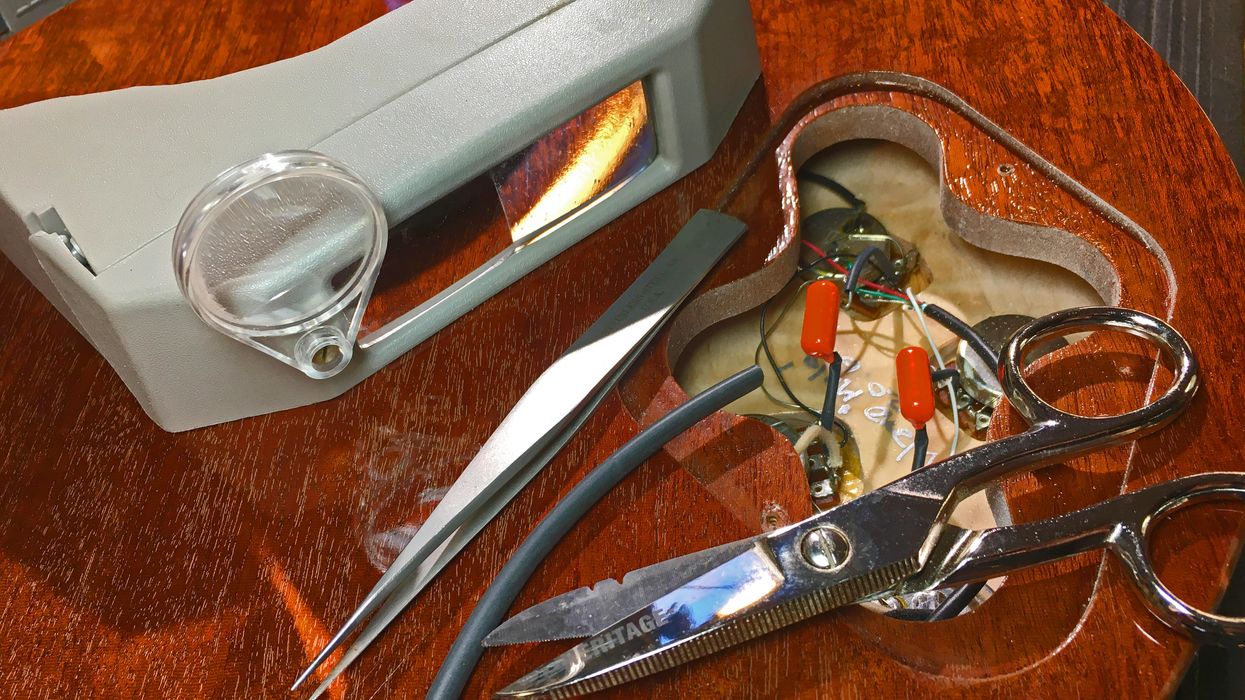
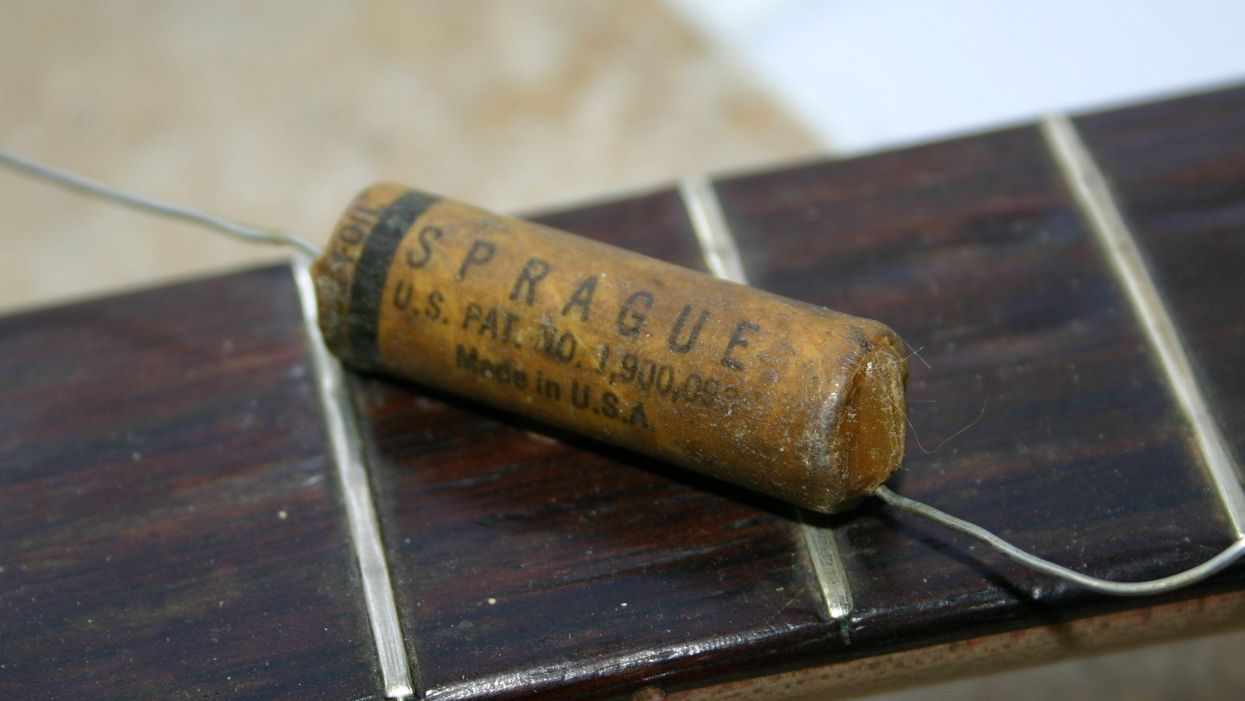
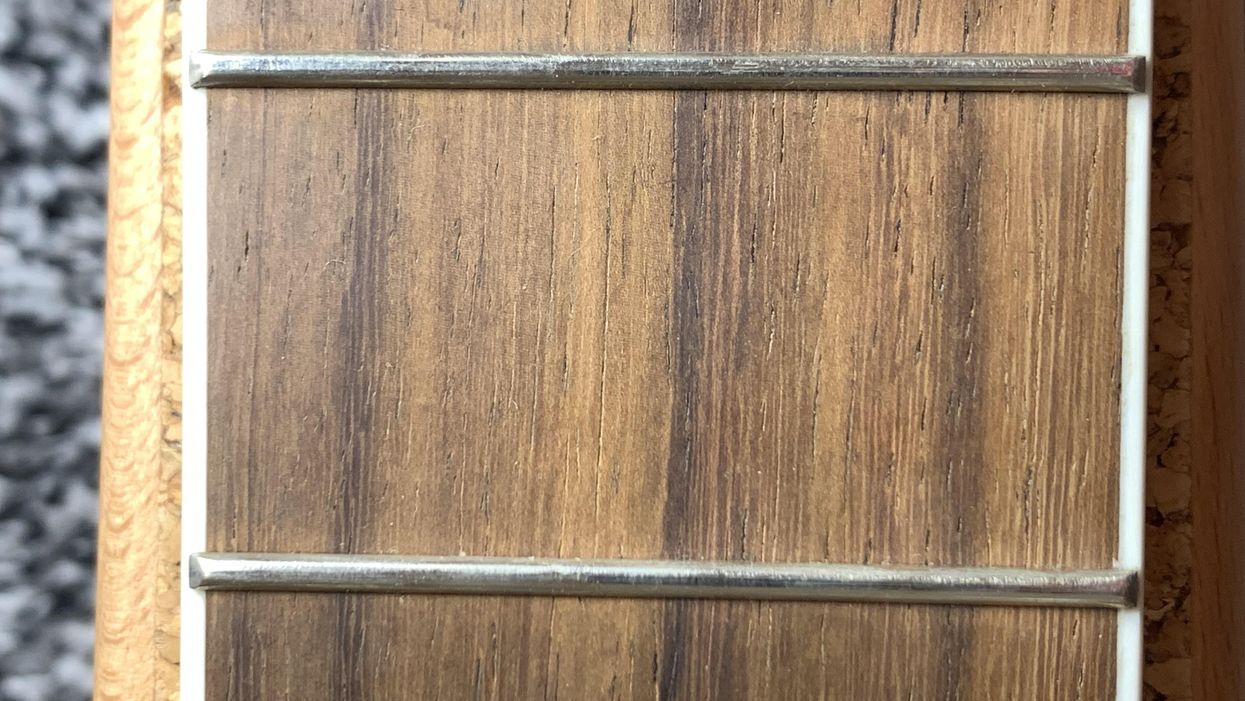
Welcome back to Mod Garage. This month we’ll have a deeper look into auto-splitting pickups on an HSS-configured Strat and similar guitars. We covered this a long time ago, exploring the basic version of this wiring in “Stratocaster Auto-Split Mod.” Today we’ll take it one step further with a pro version and discuss what can be done with it.
The HSS setup with a bridge humbucker plus two traditional single-coils is the perfect combination for many Strat players, but it’s not limited to Strats. With the bridge humbucker you have a powerful pickup for soloing and rocking the crowd, while the two single-coil pickups give you traditional sounds and everything in between. When you choose a bridge humbucker with 4-conductor wiring, you can even split it for more possible sounds and to also get the famous in-between “quack” tone with the bridge and the middle pickup together in parallel. That’s exactly where the auto-split wiring comes in when you want an easy-to-operate setup. Let’s have a look what can be done with such an HSS pickup configuration and a 5-way pickup selector switch.
Some players may not need the in-between pickup position with the bridge plus the middle pickup together in parallel. Maybe they can’t use this tone in their musical context, or they simply don’t like these slightly hollow tones with less output. Even Leo Fender himself never liked this tone that he called “out of phase” (which is technically incorrect). These players are fine with a standard 2-conductor bridge pickup and standard Stratocaster 5-way switching.
- Both coils in series (standard humbucker operation with full output)
- Both coils in parallel (a kind of hum-free, single-coil-like tone with less output)
- One coil shut down to ground (real split mode with only one coil engaged)
- With a simple 2-way toggle switch you can shut down one of the coils to ground to get an additional single-coil-like tone from the bridge pickup. This can also be used to get the in-between sound together with the middle pickup. You can also use any standard push-pull or push-push pot, or the Fender S-1 switch, for this operation, so you don’t have to alter the appearance of your guitar.
- If you want more, you can use a DPDT on-on-on switch like the DiMarzio “multi-sound switch” to get all three sounds from your bridge humbucker. This operation can’t be done from a push-pull or push-push pot—you need an additional 3-way toggle for this.
- If you want all four possible sounds from your bridge humbucker, an additional rotary switch is the way to go. We discussed this just a few months ago in “Mod Garage: How to Triple Shot Your Humbuckers.”
That’s where the pro version kicks in, replacing the standard 5-way switch with a “super switch” that has four individual switching stages instead of only two, eliminating the two peeves from the basic auto-split wiring.
Please note: This is only possible with a humbucker sporting 4-conductor wiring. You can’t do this with a humbucker with traditional 2-conductor wiring!
Of course, there are players who don’t need all the gadgets. They simply want a powerful humbucker tone in the bridge position and the typical traditional Strat tones from all the other switching positions, including the in-between position of the bridge plus middle pickup. The auto-split wiring is perfect for these players because it’s a set-and-forget situation.
What will happen without the auto-split wiring when dialing in the bridge humbucker together with the middle single-coil pickup in parallel? You won’t hear a big difference in sound compared to the bridge humbucker alone, simply because usually the bridge humbucker is a lot louder compared to the single-coil and will dominate the tone by out-acting the single-coil. To combat this problem, the auto-split wiring will automatically (hence the name) split the humbucker into a single-coil by shutting down the other coil to ground for a traditional in-between sound of both pickups, like we all know from a regular SSS-configured Strat. The switching matrix of the auto-split wiring looks like this:
- Bridge humbucker with both coils in series for full humbucker operation
- Bridge humbucker split + middle single-coil in parallel
- Middle single-coil
- Middle + neck single-coil in parallel
- Neck single-coil
Deciding what coil of the humbucker will be sent to ground leaving the other active could easily be the subject of a whole column. Depending on the winding direction and polarity of both pickups, you usually don’t want to end up with an out-of-phase tone when both pickups are engaged and when your middle pickup is RWRP (reverse-wound, reverse-polarity), you also want to have the hum-cancelling function this switching position can provide. So … choose carefully!
While the basic version of this wiring works great, it has some peeves that some players complain about:
- It’s not possible to freely arrange the dual tone controls. They are fixed to one for the middle and the other for the neck single-coil, leaving the bridge humbucker without any tone control, like in standard Strat wiring.
- You’ll have to use individual tone caps for each tone control.
That’s where the pro version kicks in, replacing the standard 5-way switch with a “super switch” that has four individual switching stages instead of only two, eliminating the two peeves from the basic auto-split wiring.
Good idea, but unfortunately the road to hell is paved with good resolutions.
The super switches are physically a lot larger compared to the standard version, so take care that they’ll fit into your guitar. Recently I had to upgrade an Ibanez HSS guitar with this wiring, and it was impossible to put a super switch in without extensive routing to make space for it. I had such problems before with Yamaha and Fender guitars. The PCB-based versions of this switch require less space, so often this is the way to go.
Often such extended auto-split wirings are trying to also handle what I like to call the “resistance paradigm.” Fender used 250k pots for their guitars with single-coil pickups in the early days, while Gibson used 500k pots for their humbucker-loaded guitars. I don’t think the resistance values were chosen for any tonal reasons. We’re talking about the 1940s and ’50s, when they simply didn’t have the choices we have today. Especially Fender used whatever was available in large quantities for a low price, and it’s likely that Gibson had a similar approach.
Today you can still find unfounded rumors all over the internet that single-coils sound best with 250k pots and humbuckers with 500k pots. While the basic idea behind this contains some truth (500k pots still leave some high-end with a humbucker while 250k pots prevent the single-coil from sounding too harsh), such rules are not set in stone and usually such debates totally neglect that we’re talking about a passive system.
Often 500k pots are used for an auto-split wiring, incorporating some additional resistors to “convert” them to 250k for the single-coil pickups. Good idea, but unfortunately the road to hell is paved with good resolutions. Digging deeper at this point is too much for this column but may be a good subject for a follow-up. My personal recommendation: Forget about it. In more than 20 years, I have tried every variation of such jack-of-all-trades wirings and not a single one really worked in a useable way. Here are my two cents regarding such a wiring:
- A good and useful distribution of the tone controls is one 500k pot for only the bridge humbucker and the other one 250k for the two single-coils.
- Using two tone caps (one for each tone control) is simply perfect for this wiring, i.e., I really like to use a small cap value for the humbucker to control the warmth of it plus a traditional value for the two single-coil pickups.
- Using a 250k master volume works excellent because in a passive system like a Strat, you can benefit from the much better taper regarding evenness compared to a 500k pot. The loss in high-end compared to a 500k pot is marginal: measurable, but not audible. Using a treble-bleed network is a matter of choice and up to your personal preferences.
The wiring layout seen in the diagram at the top of this page is what I recommend and that most players will be happy with, so here we go. I assume that the middle pickup will be a RWRP type, and as usual, I used the Seymour Duncan color code for the humbucker. If you have a humbucker from a different company, you’ll have to convert the shown color code with one of the converting charts online. The bare wire of the humbucker always goes to ground, no matter what type it is. I tried to keep the illustration as clean as possible by leaving out all ground wires, so, as usual, they’re shown with the international symbol for ground. Solder all these connections to the back of a pot of your choice.
That’s it. Next month we’ll build a cool and simple yet very effective diagnostic gadget for electric guitars and basses. I use it in my shop daily and you will love it for sure, so stay tuned!
Until then ... keep on modding!
Straight from the builder’s bench: Here are some tools that might just make your life a little easier.
Straight from the builder’s bench—these are the cool tools you need to keep your workflow moving along smoothly.
Guitar gear, by nature, regularly requires a bit of maintenance. So whether you’re a guitarist, builder, or both, having good tools makes it easier to stay on top of seasonal or technical changes. Any endeavor that requires mechanical or electrical maintenance is subject to what I call the 80/20 rule. This axiom refers to how we can spend 80 percent of our time fixing and 20 percent enjoying the fruits of our labor. You probably have a screwdriver or some wrenches, but there are a few neat little bits that make life on the workbench more pleasant and maybe shift the percentages of that rule.
Easy eyes.
Not everyone has perfect vision, and little things like guitar parts can be hard to see. Eyesight—which includes the brainpower to decipher what the eyes register—is one of the most energy-intensive things we do. Scientists say that vision uses somewhere between six and 20 percent of our brain’s resources. Even if you’ve got eyes like a hawk, it’s important to be kind to your system when manipulating tiny guitar parts like screws and strings. At the risk of sounding like your parents, I suggest you invest in some good lighting and a headband magnifier like the one Leo Fender wore. If you’re concerned about looking like a dork, remember that Leo invented the Stratocaster. I’ve got a few of these scattered about my shop at stations where vision is critical to the task, like adjusting intonation and bridges. They’re great for checking frets for high and low spots, too.
Tweeze please.
One of the most inexpensive and brilliant tools you can buy are good tweezers. Don’t bother with the junk from the health care aisle at Walmart. Go straight to McMaster-Carr’s website and get a couple differently shaped industrial-quality stainless steel ones. Once you get used to them, you’ll never turn back. And, of course, they also fit into your guitar case. I have a pair on almost every bench and desk in my shop—but then again, I’m a tool addict. The bent-tip tweezers are extremely useful for all small jobs including handling small screws. The ones with serrated gripping surfaces are great for threading strings through bridge and tuner holes. If you have champagne taste, go for the titanium solder-resistant pair for ultimate bragging rights.
After discovering these wonderful screws, everything else is Mickey Mouse—they’re great for repairing cabinets, cases, pedalboards, and more.
Shrink to fit.
I could be recommending old-school biker jeans from the ’60s, but this is about shrink tubing. I’ve been using this stuff for all kinds of jobs since before Jimi Hendrix played with Wilson Pickett—and I still haven’t run out of new uses. Basically, it’s rubberized tubing that shrinks 50 percent in diameter when heated. It’s made for insulating wire splices. You slip it over the splice and blast it with a heat gun (another great tool) until it shrink-wraps itself around the joint. But that’s not the only thing it can do. You’ve probably encountered high-dollar guitar cables with shrink tube reinforcing the ends. You can upgrade your everyday cables for pennies by adding those reinforcements yourself. I’ve also used it to protect parts from abrasion. The material is tough and can also be used to prevent scratching on certain parts. Buy an assortment of diameters so that you have the proper size for any job. You can also layer diameters to get a custom fit. There is even a shielded version, which is perfect for audio wiring. This miracle part is available at vendors from Amazon to Zoro, in sizes up to 2" diameter. If you want to get into the weeds with this stuff, McMaster-Carr is once again the rabbit hole of choice.
Don’t screw around.
We’ve all had our lives improved by drywall screws. Anything and everything you need to assemble quickly can be done with these little black wonders. Still, I’ve a new love, and its name is Spax. This German-designed, multi-purpose fastener is the Acropolis of quick-screws. The secret in each screw is three-fold: superior strength, multiple thread pitches (one for drilling, one for fastening), and a self-countersinking head. From hardwood furniture building to use with medium density fiberboard, these superior fasteners are self-drilling and reduce splitting when used without a pilot hole. After discovering these wonderful screws, everything else is Mickey Mouse—they’re great for repairing cabinets, cases, pedalboards, and more. Builders will love it for temporary tooling.
I hope a few of these items make your repair and build time more enjoyable. Nobody likes to have to fix stuff when they’d rather be banging out a tune. I still struggle with the 80/20 rule, but I have the tools to fight back. I’ve spent decades looking for the easier way around, and so should you.
Installing a vintage tone cap, like this paper-waxed capacitor (PIW), can make a noticeable difference in your guitar’s tone, because vintage caps leak more rich and detailed overtones than new tone caps.
To swap or not to swap? Let’s explore some situations when it makes sense to replace hardware … and instances when it doesn’t.
Welcome back to Mod Garage. This month I want to give you some insight into putting vintage parts into new electric guitars and explore why so many people are doing this.
The trend to put old vintage parts into electric guitars started years ago and it’s still in vogue today. But besides the hip factor, is it reasonable to do so? What can you expect, and are there specific situations where this makes sense for a new electric guitar? In this column, we’ll have to face some sad and unpopular facts (and myths) about vintage guitars and vintage parts, so not everyone will be happy about this.
In general, the vintage world is not limited to guitars or instruments. The scene includes a lot of categories, such as cars, watches, clothing, furniture, books, electric devices, and much more. But the basic principles are always the same and there are many reasons why someone decides to jump on that wagon.
We don’t have to discuss putting vintage parts on vintage guitars, which seems logical and natural. On a vintage guitar, it’s all about stock condition and authenticity, like on every vintage collector’s item, no matter what it is.
Let’s start with sad vintage “truth” number one:
Today we can build much better electric guitars than ever before.
That’s not really bad news, if you’re not a vintage guitar seller. Don’t get me wrong, I’m not saying the old vintage guitars are obsolete or bad in comparison with the ones we can build today. But with today’s high-tech equipment, the level of consistent quality is outstanding and close to perfect. All instruments produced that way are more or less completely identical. Vintage guitars, even if built from the same persons on the same day, are virtually all individual items, which for sure is one of the main keys to their magic. And naturally everyone wants to own an individual item rather than an industrial, mass-produced object.
Today we can build tuners that are far ahead of what was possible in the ’50s and ’60s, as well as bridges and tremolos that are little mechanical pieces of art regarding precision and accuracy. So, does it make sense to put vintage hardware on a new electric guitar?
Regarding quality and performance, it’s a clear NO! I have numerous customers doing exactly the opposite, no matter if it’s sacrilege or not. They want to play their vintage guitars but with today’s highest possible performance, so they take out the vintage parts, carefully storing them away, replacing them with modern 1:1 copies to spruce up the old guitars. This is often the case with tuners, string trees, tremolos, and the like, and it’s important that the new parts will fit 1:1 so no new holes need to be drilled to make them fit.
Sometimes imperfection to a certain degree can be exactly the thing you’re looking for regarding tone.
Old and brittle plastic parts like pickguards and pickup covers are also stored away. You can buy modern plastic lookalikes easily and so the old parts are ready to drop in again when you want to sell the guitar someday. Vintage amp players are taking out the original speakers to protect and store them away. This way you can have both: Play your vintage guitar and amp with the highest possible performance, plus keep their value alive because you can always swap parts back to stock condition. I have quite a few customers who take out the complete electronics along with the pickguard, playing a modern substitute under the hood because they don’t want to risk damage to the original. And, believe it or not, a lot of them say the new pickups and electronics sound better than the originals, but compared to the originals, they are worthless. In general, this applies to all vintage items. For example, today it’s possible to build better cars and watches than ever before ... but they don’t make them like they used to, which is one of the number one pro-vintage arguments.
Naturally, there could be other reasons—including emotional ones—to put vintage hardware on a new electric guitar. This is highly individual. Maybe it’s just for fun because it was already lying around, or it looks cooler because it’s used and beaten up. But this can be had cheaper—the market for aged guitar parts is huge. Or maybe one of your favorite artists did something that you want to copy. This also applies to a lot of other vintage stuff like cars and watches—who doesn’t want to drive a Porsche 550 Spyder model like James Dean or wear the same Rolex Submariner 6538 that James Bond wore in 1962 during his first appearance in Dr. No?
But maybe it’s because people think putting vintage parts into a new guitar will increase its value. This leads us straight to sad vintage “truth” number two:
A new electric guitar with vintage parts fetches more money than it does in stock condition.
This is simply not true, at least when sold as one piece with the vintage parts built into the guitar. Like any modification, this will not increase the value of a new guitar—time and being witness to countless auctions has proven this.
But this is the perfect transition to sad “truth” number three:
A vintage guitar makes the most profit when sold completely intact.
Exactly the opposite is true. If you want to make the most profit, nothing beats completely disassembling a vintage guitar and selling it in pieces. I know some vintage parts dealers in Europe and the U.S.—I’ve worked with some of them for over two decades—and they’re all doing the same thing: finding vintage guitars that are for sale, disassembling them, and selling off the individual parts.
One dealer told me this: If you can sell a vintage guitar for $10k, take it all apart and you can make $15k with the individual parts. So, if you put vintage parts on a new guitar that you want to sell, take out the vintage parts and sell them off individually to make top dollar. (It’s not a bad idea to store away any hardware you remove from your guitars, because you might need to put it back in later.)
So, are there any instances where it does make sense to put vintage parts in a new guitar? I would say yes, and I can think of two good considerations:
1. Putting vintage pickups into a new electric guitar.
Putting vintage switches, pots, output jacks, and wires into a new guitar is not reasonable. The pickup-selector switches are still made the same way now as they were in the past. Only the materials have changed a bit, enhancing reliability and longevity. So why spend $600 for a vintage CRL 3-way switch when you can get much better performance for $30? A switch has no tone, so leave the vintage switch for a vintage guitar. Same with pots: They don’t have a tone and modern pots are much more reliable. Companies spent years researching the taper and action of vintage pots and you can buy exact vintage copies for only a few bucks. You get the idea.
With a faithful recreation of a vintage pickup plus a vintage tone cap, you can come very close to the magical sound, so investing in a tested NOS tone cap can make a big tonal difference, whereas a new cap can’t.
However, if you fall in love with a set of vintage pickups, it can make sense to put them into your modern guitar. There is no financial risk. They will increase in value, so if you ever want to sell them again you will get more than you paid, enjoying their tone in the meantime. Keep in mind that companies also spent years to analyze, research, and re-engineer vintage pickups and today you can buy almost every given pickup you’re looking for and as close as possible to its original. Such pickups are a lot cheaper compared to a vintage set, but naturally this is no investment.
2. Putting vintage tone caps into a new electric guitar.
This is for sure a reasonable procedure to quickly enhance the tone of a new electric guitar. Installing a vintage tone cap into a guitar is also done easily because it’s a simple 1:1 swap with the original tone cap. It’s still possible to find NOS vintage tone caps today, but prices are rising while supplies are running out. Why is this an improvement in tone? The tone of vintage guitars is often described as detailed, harmonically rich, and open. Part of this tone is from the tone cap. Today capacitors are built to perfection and with very low tolerances so they will do a perfect job. In our electric guitars we use them to only short out the highs against ground, leaving the bass untouched ... in very simple words.
Production processes to build capacitors in the ’50s and ’60s were far from perfect, and besides high tolerances in capacitance, certain caps (depending on the dielectric inside) tend to be kind of “leaky” regarding overtones. A modern cap will do a perfect job, filtering out all overtones that it’s supposed to. Most vintage caps will do a lousy job, still letting some overtones through, especially the harmonic ones. This is what makes the tone so rich and detailed, and, by the way, it’s the same situation with tube amps.
With a faithful recreation of a vintage pickup plus a vintage tone cap, you can come very close to the magical sound, so investing in a tested NOS tone cap can make a big tonal difference, whereas a new cap can’t. Sometimes imperfection to a certain degree can be exactly the thing you’re looking for regarding tone. Back in the golden guitar days, no one really cared about such odd details, and even if they did ... it was state of the art and all new technologies were still science-fiction at that time. Today we know better and can use old technology for certain tasks.That’s it for now.
Next month we’ll explore our next guitar mod, so stay tuned. Until then ... keep on modding!