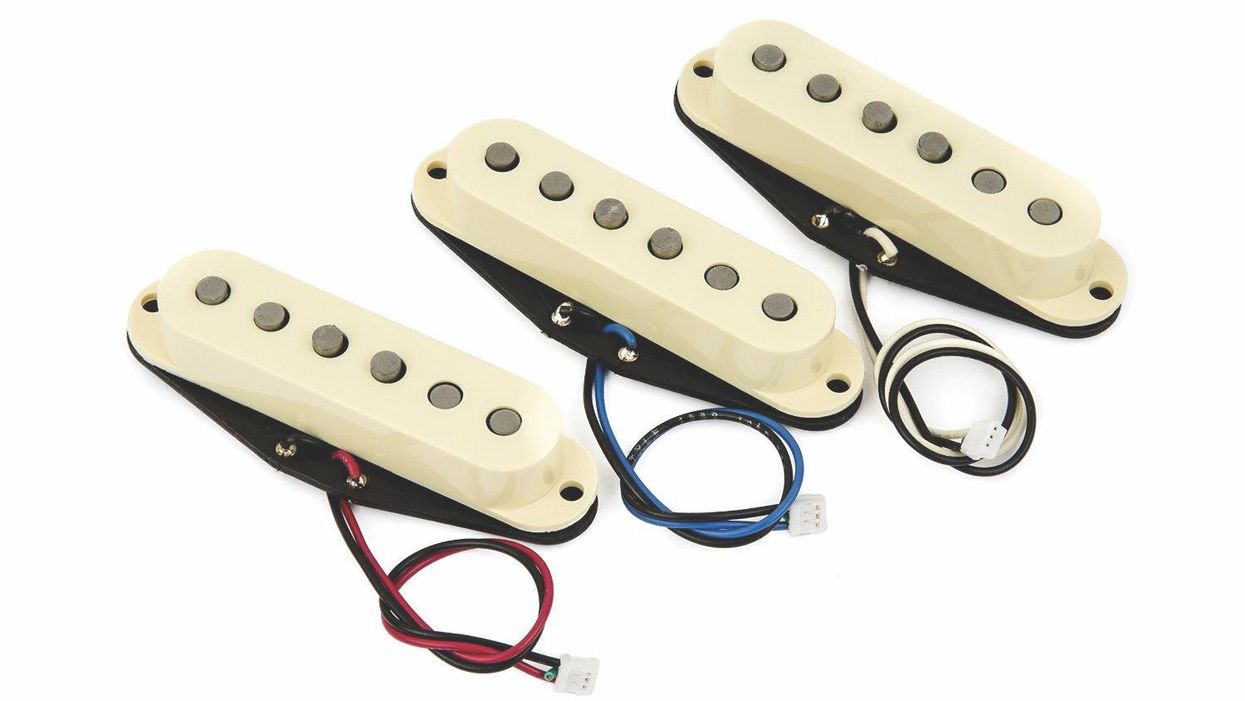
Hello and welcome back to Mod Garage. After numerous requests, this month we’ll have a closer look at changing wires on a single-coil pickup. As our guinea pig for this, I chose a standard Stratocaster single-coil, but it’s basically the same on all single-coil pickups and easy to transfer. It’s not complicated but it is a delicate task to not destroy your pickup during this process, and there are some things you should keep in mind.
Why would you change wires on a pickup? Here’s a list of reasons I mostly hear in the shop when someone brings in a pickup for this operation:
1. A wire is broken and needs to be replaced.
This can happen if the wire was bent too much, or it was damaged with a soldering iron, a screw split it, etc.
2. A used pickup was bought on eBay or a similar marketplace and the wires are too short for your wiring.
Maybe one of the pre-owners snipped it out of the circuit at some point, rather than desoldering it to save the full wire length. The quick-and-dirty solution in such a case will be to extend the wire by soldering another piece of wire to it. For the “Trekkies” of us, that’s the way James T. Kirk and Scotty would fix it. Jean-Luc Picard and Geordi La Forge would solder a new wire with the correct length to the pickup to replace the old one. Make it so!
3. Changing the wires as a quality update.
Often cheap pickups have thin and shoddy plastic-coated wires that will likely break soon. It’s always a good investment regarding reliability and longevity to swap them with a good quality wire.
4. Changing the wires for tonal and/or aesthetic reasons.
Changing the wire material can alter the sound of a pickup, so replacing a cheap plastic-coated wire with a good-quality cloth-covered wire will not only look more vintage but will also result in a slightly warmer tone. Or the other way around for a slightly brighter tone. Or maybe you want to upgrade your pickups with a high-quality Teflon-coated or audiophile HiFi-wire. Perhaps you like to have neon green and pink wires on your pickups, for whatever reason.
5. Changing the wires for a shielded cable to add more shielding to the pickup.
This often goes hand in hand with shielding the complete single-coil pickup and is a logical step in such cases.
6. Changing the wires with NOS wire.
Often vintage pickups are modded with a non-original wire, sometimes as part of a repair. Bringing them back to factory specs is a good investment to keep the value of a vintage pickup alive.
Let's Begin
So, you see there are some good reasons to change the wires on a pickup. This list is not complete; for sure there are others.
Now, let’s start our project by preparing the pickup for this operation. It’s first and foremost important to protect the windings of your pickup against any damage. It only takes a fraction of a second to hit the winding with the tip of the soldering iron and this is a scenario you do not want.
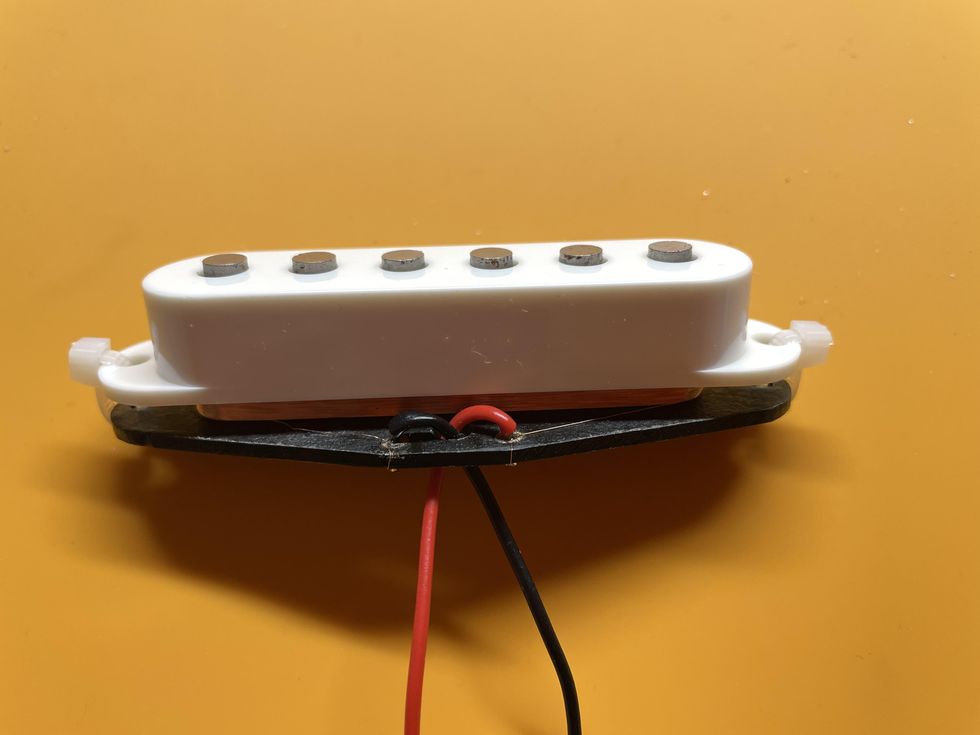
Photo 1
Courtesy of SINGLECOIL (www.singlecoil.com)
1. I simply put a standard plastic pickup cover on the pickup to protect the winding. I usually use two small zip ties to fasten the cover, but you can also use two small screws and a hex nut, a rubber band, or a piece of masking tape.
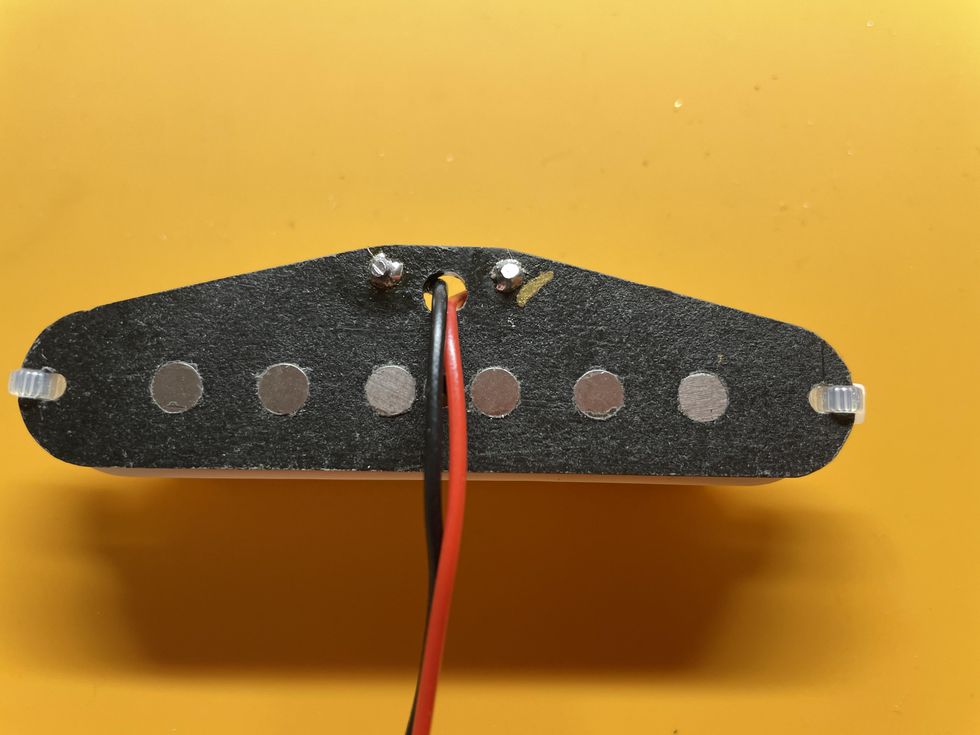
Photo 2
Courtesy of SINGLECOIL (www.singlecoil.com)
2. Have a look where the hot (usually white, yellow, or red) and the ground (usually black) wires are connected to the pickup and mark one of them. I always mark the hot connection by using a Sharpie, but you can also use a drop of nail polish, a small piece of masking tape ... be creative.
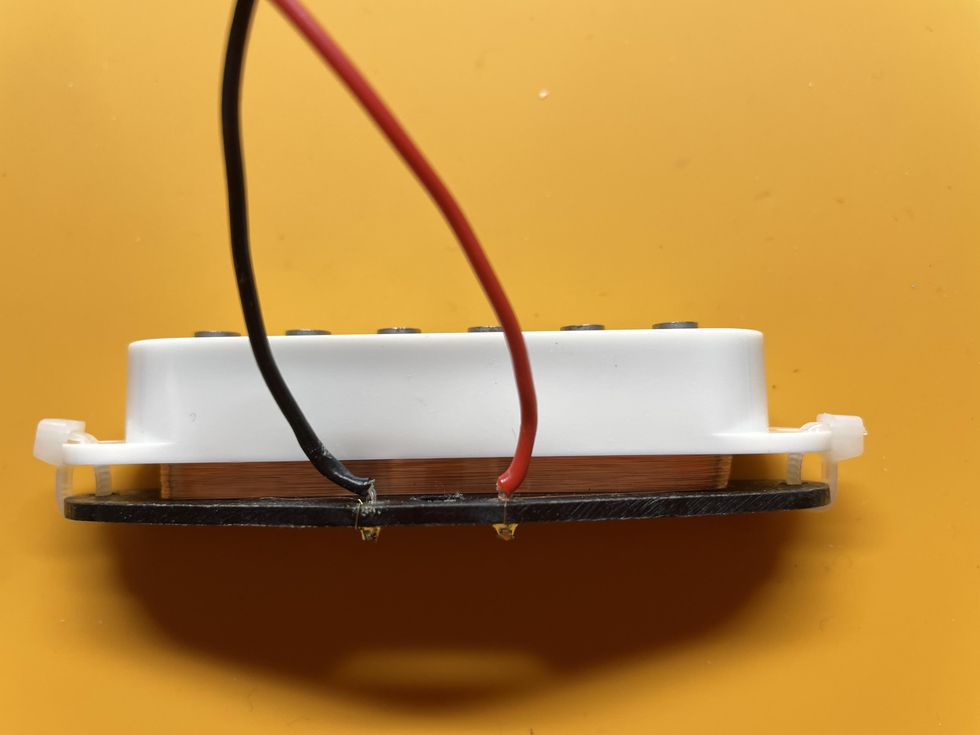
Photo 3
Courtesy of SINGLECOIL (www.singlecoil.com)
3. Measure the DCR (direct current resistance) of your pickup as a reference using your DMM (digital multimeter) and note it. After this is done, push the wires you want to replace upwards through the hole and pull them out, as shown in Photo 1, Photo 2, and Photo 3.
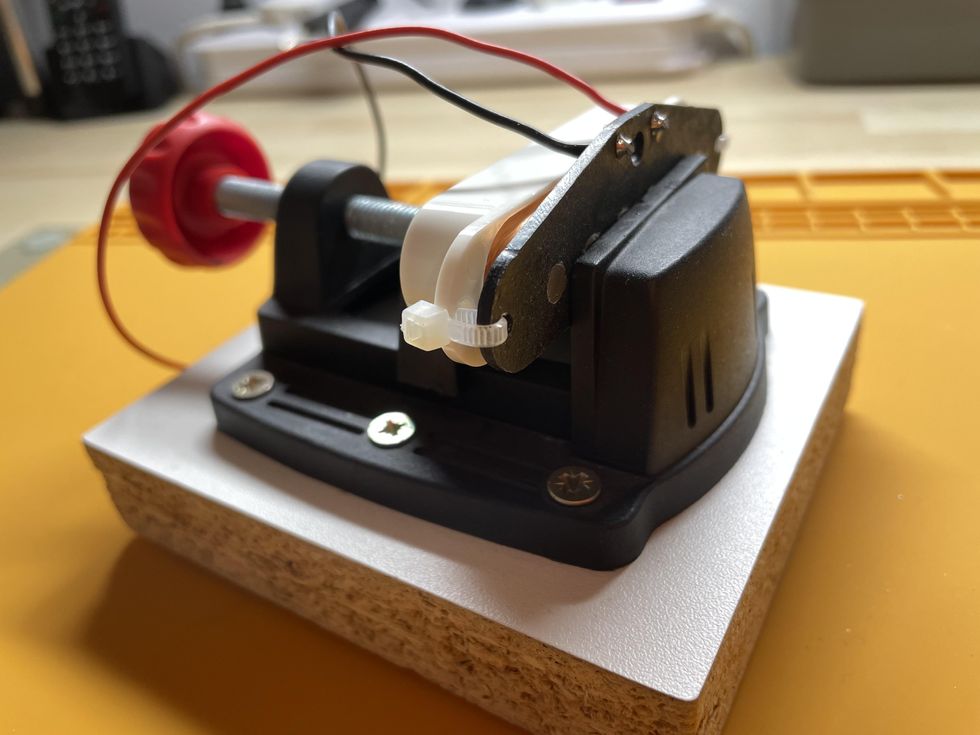
Photo 4
Courtesy of SINGLECOIL (www.singlecoil.com)
Now put the prepared pickup into a small vise and orient it so that you can look at the soldering terminals the two wires are connected to (Photo 4). Take care to not apply too much pressure with the vise: We only want to fasten the pickup, not break it.
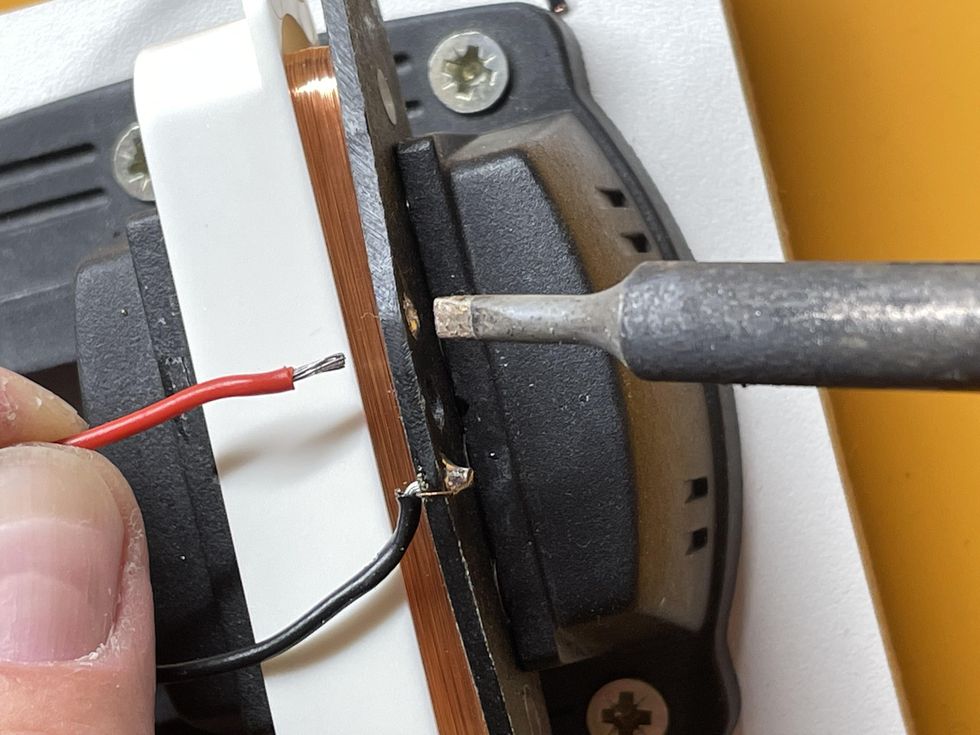
Photo 5
Courtesy of SINGLECOIL (www.singlecoil.com)
Pre-tin the tip of your soldering iron and heat up the soldering spot while gently pulling on the wire until it comes out (Photo 5). This should not take longer than 2 to 3 seconds. A small chisel-shaped soldering tip is my weapon of choice. Warning: Don’t touch the bobbin of the pickup with the soldering iron—it will melt. Repeat this procedure with the second wire.
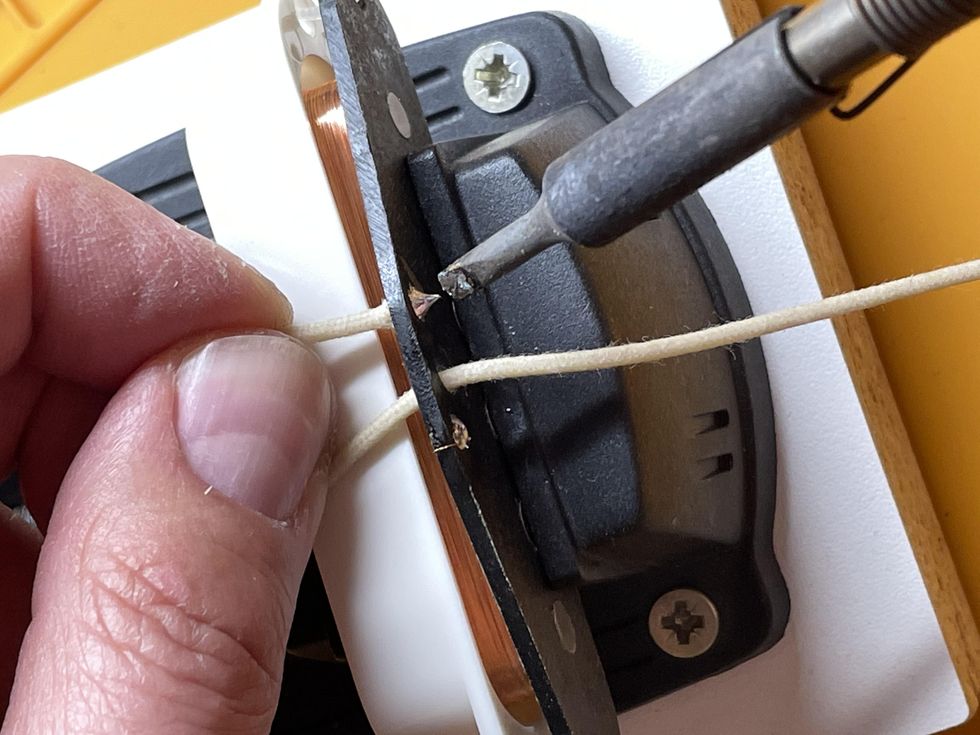
Photo 6
Courtesy of SINGLECOIL (www.singlecoil.com)
Strip the new wire, pre-tin it, pull it through the hole, and bend it so the stripped part will touch the soldering spot (Photo 6). I prefer to guide the wire with my hands, but you can also use tweezers for this. Now pre-tin the tip of your soldering iron and heat up the soldering spot while gently pushing the wire until it is in. This should not take longer than 2 to 3 seconds to perform. Repeat this procedure with the second wire. Cut off the excess wire with a small side cutter.
To check your work, measure the DCR of the pickup and compare it to the value you measured before. Small differences are okay and can be caused by the higher temperature directly after soldering to the pickup, or the new wires can be a different type and might have a different length. If you read zero or infinite, there is something wrong and you should check your soldering spots.
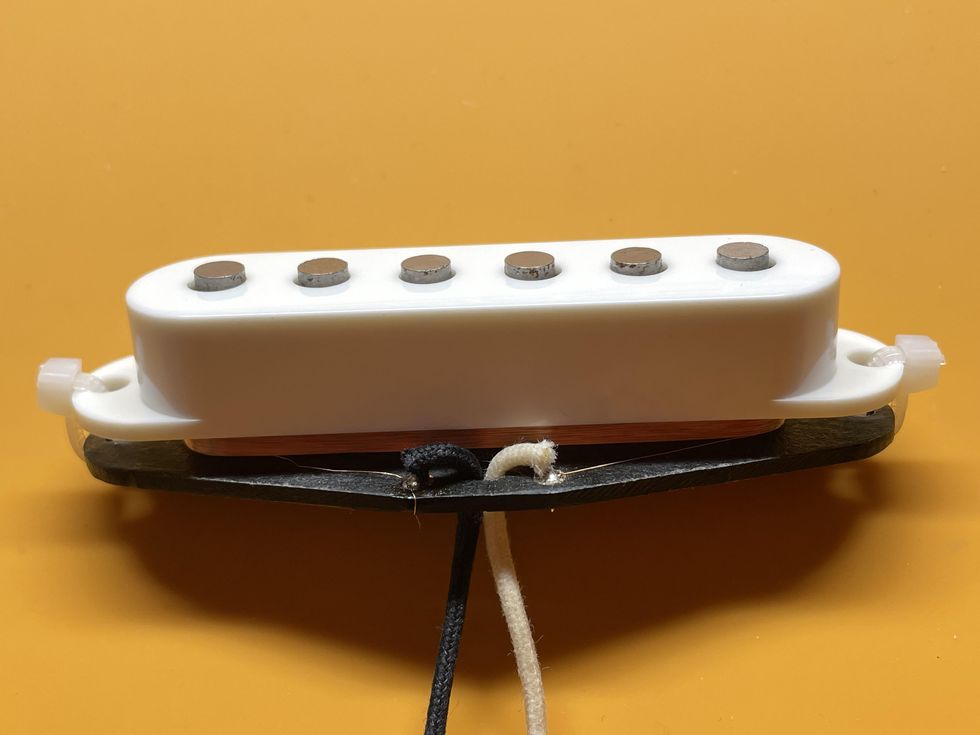
Photo 7
Courtesy of SINGLECOIL (www.singlecoil.com)
Take off the pickup cover you put on the pickup to protect the winding, and you are done (Photo 7). Congratulations! If you’re doing this regularly, you’ll become better and faster over time, so don’t worry if it takes longer than expected the first time.
Bonus: Staggering Pickup Wires
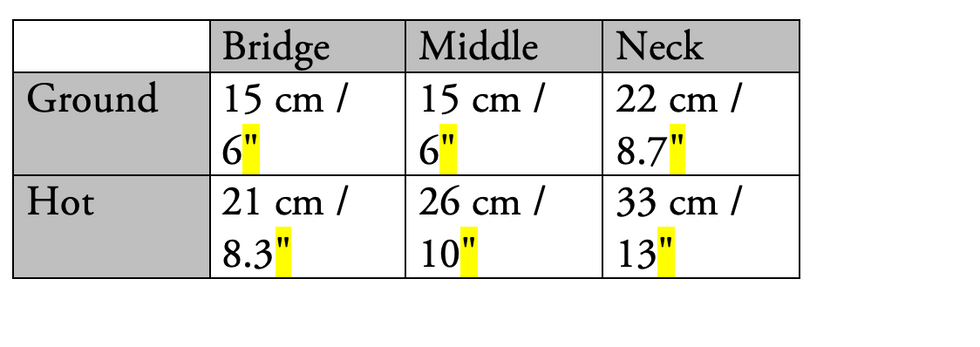
Staggering pickup wires is a neat trick to not waste any wire, which can be a real issue when using expensive audiophile wires. Pickup manufacturers usually apply the same wire length to all pickups, no matter if it’s a bridge, middle, or neck pickup. And they’re usually way too long, resulting in a good portion of obsolete, snipped off wires. To avoid this, you can add only the length of new wire you really need. Here are the values I use in the shop for a standard Stratocaster:
That’s it for this month. Next, we’ll continue with our guitar relic’ing project, so stay tuned. Until then ... keep on modding!


