Hello, and welcome back to Mod Garage. It’s been some time since my last column about how to make DIY guitar tools, but I’ve received several emails asking for some more tips, so this month, we will look into some sustainable and environmentally friendly DIY guitar helpers—all of which you can build yourself by upcycling things you already have at home.
We live in a time where you can buy excellent-quality tools for almost every guitar job. Companies like StewMac, Madinter, Allparts, GMS, or Philadelphia Luthier Tools provide many specialized tools that can make difficult tasks much easier and save a lot of time. But there’s always the question: How often do you actually need them? There are many tools that I use in the workshop every day, and I need them to be dependable, so I don’t care what it will cost to get the best-quality soldering equipment, digital multimeter, scope, screwdrivers, wrenches, nut files, etc. But there are also tools I only need very rarely, and for these, I will either find them in standard, Home Depot-grade versions, or I’ll look into a DIY solution, which is always a fun project!
Here are three simple DIY guitar workshop tools that focus on upcycling and sustainability, which I think are important points today.
1. Cardboard
Some of you will remember MacGyver’s ingenuity and penchant for using cardboard for important tasks. He was on the right track. Cardboard is the most universal helper in your own little guitar workshop, and we all have a lot of it at home: USPS envelopes, Amazon boxes and packages, food packaging, padding material, and much more. Next time you get your hands on some cardboard, keep some of it around; I always have a (cardboard) box full of cardboard in the workshop.
Cardboard is easy to work with—all you need is a pair of scissors and a box cutter, and it often makes the perfect protection and support for a lot of different work. You can simply use it as a support to protect surfaces underneath it for painting, oiling, waxing, filing, and more, though old newspapers will do the trick here, too. Here are some examples of how I use it in the workshop to protect the finish of an instrument.

Photo courtesy SINGLECOIL (https://singlecoil.com)
Mark the outline of a Telecaster control plate on the cardboard, cut it out, and use it as a protection for the finish and the pickguard when taking the screws of the control plate in and out. If you slip off with your screwdriver it’s easy to damage the finish and the pickguard. It also can’t hurt to protect the finish of the control plate with another piece of cardboard or a piece of foil.

Photo courtesy SINGLECOIL (https://singlecoil.com)
Poke a little hole in a piece of cardboard by using a drill bit or X-Acto knife, and use it as a protection for the pickguard when removing or reinstalling screws.

Photo courtesy SINGLECOIL (https://singlecoil.com)
Clamp a piece of cardboard underneath your Strat’s tremolo when adjusting string intonation to protect the finish of the body. Do the same on your Telecaster, Les Paul, etc. All you need is an appropriately sized rectangular piece of cardboard.

Photo courtesy SINGLECOIL (https://singlecoil.com)
Put a piece of cardboard behind the bridge of your classical guitar when changing strings to prevent scratches and nicks to the soundboard.

Photo courtesy SINGLECOIL (https://singlecoil.com)
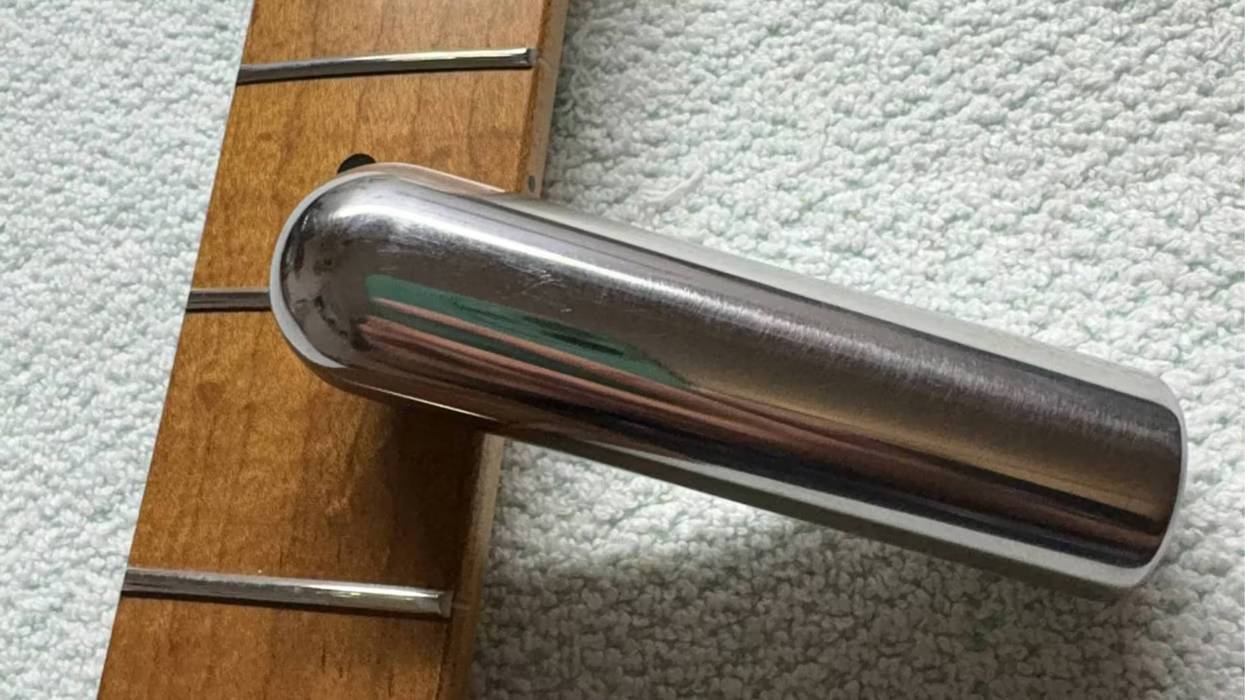
Cut two strips of cardboard to protect the surrounding surfaces when working on a nut. It’s very easy to slip with a nut file and ruin the finish on your headstock.
There are many, many more tasks for which cardboard can come in handy. Be creative!
2. Styrofoam/Polystyrene
You might be familiar with these wooden self-leveling guitar-neck support cradles when working on a guitar. They are great, but they’re not cheap, and naturally, you can stuff almost any material underneath the neck to support it. There are also budget neck-support devices available, but most of them suffer from a lack of stability. This might not be a problem when oiling your rosewood fretboard, but when you need the neck to be stable on a surface, the fun really starts.

Photo courtesy SINGLECOIL (https://singlecoil.com)
Next time you receive an acoustic guitar that was shipped to you, inspect the inside of the box. Chances are good you will find a piece like this glued on the bottom.

Photo courtesy SINGLECOIL (https://singlecoil.com)
A lot of special shipping boxes for acoustic guitars use a neck support made of styrofoam, and you only need a knife or spatula to detach it from the cardboard box, and presto: You have a great and stable neck support for free! You can also ask your local music store if they have some boxes in store; I’d bet they would be happy to give you some of them for free so they don’t have to throw them away themselves. Simply put an old towel, t-shirt, or whatever you have at the ready around the styrofoam to protect the finish of the guitar neck, and you’re ready to go.

Photo courtesy SINGLECOIL (https://singlecoil.com)
3. Wood Scraps
In closing, here is a real little DIY build. If you’ve done some basic work on your own tube amps, you’ve puzzled over how to place the removed chassis in a stable position with the tubes installed. The professional solution is an amp-chassis stand with variable width and tilt angle which will work like a lockable cradle. This is perfect if you need it every day for all kinds of different amp chassis. If you don’t need the tilt-angle locking feature, you can build one with some old scrap wood pieces. Personally, I never cared about the tilt-angle feature, and I’ve used several pairs of this DIY-built amp stand for many years.
You’ll need four pieces of wood panel sized 12 cm by 12 cm (approximately 4.7" by 4.7"). This height is sufficient for most tube amps so that the installed tubes will not touch the ground. If you’ll only use this stand for one particular tube amp, you can customize the height to your preferences. For better stability, choose a thicker material. I like to use wood that’s at least 20 mm, or 1/2", thick
Find and mark the exact middle on the two panels which will serve as the base, and decide where you want to drill the holes to attach the second panel. I always use three longer wood screws (red dots on the middle line) plus wood glue to attach the second panel, resulting in a very strong connection. Measure the thickness of the panel, divide it by two, and draw these lines in parallel to your middle line.

Photos courtesy SINGLECOIL (https://singlecoil.com)
Drill the holes, put on some wood glue, and attach the second panel to the base so it will stand upright. Put some rubber feet under the base and some felt, carpet, or leather on top of the second panel. Repeat the process with the second pair of panels.

Photos courtesy SINGLECOIL (https://singlecoil.com)
There you have it! Place the amp chassis of your choice on the two stands and use the base panel to arrange your tools or parts.

Photo courtesy SINGLECOIL (https://singlecoil.com)
After receiving numerous requests from you about this, next month we will start a new little series and we will play a little game I’ll call “Custom Shop on a Budget.” We’ll talk about what is really important for the amplified tone of an electric guitar, and test all of this on a very cheap 6-string subject, taking it apart down to the last screw and seeing what is possible to make it an excellent sounding guitar. The experiment will start with the never-ending legends about “tonewood” on electric guitars and what they really mean, so stay tuned!
Until then ... keep on modding!