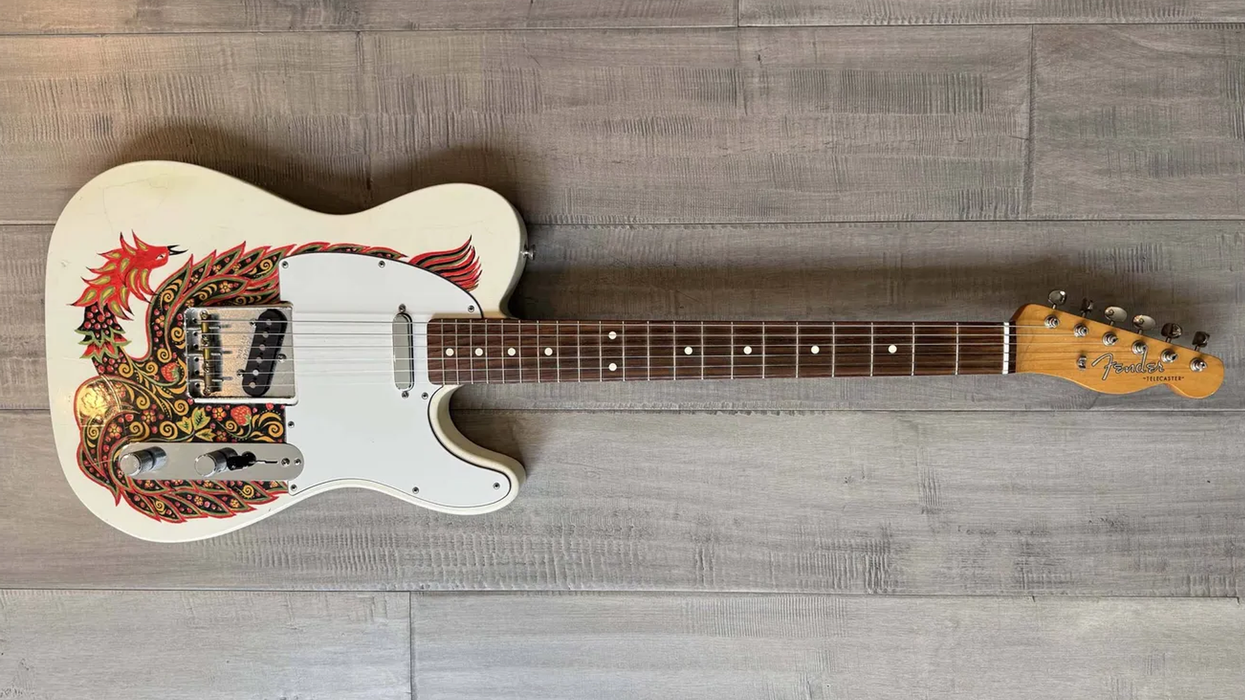
Reader Guitar of the Month Reader Guitar of the Month: A phoenix rises, with inspiration from Jimmy Page Premier Guitar Staff Dec 22, 2025
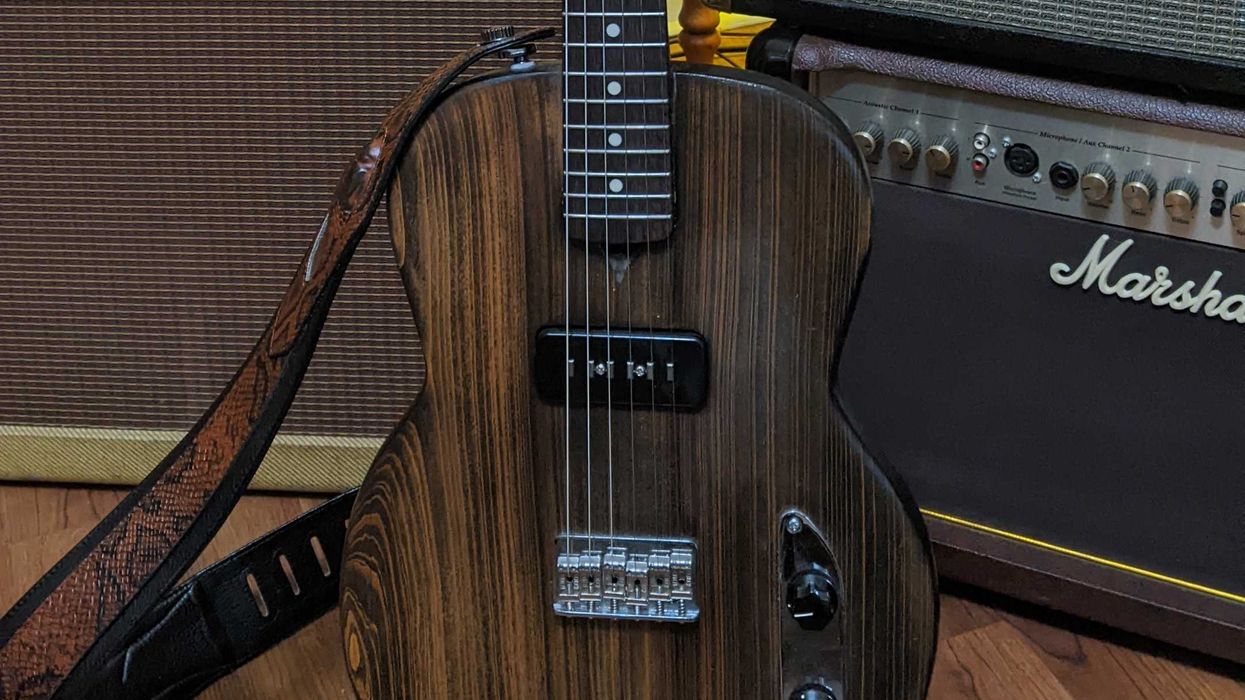
Reader Guitar of the Month Reader Guitar of the Month: Bald Cypress and Lindsey Buckingham Inspire a #1 Instrument Premier Guitar Staff Oct 31, 2025
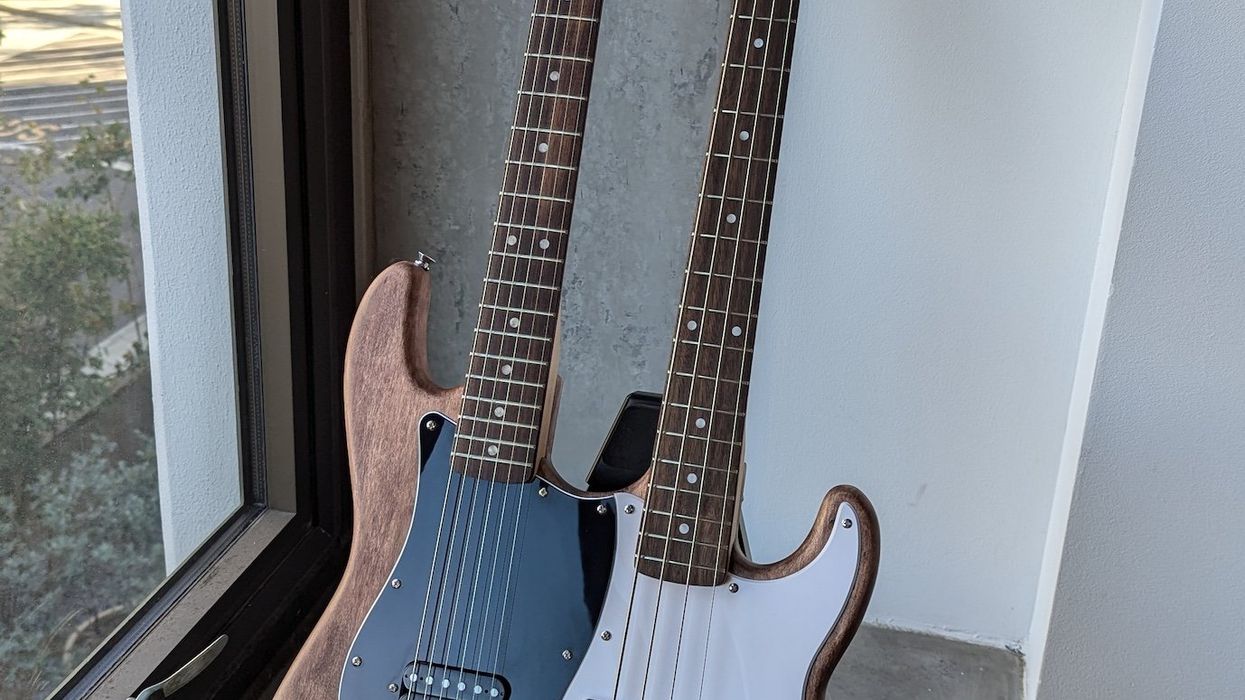
Reader Guitar of the Month A Father’s Cherry Wood Becomes a One-of-a-Kind T-Style Premier Guitar Staff Oct 05, 2025
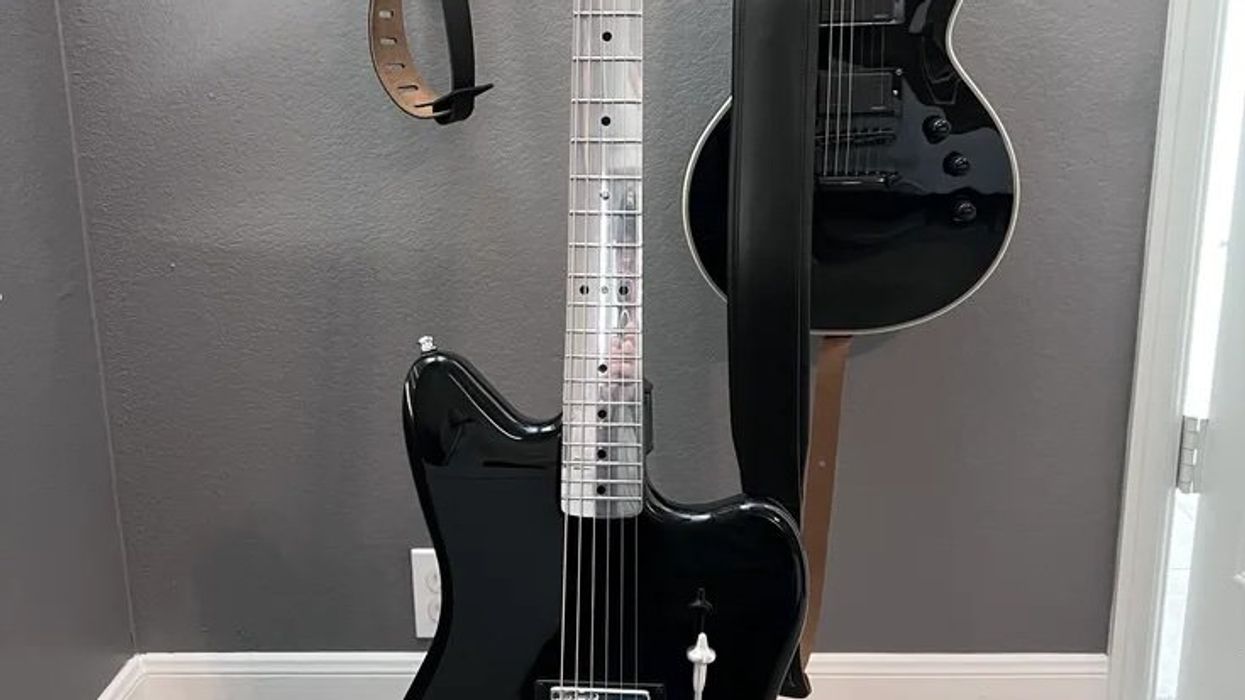
Reader Guitar of the Month A Psychedelic Swirl S-style Honors a Lucky Black Cat Premier Guitar Staff Sep 07, 2025
Reader Guitar of the Month Reader Guitar of the Month: The Labrocaster A partscaster took on a whole new meaning when a simple canine-inspired logo took shape. Premier Guitar Staff Mar 03, 2025
Gear Features Premier Guitar’s Reader Pedalboards 2025 Our readers share what’s been on their boards, from functional gig platforms to dream generators. Premier Guitar Staff Feb 03, 2025
Reader Guitar of the Month Reader Guitar of the Month: The Green Snake With a few clicks on Reverb, a reptile-inspired shred machine was born. Premier Guitar Staff Dec 30, 2024
Reader Guitar of the Month Reader Guitar of the Month: Two Necks Are Better Than One! Here’s the doubleneck dream realized, and it only weighs 9 pounds, 5 ounces. Premier Guitar Staff Dec 03, 2024
Reader Guitar of the Month Reader Guitar of the Month: King of the Road Premier Guitar Staff Nov 04, 2024
Reader Guitar of the Month Reader Guitar of the Month: 2018 CCL Deco Custom This reader solicited the help of his friend, luthier Dale Nielsen, to design the perfect guitar as a 40th-birthday gift to himself. Premier Guitar Staff Sep 08, 2024
Reader Guitar of the Month Reader Guitar of the Month: Big Mamie The T-style Big Mamie has a teak body, roasted-flame-maple neck, and ebony fretboard. Premier Guitar Staff Aug 05, 2024
Reader Guitar of the Month Reader Guitar of the Month: Pining for a P-90 Tele Premier Guitar Staff Jul 05, 2024
Reader Guitar of the Month Reader Guitar of the Month: The Marcel Paul Premier Guitar Staff Jun 03, 2024
Reader Guitar of the Month Reader Guitar of the Month: The Alumidoomer Our featured reader designed this guitar with doom metal in mind, then farmed out the building of its components to various companies. Premier Guitar Staff Apr 27, 2024