 Have you ever found yourself at a gig and you break a string on stage? You hand the guitar to your tech, he restrings it, and when you get it back it’s missing a tuner bushing? Perhaps this has happened more than once, after you’ve restrung and polished your guitar at home, and later you find yourself crawling on the floor, irritated, looking for those missing tuner bushings. This “find-thepart” game happens at our shop every so often, too. Perhaps the worst is when you’re in the studio laying down a track and there is an annoying rattling sound coming from your guitar as the musical vibrations shake the loose bushings. These bushings can loosen up on older vintage guitars as the aged wood contracts, enlarging the hole and creating a loose fit. There are also times when someone may have decided to alter the bushing hole with their handyman’s touch, and the tuner bushings just don’t sit securely any more.
 Peghole Rebuild
Some of the bushings may fall out of the hole, while others stay in place loosely, and as you go to extract them they tighten and bind up.
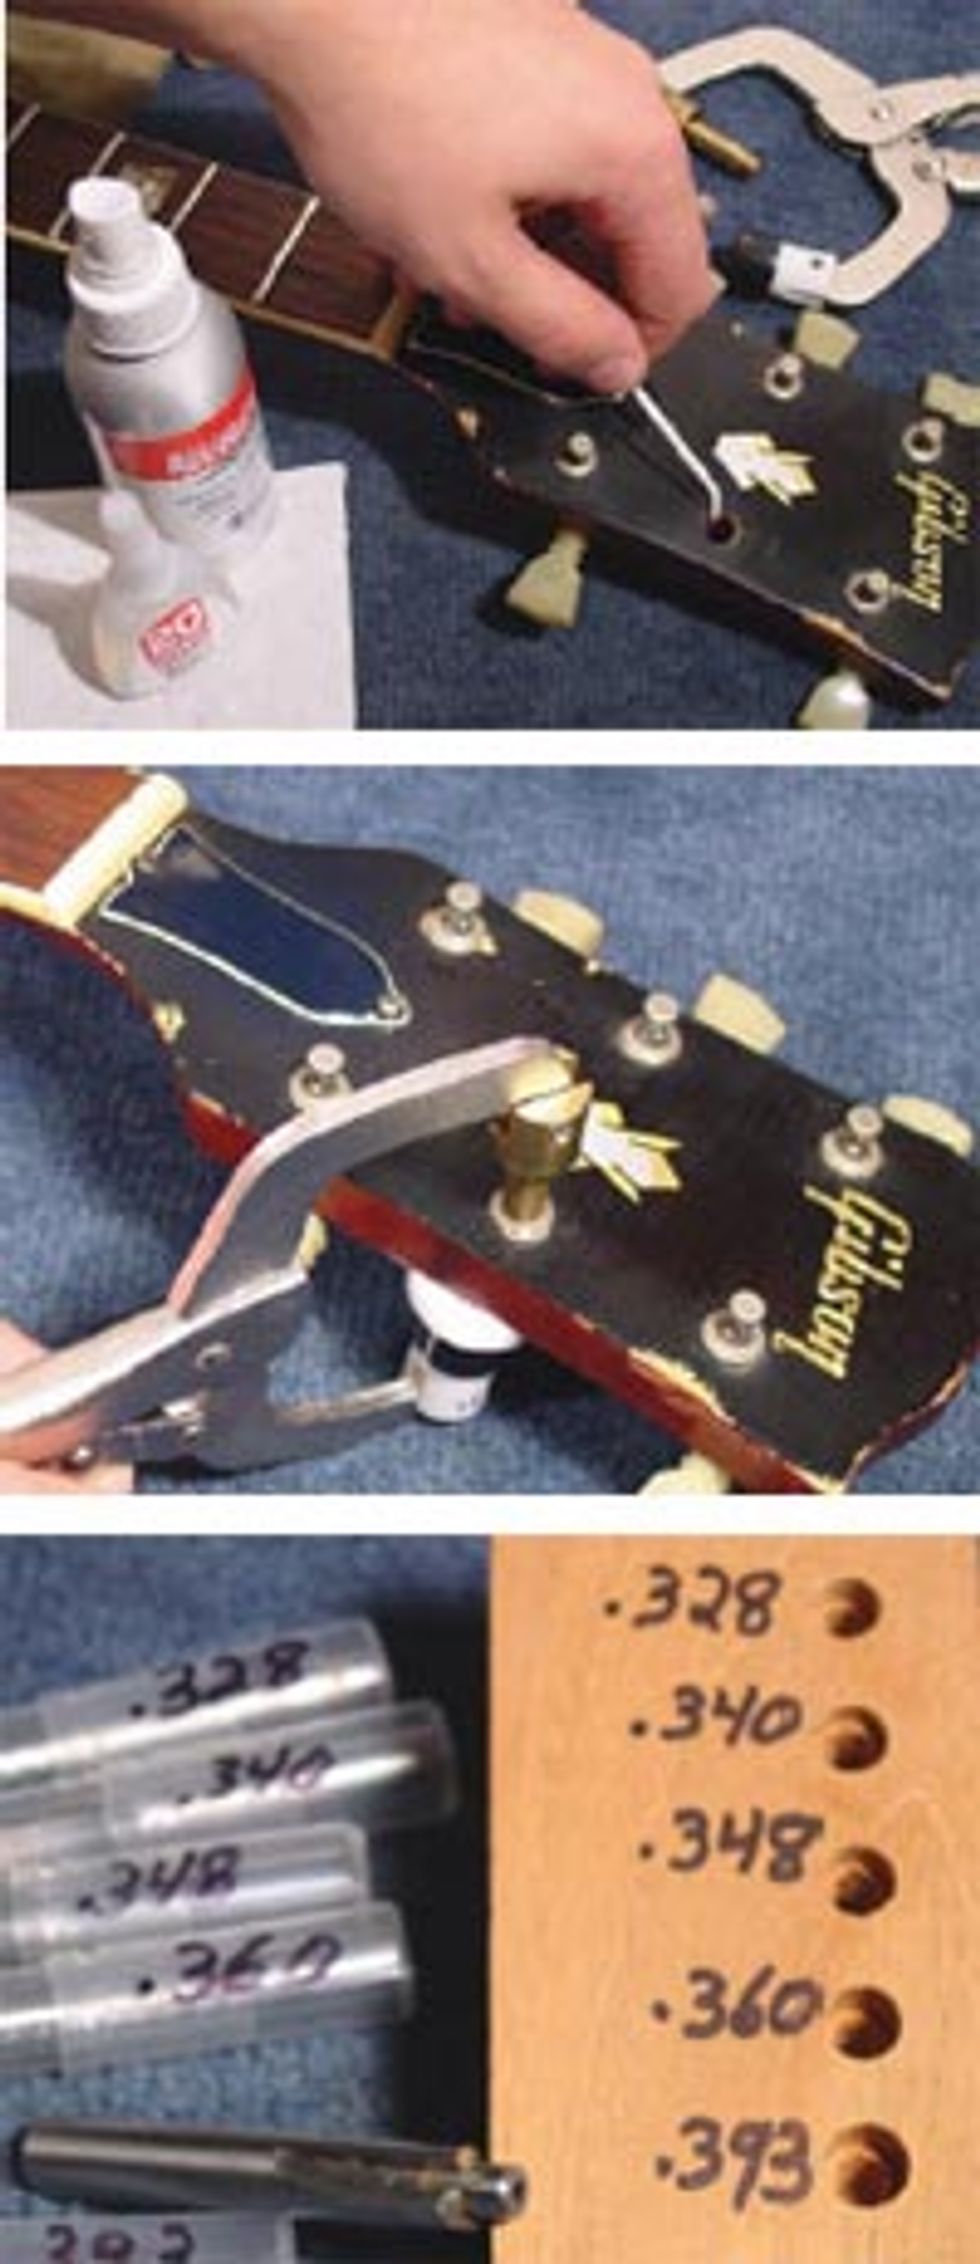
To remove and reinstall the bushings, I’m using the new Tuner Bushing Press by StewMac. It’s a handheld tool that installs and removes press-fit peghead bushings easily and safely. Do not use a hammer in place of this tool. One slip of the hand and you could have a scar tattooed across the peghead of your prized possession. This would also be a terrible way to go about relicing your guitar. Once the tuners and bushings are removed, we’re ready to rebuild the hole to a tighter diameter.
If I’m working with 1920s-style Tuner Bushings, I like to use the thin Super Glue, and Super Glue Accelerator to lightly build thin layers, with a Drop-Fill Toothpick to the inside rim of the peghead bushing hole. It’s only off by a couple thousandths, so I don’t want to overdo it. That way, when I go to press in these simple stamped brass 7.19 mm diameter bushings, they will not collapse.
There are times when I’m working with more heavy-duty bushings, such as 8.84 mm, 10 mm, or 10.5 mm diameter. For those, I like to build up the peghead bushing walls with Medium Super Glue and Accelerator. If by chance you were to end up with too much glue buildup, you could use a Peghole Reamer and rat-tail file to resize your hole for the perfect fit. (Note: you do not want the finished fit to be so tight that you could crack the overlay, or possibly the peghead.)
For this month’s restoration, I used the following supplies, available at stewmac.com:
#0460 - Tuner Bushing Press
#2060 - Peghead Bushing Reamers (set of 5)
#0010 - Thin Super Glue
#0020 - Medium Super Glue
#5984 - Super Glue Accelerator
#3110 - Drop-Fill Toothpicks
#0343 - Large Peghole Reamer
#3458 - 3/8” Conversion Tuner Bushing
#3459 -10.5 mm Round Conversion Post
#2060 - Peghead Bushing Reamers (All 5 sizes)
Conversion Tuner Bushings
I occasionally find that a vintage Martin, Gibson or some other older guitar originally had an 8.84 mm diameter bushing size that was later altered by drilling a 3/8” or 10 mm peghole size to accommodate Grover, Schaller and Gotoh-sized tuners.
StewMac now offers a 10 mm and 10.5 mm Conversion Tuner Bushing—a great idea if you want to put the original vintage tuners back on without major reconstruction. These Conversion Bushings will grip into the oversized peghole and the inside diameter of the bushing hole will adapt for the original 1/4” string post tuner. This sure makes it easy when you want to restore the guitar with its original tuners. If you’re up for a bigger, costlier restoration, you could plug those 10 mm pegholes with a Mahogany dowel. Cut flush and square to the face and back of the headstock, allowing enough depth for finish building. After the plugs have been glued in, drill a 1/4” pilot hole through the center of the mahogany plug. The 1/4” hole will help guide a .340” Peghead Bushing Reamer to cut a clean counterbore for the press fit original tuner bushings. Keep in mind that when using these Peghead Bushing Reamers, you should adjust your hand drill or drill press to a low speed for the best results, and for the life of the cutting flutes.
John Brown
John Brown, of Brown''s Guitar Factory, is the inventor of the Fretted/Less bass. He owns and operates a full guitar manufacturing and repair/restoration facility, which is staffed by a team of talented luthiers. He is also the designer of guitar making/repair tools and accessories that are used today by instrument builders throughout the world.
www.brownsguitarfactory.com
info@brownsguitarfactory.com


![Rig Rundown: Russian Circles’ Mike Sullivan [2025]](https://www.premierguitar.com/media-library/youtube.jpg?id=62303631&width=1245&height=700&quality=70&coordinates=0%2C0%2C0%2C0)


