 Welcome back to our fifth installment, detailing the restoration of a 1921 Martin 0-18. Last month we addressed the warped soundboard and bridge plate caused by the more than 80 years of tension on the top. We rewarped both back to their original positions and finished by regluing the pyramid bridge to the top. This month we’ll turn our attention to the neck, which has entirely too much relief in it.
 For this month’s restoration, I used the following tools, all available from stewmac.com:
- Notched Straightedge #3814
- Feeler Gauge Set #1811
- String Action Gauge #0670
- Radius Gauges #5432
- Fret Puller #1637
- Fret Slot Cleaning Tool #4870
- Fret Cutter #0619
- FretFitter #4898
- Fretting Hammer #4895
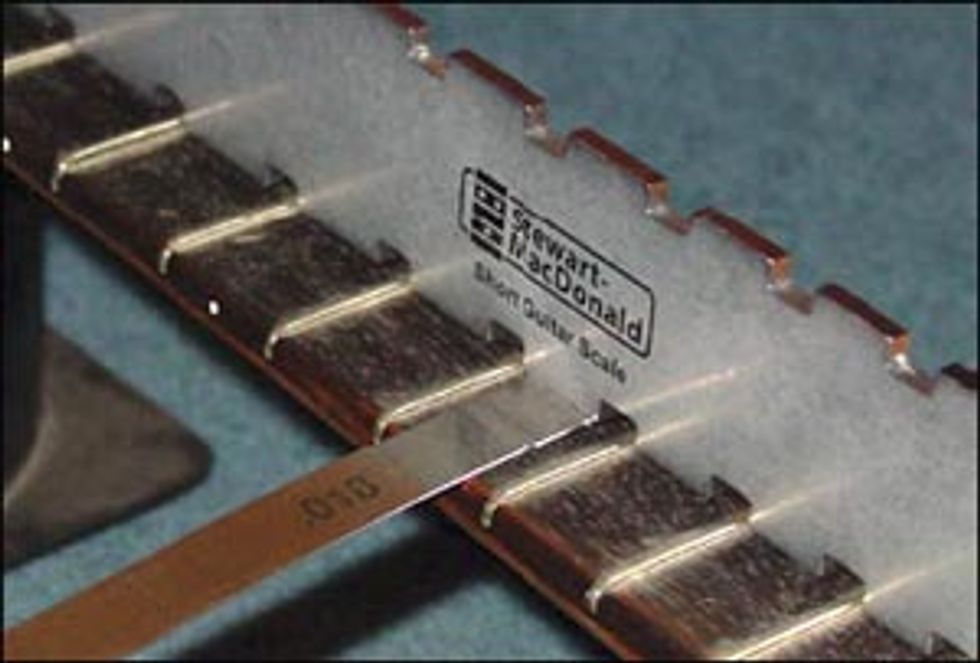
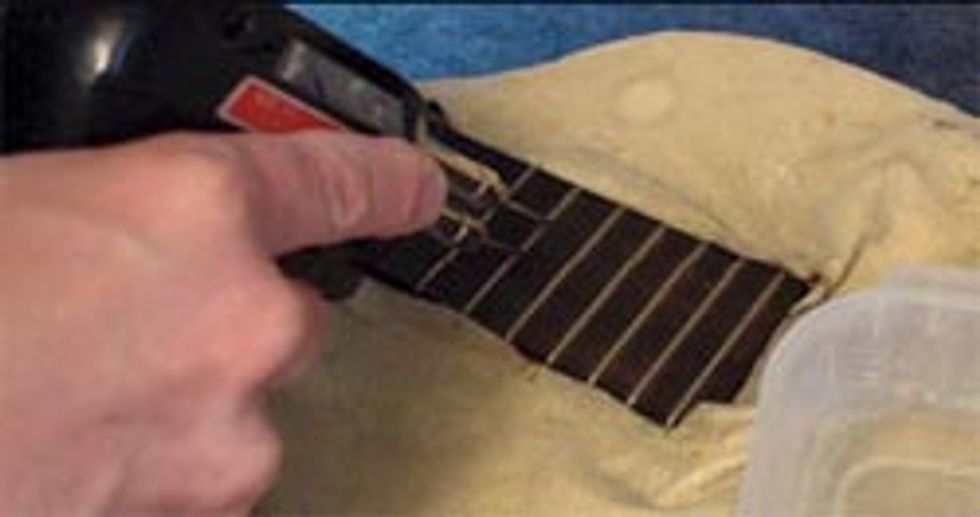
Bar fret wire was used before T fretwire came along. The old bar fretwire was solid and rectangular, while modern T fretwire, used on most instruments today, has beads and barbs. If you have never done bar-style fretting before, prepare for a slippery slope. Before I began removing any frets, I took relief measurements with and without string tension. The notched straightedge and feeler gauges helped give me an accurate reading. Place the notched straightedge length-wise over the fingerboard and measure the distance between the fingerboard and bottom surface of the slotted straightedge using feeler gauges at the 8th position.
Neck Relief Measurements
.033 w/ strings
.018 w/o strings
.015 difference
The.015 difference is the measurement of flex/density difference of the neck with no strings and under tension. My goal was to have the relief in the neck be .006 with strings on once we were done with the fretting – to create extra heavy relief, I would suggest no more than .010 of relief with strings on. Are you beginning to feel that slippery slope yet? There was no truss rod to simply adjust the relief by a turn of a wrench; we would rely on fret compression to flex this 20-fret neck back.
Martin Guitar Company
It was important for me to know what types of bar fretwire were available when this guitar was made; after contacting the company, I found that Martin was using .045, .051, and .057 bar fretwire at the time. After patience, persistence and some special requests, I was able to obtain some .040, .050, and .051 bar fretwire. I would like to offer a big thanks to Mike Dickinson at Martin.
 While talking to the people at Martin, I came across a man by the name of Fred Castner, who has been employed by Martin for a few years and does two or three bar fretwire frettings a day. When I got Fred on the phone, I was very impressed by his enthusiasm and passion – I immediately recognized that he was not only the right guy to be working for Martin, but also the right person to answer a few of my questions. I really wanted to get Martin’s take on working with bar fretwire, since this was a restoration of a guitar that was made by Martin in 1921. I knew that even with today’s technology, Martin would still have a highly-skilled employee working his craft. I would like to offer another big thanks to Fred Castner.
 Removing and Replacing
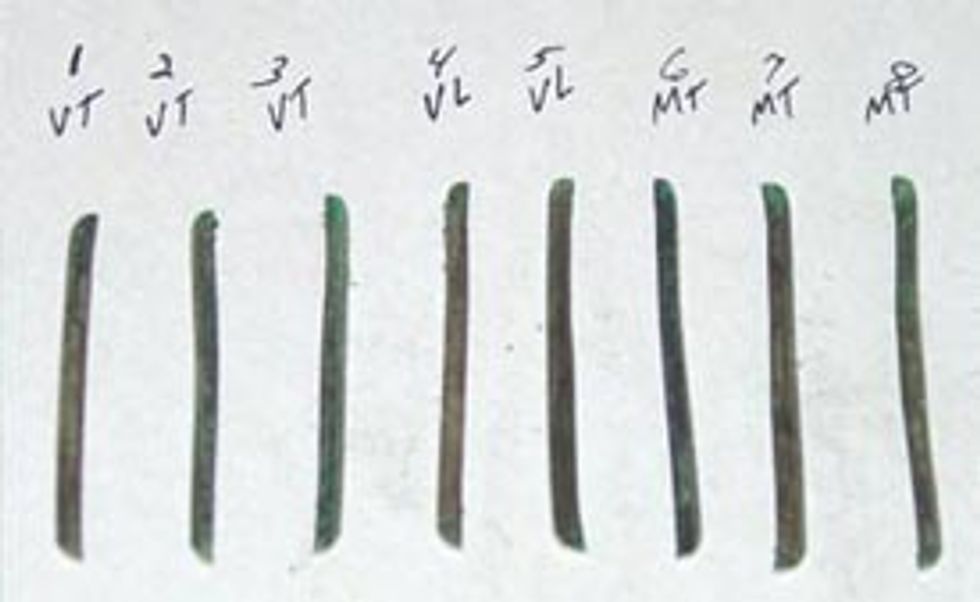 I could pull out some of the frets with my fingernail, while others needed to be heated up with my fret iron. I lightly moistened around the fret with water so that when I used my fret iron I could gauge the heat by the dissipating water. I had little to no “chip out” – fingerboard damage caused by using this technique. As the frets were being removed, I made a chart and kept notes on each fret as it was extracted, writing down “VT” for very tight, “VL” for very loose, and “MT” for medium tight.
 The fret slot cleaning tool works well for prepping the slots before installing bar fretwire. In compression fretting, it’s the sum total of all the frets that gives you the desired result. Crimping or railroading the frets increases the compression, while flattening or thinning out the fret – by mashing them with a fretting hammer – decreases the compression. Before using a fretting hammer to install a fret, I insert the fret into the slot with thumb pressure. Keep in mind that the fourth and eighth fret slot positions are key in creating back bow through crimping or railroading the fret.
At this point, if there is not enough relief after all the frets are in, you can dress in the relief, although I prefer to remove the number four and number eight fretwire, thin them out with the mashing technique and create forward relief, which takes a little longer.
John Brown
John Brown, of Brown''s Guitar Factory, is the inventor of the Fretted/Less bass. He owns and operates a full guitar manufacturing and repair/restoration facility, which is staffed by a team of talented luthiers. He is also the designer of guitar making/repair tools and accessories that are used today by instrument builders throughout the world.
www.brownsguitarfactory.com
info@brownsguitarfactory.com


![Jared James Nichols [2026]](https://www.premierguitar.com/media-library/image.jpg?id=66892615&width=1245&height=700&quality=70&coordinates=0%2C0%2C0%2C0)