
Back in early 2017, Australia's ever-experimenting, genre-melding, envelope-pushing ensemble King Gizzard & the Lizard Wizard released Flying Microtonal Banana, their initial foray into the world of microtonal music. The band's interest in microtones, or those notes that fall in between the keys on a piano, was piqued when Stu Mackenzie—one of the group's three guitarists, co-lead vocalist, and de facto ringleader—started fooling around with traditional Middle Eastern instruments such as the Turkish bağlama [also called the saz] and Persian setar. Mackenzie asked Aussie luthier Zac Eccles to add extra frets to the banana yellow guitar he was building—dubbed the "Flying Microtonal Banana"—in order to enable the guitarist to play strategically placed quarter-tones in specific, pre-determined keys. Eccles then modified instruments for the band's bassist, Lucas Harwood, and guitarists Cook Craig and Joey Walker, and they got to work adapting their sound to this new approach.
Despite the extensive effort that the band put into creating Flying Microtonal Banana, King Gizzard & the Lizard Wizard soon drifted away from their microtonal explorations. They had plenty of other stuff on their mind, releasing four more albums in 2017 alone. After a hiatus in 2018, they returned the following year with Fishing for Fishies, which is a playful, boogie-centric romp; Infest the Rats' Nest, a brain-splitting heavy metal album; and a cadre of live recordings and archival releases. But microtones were again calling, and 2020 proved to be an opportune time for their return.
"We talked about coming back to it as soon as we finished playing Flying Microtonal Banana, because it was one of the funnest experiences we ever had," Mackenzie says. "We were experimenting with this new thing—with Flying Microtonal Banana we definitely did not yet feel super at home with what we were doing—but by the time we actually tracked that record, it felt way more intuitive than we thought it would. It just worked, which doesn't always happen, and because of that we were pining to go back. There are a handful of microtonal tracks scattered throughout a couple of records since then, but we hadn't taken the time to do a full record like that again. We also wanted to do all those records in between. But then the pull became too strong, and we started writing microtonal stuff again."
King Gizzard & The Lizard Wizard - Intrasport (Official Video)
It'll come as no surprise to King Gizzard fans that this was fertile ground for the prolific group. "It was a free and creative time, and we accidentally wrote two records worth of songs, which was a huge surprise to everyone," says Mackenzie. Across both of those records, K.G. and L.W., the band dives back into the microtonal deep end to deliver 84-minutes of pounding psychedelia ripe with enough multi-meter grooves and warped tonality to keep your head spinning the whole way through. As a cherry on that double scoop, they've now also just released the strongly synth-centric Butterfly 3000, in June, and chances are that by the time you read this article, something else, perhaps even more incongruous, will be on the way.
The band was obviously enthusiastic about returning to their microtonal approach, but they also had their fair share of challenges. For one thing, their instruments created a hurdle. Mackenzie's custom-build is a well-made, high quality guitar, but that wasn't true for the others, who initially asked Eccles to add frets to their inexpensive bottom-feeder guitars.
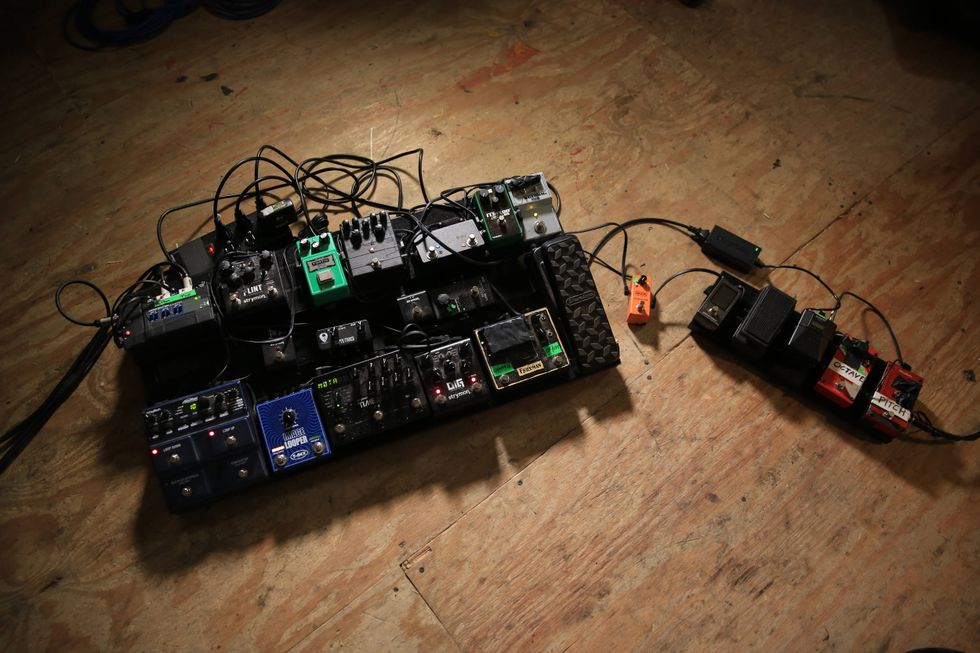
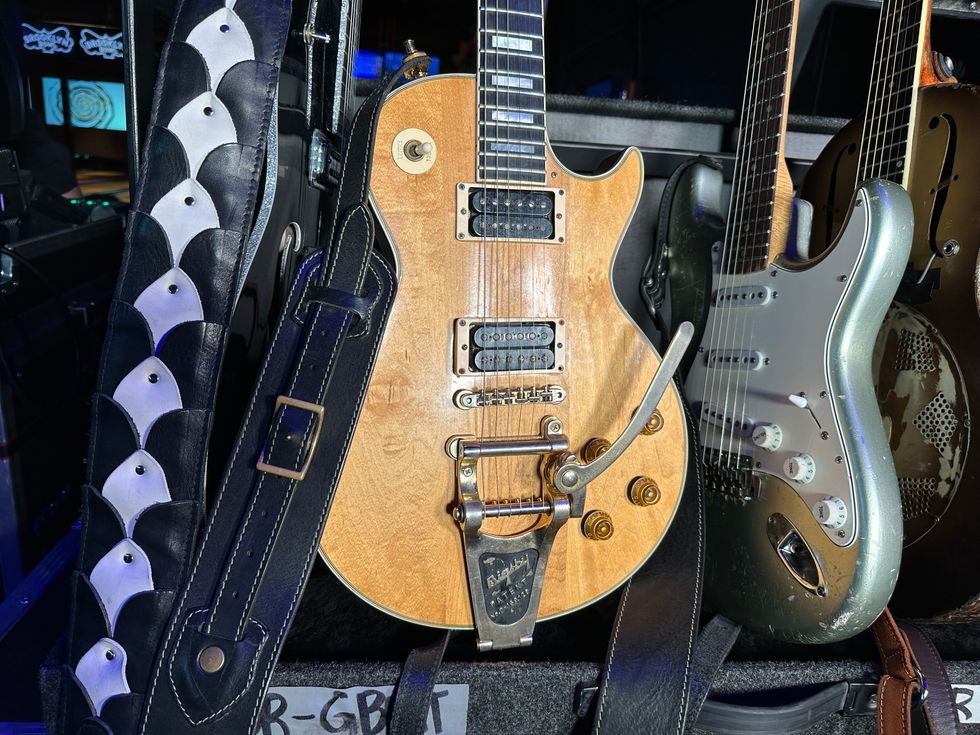
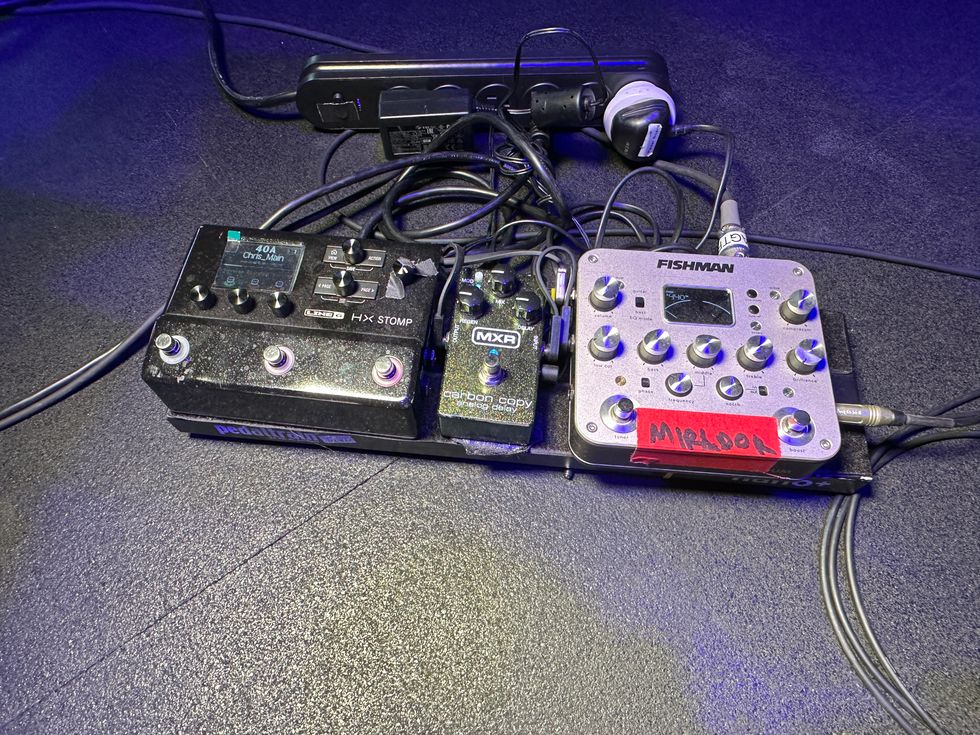
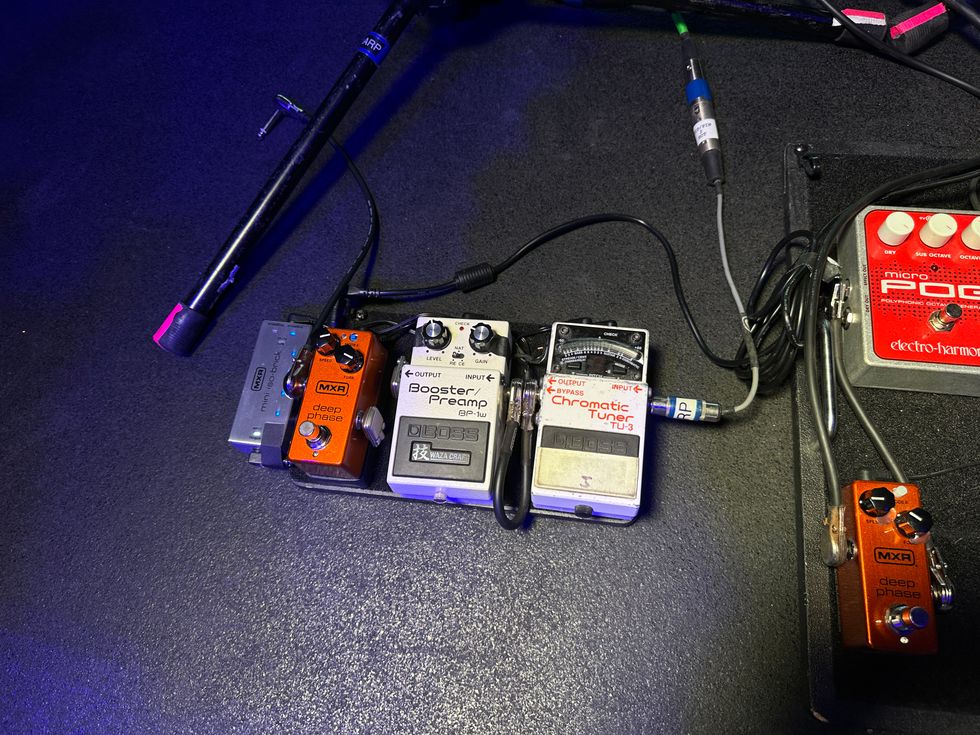
Craig Cook's Gear

Before modifying his Rickenbacker 610 with microtonal frets, Cook Craig was using a Univox to perform music from the band's Flying Microtonal Banana album.
Photo by Jordi Vidal
Guitars
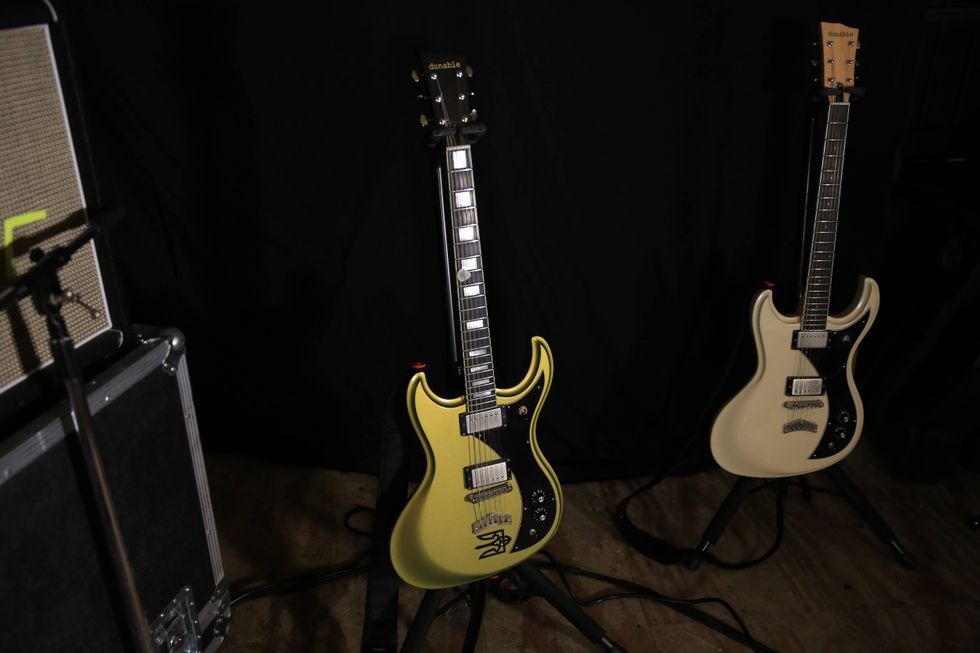
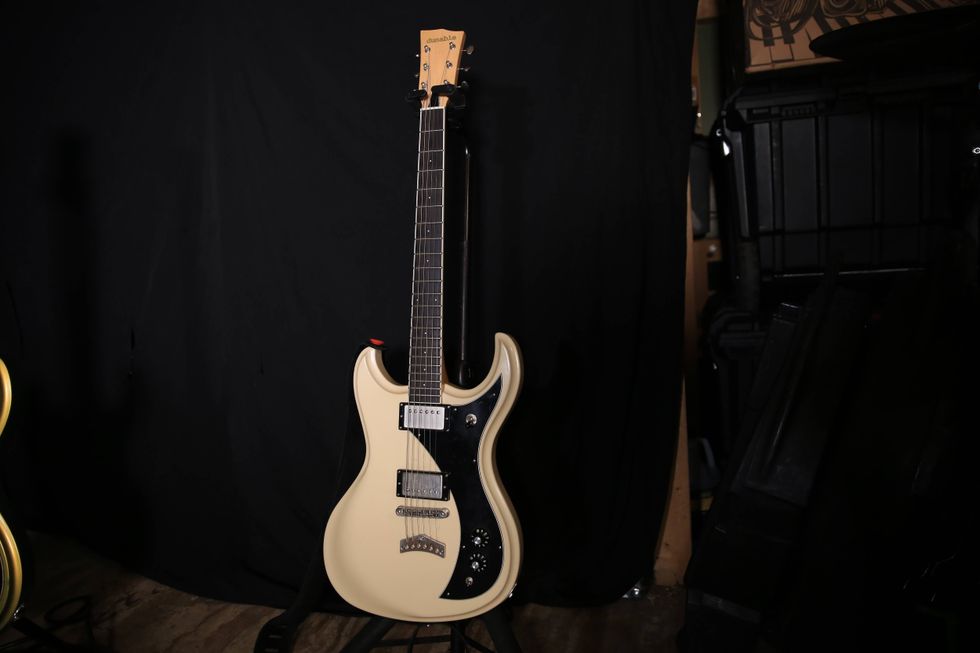
Rickenbacker 610 modified with microtonal frets
Fender 60th Anniversary Classic Jazzmaster with Gibson 496 pickups
Fender 60th Anniversary Classic Jazzmaster (tuned C# standard) with Gibson 496 pickups
Strings and Picks
- D'Addario XL (.012–.052)
- Dunlop Nylon Max Grip .60 mm
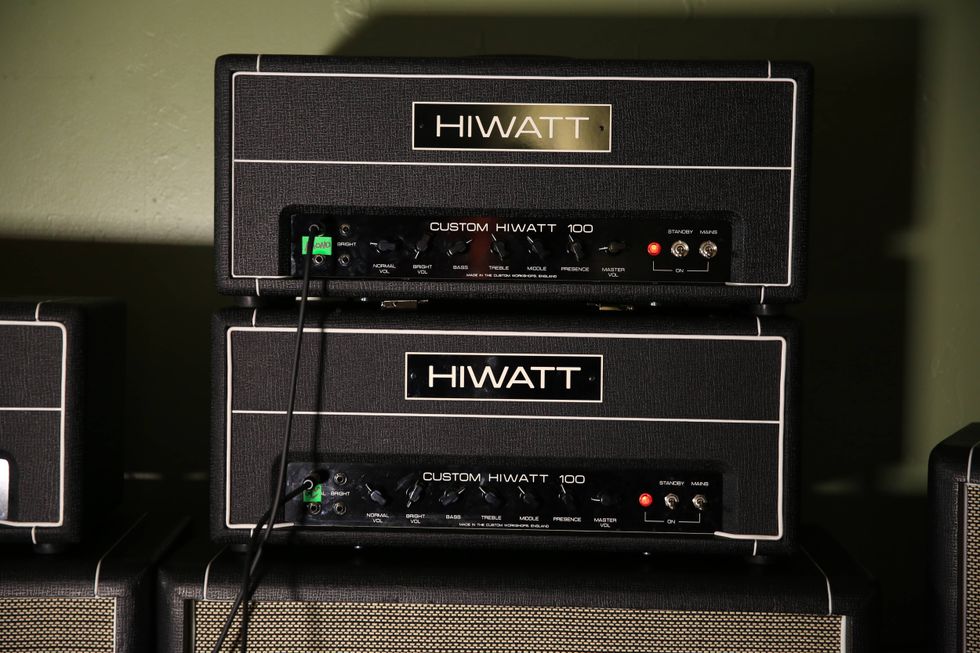
Amp
- Fender Hot Rod Deluxe
Effects
- AMT Electronics B1 Legend Amps preamp
- Boss DD-7 Digital Delay
- Dunlop Cry Baby
- TC Electronic Shaker Vibrato
- ZVEX Fuzz Factory
"I first recorded with a hunk of junk," says guitarist Joey Walker about the initial instrument he modified with microtonal frets. "It was a $300 AUD guitar [about $227 U.S. today], and that was modded and used for the record. We started playing at festivals in Australia and, as we were playing, that guitar started falling apart. Parts were falling off and the bridge started disintegrating. After two shows it was this crazy piece of crap. I then had to quickly mod another guitar that I already had."
Both Walker and Craig decided to commit to reliable microtonal guitar setups, so Walker upgraded to a sturdier Godin Richmond Dorchester and Craig is using a Rickenbacker 610 outfitted with microtonal frets.
On the new material, all three guitarists tune their instruments to C#–F#–C#–F#–B–E and use the bottom four strings as drones while playing melodies on the top two. Bassist Lucas Harwood uses standard tuning, which required some extra problem solving as he and Eccles collaborated on a new bass.
As we were playing, that guitar started falling apart. Parts were falling off and the bridge started disintegrating.—Joey Walker
"For a handful of the songs on the new [guitar-driven] albums, K.G. and L.W., Stu programmed the bass using MIDI, and I had to reverse engineer a new instrument," Harwood says. "That took a few days of me sitting down with him and working out which notes I didn't have on my current instrument, and then designing a new fretboard that would cover all bases—excuse the pun." To gain easy access to all of the notes necessary to play the band's new material, Harwood ended up having Eccles install partial frets into his new bass. He explains, "Some frets cover one string or two or three. It looks really bizarre and more complicated than it is. Some of the songs also had notes that are lower than the low E on the bass, so I got a fifth string as well. That took another relearning. The 5-string bass is like picking up a different instrument compared to a 4-string. Your brain shifts gears when you pick up that instrument. The low B still trips me up now and then, but I am getting used to it."
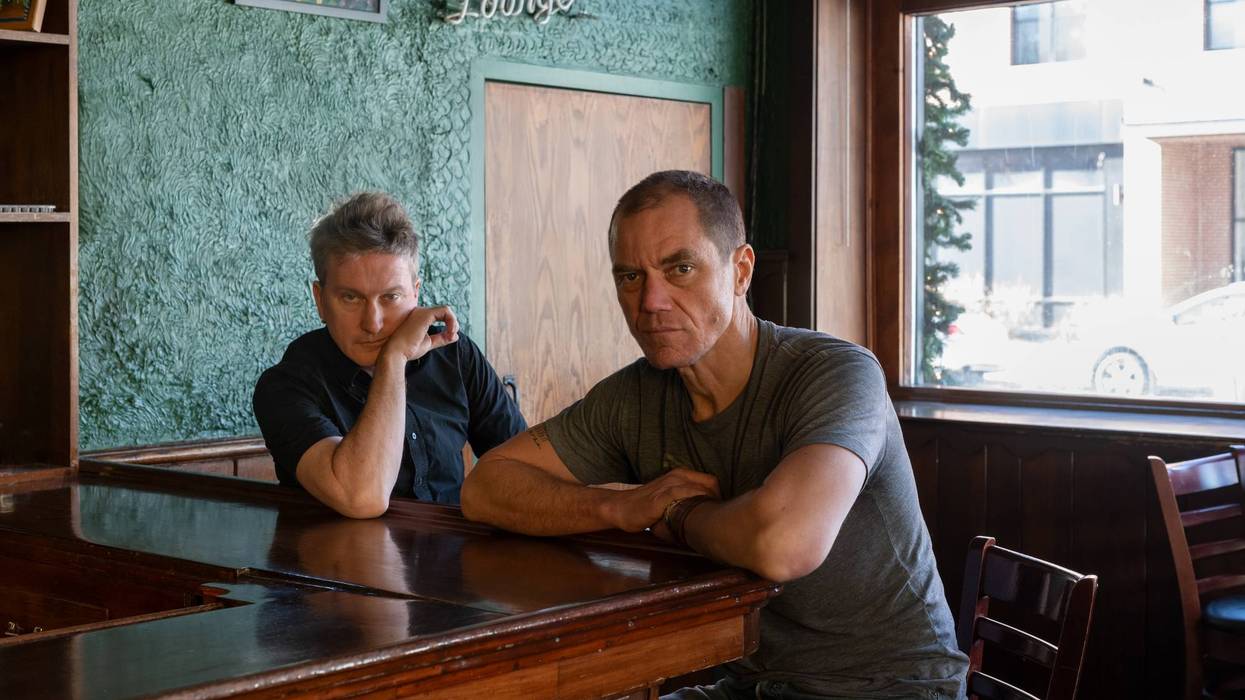
When they're not on the road, King Gizzard spends an inordinate amount of time jamming, hanging out, and crafting songs and arrangements in a warehouse in Melbourne, which they also recently upgraded. "We moved into a new space just before lockdown hit," Craig says. "We built a new room in this warehouse. It's sound treated and has multiple rooms. It has a control room, tracking room, and a rehearsal room. We go there most days of the week, hang out, jam, and fuck around."
Although the band had recently set up a new space to rehearse and record, both K.G. and L.W. were recorded remotely in compliance with Australia's lockdown rules.
With the lockdown in full effect—and in Australia, as crazy as it may seem, musicians were not considered essential workers—the band was forced to record in isolation, which meant each member contributed ideas and recorded his parts at home, although Craig downplays the challenge. "We've made many albums together and know each other's vibe like the back of our hands," he says. "It is pretty easy to slot in together now, even though we weren't in the same room. It didn't feel too rigid or click-track-y or weird recording it separately."
K.G. and L.W. have that same organic, loose, improvisatory vibe King Gizzard is known for, but they did use a click, which was unusual for them. "Stu would send the sketch of a song with a drum sample, or Cavs [drummer Michael Cavanagh] would send a groove to Stu," Harwood says. "He would play something over it, and we would have a Soundcloud where everyone uploaded everything they did that day. At the end of the day, there'd be a bunch of new ideas to sift through. The main difference here, recording in isolation, is that everything was played to a click track, because when you're sending stuff from one place to another in the virtual world—especially if Cavs just uploads a drum beat—it's near impossible to play just to that if it's in free time. With everything everyone would upload, we'd say something like, 'This track is 120 BPM.' You can then drag it into your software, line it up in a grid, easily play to that, and send it on again."
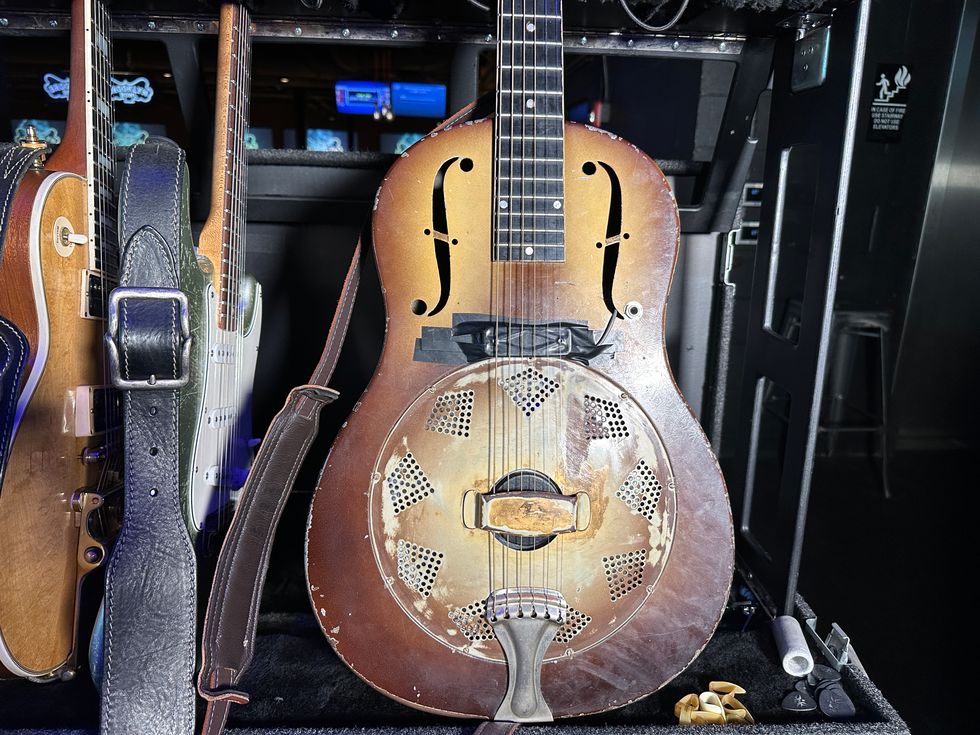
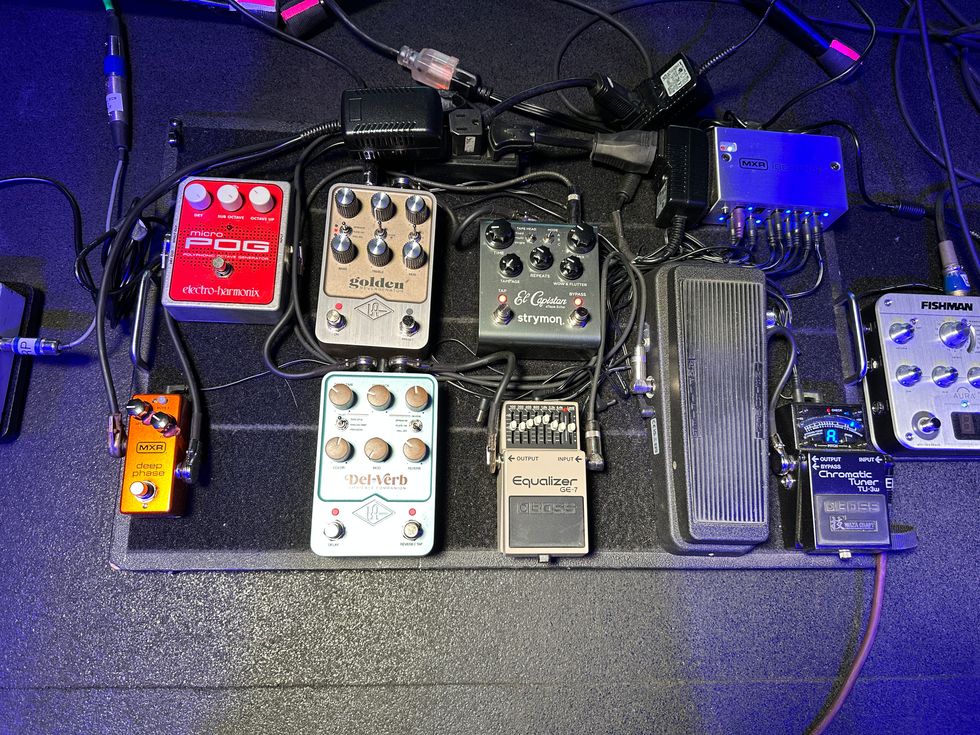
Lucas Harwood's Gear
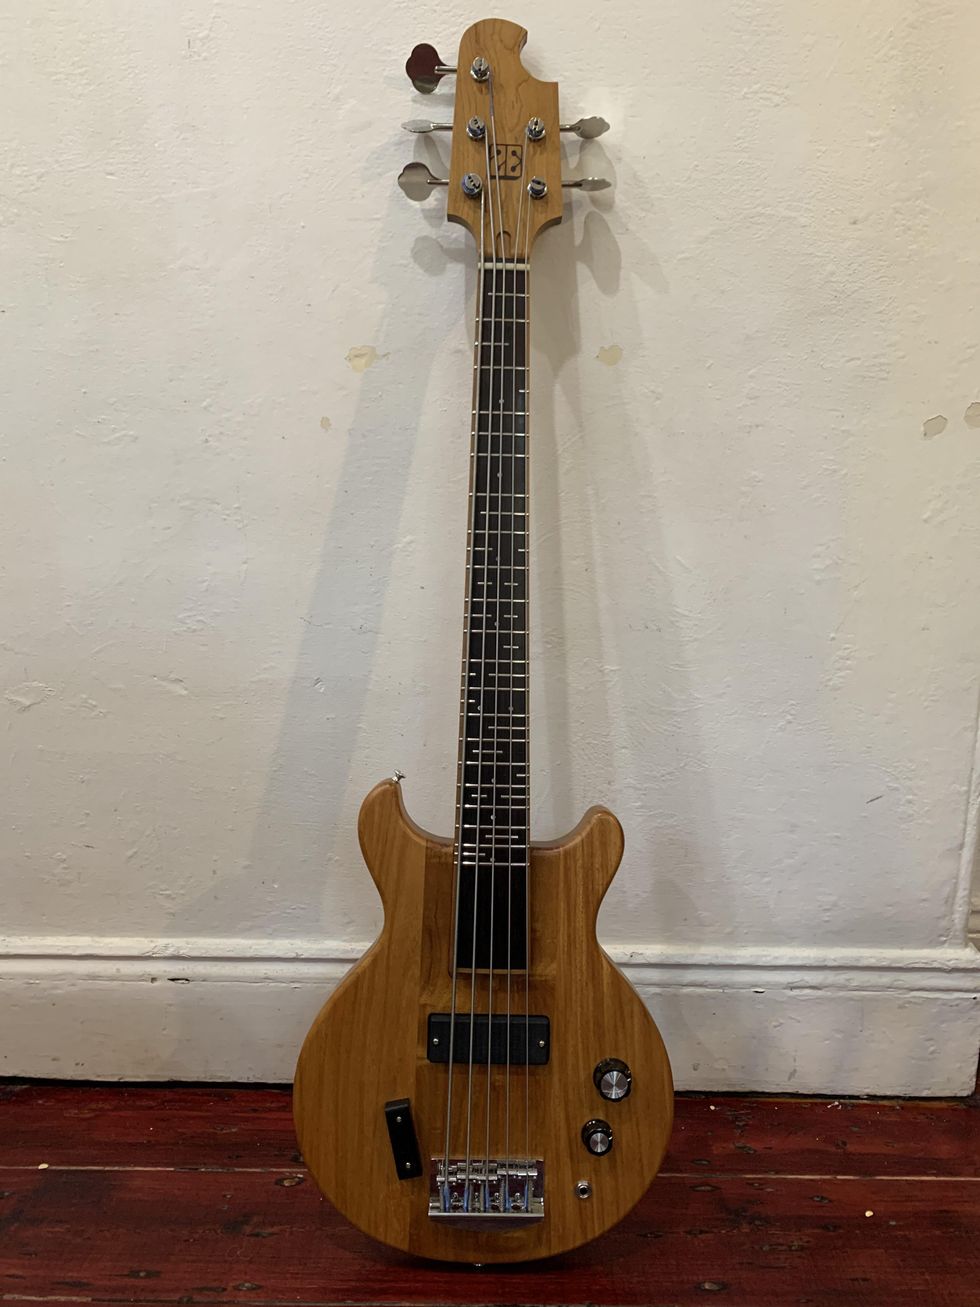
"It looks really bizarre and more complicated than it is," says bassist Lucas Harwood, who redesigned his Zac Eccles–modified fretboard to use partial frets. This gives him easy access to all of the microtones that are necessary to perform the band's new songs.
Basses
- Custom 5-String bass built by Zac Eccles
- 1972 Fender Musicmaster
Strings and Picks
- Flatwounds (no brand preference; .045–.105)
- Dunlop Tortex .60 mm
Amp & Cabinet
- Darkglass Alpha-Omega
- Ampeg 8x10 cab
Effects
- Ampeg SCR-DI preamp
- Ampeg Scrambler Bass Overdrive
- Dunlop Cry Baby Mini Bass Wah
- Electro-Harmonix Bass Big Muff
"Stu was like the brain in the center," Craig adds. "We all sent stuff to him and he organized it. He'd upload a bed and people could overdub on top of that. He chopped that up and did stuff like that. He sifted through the shit I guess. I used Logic a lot to make the new albums, because Logic is really easy to set to microtonal scales. You can play stuff on the keyboard and it is all in that scale. There were a lot more keyboards on this microtonal album compared to the original one. If we hadn't been in isolation and been actually recording the songs in a studio together, they would have been more guitar-based, I reckon. That's what it is. The time and the situation informed the music, which is cool and gives it a different sound."
That sound was informed by other non-musical considerations, too. "I only played on a handful of the tracks," Harwood says. "I was in lockdown with two kids. I don't have a home studio, I have my laptop and bass and a MIDI cable at my dining table, and I did that while trying to homeschool and having a toddler running around as well."
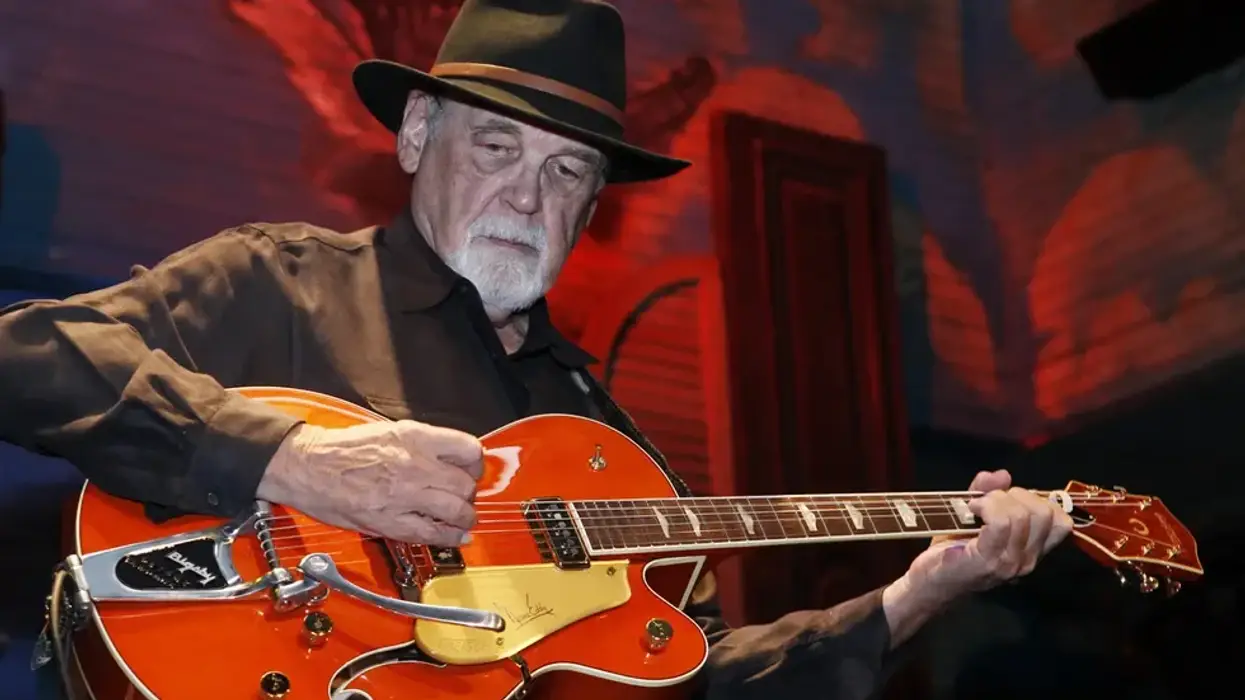
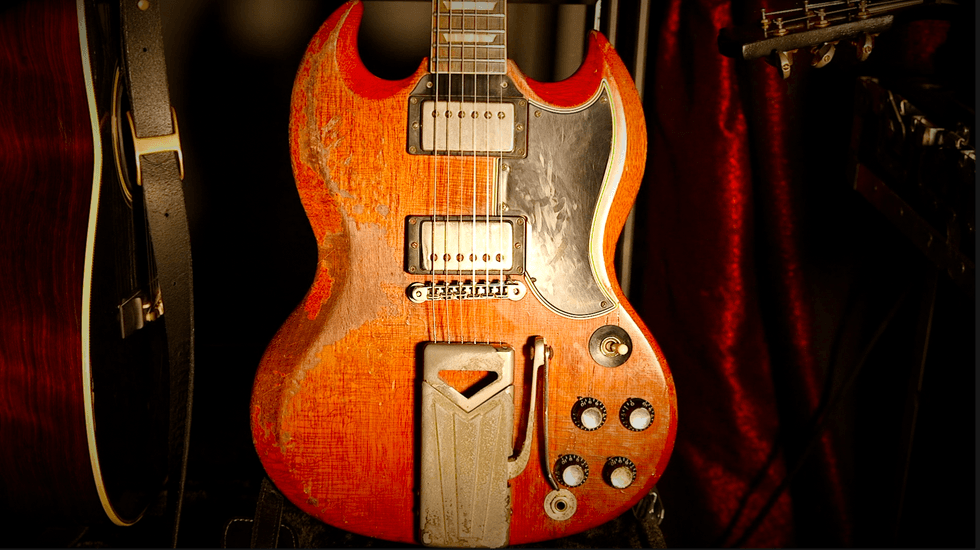
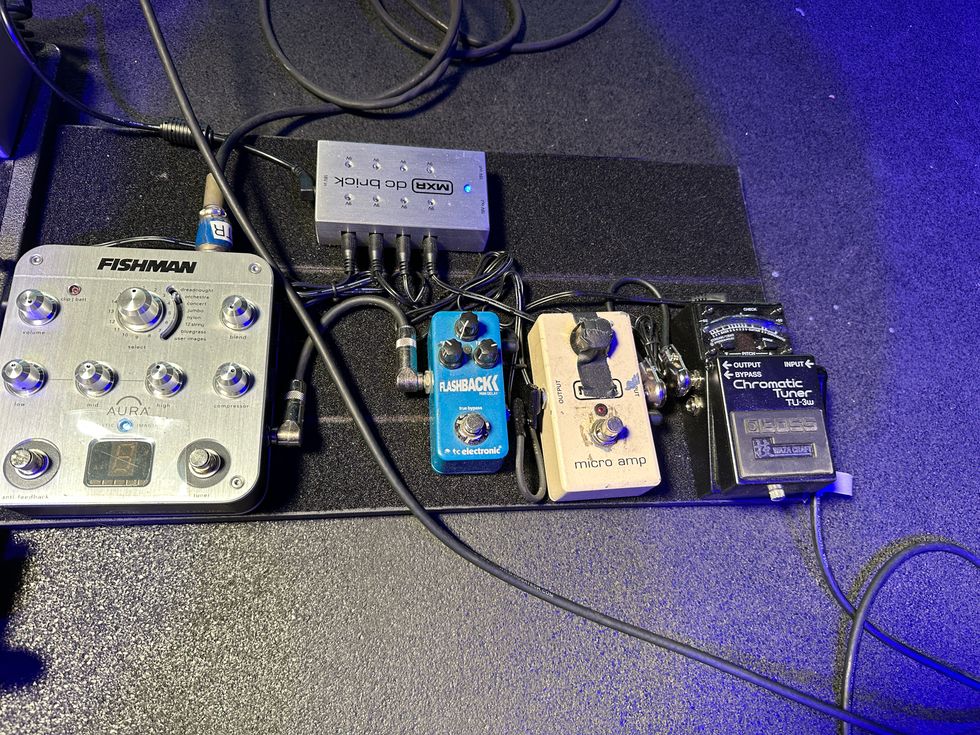
Stu Mackenzie's Gear

Holy tones! When he's not ripping microtonal riffs, Stu Mackenzie often reaches for his Gibson Holy Explorer, which features a unique take on weight-relief measures. Photo by Debi Del Grande
Photo by Debi Del Grande
Guitars
- Flying Banana Microtonal Guitar built by Zac Eccles
- Gibson Holy Explorer
- Hagstrom F12 12-string
- 1967 Yamaha SVG 800 Flying Samurai
Strings and Picks
- .011 sets, any brand, for 6-strings
- .010 sets, any brand, for 12-string
- Dunlop Nylon Standard .50 mm
Amp
- Fender Hot Rod DeVille
Effects
- AMT Electronics B1 Legend Amps preamp
- Boss TU-2 Tuner
- Boss DD-3 Digital Delay
- Devi Ever FX Torn's Peaker
- Dunlop Cry Baby
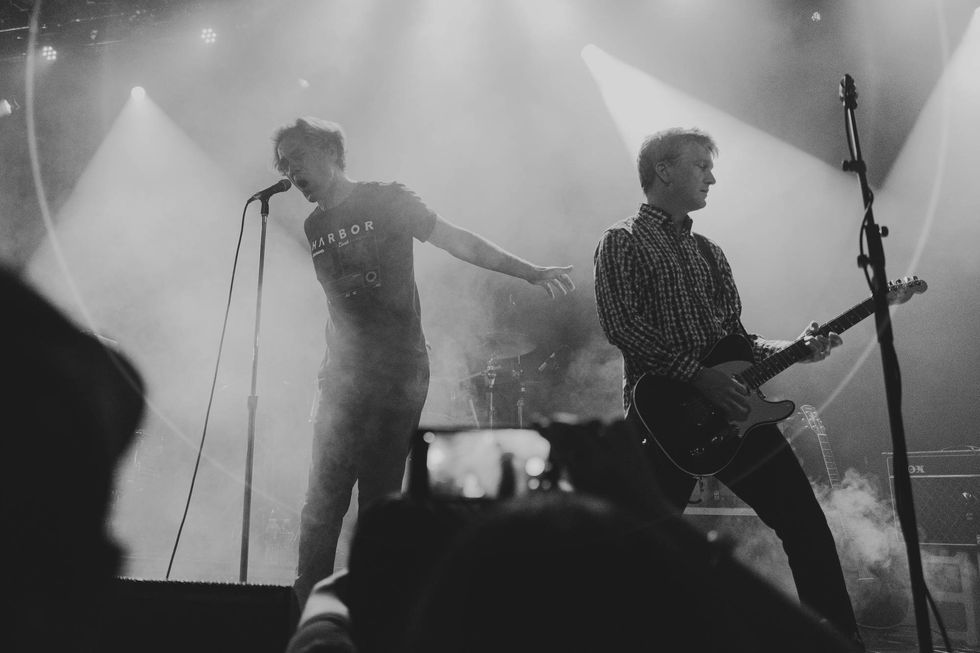
As the lockdown lifted in Australia in March, King Gizzard took their microtonal show on the road. It was also the band's first outing as a one-drummer band. Second drummer and manager Eric Moore left the band in August 2020 to focus more attention on running their label, Flightless Records.
"It's a little bit different," Harwood says about the impact Moore's departure has had on the band's rhythm section. "But Cavs has always been the main driving drummer, and I am still standing right next to him. Eric used to play off him as well. Sonically, and on stage, it hasn't changed too much for me. But we've all picked up little things to fill that void a little bit. Cavs has been playing double kick for a while, and he's expanded his playing with sample pads. We have a few more keyboards on stage. We're trying to fill that void in other ways, not in a rhythmic way, but more sonically."
"The shows we've played, we've only played the new microtonal stuff," adds Craig. "We haven't really played any of the older stuff, which has two drummers. I think once we start doing that, we'll probably notice the change. But for now, it's like everything is new, so you don't notice as much."
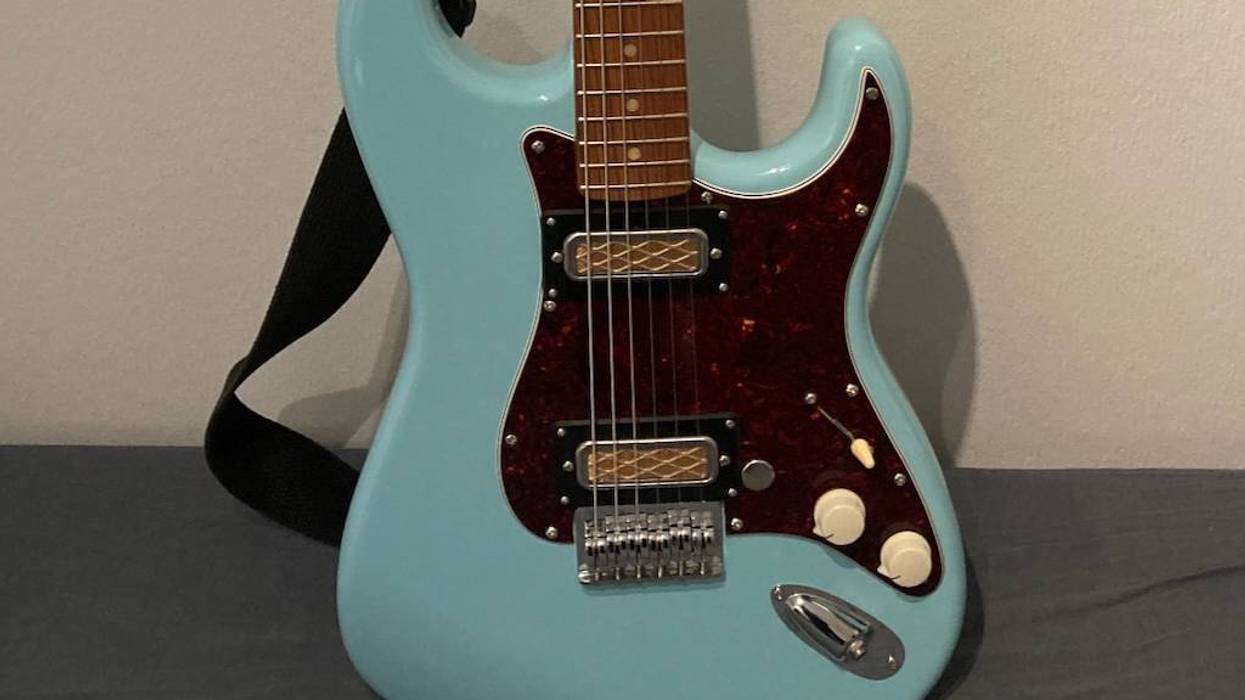
Joe Walker's Gear
Guitars
- 1965 Burns Short Scale Jazz Guitar
- Gibson Flying V
- Godin Richmond Dorchester modified with microtonal frets
Strings and Picks
- D'Addario XL (.011–.046)
- Dunlop Nylon Max Grip .60 mm
Amp
- Fender Hot Rod DeVille
Effects
- Devi Ever FX Torn's Peaker
The different lineup might not have hit Craig yet, but returning to a live audience has. "We played three shows in Melbourne, which was surreal," he says. "Just being around that many people. We were in the green room before the show, and socializing with more than 10 people was bizarre. You become like a hermit in lockdown. Playing was so good. It was still a bit weird because normally at our shows there are people moshing and, here, you look at the crowd and it is very contained and everyone is in their own little section. But it was amazing to perform in front of people again."
Whatever happens as the world pulls out of its COVID haze, King Gizzard will keep learning, growing, and venturing into uncharted waters. "I am a surface-level geek," Mackenzie says. "I am not the deepest studier ever, but I am an absolute music dork. When we wrote K.G. and L.W., we internalized a lot of new ideas and let them get involved in the music in their own way. In the writing process, we weren't thinking about all that stuff. We were just writing songs the way we usually do. But with anything you learn, or read, or ingest, it seeps its way in, in this fluid type of way. There's no particular song on either of the two new records where we're trying to do some specific thing, but we did learn a lot of things along the way that have infested the music."
King Gizzard & The Lizard Wizard - Live in Melbourne '21
King Gizzard and the Lizard Wizard kick out a slew of microtonal rock jams in front of a live audience in Melbourne earlier this year. There are plenty of closeups throughout this concert-length video, so keep your eyes peeled for extra frets.
Lizards in the Rat’s Nest
King Gizzard & the Lizard Wizard first embraced microtones about four-plus-years ago, but that's not the only sonic adventure they've taken in that time. Another was turning up the volume with their 2019 release, Infest the Rats' Nest, which is when they—finally—embraced heavy metal. To do it right, their 12-string Hagstroms and vintage Yamahas weren't going to cut it. They needed new instruments that were more meaty and ferocious. For guitarist Stu Mackenzie, a Gibson Explorer was the obvious choice, although, being King Gizzard, that meant an Explorer with a twist.
"My guitar is a Holy Explorer," he says. "Gibson only made 350 of them. When they came out, everyone in the entire world was like, 'That's the worst guitar that Gibson has ever made.' I've been looking for an Explorer for years—being interested in heavy metal for my entire life—and when we talked about making a proper heavy record, it made sense for me to do it on an Explorer. They're cool, and they feel right. I like the shape of them. I like how they feel on you. I looked for ages trying to find something and a Holy Explorer came up in a store when we were on tour. I played it and thought, 'This is actually really dope. This guitar is awesome.' But I didn't buy it because I got scared. It was too bizarre to buy it and all the reviews online were like, 'Worst guitar ever made.' But I couldn't stop thinking about it, and about six months later I bought one off of Reverb that was in Malaysia. It's a beast. It's all still stock, everything on it, and it sounds amazing. Pretty much every guitar, every overdub, every single guitar sound [of mine] on Infest the Rats' Nest is that guitar."
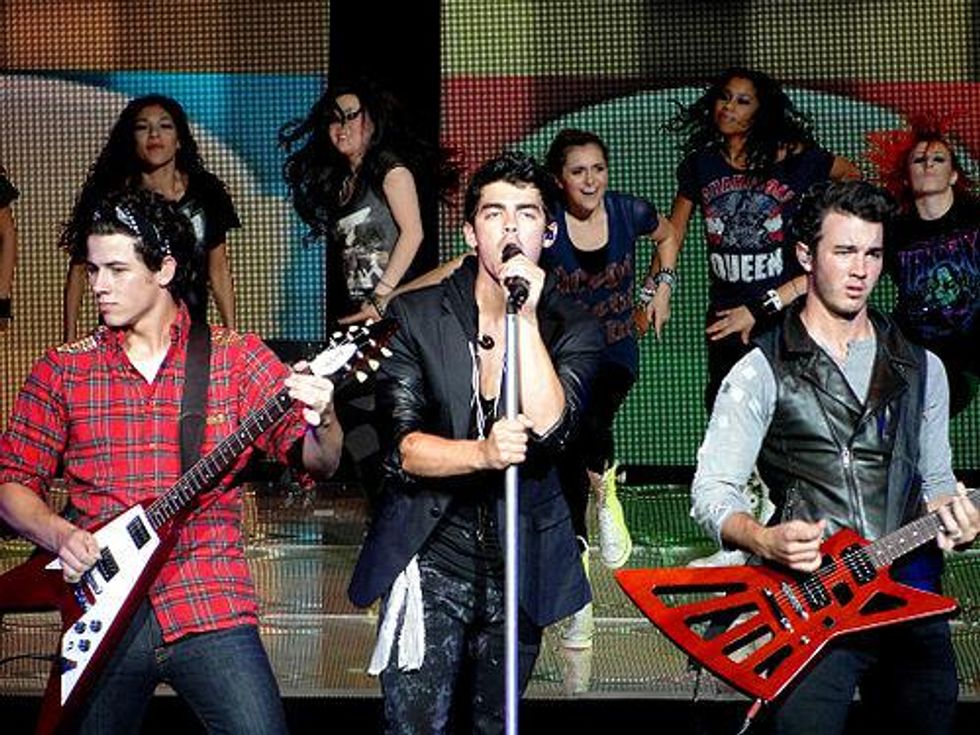
Guitarist Joey Walker felt a similar vibe, and chose a Gibson Flying V. "Stu bought that for me when he was in New York about a year ago, just before we recorded Infest the Rats' Nest," he says, although there's more to it. "There's a picture going around of the Jonas Brothers playing the exact same guitars that Stu and I play—a natural woodgrain Flying V and a Holy Explorer. It's obvious, and under everyone's nose, but the Jonas Brothers are doing a tribute to the King Gizzard recipe."


![Rig Rundown: Russian Circles’ Mike Sullivan [2025]](https://www.premierguitar.com/media-library/youtube.jpg?id=62303631&width=1245&height=700&quality=70&coordinates=0%2C0%2C0%2C0)