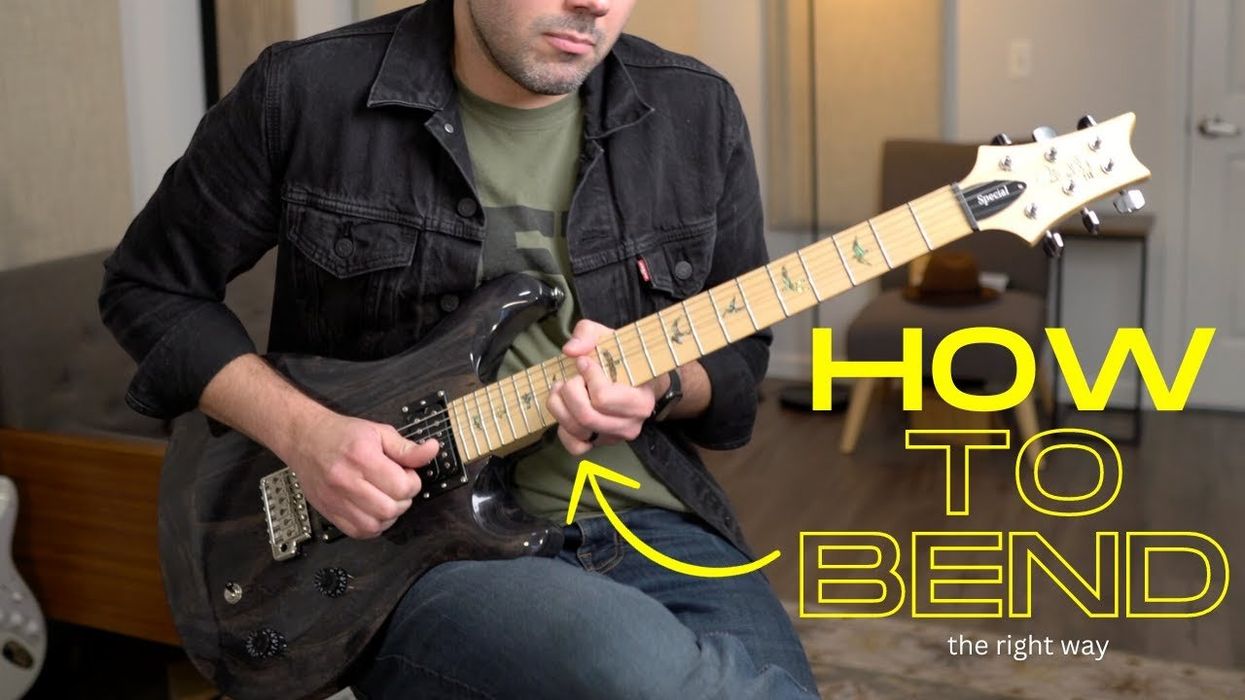
Intermediate
Advanced
• Learn melodic minor scales
• Create melodic minor chord-voicing strategies
• Develop melodic minor melodic and harmonic vocabulary
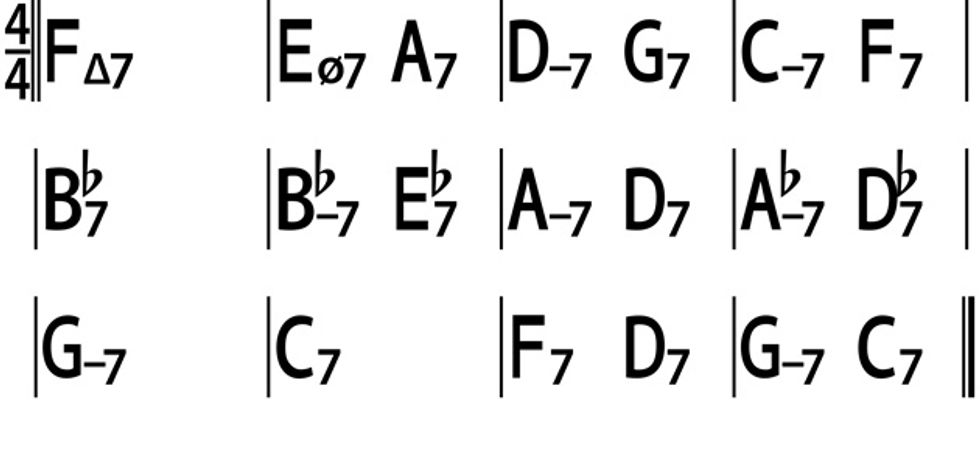
First, take a look at Ex. 1, which is the chord progression for an A minor blues. I will be referring back to specific locations in this progression from time to time.
Why is the Melodic Minor Scale so Bright?
Melodic minor scales are built with a W–H–W–W–W–W–W–H step pattern—W is a whole-step (two frets) and H is a half-step (one fret). The A melodic minor scale is spelled A–B–C–D–E–F#–G#–A, or 1–2–b3–4–5–6–7–8 in scale tones. (In classical theory, the melodic minor scale has a separate formula for its ascending and descending forms. For our purposes—as is often the case in jazz—we’re using the ascending form for both directions, not the descending form, which would be the same as an A natural minor.)
It sounds bright because its structure yields an abundance of whole-steps in the upper part of the scale. Take a listen to Ex. 2 to hear how it sounds against an Am chord. You can use this scale anywhere you see an Am chord in Ex.1. Measures 1–3, measures 7–8, and measure 11.
Since this scale has a natural 7, or a leading tone, it makes the Am chord sound like tonic minor. Basically, this scale tells everyone, “Yo! We’re in the key of A minor!”
Consider the bVI chord—F7—in measure 9. This is an opportunity to use F Lydian Dominant, which is the fourth mode of the melodic minor scale system. It is built with a W–W–W–H–W–H–W step pattern, spelled F–G–A–B–C–D–Eb–F, and its scale tones are 1–2–3–#4–5–6–b7–8. When using this mode, you’re implying that your F7 chord has become an F7(#11). Since this scale is the fourth mode, the parent scale of F Lydian Dominant is C melodic minor. Listen to Ex. 3 and hear how the F Lydian Dominant mode sounds over an unaltered F7 chord.
Let’s talk about dominant function chords.
The actual V chord in the key of A minor is E7, and it’s found in measure 10. There is also a secondary dominant in measure 4. A7 is functioning as the V chord in the key of D minor and provides some forward motion, making it sound like you’re headed to a new key. The seventh mode of the melodic minor scale system is Super Locrian, and you use this mode to get a fully altered dominant chord sound. For E7, you play the E Super Locrian mode, which is built with a H–W–H–W–W–W–W–H step pattern, spelled E–F–G–Ab–Bb–C–D–E, and its scale tones are 1–b2–#2–3–b5–#5–b7–8. Using this mode over a dominant chord gives you both altered 9s and altered 5s, turning E7 into an E7alt chord.
The method is the same for A7, where you would use the A Super Locrian scale to achieve an altered dominant sound, creating more musical tension that can be resolved when you land on the tonic chord. Listen to Ex. 4 to hear each of these Super Locrian modes played over their corresponding unaltered dominant chords. Again, remember that the parent scale of E Super Locrian is F melodic minor, and the parent scale of A Super Locrian is Bb melodic minor.
So, what does this sound like when you put it all together?
Ex. 5 is one possible solo, blending traditional minor pentatonic sounds with the melodic minor scale. The lines are also not too heavy on altered sounds over the dominant chords.
Ex. 6 leans into the melodic minor scale and the altered sounds more, arriving at Ex. 7 which is more angular and rhythmic.
There are two paths to creating chord voicings for these altered sounds. One way is to take the unaltered seventh chord, find all your altered 9s, 5, and 11s, and adjust the shape. The other way is to simply use the min(maj7) chord of the parent scale. Take a look at Ex. 8 for some Drop 2 min(maj7) voicings and inversions. Substituting Amin(maj7) for Am or Am7 should be pretty straightforward, keeping in mind that a major seventh chord will sound kind of bright. For your F7(#11) sounds, use a Cmin(maj7) chord voicing, where C–Eb–G–B will sound like the 5, b7, 9, and #11 of F7.
To get the altered dominant sounds, play an Fmin(maj7) chord instead of E7, where F–Ab–C–E will sound like the b9, 3, #5, and root of your E7 chord. The same relationship holds for A7, where you would use a Bbmin(maj7) voicing to get an altered chord sound. In Ex.9, you can hear how these voices are working against a bass line.
There’s a lot to unpack here, especially if you’re not familiar with all the modes of the melodic minor scale system. Learn the modes, then start with simple, straightforward musical ideas. Just going up and down the mode will get these new sounds in your ear, and using traditional structures like thirds, triads, and arpeggios will give you something to play without feeling overwhelmed. Welcome to the bright side of the blues!
We’re giving away more gear! Enter Stompboxtober Day 24 for your chance to win today’s pedal from Maxon!
Maxon OD-9 Overdrive Pedal
The Maxon OD-9 Overdrive Effects Pedal may look like your old favorite but that's where the similarity ends. Improved circuitry with a new chip yields the ultra-smooth dynamic overdrive guitarists crave. Drive and Level controls tweak the intensity and volume while the Hi-Boost/Hi-Cut tone controls adjust brightness. Features true bypass switching, a die-cast zinc case, and 3-year warranty. From subtle cries to shattering screams, the Maxon OD-9 delivers a huge range of tones.
Features
Improved circuitry with a new chip yields ultra-smooth dynamic overdrive
Drive and Level controls tweak the intensity and volume
Hi Boost/Hi Cut tone controls adjust brightness
True bypass switching
Die-cast zinc case
AC/DC operation (order optional Maxon AC210N adapter)
Product Specs
Input: 1/4" mono jack
Output: 1/4" mono jack
Power: 9V DC, 6 mA, center pin minus (not included)
Dimensions: (WxDxH) 74 mm x 124 mm x 54 mm
Weight: 580g
Here’s part two of our look under the hood of the funky rhythm guitar master’s signature 6-string.
Hello and welcome back to Mod Garage. In this edition, we’re continuing our journey through the Fender Cory Wong Stratocaster wiring, bringing it all together.In the previous installment, the last feature on the funky 6-stringer’s signature axe that we discussed was the master volume pot and the corresponding treble-bleed circuit. Now, let’s continue with this guitar’s very special configuration of the tone pots.
Tone pot with Fender Greasebucket tone system:
This 250k tone pot is a standard CTS pot with a 90/10 audio taper found in all U.S.-built Fender guitars. The Cory Wong guitar uses the Fender Greasebucket system, which is added to the pot as a ready-to-solder PCB. The Greasebucket PCB is also available individually from Fender (part #7713546000), though you can use conventional electronic parts for this.
Fender introduced this feature in 2005 on some of the Highway One models and some assorted Custom Shop Strats. The Greasebucket name (which is a registered Fender trademark, by the way) is my favorite of Fender’s marketing names, but don’t let it fool you: Your tone will get cleaner with this modification, not greasy and dirty.
According to Fender, the Greasebucket tone circuit reduces high frequencies without adding bass as the tone knob is turned down. Don’t let that description confuse you. A standard Strat tone control does not add any bass frequencies! As you already know, with a passive system you can’t add anything that isn’t already there. You can reshape the tone by deemphasizing certain frequencies and making others more prominent. Removing highs makes lows more apparent and vice versa. In addition, the use of inductors (which is how a passive pickup behaves in a guitar circuit) and capacitors can create resonant peaks and valleys (band-passes and notches), further coloring the overall tone.
Cory Wong bringing the funk onstage.
This type of band-pass filter only allows certain frequencies to pass through, while others are blocked. The standard tone circuit in a Strat is called a variable low-pass filter (or a treble-cut filter), which only allows the low frequencies to pass through while the high frequencies get sent to ground via the tone cap.
The Greasebucket’s band-pass filter is a combination of a high-pass and a low-pass filter. This is supposed to cut high frequencies without “adding” bass, which has mostly to do with the resistor in series with the pot. That resistor means the control will never get to zero. You can get a similar effect by simply not turning the Strat’s standard tone control all the way down. (The additional cap on the wiper of the Greasebucket circuit complicates things a bit, though; together with the pickups it forms an RLC circuit, but I really don’t want to get into that here.)
The standard Fender Greasebucket tone system is used in the Cory Wong Strat, which includes a 0.1 μF cap and a 0.022 uF cap, along with a 4.7k-ohm resistor in series. These are the values used on the PCB, and without the PCB it looks like the illustration at the top of this column.
Push-push tone pot with preset overwriting function:
The lower tone pot assigned to the bridge pickup is a 250k audio push-push pot with a DPDT switch. The switch is used to engage a preset sound by overwriting the 5-way pickup-selector switch, no matter what switching position it is in. The preset functionality has a very long tradition in the house of Fender, dating back to the early ’50s, when Leo Fender designed a preset bass sound on position 3 (where the typical neck position is on a modern guitar) of the Broadcaster (and later the Telecaster) circuit. Wong loves the middle-and-neck-in-parallel pickup combination, so that’s the preset sound his push-push tone pot is wired for.
The neck pickup has a dedicated tone control while the middle pickup doesn’t, which is also another interesting feature. This means that when you hit the push-push switch, you will engage the neck and middle pickup together in parallel, no matter what you have dialed in on the 5-way switch. Hit the push-push switch again, and the 5-way switch is back to its normal functionality. Instead of a push-push pot, you can naturally use a push-pull pot or a DPDT toggle switch in combination with a normal 250k audio pot.
Here we go for the wiring. For a much clearer visualization, I used the international symbol for ground wherever possible instead of drawing another black wire, because we already have a ton of crossing wires in this drawing. I also simplified the treble-bleed circuit to keep things clearer; you’ll find the architecture of it with the correct values in the previous column.
Cory Wong Strat wiring
Courtesy of singlecoil.com
Wow, this really is a personalized signature guitar down to the bone, and Wong used his opportunity to create a unique instrument. Often, signature instruments deliver custom colors or very small aesthetic or functional details, so the Cory Wong Stratocaster really stands out.
That’s it! In our next column, we will continue our Stratocaster journey in the 70th year of this guitar by having a look at the famous Rory Gallagher Stratocaster, so stay tuned!
Until then ... keep on modding!
The Keeley ZOMA combines two of iconic amp effects—tremolo and reverb—into one pedal.
Key Features of the ZOMA
● Intuitive Control Layout: Three large knobs give you full control over Reverb Level, Tremolo Rate,and Depth
● Easy Access to Alternate Controls: Adjust Reverb Decay, Reverb Tone, and Tremolo Volume withsimple alt-controls.
● Instant Effect Order Switching: Customize your signal path. Position tremolos after reverb for avintage, black-panel tone or place harmonic tremolo before reverb for a dirty, swampy sound.
● True Bypass or Buffered Trails: Choose the setting that best suits your rig.
Three Reverb and Tremolo Modes:
● SS – Spring Reverb & Sine Tremolo: Classic spring reverb paired with a sine wave tremolo for that timelessblack-panel amp tone.
● PH – Plate Reverb & Harmonic Tremolo: Smooth, bright plate reverb combined with swampy harmonictremolo.
● PV – Plate Reverb & Pitch Vibrato: Achieve a vocal-like vibrato with ethereal plate reverb.
Reverb: Sounds & Controls
● Spring Reverb: Authentic tube amp spring reverb that captures every detail of vintage sound.
● Plate Reverb: Bright and smooth, recreating the lush tones of vibrating metal plates.
● Reverb Decay: Adjust the decay time using the REVERB/ALT SWITCH while turning the Level knob.
● Reverb Tone: Modify the tone of your reverb using the REVERB/ALT SWITCH while turning the Rate knob.
Tremolo: Sounds & Controls
● Sine Wave/Volume Tremolo: Adjusts the volume of the signal up and down with smooth sine wavemodulation.
● Harmonic Tremolo: Replicates classic tube-amp harmonic tremolo, creating a phaser-like effect withphase-split filtering.
● Pitch Vibrato: Delivers pitch bending effects that let you control how far and how fast notes shift.
● Alt-Control Tremolo Boost Volume: Adjust the boost volume by holding the REVERB/ALT footswitch whileturning the Depth knob.
The ZOMA is built with artfully designed circuitry and housed in a proprietary angled aluminum enclosure, ensuring both simplicity and durability. Like all Keeley pedals, it’s proudly designed and manufactured in the USA.
ZOMA Stereo Reverb and Tremolo
The first sound effects built into amplifiers were tremolo and reverb. Keeley’s legendary reverbs are paired with their sultry, vocal-like tremolos to give you an unreal sonic experience.
Your 100 Guitarists hosts are too young to have experienced SRV live. We’ve spent decades with the records, live bootlegs, and videos, but we’ll never know quite how it felt to be in the room with SRV’s guitar sound.
Stevie Ray Vaughan was a force of nature. With his “Number One” Strat, he drove a veritable trove of amps—including vintage Fenders, a rotating Vibratone cab, and a Dumble—to create one of the most compelling tones of all, capable of buttery warmth, percussive pick articulation, and cathartic, screaming excess. As he drew upon an endless well of deeply informed blues guitar vocabulary, his creativity on the instrument seemingly knew no bounds.
Your 100 Guitarists hosts are too young to have experienced SRV live. We’ve spent decades with the records, live bootlegs, and videos, but we’ll never know quite how it felt to be in the room with SRV’s guitar sound. So, we’d like to spend some time imagining: How did it feel when it hit you? How did he command his band, Double Trouble? The audience?
SRV was mythical. His heavy-gauge strings tore up his fingers and made a generation of blues guitarists work a lot harder. And his wall of amps seems finely curated to push as much air in all directions as possible. How far did he take it? Was he fine-tuning his amps to extreme degrees? Or could he get his sound out of anything he plugged into?