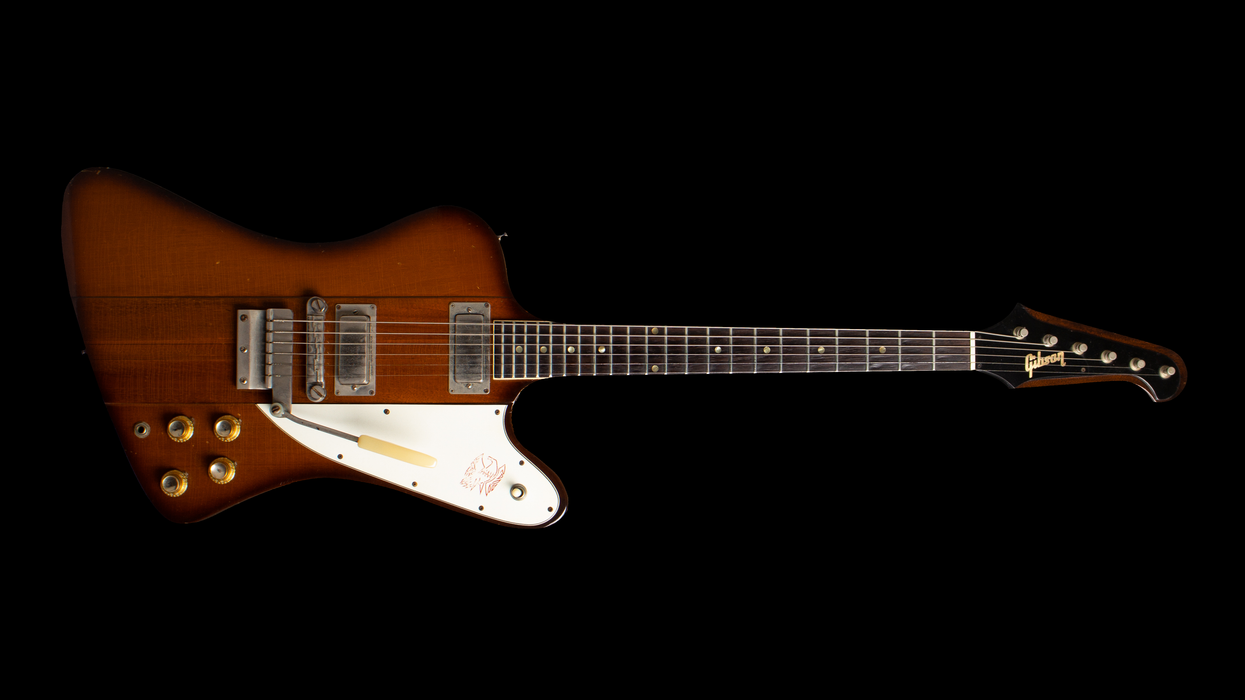
Photo by George AslaenderVintage Vault Platypus Meets ’Bird with This Reverse Gibson Rarity Peter Stuart KohmanOct 03, 2023
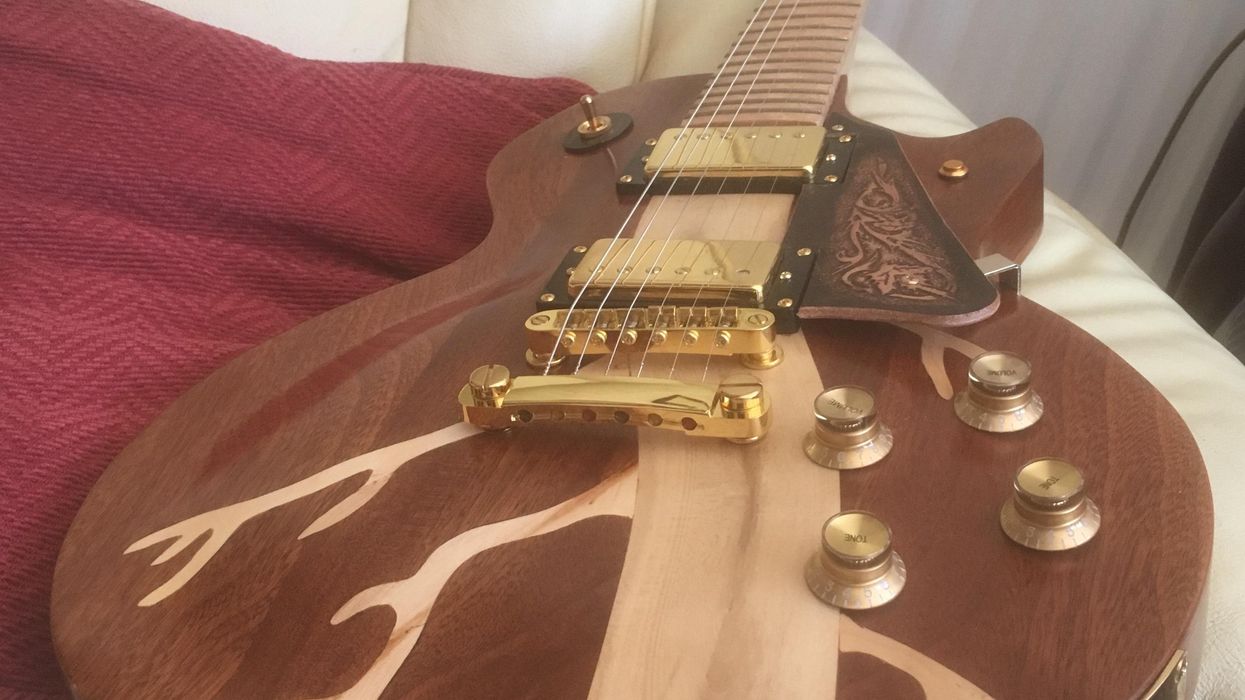
Reader Guitar of the Month Reader Guitar of the Month: Woodie from Belfast Premier Guitar StaffNov 21, 2022