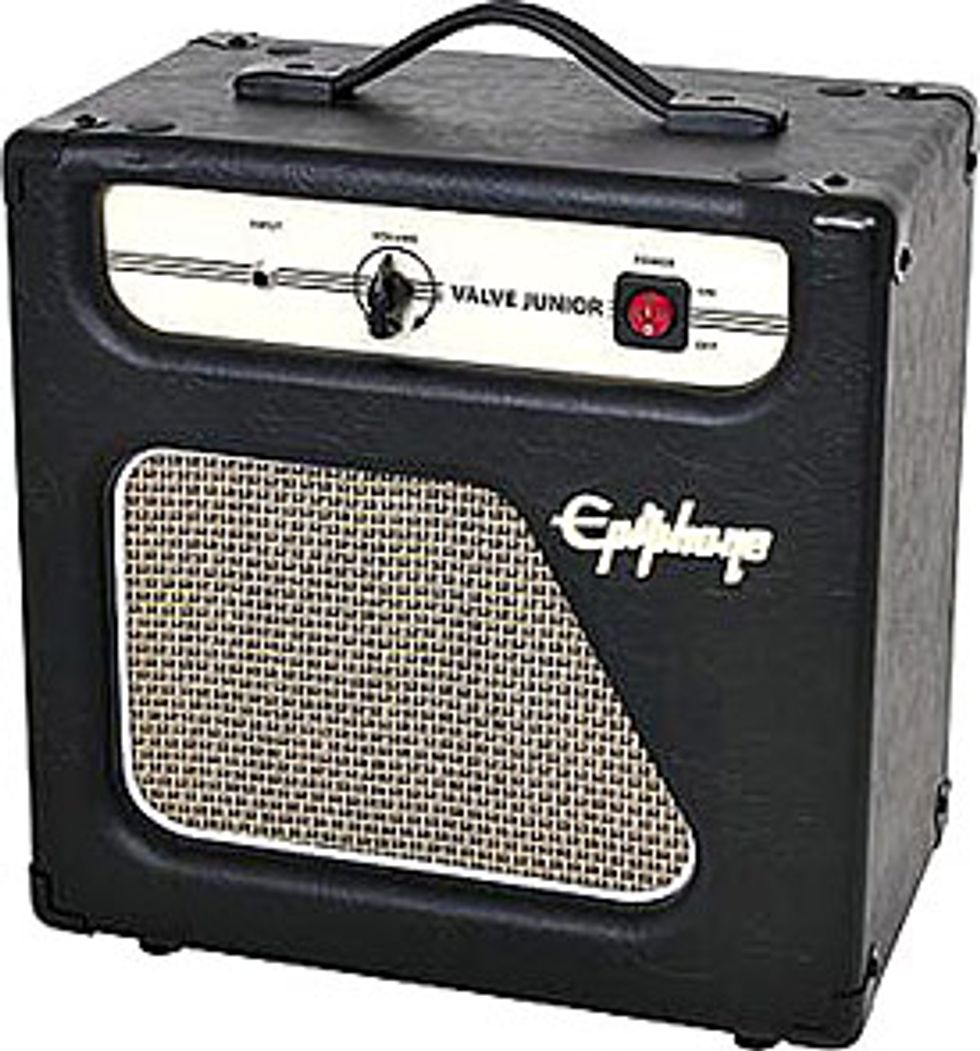
Hello everybody, I hope you''ve found some time to try all the mods on
your Epiphone Valve Jr. amp we discussed last month and that you
finally found the tone you like.
To close out our Epiphone adventures, this month I will show
you how to add some really useful features to this amp to make it much
more versatile and flexible. Again, all these mods are shown for the
second generation of this amp, which was sold from approximately March
2006 to today as the combo or the "head only" version, but there is
good news - all the mods will also work for the first generation of
this amp without any additional work. So pull out your soldering irons,
heat them up, unplug the amp, and discharge the capacitors.
Before we start, I''m sure you know what''s coming next:
Do not attempt to perform these mods if you are not familiar with
working inside tube amps or other high voltage electronics. There are
lethal voltages inside the amp, even when unplugged (if the filter
capacitors have not been discharged) and these voltages can cause
serious injury or kill you. If you are unsure, take it to an amp tech.
If you decide to perform these mods, you assume all responsibility for
anything that happens! Whether the amp explodes, you get zapped, or the
amp suddenly increases in value because everyone falls in love with it,
it''s all because of you. The glory, the pain, whatever, they''re all
yours. If you can''t live with that, don''t mess with the stuff here.
I apologize for telling you this over and
over again, but I want to see all of you here next month in a good
health, so please take care of what you are doing inside the amp.
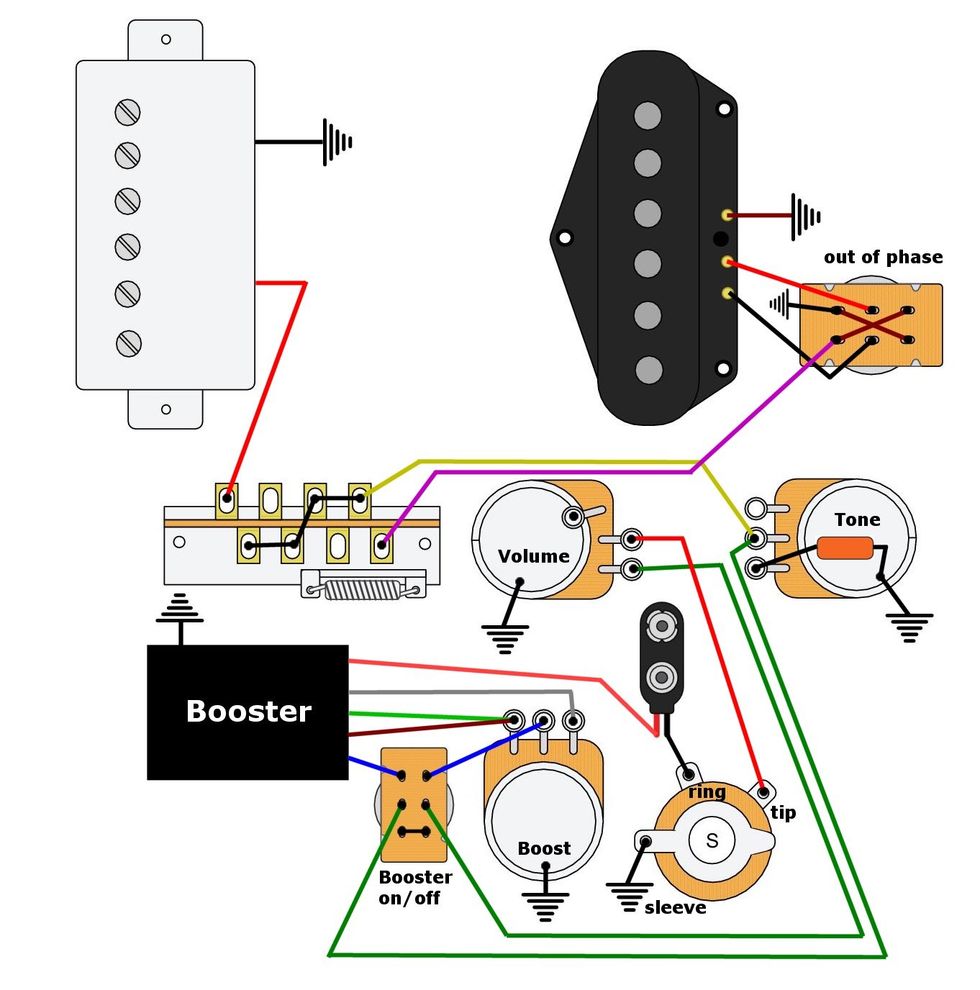
If you are missing the circuit drawing of our Epiphone amp, here it is again. Print it out and put it on your workbench to follow along.
| Standby Switch |
To begin, we will perform a very easy to do modification and add a standby switch to our amp. A standby switch can extend tube life dramatically. When you turn on your amp, make sure that the switch is always in the standby position, wait a minute and switch to the play position. Likewise, when you shut down your amp, always switch over to the standby position first. Such a switch is also a good help when you take a break without shutting down your amp - make sure that you engage the standby mode before you have a Coke, as you don''t need a full throttled tube during this time!
All you need is a Carling SPST switch. Drill a hole for the switch on the right side of the amp''s on/off switch and install the new switch; there will be plenty of space for it. All you have to do now is simply connect the switch between the T2 wire and the T2 terminal, that''s it!
| Gain Control |
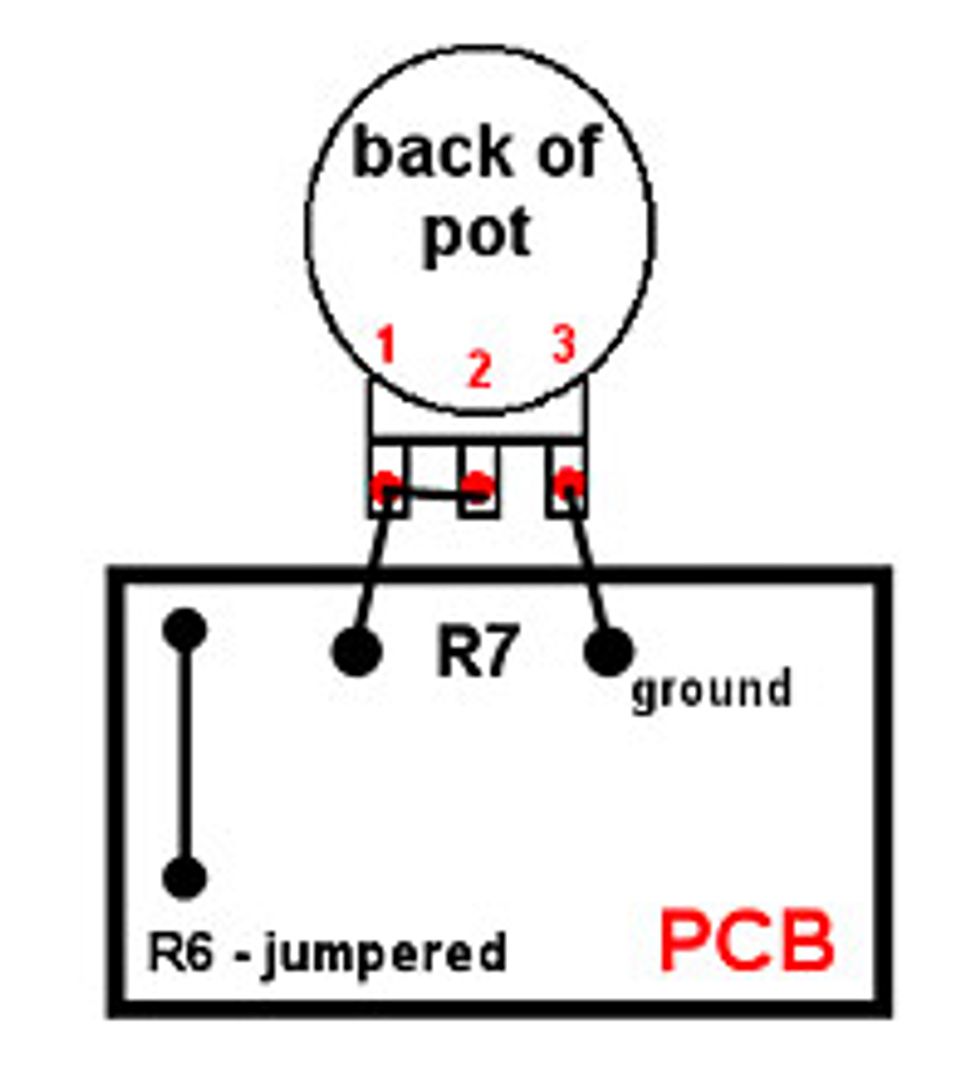
Next we will add gain control, also a very easy and effective mod for your amp. The basic idea of this mod is to replace the R7 "gain resistor" with a pot, which is of course a variable resistor.
All you need for this is a quality CTS 1M audio pot. Remove R7 from the PCB and connect the pot as shown on the drawing below; it''s a good idea to use shielded cable for this operation. Place the new pot on the right side from the volume pot, just between the on/off switch and the volume pot. Do not place it on the left side from the input jack - you will see why later on.
| Tone Control |
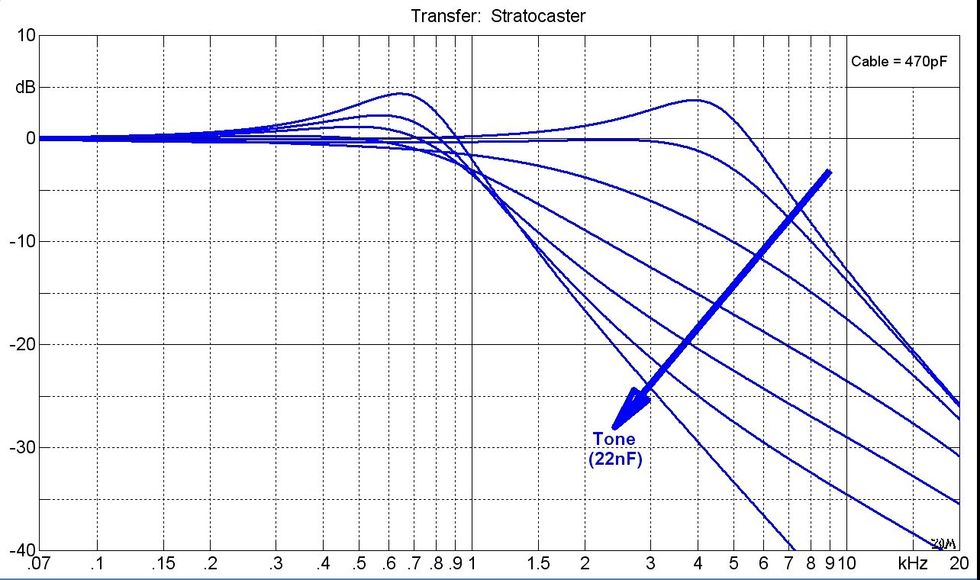
Now it''s time for an effective tone control for your Epiphone amp. For this, you''ll need a CTS 1M audio pot with integrated switch, a 470pF silver mica cap, a 0.0047uF cap (Sprague Orange Drop cap for a more Fenderish tone or Mallory caps for a Marshall-like tone) and a piece of shielded wire.
The switch gives you the possibility to completely remove the tone control from the circuit, a nice additional feature. The tone control is very similar to the very early classic single tone controls from Fender and Gibson amps. It''s independent from the volume and it''s responsive, capable of cutting or boosting the high mids and the treble.
Please note that for this mod it is necessary to have the stock 1M resistor at R6 - don''t remove it when you want to have the tone control! If you removed it as a mod, put it back in, otherwise the tone control will have no function. So let''s start and connect everything as shown in the drawing below (looking at the back of the pot):
Now the tone control gets added across the R6 resistor. Solder the black wire coming from the 470pF cap to the end of R6 closest to the edge of the circuit board. Now solder the red wire from the switch/center pot lug to the end of R6 farthest from the edge of the circuit board. Solder the shield wire from the pot case (and the 0.0047uF cap) to the ground-jumper wire marked JP2 and you are done.
To install the tone control, it''s important to place it on the left side of the input jack, far away from the noisy large capacitor cans and transformers. That''s why I recommend placing the gain control on the other (right) side of the volume pot. You can also mount the tone control on the back of the chassis elsewhere. However, to prevent any noise problems, placement of the control and routing of the shielded wire is important.
| Recording-out Jack |
As you know, our amp has only 5 watts and so it''s very easy to drive it into saturation for a raw and musical overdriven tube tone, ideal for recording purposes. So all we need now is an additional recording-out (aka "line-out") jack.
From the basics, this is a simple 1:1 copy from the speaker out jack, attenuated to line level. For this, you need to install an additional jack on the back of the enclosure - use an insulated nylon jack for this option! All you have to do is connect the new jack in parallel to any speaker output jack as shown in the drawing below. If you have done the Fender mods from the first column, use the resistor values shown in green; for the Marshall and gain mods from column number two as well as a stock Epi amp, use the values shown in black.
The values depicted will result in a well balanced, line level output and are a good point to start from. Changing them will affect the sound, so feel free to experiment from there. 1/2 watt for the resistors is more than enough for this application, but using higher wattage resistors is OK as well. Also note that metal film resistors will give you a different tone than carbon comp resistors, so feel free to experiment with that.
The sweet spot in terms of resistor values varies from amp to amp and depends on the mods you have done. Anything in the neighborhood of the above resistor values should work, at least somewhat, but you can always start with a pair of pots (perhaps with a minimum resistance in series) to set the sweet spot. Once you find the sweet spot, you can wire in resistors of as close values as you can find. And don''t forget to keep the speaker plugged in!
Another very popular way of adding a lineout option is the so-called "Herzog network" as shown below.

You can use this lineout for recording purposes or to connect it to the input of another guitar amp, PA, etc. There are lots of possibilities, so feel free to experiment.
| 8-ohm Speaker Output Jack |
To close I will show you how to install an additional 8-ohm speaker output jack. When you own the "head only" version of the amp, you are a lucky camper, as you will find 4, 8 and 16-ohm speaker out jacks on the back of your amp to connect any cab you want to. Combo owners will only find a single 4-ohm output to drive the internal 8" speaker.
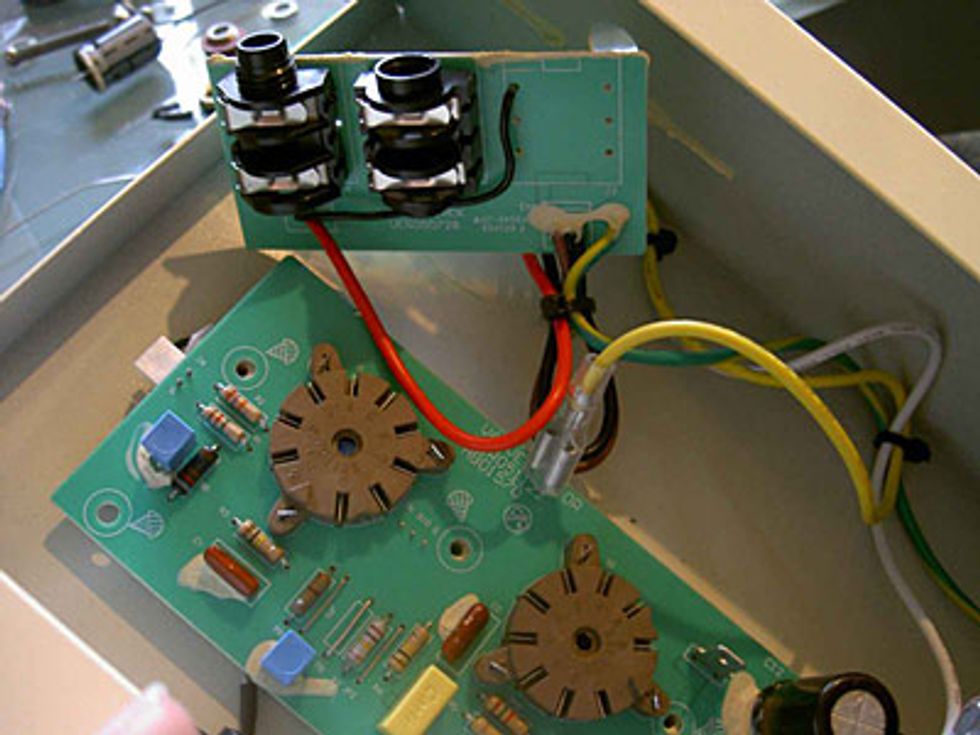
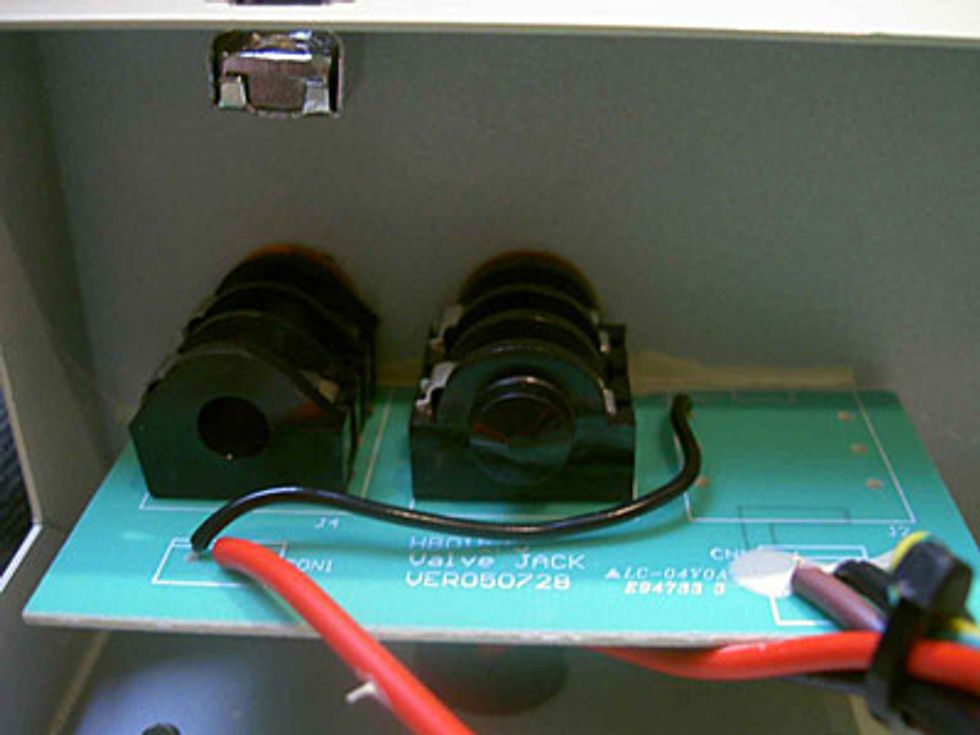
When you have a look inside the amp, you will notice that the speaker out jack is soldered to a very large individual PCB with a lot of free space - this is the place to solder in the new nylon jack, the same type as the 4-ohm speaker out jack. It doesn''t matter if you install the new jack on the right or the left side of the stock 4-ohm speaker out jack.
Drilling the additional hole for the new jack is a bit tricky. I used a cardboard pattern for best results. Please note that it''s not possible to add a 16-ohm speaker out to the combo version with the stock output transformer! If you want or need a 16-ohm speaker out, you will have to replace the OT. So let''s connect the new 8-ohm speaker out - have a look at the pics below.
On my combo, the red OT wire is the 8-ohm and it''s also labeled as such. This goes to the new jack socket "tip". The "sleeve" has the additional ground connection, this is the black cable shown on the pics.
Folks, we are finished! I''m sure you learned a lot while trying all these mods and I hope that I''ve inspired you to try some more DIY amp work, or to build your own "18-watt wonder" from scratch. Using the tone mods from the last two columns and the stuff from this month, you should have a killer amp that will suit all your needs for a long time.
Next month, we will start to talk about the primary tone of your axes and how to enhance it, so your soldering irons will have the chance to cool down a bit. Happy soldering and we''ll see you all next month!
Dirk Wacker has been addicted to all kinds of guitars since the
age of 5 and is fascinated by anything that has something to do with
old Fender guitars and amps. He hates short scales and Telecaster neck
pickups, but loves twang. In his spare time he plays country,
rockabilly, surf and Nashville styles in several bands, works as a
studio musician and writes for several guitar mags. He is also a
hardcore DIY guy for guitars, amps and stompboxes and also runs an
extensive webpage (singlecoil.com) about these things.