
Expand your playing by limiting your options.
Intermediate
Intermediate
- Learn how to "trick" yourself into creativity.
- Understand how to focus on a single rhythmic motif through a progression.
- Develop a better sense of articulation, time, and phrasing.
Improvisation is one of the great joys in music that celebrates spontaneity and self-expression. It gives us a chance to explore our instrument and what we naturally hear and feel in an open format. Limitations help challenge us to improvise inside specific parameters and, as a result, can break us out of our typical musical vocabulary.
It is all too easy to devolve into incessant noodling when presented with a blank harmonic canvas. While this may be a blast to participate in, it doesn't necessarily mean it's fun for an audience to listen to, or that our ideas are linking together thoughtfully. Adding limitations can pave the way to inspiration.
These could include limiting yourself to a set of notes or a shape, creating phrases out of the same rhythmic idea, or physically restricting your access on the fretboard. If a personal goal is developing more focus with improvisation or getting more music out of fewer elements, this approach is highly recommended and can be a lot of fun.
The following examples will apply to a blues progression in the key of Ab, but can be used in any situation regardless of simplicity or complexity.
In Ex. 1 the limitation is only playing on the 4th and 2nd strings. This approach immediately shatters access to most of the pentatonic lines that many of us play, and makes us look for horizontal connections on the fretboard for ideas that we might generally play in a vertical box. Using sixths is one of the easier things to make music out of here, so there are a few of those for sure. Having less access to the fretboard will immediately create different ideas, and this limitation certainly facilitates that.
Limitless Limitations Ex. 1
The "Django" Limitation
This one is a Django limitation (Ex. 2), imagining that a caravan fire partially mangled our fretting hand, only leaving us with the use of the first two fingers. With such a physical limit, the ideas are naturally a little simpler, more horizontal than vertical, and provide an absorbing challenge. Even playing phrases that we naturally hear can call for a different layout on the fretboard when playing with two fingers instead of four. I tend to notice myself using more slides with this approach.
Limitless Limitations Ex. 2
Ex. 3 uses the same general rhythm of four consecutive eighth-notes for every idea through the chorus. We can place the four notes anywhere in the bar, but the rhythmic idea's consistency brings more attention to the note choices and allows us to hear them in a unique context. This one is helpful in any style and gives the listener something to grab onto almost immediately. Feel free to try doing this with longer rhythmic phrases as well.
Limitless Limitations Ex. 3
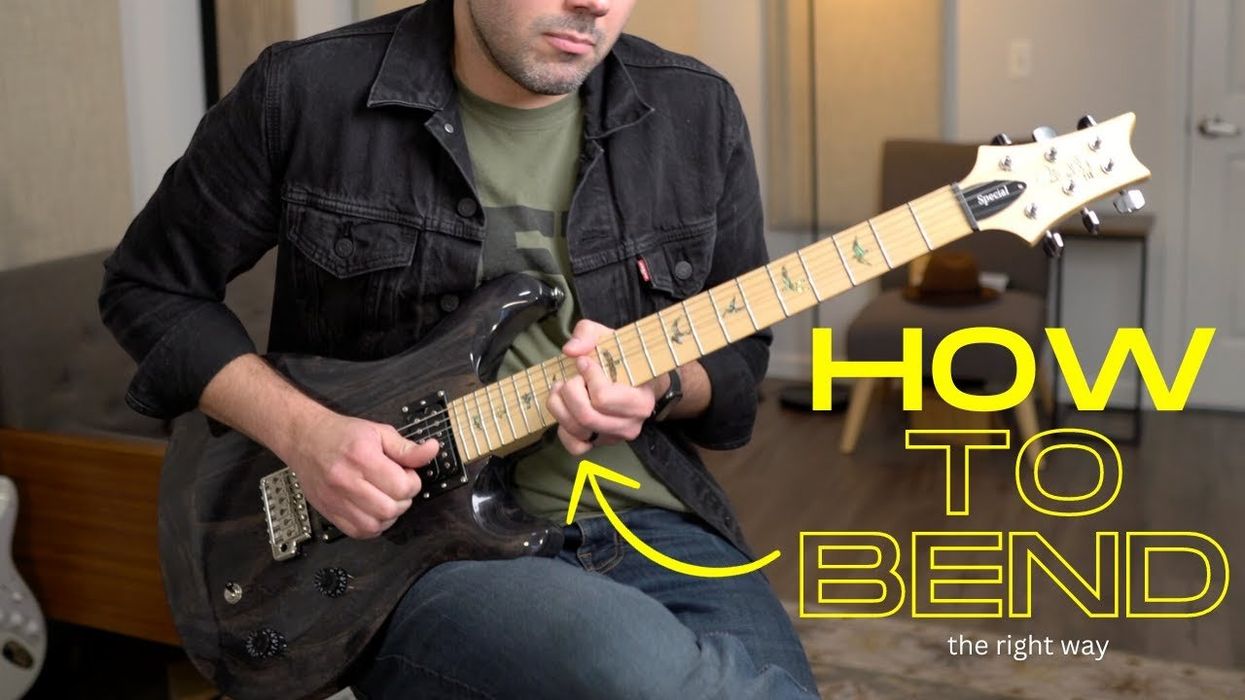
Bending is the focus of Ex. 4, and while the intention was to make every note a bend, there are a few cheater notes in there. This approach can help bring out different articulations, get us thinking about pitches above and below a particular scale shape, and be physically challenging since we usually have to support bends with more than one finger. Remember that these can include regular half- or whole-step bends, pre-bends, or double-stop bends.
Limitless Limitations Ex. 4
Ex. 5 uses double-stops (mostly thirds) exclusively in this chorus. This limitation helps us see a little more harmony in the scale than we might notice with single-note lines. Also, the physicality of playing two notes together for the left hand makes our ideas a little simpler, curbing the temptation of flashier playing in this context. There was quite a bit of horizontal movement here, but another angle would be to try this while staying in a single position.
Limitless Limitations Ex. 5
Ex. 6 can be tricky, but extremely rewarding once you get a hold of it. In this case, the limitation was to use one note over the entire chorus (an F on the 2nd string). Having little or no access to any other melodic options forces us to rely on rhythm, phrasing, articulation, or any other fundamental musical element. Another useful variation is using only a metronome and stick with two notes on one string for 3 to 5 minutes. If we can make one or two notes work, we can make almost anything work.
Limitless Limitations Ex. 6
Our last example (Ex. 7) is limiting us to a moving a melodic shape up the neck but keeping it inside the Mixolydian scales that follow the chord changes. If we harmonize a musical phrase through the entire scale, we can create six other lines or alternate versions of the same idea, a similar process to what we would naturally do with a chord scale. This approach results in many different melodic variations on the original phrase, but they are potentially useful together since they are all inside the harmony. Aside from the melodic thread of playing the same kinds of shapes, similar rhythmic placement also gives the listener a tangible element to grab.
Limitless Limitations Ex. 7
The above approaches are places to start if nothing else. Working with limitations helps us find new sounds and methods on the fretboard, expand our ideas a little longer than usual, and open our musical vocabulary in new and exciting ways. The beauty of limitations is that everyone will apply them differently and uniquely. Even using one that seems generic will naturally highlight our distinct musical voice and choices.
Using these is somewhat like running with weights on or swinging three baseball bats together. Once we run, swing, or solo in an actual situation, it can feel easier and freer, and we may have different ideas we can follow and build on. Sticking to a limitation for a short amount of time can create enough breadcrumbs the listener can track where they share in our excitement of creating improvised music in real time. Feel free to get creative, as any limitation we naturally conceive will likely prove valuable to our playing and improvisational development. They are always available at any moment you are playing music.
- Twang 101: Swampy Blues - Premier Guitar | The best guitar and ... ›
- How to Play Bentonia Blues - Premier Guitar | The best guitar and ... ›
- The Building Blocks of the Blues - Premier Guitar | The best guitar ... ›
- Carter-Style Picking and Beyond - Premier Guitar ›
- Blues Basics: 10 Essential Ways to Get Through the Blues - Premier Guitar ›
Want the world to know about your pedalboard? Got a great story to tell about it? Fill out the form below for your shot at being in Premier Guitar's March issue! Not everyone will be used, so be sure to say why your pedalboard stands out. And be sure to include good hi-res photos of your board!
Submit your pedalboard below!
Billy Doyle of Man/Woman/Chainsaw
Guest picker Billy Doyle of Man/Woman/Chainsaw joins reader Eddie Carter and PGstaff in musing on the joys of playing music.
A: I think the most rewarding aspect of music is the rush and chaos of playing live shows with my friends. I really love the tension—not knowing what’ll go wrong each night and what’ll come together nicely.
Billy’s recent fascination has been with The Last Waltz, both film and accompanying album.
Obsession: This summer I discovered the Band’s The Last Waltz concert film and album and fell into a mini obsession with it. Seeing some of the most stellar songwriters of their era share a stage is really special, not to mention how comfortable as a unit the Band is and how high the standard of musicianship is—Levon Helm singing his heart out while playing the drums is particularly wicked. Joni Mitchell’s performance of “Coyote” and Van Morrison’s rendition of “Caravan” are both particularly special, as I grew up listening to those artists. It’s a great insight to be able to learn these songs exactly how they played them.
Eddie Carter - Reader of the Month
A: The most rewarding aspect of playing for me is when I connect with the audience. The main purpose of playing music live, in my opinion, has always been to take the audience away from everyday life for a while. Life smacks a person down a lot, whether it’s a bad day at work or school, bills you can’t keep up with, bad news, etc. When a person goes to hear live music, they want to forget that and have some fun and unwind. When I see the audience smile, sing along, or dance, I know I’ve managed to help with that. That’s why I enjoy doing cover songs and just mix in an original here or there. It’s also why I try to do a variety of music from several decades.
A recent go-to for Eddie has been Duane Betts’ Wild & Precious Life.
Obsession: I guess my current obsession is looping. I don’t plan to get into looping as deep as Phil Keaggy, or use drums and keyboards. I do enjoy stacking parts on guitar and even playing mandolin over a guitar loop, though. It helps with making a song sound more like the recorded version. I also use a looper, a Boss RC-500, to store and make backing tracks for a few songs.
Jon Levy - Publisher
For Jon, Pretenders’ self-titled never gets old.
A: Playing music has enriched my life in so many ways, it’s hard to pick the most important one. Is it the headrush from writing and recording? The thrill of live gigs? The champagne-soaked limousine rides with supermodels and celebrity fans? (Just kidding about that last one.) To be honest, it’s the deep friendship and goofy camaraderie with my bandmates. My entire social life is based on music, and it makes the backaches, hangovers, and tinnitus totally worth it.
Nashville-based singer-songwriter Stephen Wilson Jr. is in Jon’s current rotation.
Obsession: Not looking at my hands when I’m playing. It forces me to concentrate on what I’m hearing and feeling—stuff that’s actually musical, rather than visual. I still ogle the fretboard a bunch, but I’m consciously trying to rely on my other senses as much as possible.
Brett Petrusek - Director of Advertising
Brett’s a big fan of Iron Maiden’s Killers, but also loves Miles Davis’ timeless Kind of Blue.
A: All of it. There are so many seasons and the change of the seasons is what makes it so great. Hitting the perfect riff to inspire a new song. Recording: layering guitars and vocals, hearing the tracks build up and turn into a mix (I really love this part). Creating a body of work. Being on stage with your band and feeling the roar of your guitar through the PA. Connecting with an audience, or better yet, knowing a single person connected with your music in a meaningful way. Watching my team develop and get better at the game. I feel fortunate just to be able to do it and to be able to share the experience with my group, Fuzzrd. The single most important thing? It’s unconditionally always there for me—and it alway starts with a guitar.
Irish hard-rocker Gary Moore’s Victims of the Future is a favorite of Brett’s.
Obsession: Taking a page from the legendary Gary Moore’s playbook: “So try and leave some big moments of silence in your solos—at least twice as long as what comes to you instinctively. After a while, you get in the habit of hearing those spaces, and the waiting comes naturally. And if you’ve got a good tone, you’ll create this anticipation where the audience can’t wait for the next note.”
Gallagher’s road worn Strat in play in the cover of his 1972 concert album.
How the Irish guitar virtuoso got a unique tone with a factory-stock Strat.
Hello and welcome back to Mod Garage. In this column, we’ll take a closer look at the very unique sound of the famous Rory Gallagher Stratocaster and discuss why it sounded so outstandingly good.
Unless you are living in a cave, you should know who Rory Gallagher was and will recognize his beaten-up Fender Stratocaster, which is a symbol of pure rock ’n’ roll. The story goes that Rory bought this used 1961 sunburst Stratocaster in 1963 for £100 in Cork, Ireland, in a shop named Crowley’s Music Store. Allegedly, this was the first Stratocaster ever to reach Ireland. The guitar’s previous owner ordered a red Stratocaster from the U.S., but a sunburst came instead. After using the guitar for around half a year, the red one arrived. The sunburst was exchanged and put on sale, and Gallagher soon found it. True or not, the story is simply priceless.
When Rory bought this Strat, it was absolutely factory stock, which was typical for this time. It stayed that way for a long time and became a piece of musical history in the hands of Rory. Nearly all of the sunburst lacquer was naturally removed over the years by Gallagher’s acidic sweat, so today the guitar is almost completely stripped down to the bare wood, giving it its iconic look.
The first mods done to this guitar happened around the mid-70s, when two of the pickups were damaged and had to be replaced. Later on, some other parts like the pickguard and pickup covers had to be replaced, and in his later career he did start to use different pickups. The standard 3-way pickup-selector switch was replaced with a more modern 5-way switch, and the controls were rewired for master volume and master tone with the middle tone pot disconnected.
What was the secret behind Rory’s unmistakable Stratocaster tone, which he had from the start? First and foremost, and without any doubts, you all know the saying: Tone comes from the fingers! When such outstanding playing chops meet a great instrument, the result is marvelous.
Having said that … Rory’s pickups did play a large role in his sound. The standard Stratocaster pickups Fender used at the time had staggered magnets with beveled edges. There is complex physics behind it, but in basic terms, these pickups sound fatter, sweeter, and with more overtones. The beveled edges greatly influence the magnetic field, which causes them to sound so different. This has to do with the pickup’s unique aperture or “magnetic window.” These were hand-beveled edges, and it was generally assumed that this was done to disguise the rough and uneven surface left by the sand casting. But this can’t be the reason because doing such handiwork takes a lot of time and care to get right, and Leo Fender wasn’t known for spending time on such unnecessary things in his building processes. (Later, Fender stopped beveling and the sound of the pickups changed because of this.)
In 2016, Seymour Duncan explained the tone of beveled pickups to Guitar.com: “The bevel causes the magnetic field to shoot out a little around the bevel area, but it results in a tapering of the field above that point. So, if you could, imagine the magnetic field shaped like the flame of a candle or a teardrop.” That’s an excellent metaphor that hits the nail on the head.
“Depending on the employee working the sanding machine, the edges are more or less beveled from pickup to pickup—one of the reasons why vintage Strats sound so different from guitar to guitar.”
But why did Fender originally do hand beveling and why did they stop later on? Were his choices based on tone? I don’t think so. I think the answer must be seen in the historical context of the time.
The alnico 5 material used for the magnets was brand-new and very expensive at that time. It was also very porous, and many magnets crumbled while using a hammer to drive them into the pickup, which was the usual procedure in the Fender factory. So, Fender started hand beveling the magnets on one side, which minimized the risk of destroying the magnet during the hammering process. It was an accident that this created such great tone. Depending on the employee working the sanding machine, the edges are more or less beveled from pickup to pickup—one of the reasons why vintage Strats sound so different from guitar to guitar.
Here you can see the normal, non-beveled magnets of a Stratocaster pickup:
Photo courtesy of Leosounds (https://leosounds.de)
And here is a faithful recreation of the beveled magnets in Gallagher’s Stratocaster:
Photo courtesy of Leosounds (https://leosounds.de)
Gallagher’s pickup set has a very pronounced bevel. The Fender worker who produced these certainly also created some more sets like this.
The influence of the bevel on a pickup’s tone is huge. To give a better idea, here are some magnetic visualizations that my dear friend Bernd C. Meiser from the German BSM company made for me. Bernd sadly died on July 30, 2024, after fighting against cancer for two years. It won’t get loud anymore without him.
Here you can see the common magnetic spread-out of a non-beveled Strat pickup:
Drawing courtesy Singlecoil (https://singlecoil.com) in memory of Bernd C. Meiser
And here is the same with a beveled Strat pickup:
Drawing courtesy Singlecoil (https://singlecoil.com) in memory of Bernd C. Meiser
You can clearly see the difference of the magnetic spread-out and the much wider aperture these beveled magnets provide, causing the different tone.
So where is the mod for this column? I’m sorry to disappoint you, but it’s not possible to change the magnets on a standard Stratocaster pickup without destroying the pickup. And there is no way to retroactively put a bevel on the magnets of your pickup with the magnets installed. The only way to convert your Strat to beveled pickups is to install a new pickup set with beveled magnets. Fender ’57/’62 pickups feature beveled edges, as do many offerings from other pickup companies.
Next time, we will have a look at the mid-boost and scoop mod from Dan Torres, so stay tuned!
Until then ... keep on modding!
Saxophonist Charlie “Bird” Parker’s challenging version of a 12-bar blues is one of his most enduring contributions. Learn how to navigate these tricky changes by combining bebop and blues.
Chops: Intermediate
Theory: Intermediate
Lesson Overview:
• Use IIm–V7 progressions to add interest to a blues progression.
• Combine the blues scale with Mixolydian and Dorian to create swinging phrases.
• Increase your rhythmic awareness by using triplets and syncopation.
Click here to download a printable PDF of this lesson's notation.
A big part of the bebop spirit was learning how to navigate through seemingly unrelated chords at speedy tempos. Saxophonist Charlie “Bird” Parker was a pioneer in the bebop movement and he combined his love of the burgeoning style with a deep appreciation for the blues. It’s easy to look at bebop in 2017 and think of it as a complicated and overly intellectual genre, but adding in a blues sensibility can make the changes a bit more approachable.
When looking at a traditional I–IV–V blues, there’s not all that much harmonic information to outline, so bop players like Parker would add chord substitutions. His composition “Blues for Alice” is an example of what’s become known as “Bird Blues.” The changes Parker used on this tune of become so accepted that other composers have written contrafacts—a different melody written on the same changes.
To fully digest these changes, it makes sense to examine the progression in small chunks and see how it relates to the traditional blues form. First, let’s look at the “Bird” changes below. (Remember, in jazz circles a triangle means a major 7 chord and a dash means minor 7 chord.)
When looking at a traditional 12-bar blues in F, the first four measures are usually an F7 (I) moving to a Bb7 (IV) in measure 5. In this version, Parker works backwards from the IV chord with a series of IIm-V7 moves that descend in whole-steps. Measures 4 and 3 are “major” IIm–V7s, but the second measure uses a “minor” version with a half-diminished chord for the IIm. Finally, Parker changed the chord in the first measure from a dominant 7 to a major 7 to place us squarely in the key of F. (It also helps with voice-leading across the first four measures.)
YouTube It
Saxophonist Charlie “Bird” Parker was the figurehead of the bebop era. Listen to his relaxed, swinging take on “Blues for Alice,” which is one of his most popular compositions.
Ex. 1 demonstrates one way to navigate the first four measures. Let’s break that down a bit. I stick entirely within the F major scale (F–G–A–Bb–C–D–E) for the first measure. Easy enough. In the second measure, for the sake of simplicity, I am just implying A7 through both chords. The first two beats outline A7 (A–C#–E–G) and the remaining notes are plucked from the A Super Locrian scale (A–Bb–C–Db–Eb–F–G).
Click here for Ex. 1
I’m using a similar concept in Ex. 2, working with the F major scale in the first measure and thinking A7 in the second. I’m using the D melodic minor scale (D–E–F–G–A–B–C#) over the third measure while targeting the 3 of Cm7 (Eb) on the downbeat of the fourth measure. To create an altered sound over the F7b9, I use a Gbdim7 arpeggio (Gb–A–C–Eb) to nail the b9 (Gb).
Click here for Ex. 2
This next example (Ex. 3) takes cues from great piano players so it requires some quick position shifting. The first shift happens in the first measure, where we move from 5th position up to 8th on the “and” of beat 2. In the second measure, we imply an A7b9 sound using a Bbdim7 (Bb–C–E–G) arpeggio that touches on the #9 (C) and b9 (Bb).
In the second and third measures of this example, we’re basically using the same concept. Because D Dorian (D–E–F–G–A–B–C) and G Mixolydian (G–A–B–C–D–E–F) contain the same notes, we’re simply adding some chromatic passing tones that help the chord tones line up on strong beats. Move the whole concept down a whole-step (to C Dorian/F Mixolydian) for the next measure.
Click here for Ex. 3
The next section of a blues in F might look something like: Bb7–Bb7–F7–F7. Or, if you think of a traditional jazz-blues progression, it might be Bb7–Bdim7–F7–D7. Looking ahead, Parker wanted to target the Gm7 in measure 9. What’s the best way to lead into that chord? Simply add a IIm–V before it. Parker used backcycling to create a series of descending IIm-V7 progressions that connect the Bb7 in measure 5 to the Gm7 in measure 9. Rather ingenious, huh?
While these chords are easy enough to play with basic chord forms, it’s much trickier to solo through them in an authentic way.
Ex. 4 uses the Bb Mixolydian scale (Bb–C–D–Eb–F–G–Ab) over the Bb7 before moving to Eb Mixolydian (Eb–F–G–Ab–Bb–C–Db) for Bm7–Eb7. In the third measure, we move to A minor pentatonic (A–C–D–E–G) before coasting through an Abm7 arpeggio (Ab–Cb–Eb–Gb) for the last measure.
Click here for Ex. 4
The next lick (Ex. 5) demonstrates how you can use simple melodies to navigate this chord progression. The first measure is a simple lick based on the Bb7 chord, then we create a melody just using the F major scale—it’s all about landing on the Gm7 chord at the right time.
Click here for Ex. 5
Our final example over this section (Ex. 6) is just as loose with the chords, but makes sure to hit them as they land. The first measure uses the Bb major pentatonic scale (Bb–C–D–F–G) before using some outside notes that resolve to the root of the Am7 chord. At this point you should be seeing that a big part of the bebop genre is based on rhythm. The mixture of triplets and heavy syncopation is an essential part of the sound.
Click here for Ex. 6
The final section of a blues in F usually goes: C7–Bb7–F7–C7, but that’s too basic for beboppers. In Bird blues, we use a two-measure IIm-V7 progression before increasing the harmonic rhythm with F7–D7–Gm7–C7. In Roman numerals, this translates to I7–VI7–IIm7–V7.
I find the best way to play over this section is to remember you’re playing a blues, so some blues scale ideas might not be a bad idea, as shown in Ex. 7. We’ve even included some slight bends!
Click here for Ex. 7
This final example (Ex. 8) feels like another melody rather than something clever. Remember, we’re playing music, and often the best music is the type that your audience can sing along to. So don’t be afraid to hold off and play something melodic.
Click here for Ex. 8
Lastly, here’s a short backing track to help you practice these ideas, and then come up with some of your own. Keep listening and copying and before long you’ll be soaring like Bird!