“The Small Stuff ” contains several compositional elements that really make a solo guitar piece—a good groove, nice melody, and a solid bass line with clear separation from the melody.
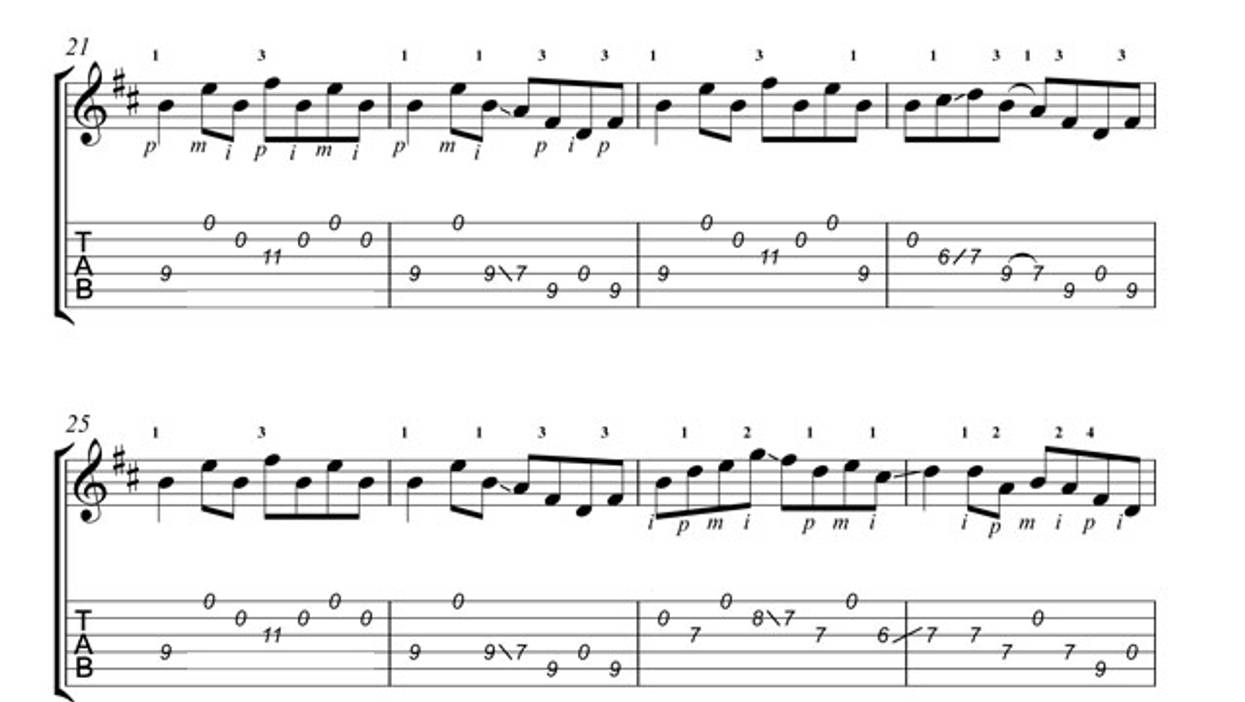
Develop speed, sound, and nuance in your fingerstyle playing by exploring the “secrets” of classical guitar technique—beginning with a great right-hand setup.
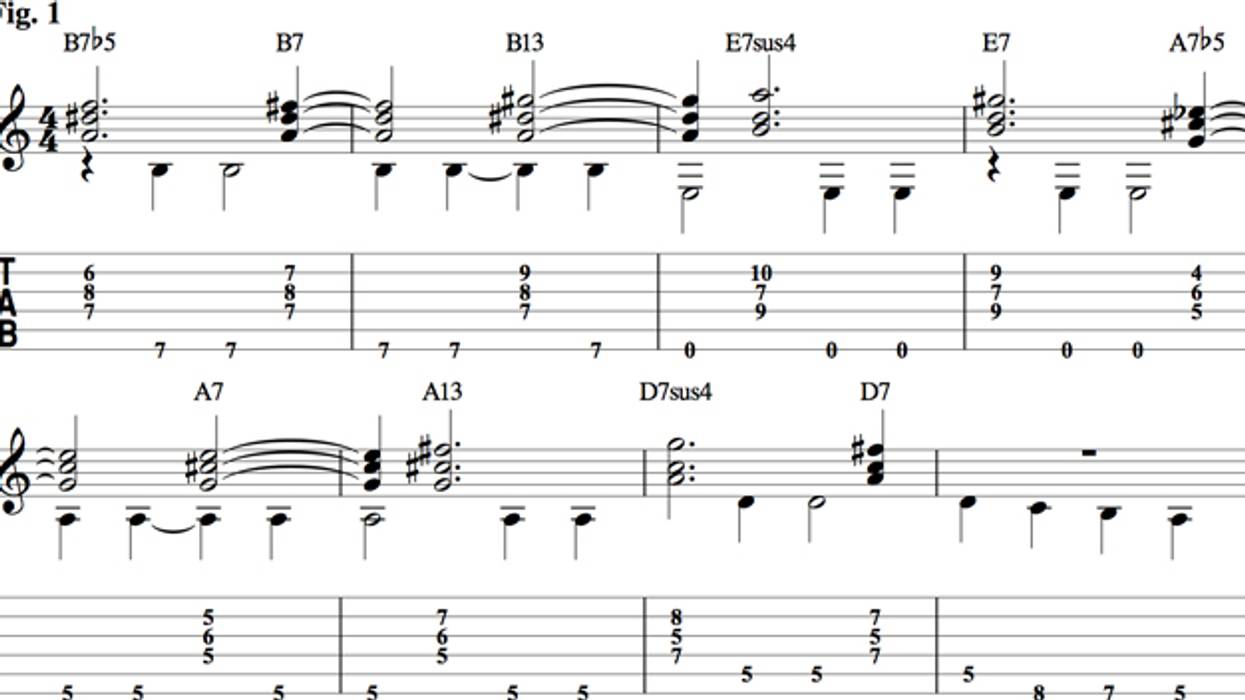
I enjoy using this style when accompanying a singer or horn player in a duo setting. It’s a nice change of pace from the usual roles of walking bass lines and comping à la Joe Pass, or playing a chord on every beat to mimic Freddie Green’s big-band rhythm sound.