Chops: Beginner
Theory: Beginner
Lesson Overview:
• Learn about the four elements of your right-hand technique.
• Understand how “tilt” creates a fatter tone.
• Add speed, sound, and nuance to your picking.
Too often, guitarists are so eager to get to the music that they gloss over the basics of technical form. Virtuosi in the classical style know that their level is dependent on their right-hand setup and pay vigilant attention to its components. A “classical” right-hand setup is dependent on four things: position, angle, height, and tilt.
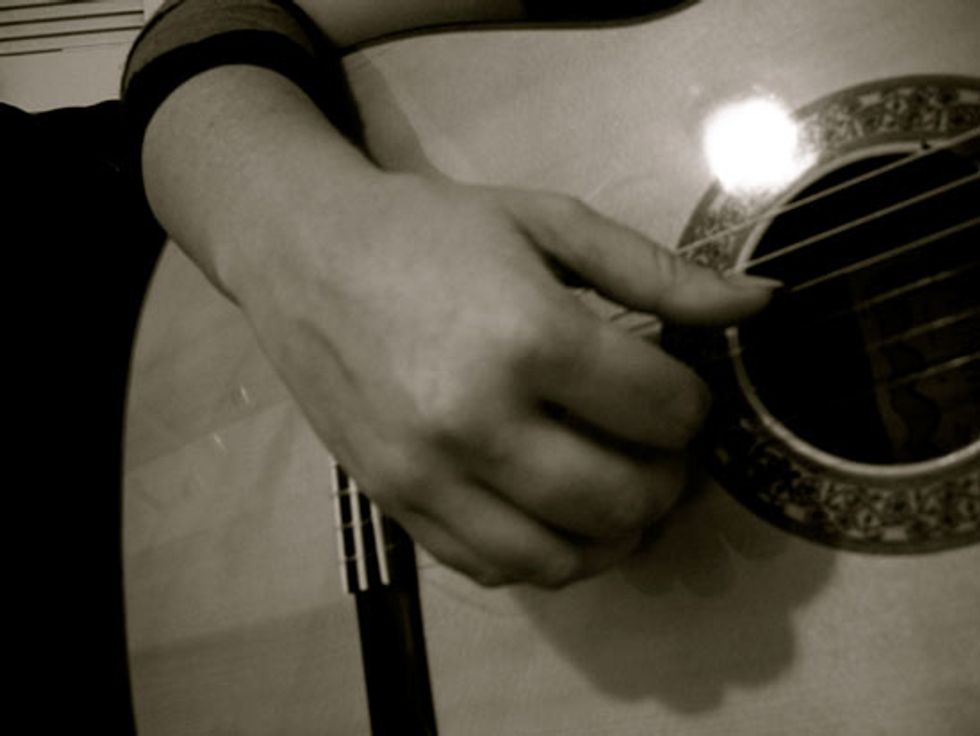
“Position” refers to the way your arm rests on the body of the guitar and the way your hand approaches the strings. Classical guitarists who sit with the guitar on the left leg rest their right arms on the instrument just below the elbow at the base of the forearm. Guitarists who sit with the guitar on their right leg or stand rest their right arm on the body of the guitar at the elbow.
In both positions, the hand should “come over” the strings, meaning that the large knuckle of each finger should be over the string it is playing. You want your fingers to pluck the strings on a diagonal—not straight-on, which would be perpendicular (this produces a thin tone), and not parallel (which produces a muffled, muddy tone). Make sure to keep your thumb on the outside of the fingers.
“Angle” refers to the position of your wrist. Many fingerstyle and old-school classical players make the mistake of “crooking” their wrist—putting undue pressure on this joint and limiting technical power. Your right arm should be positioned with a “straight wrist,” meaning that you could draw a straight line from your elbow to your middle finger.
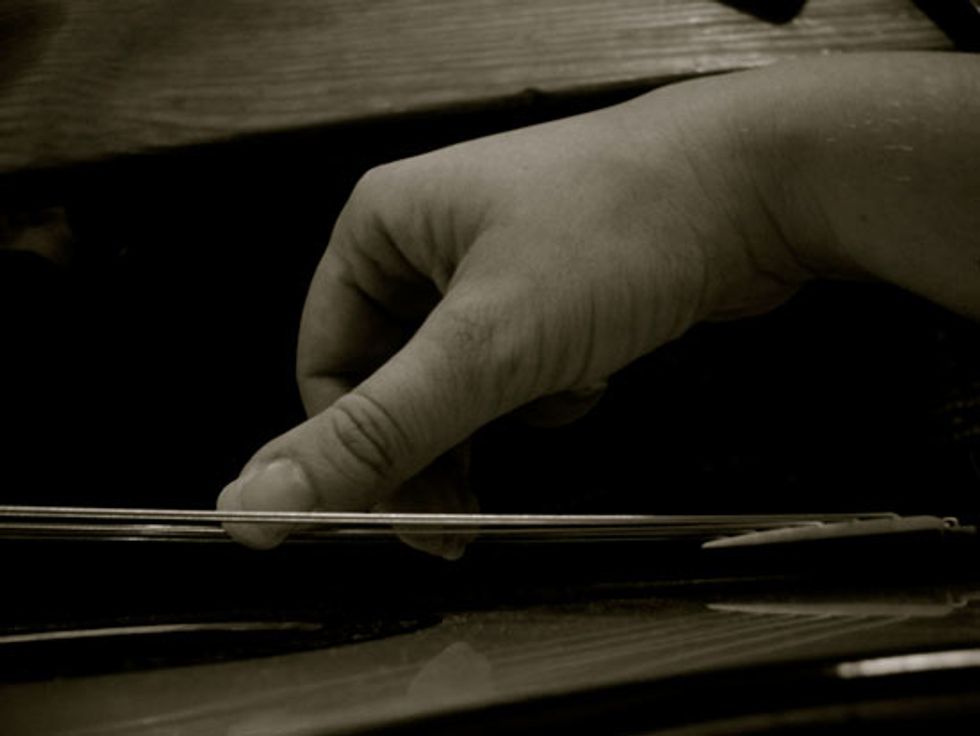
The “height” of your wrist gives your technique some leverage. Push your wrist out so that it is level with or just a bit higher than your big knuckle joint. Later, when you’re playing, this will allow you to pull your fingers into your hand from the big knuckle joint—as if you’re making a fist. When palm muting, you can deviate from this position, but return to it. Make the higher wrist your basic position and flatten only when you need to.
“Tilt” evens out the strength of your fingers and can fatten up your tone. Because the thumb side of the hand is heavier, your tendency will be to lean your hand and arm towards the thumb, but don’t. Lean slightly away from the thumb to support your weaker fingers—when they’re supported, they’ll reward you with a fat, round sound!
With these parameters in mind, take a look at Fig. 1 and Fig. 2 and then give it a try.
• Place your right arm on the body of the guitar and let your hand fall into the position of a loose fist, resting thumb (p) on the 4th string, index (i) on the 3rd, middle (m) on the 2nd, and ring (a) on the 1st.
• Go through your checklist: Are your fingers “over” the strings? Are they contacting the strings at a diagonal? Is your thumb to the side? What about your angle, height, and tilt?
Now, let’s practice. Classical guitarists will caution you not to rush at this point. Resist the urge to immediately try out all of your hardest licks. Instead try this:
1. Practice getting in and out of position. Do it hundreds of times until it becomes second nature.
2. When you feel confident, practice using your thumb and fingers separately. Leave your fingers on the treble strings for balance and play your thumb on the 4th string, allowing it to “follow through” as dead weight and rest on your index finger after playing the string.
3. Leave your thumb on the 4th string and play your fingers together. Let the primary motion come from your big knuckles and aim for the back of your palm. You’ll feel as though you’re playing “back” into your hand instead of “up,” and your hand will look like a loose fist after you follow through.
Remember: Patience and attention to form are the first secrets to building a great classical right-hand technique. Go through the steps every day and slowly work the concepts into your overall playing.
 Guitarist Kim Perlak has been recognized as an inspired voice in new American music. Her playing was praised by The Austin-American Statesman as, “thoughtful, enchanting, vivid … a songwriter’s circle without the lyrics.” Her performances of new classical works and collaborations with jazz and traditional players have been featured on National Public Radio and on CBS’ Sunday Morning, at the Yale Guitar Extravaganza and the National Guitar Workshop, and in concert halls across the nation. For more information, visit kimperlak.com.

