Effects Taurus Amp Announces the Vandall-500 The Polish-made hybrid bass amp rocks out 500W and includes both solid-state and tube preamps. News Dec 27, 2018
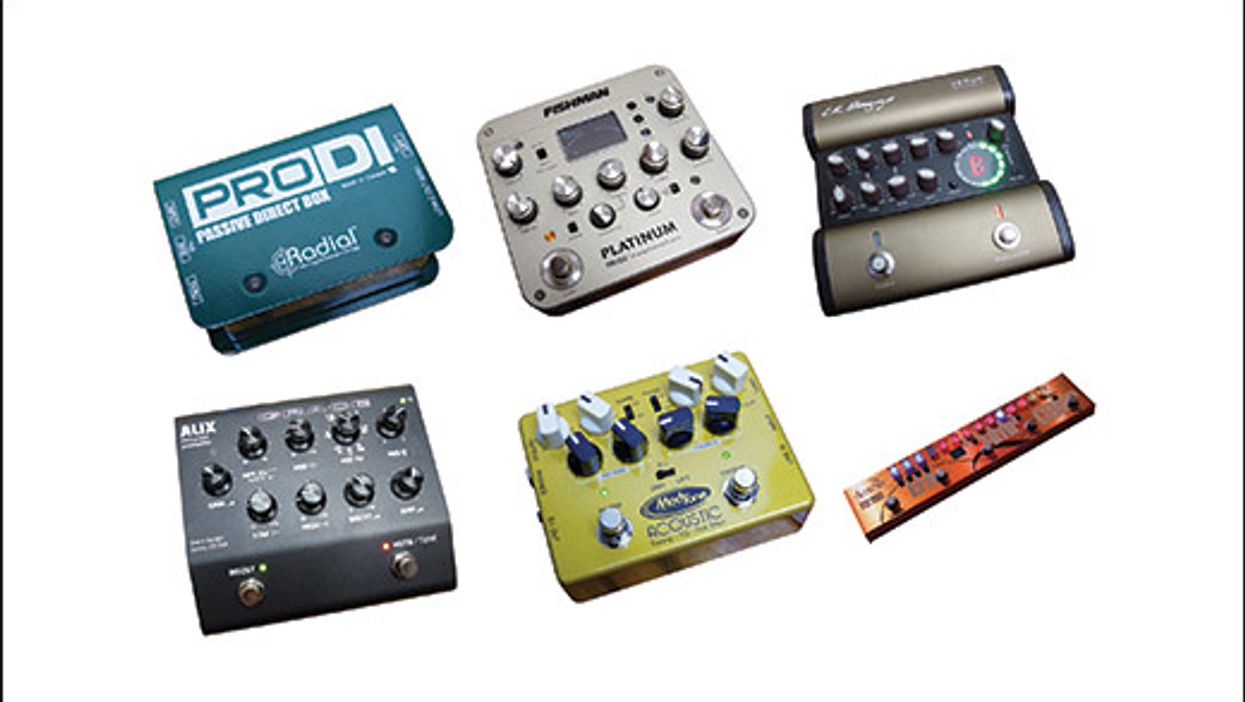
Effects The 411 on Acoustic Guitar DIs Crawl under the hood of the magic boxes that make you sound awesome through club PAs, venue mixing boards, and studio consoles. Mark Marshall Aug 14, 2018
Bass TC Electronic SpectraDrive Review A true multi-tool for bassists that packs all the essentials for performance and practice. David Abdo Aug 10, 2018
Gear Universal Audio OX Review A direct-recording tool that’s 50 percent load box, 50 percent modeler, and 100 percent awesome. Joe Gore Mar 26, 2018
Effects Agave Audio Introduces the Loadout A passive direct box engineered to give musicians increased flexibility when recording guitar. News Sep 30, 2015
Gear Quick Hit: Mesa/Boogie CabClone Record or gig with your favorite amp—minus the cabinet and mic. Joe Gore Apr 26, 2015
Look Ma, No Speakers! How to record a cranked-up sound without disturbing the peace. Steve Ouimette Jun 14, 2008