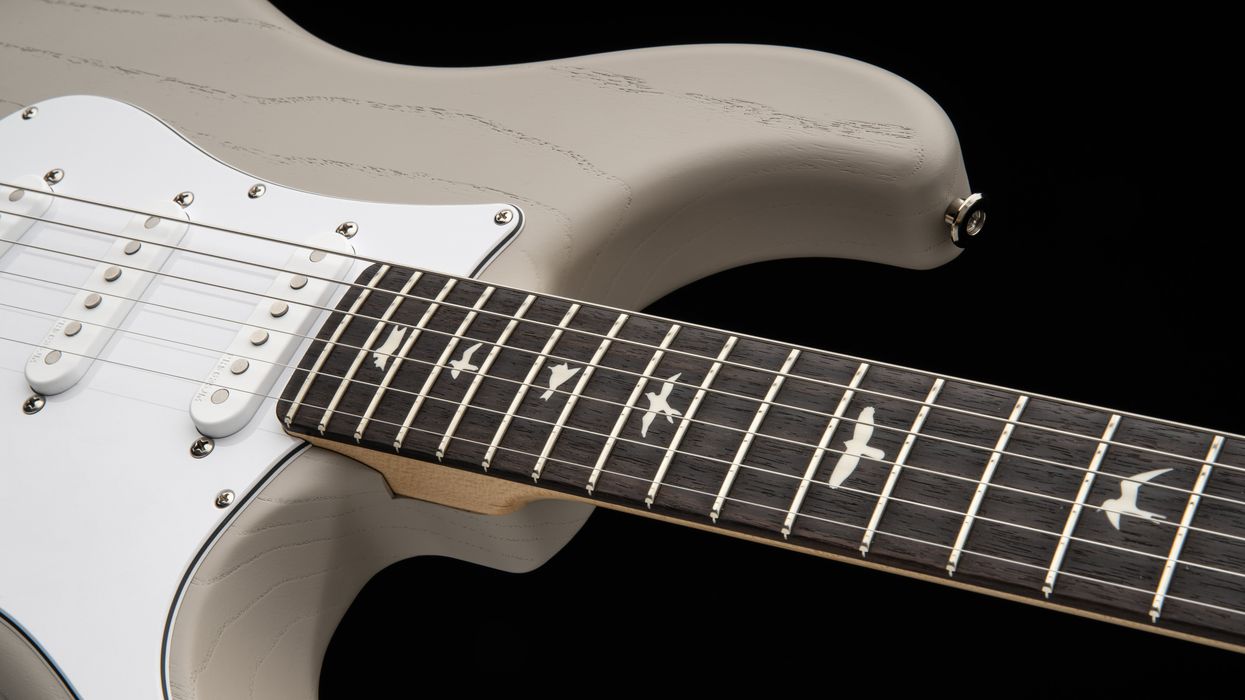
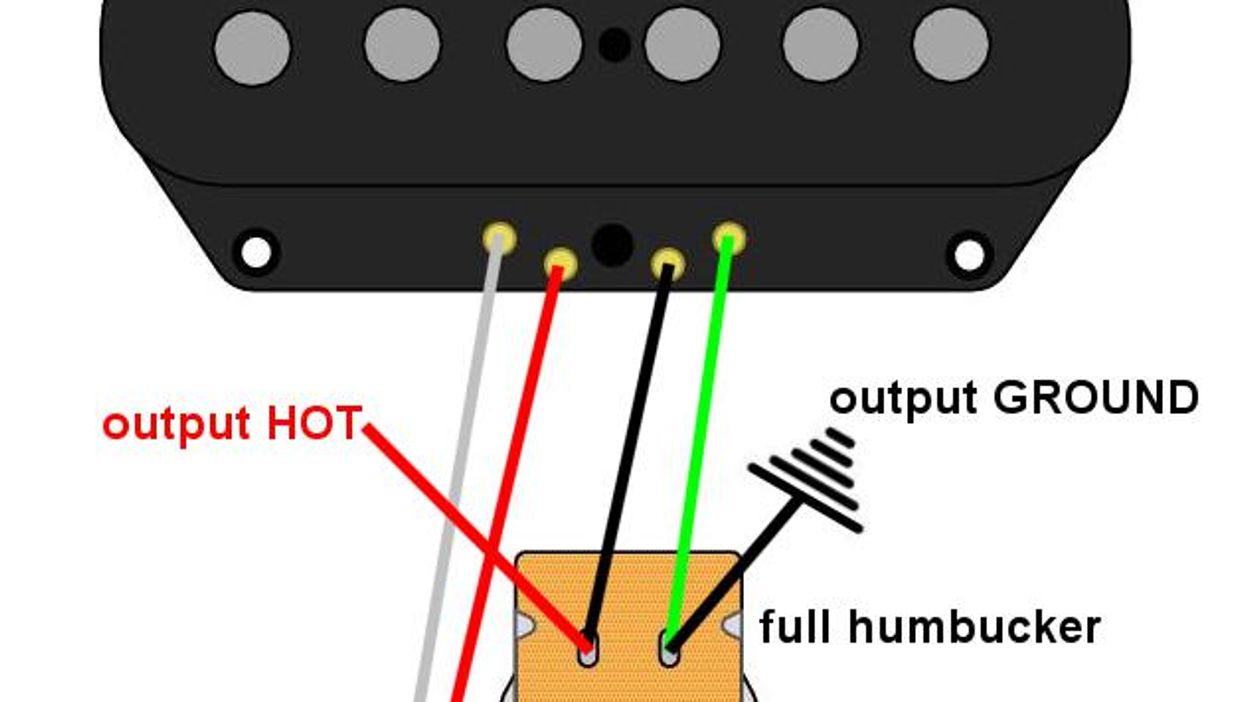
Photo courtesy of singlecoil.comMod Garage Mod Garage: The Alternative Brent Mason Telecaster Wiring Dirk WackerJul 22, 2022
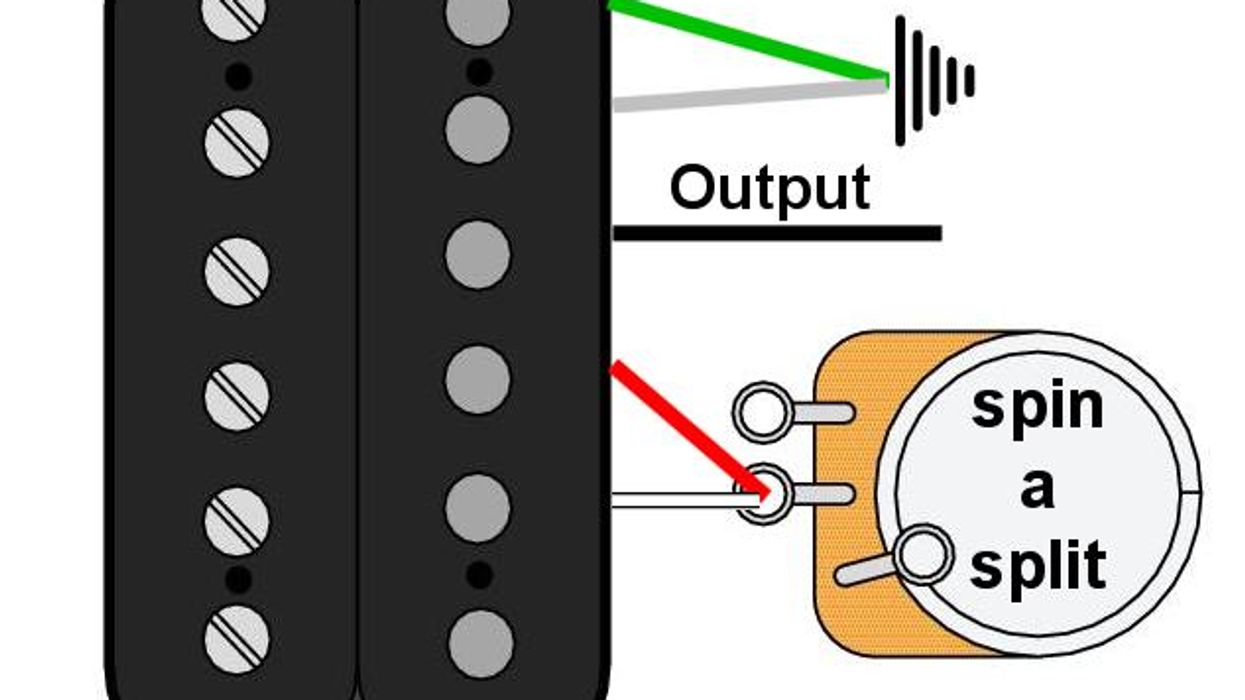
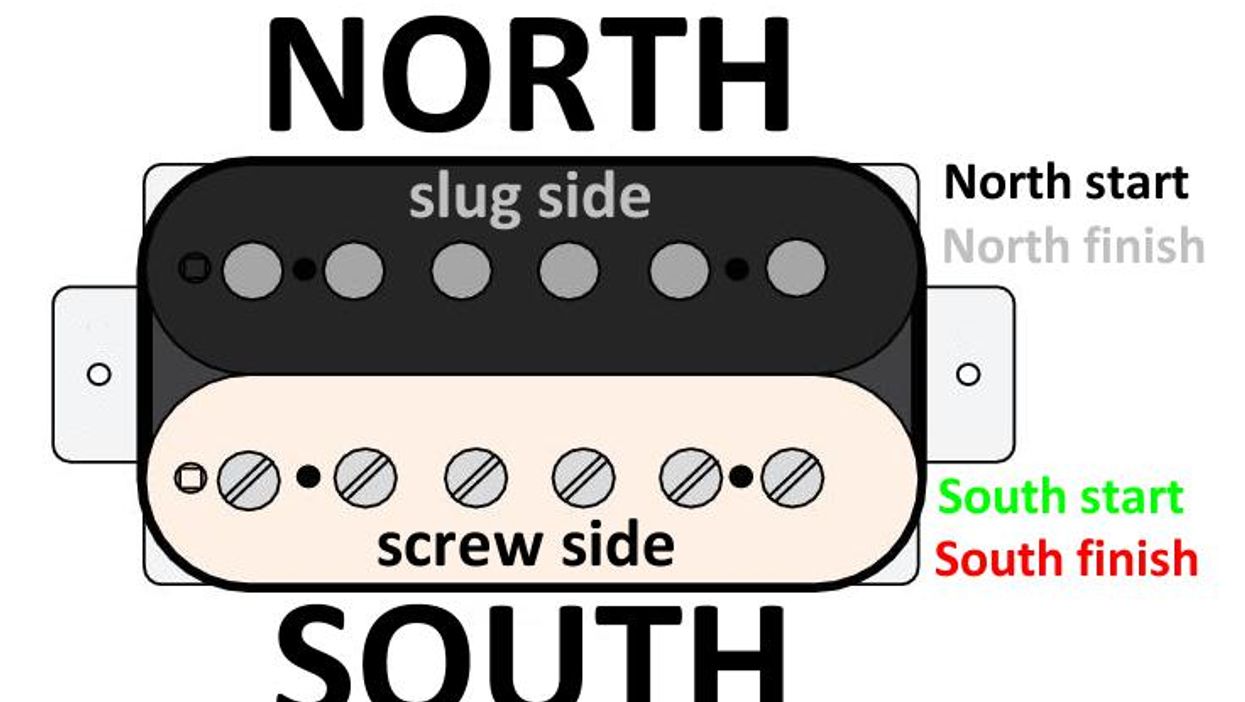
Mod Garage Tapping and Splitting: What’s the Difference? You can split a humbucker to the north coil or south coil, or you can access a tapping point in the middle of a single-coil pickup. Learn what this means, and how to do it.Dirk WackerAug 20, 2021
Mod Garage Multi-Phase Switching—The Final Frontier We've discussed full out-of-phase and half out-of-phase pickup switching. Here's a wiring for those who want it all in one switch.Dirk WackerJun 25, 2021
DIY How to Ground Passive Guitar (and Bass) Circuits, Pt. 1 Get out your DMM, and let's explore the simple ways to ground Strats, Teles, and Les Pauls. The good news is, there is no such thing as overgrounding.Dirk WackerApr 02, 2021
Mod Garage Ultra-Flexible Wiring for Your Duo-Sonic Four rad add-ons and a whopping six pickup combinations for the Fender offset.Dirk WackerJan 15, 2021
Mod Garage How to Get the Most out of Hum-Sing-Hum Wiring This circuit lets you get HSH and SSS-like tones from a single guitar.Dirk WackerSep 11, 2020
Mod Garage Mod Garage: Working with Wire What are the best tools and practices for wiring a guitar? And what’s up with “push-back” wire? Glad you asked.Dirk WackerDec 28, 2018
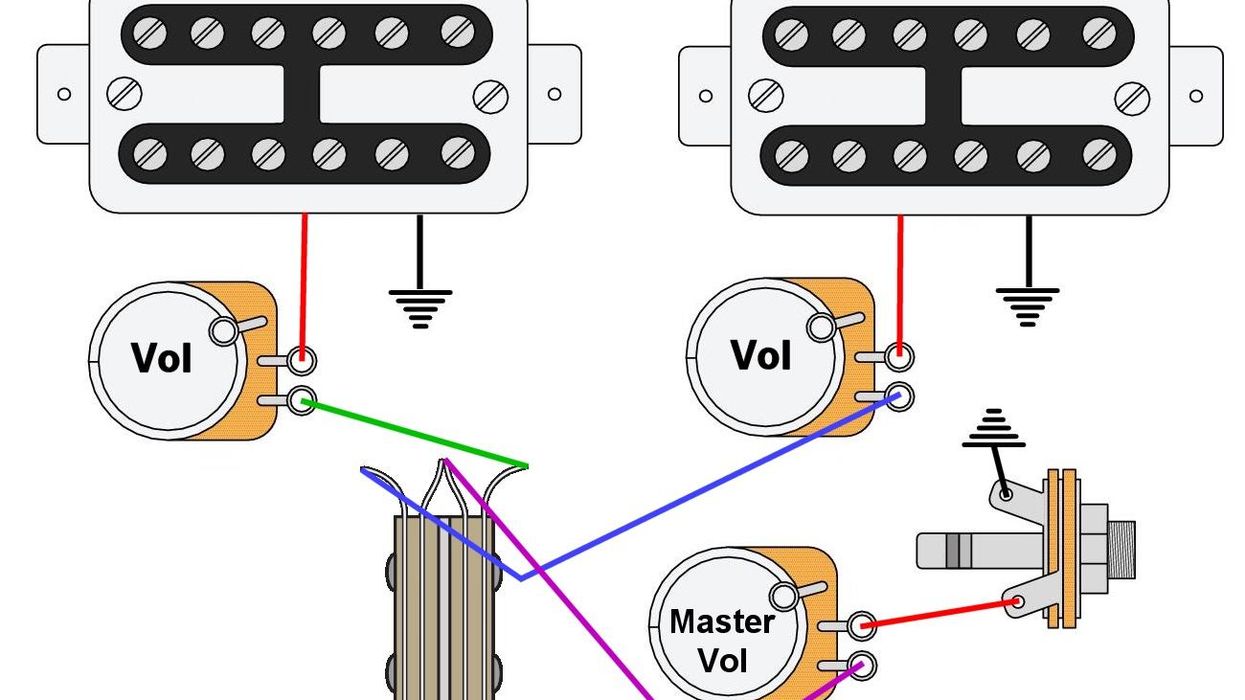
Mod Garage Mod Garage: Strat-PRS Crossover Wiring Want a vast sonic palette at your fingertips? Here’s a way to get 10 unique sounds from one guitar.Dirk WackerAug 26, 2016