My last couple of columns covered home-recording basics—the gear your need, and tips on using it for the first time. This month we’ll start exploring one of the first skills you’ll need after recording yourself: audio editing.
There are many reasons to carve up recordings once you’ve captured them. You may want to rearrange the music’s structure, or trim a long, meandering performance down to a short, punchy one. And you’ll almost certainly want to repair embarrassing mistakes in otherwise good performances.
Retro razorblades. Audio editing has been around since the first tape recorders appeared early last century. Engineers used to use razorblades to remove unwanted bits. (Like in old crime movies, where the fall guy’s phone recording gets doctored: “I swear on my mother’s life—I did [snip] kill that woman!”) You also hear countless razor-blade edits on recordings from the ’60s and ’70s. The Beatles, Beach Boys, and that whole crowd relied on edits for “impossible” transitions. Steely Dan was known for constructing songs from many short snippets. And Miles Davis producer Teo Macero routinely edited long jam sessions down to their thrilling highlights.
We can debate the relative merits of analog and digital till the cyber-cows come home, but here the winner is clear: Digital editing is far more easy and flexible than analog editing.
See it, snip it. In the analog days, you’d find the best splice point by slowly rolling the tape over the deck’s playback head. But digital recording provides an invaluable visual aid: the waveform, a graphic representation of your recording.
Let’s see how waveforms work and what they can tell us. Image 1 shows a typical waveform for a guitar recording.
The blue part of the image is the waveform, as displayed in my Logic Pro DAW. The precise appearance varies from DAW to DAW, but the basics are always the same. The yellow is my annotation. The waveform and background colors have no significance—most DAWs let you pick colors, which can aid visual organization.
The further the waveform extends from the centerline, the louder the sound. Did you notice that the waveform looks like a bunch of right-facing isosceles triangles? The flat edge on the left represents the start of each note or chord. With guitar, the attack (that is, the beginning of each note or chord) is almost always the loudest part of the sound. From that point, the volume decays (fades away).
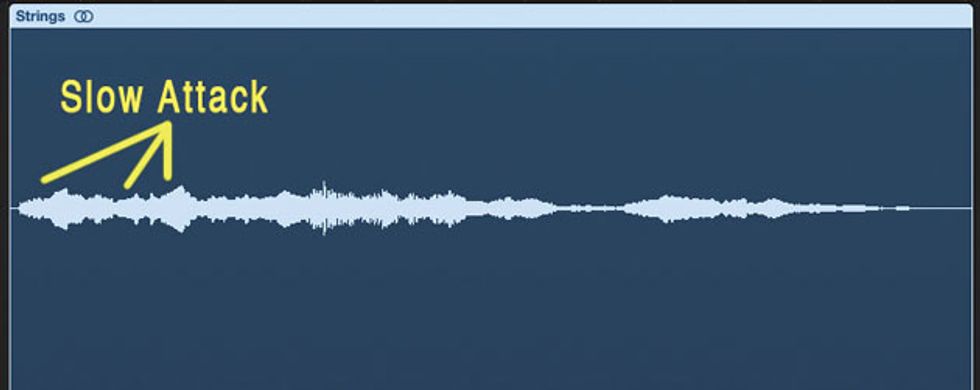
Compare the appearance to a bowed string sound [Image 2], where notes reach their maximum volume after the initial attack.
Image 2
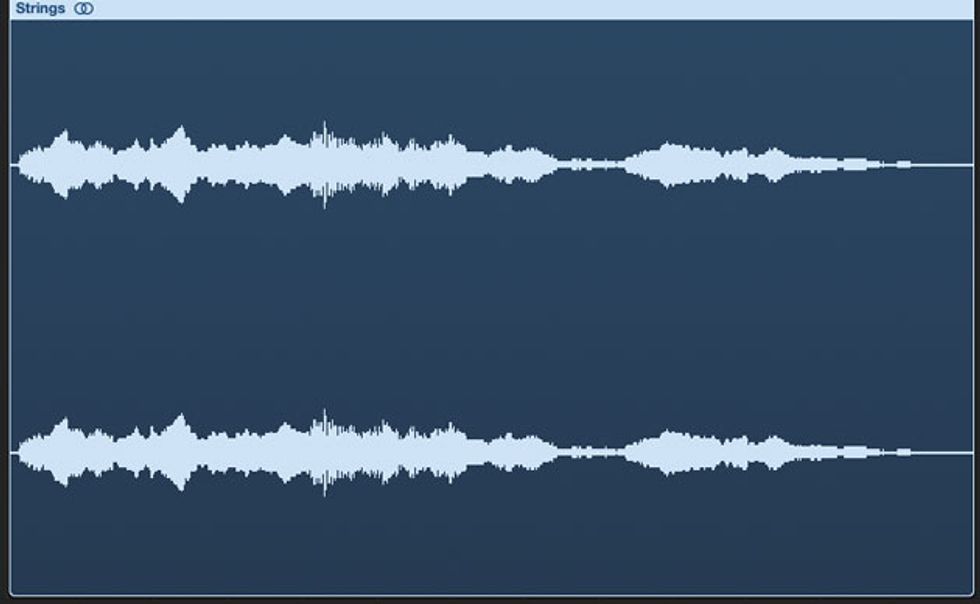
Sometimes you see two parallel waveforms in the same box. This simply means it’s a stereo recording. Image 3 depicts a similar string recording, this time in stereo.
Image 3
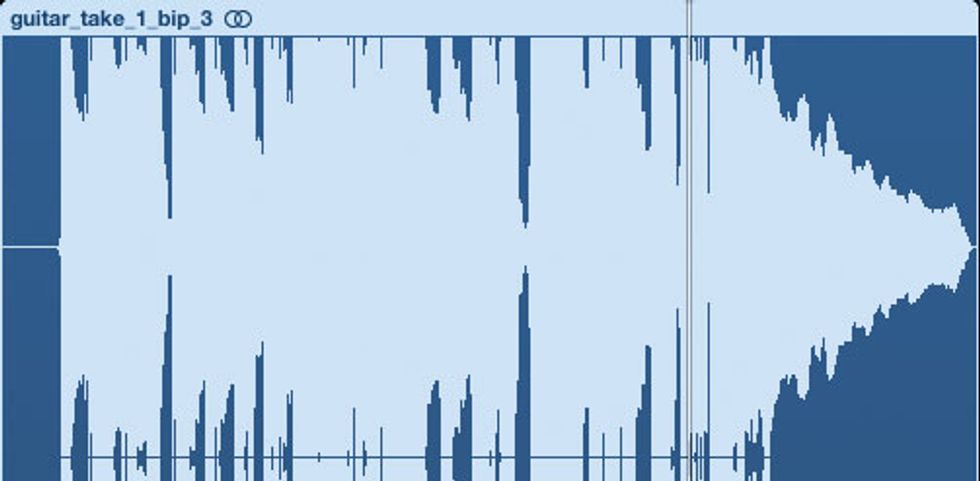
Knowing where the attack comes is crucial because the attack point is almost always the best place to cut and splice recordings. Note that DAWs let you zoom in and out on waveforms, which means the distance from the centerline is relative, not absolute. If I zoom in on the image above, it may appear louder, but it isn’t. However, when the tops and bottoms of the waveform get squashed flat, that means digital distortion. If anything like Image 4 appears while you’re recording, don’t bother finishing the take—it’s screwed. Lower your interface’s output level and start over.
Image 4
Mind you, we haven’t even heard any sounds yet. But see how much info you can glean just by looking at waveforms?
Dude, I suck. Let’s turn to the number one rationale for editing: fixing dumb-ass mistakes! Clip 1 is a brief nylon-string guitar recording I made. It sounds okay for the first 10 seconds, but holy cannoli, that’s a nasty flub near the end. (I suck.)
Image 5 shows the waveform for the performance, with the offending notes inside a yellow box of shame. They’re not just wrong—they’re wrong and loud.
Image 5
I replayed the music and managed not to repeat the mistake. But I preferred the feel of the first performance, so I stole the yellow-box notes from the second take and spliced them into take 1. That way I could keep most of the original performance. (This was a judgment call. A good, complete performance usually sounds better than a cobbled-together one, and sometimes it is better to just play everything again.)
Clip 2 is the same performance after the repair.
While I was at it, I probably should have also nixed the noise under the very last chord. (As the chord fades, you can hear my headphone cable bump against the back of the guitar.) But as noted above, I suck.
Listening with your eyes. Producers and engineers sometimes use the phrase “listening with your eyes,” and it’s rarely a good thing. Listening with your eyes means not trusting your ears and instincts. If a performance sounds great, but you change or discard it because of visual input (like a meter indicating overload, even though everything sounds great), you’re guilty of the crime.
But learning to read waveforms is a positive example of listening with your eyes. It can help you evaluate recordings in process before wasting too much time, compare multiple takes, and, most important, perform fast, effective edits.Next time around, we’ll walk through the editing process step by surprisingly easy step. Until then, meditate on these words: The attack point is almost always the best place to cut and splice recordings. (Yeah, I said that already, but it bears repeating.)










![Rig Rundown: Russian Circles’ Mike Sullivan [2025]](https://www.premierguitar.com/media-library/youtube.jpg?id=62303631&width=1245&height=700&quality=70&coordinates=0%2C0%2C0%2C0)

![Rig Rundown: AFI [2025]](https://www.premierguitar.com/media-library/youtube.jpg?id=62064741&width=1245&height=700&quality=70&coordinates=0%2C0%2C0%2C0)

