Behind every radio hit is a group of guitarists who've created ear-catching parts. Check out these tips and tricks used by some of Music City’s most in-demand sidemen.
Intermediate
Beginner
• Learn how to use "box" patterns to create licks in different keys.
• Understand how to use open-string drones to create signature parts.
• Hone your ability to play melodic slide-guitar textures.
I feel a little embarrassed when people ask me about my guitar influences. I can't claim expertise of Hendrix, I haven't spent hours woodshedding Eric Johnson, and I couldn't tell you the first thing about how to play like David Gilmour. My influences are more behind the scenes, lurking in the shadows of the music industry. They don't have big names, but they are monster players. I'm talking about the number one, most honest influence on my guitar playing: Nashville session guitarists.
In case you don't know, Nashville session guitarists are the cream of the crop—they have to be. Their job is to listen to a song once, write a chart for it during that single listen, step out onto the tracking room floor and simultaneously create, react, and execute a guitar part at a radio-perfect level in one take. I've figured out some tricks by studying the work of musical sharpshooters like J.T. Corenflos, Kenny Greenberg, and Tom Bukovac, and now I get to apply it in my own career when I'm called in for a session. Now, let's steal some tricks.
“Kiss You in the Morning" Box
An important thing to remember throughout this lesson is that the goal is to sound perfect. A dead note on your guitar solo should not be the reason that one of your fellow session players is late to pick up his daughter, so this is no time for finger tapping or seven-fret stretches. I call this the "Kiss You in the Morning" box because it's similar to the signature lick in Michael Ray's song of the same name.
You want the song to sound good, which means you need to sound comfortable. That's why this pattern (Ex. 1) is a great home base for your chord-based riffing. This is a segment of a diagonal major pentatonic scale that only uses your first and third fretting-hand fingers. You don't have to stretch or remember complicated patterns, and it's almost impossible to sound bad here. Place your first finger on the chord's root, which falls on either the low 6th or 5th string, and slide your third finger up two frets to access the rest of the pentatonic notes. It's a closed shape, so you can move it all over the fretboard to whatever key or chord you need, which comes in handy when you're scanning down a Nashville number-style chart in real time and having to come up with a hook or rhythmic motif.
The “All About Tonight" Box
This one is a little tougher, but more rewarding. I could do an entire session just using this box and rearranging the notes in different ways to make my melodies and textures fit the mood of the song. You can hear hints of this pattern in Blake Shelton's "All About Tonight." This is a natural extension to the previous example, but in Ex. 2 we start to introduce double-stops (playing two notes at a time). Low notes on the lower strings sound thick on their own, but as you move up the neck it's a good idea to start using double-stops if you want to keep the guitar sounding thick. In this box, your first finger is always in charge of the same fret, and your third finger oversees hammer-ons two frets higher. To play the double-stops I'm talking about, barre the 5th and 4th strings with your first finger and pick them. Then hammer on the 5th string with your third finger. Boom. You can do the same trick with different string sets.
Open for Business
You've got some lead chops built up, but somebody will be singing for 90 percent of the song, so what do you do? In keeping with our rule that we want our playing to sound comfortable, the answer is open chords. Full barre chords give you a lot of strings to keep track of, and if your dynamics, sustain, and muting aren't spot on, then the producer is going to have to hire someone to redo your parts after you leave, and that doesn't bode well for your session career.
Throw on a capo because only five keys are generally acceptable for playing guitar in a session: G, D, E, C, and A. Is the song in Db? Put a capo on the 1st fret and play in C. How about F#? Place a capo on the 2nd fret and play in E. Even if a song is in A, 95 percent of the time the acoustic guitar player will opt to play with a capo on the 2nd fret so he or she can move around comfortably in the key of G. Ex. 3 shows some of the special open chords that session players use all the time.
Palm-Muting Verses
Wide-open chords aren't everything, though. Songs need to have structure and flow, and the band members need to be on the same page about where the song is going. If you watch a session with guitarists Derek Wells and Jerry McPherson both playing guitar, they aren't clashing. They both know how energetic the song needs to be at any given moment. Chances are you'll nail it if you play the verses a little lower in energy and the choruses a little higher in energy. You can palm-mute the lowest two strings of an open chord, or you can palm-mute a power chord, or you can palm-mute thirds that fit inside of the chord. Check out Ex. 4 for an example. Any of those routes will work to get you from the intro to the chorus. And when it comes time to do a "fill" at the end of the measure or progression, all you really need to do is unmute what you're already doing! Fish in a barrel.
My Kinda Drones
"Box" playing is great, but I'm sure you want to have more than just boxes in your toolkit. One of the best tricks for coming up with melodies that don't sound boxy is by using what I call "My Kinda Party" drone lines. The signature lick in Jason Aldean's song, "My Kinda Party," is a wonderful example of this. Come up with a melody and play the whole thing on the 2nd string. Don't get too complicated, and don't make it too fast. Make it a nursery rhyme, a simple, hummable jingle that a drunk Bonnaroo crowd could sing back to you.
To allow the 1st string to ring out as you move along the neck, you need to fret the notes on the 2nd string using the very end of your fingertips. Now pick through both the top two strings while sliding from note to note (Ex. 5). This adds thickness and texture to the melody and helps make it sound like music, so someone like super-producer Justin Niebank doesn't have to spend time adding effects to your guitar to fill out the mix. As with the open chords, make sure you have the capo in the right spot so the open 1st string fits the song's key.
Get Low
The opposite of that approach is using a technique found in Luke Bryan's tune, "We Rode in Trucks." With this trick, you place the root of the chord on one of the lower three strings and build your melody on the string above it (Ex. 6). My favorite application of this is when you hammer-on to a 3, which puts your hand right in the "All About Tonight" box we talked about earlier if you need to launch into a solo. This trick can only be done if one or more of the low open strings works with the song's key, so you'll have to do some quick mental math and capo accordingly.
Swell into It
This technique is one of the physically easiest to perform, but requires some mental energy to get right. Sometimes the song needs an ambient volume swell to hold things together over chord changes, and this requires choosing your notes carefully. Let's say the progression is Em–C–G–D, with two chords per measure. Look for the notes that both chords share in each measure. Em and C both share E and G notes; G and D both share D notes.
That's the safe route, but you can also swell into notes or pairs of notes that challenge the chord a little bit and make an extension out of it. Swelling into a D over the Em and C turns them into Em7 and Cadd9, respectively, both very cool sounds. And G to D is a pretty strong chord change in this key, so you'll probably want to stick the landing and end up on chord tones here. To change things up from just a D note you can swell in a pre-bent G note and let it down to an F# when the D chord comes in. Or do the same thing, but pre-bend a B note and let it fall to an A (Ex. 7). You can nail this approach if you know your chord tones. Note: You'll need a good amount of delay and reverb to make the most of your swells. Most players do this with a volume pedal, but with the right guitar—a Strat, for example—you can also accomplish this manually.
High Extensions
Now that we're in the mindset of thinking about what our notes do to the chords we're playing over, adding higher extensions can introduce complexity and texture to a song. I have fond memories of sitting with a friend in high school, both of us holding acoustic guitars, and playing different triads and double-stops over each other's open chord strums—just to hear how one person's triad could affect the other person's chord.
The idea is that you'd pick notes that might not be within the basic triad and use these additions to alter the song's principle chords. If a bass player plays a C, and the acoustic guitar plays an open C chord, and the other electric guitarist plays a C power chord, but you play a B and D double-stop high on the fretboard you just made the entire band sound like a Cmaj9 chord, which is really pretty sounding. If you pick G and Bb, then you made the band sound like a C7 chord, which is bluesy and sarcastic sounding. Session players know what note extensions to add to chords, what these extensions will sound like, and when it's appropriate to use them. Ex. 8 illustrates how to use this trick over a basic progression.
Simple Slidin'
On most sessions, slide is used for texture and not for Derek Trucks- or Sonny Landreth-inspired shredding, so it's mostly limited to chord tones and a couple of simple lines. It is a very cool color, though, and it's well worth learning how to navigate a melody with a slide on your pinky. Slide sounds more like a human vocal than fretted notes, so this technique can really lend itself to making memorable, catchy, singable hooks. This is part of the reason guitarist Rob McNelley is on so many records—he's able to really make slide sing. Just be very careful about not letting strings ring unless you want them to. To come up with a simple, catchy, single-note slide line that soars over the arrangement, tap into the same melody-creating brain space you used for the "My Kinda Party" example, as well as the chord knowledge required for swells and extensions. Chord tones are always safe, extensions can be really cool, and make sure you stick the landing (Ex. 9).
Dot … Dot … Dot
You made it all the way to Ex. 10, so give your brain a break and let a pedal do all the work. Delay is a powerful effect, and when you sync that delay to the song tempo, the pedal can play notes for you. If you see guitarist Justin Ostrander doing something simple, chances are there's a timed delay happening to carry the simplicity. A dotted-eighth is equal to three 16th-notes, and a dotted-eighth delay means once you play a note, that note will come around again three 16th-notes later. And if the repeats are turned up, it'll keep repeating every three 16th-notes to create a cool syncopated feel (Ex. 10).
If you play something completely straight against the syncopated pattern the delay will be creating, the delay fills in the notes between what you're playing and makes an otherwise boring figure sound incredibly interesting. To make this trick work, you'll need a delay with programmable or tap tempo. For best results, tap the tempo for quarter-notes, play eighth-notes, and have the delay set for dotted-eighth-notes.
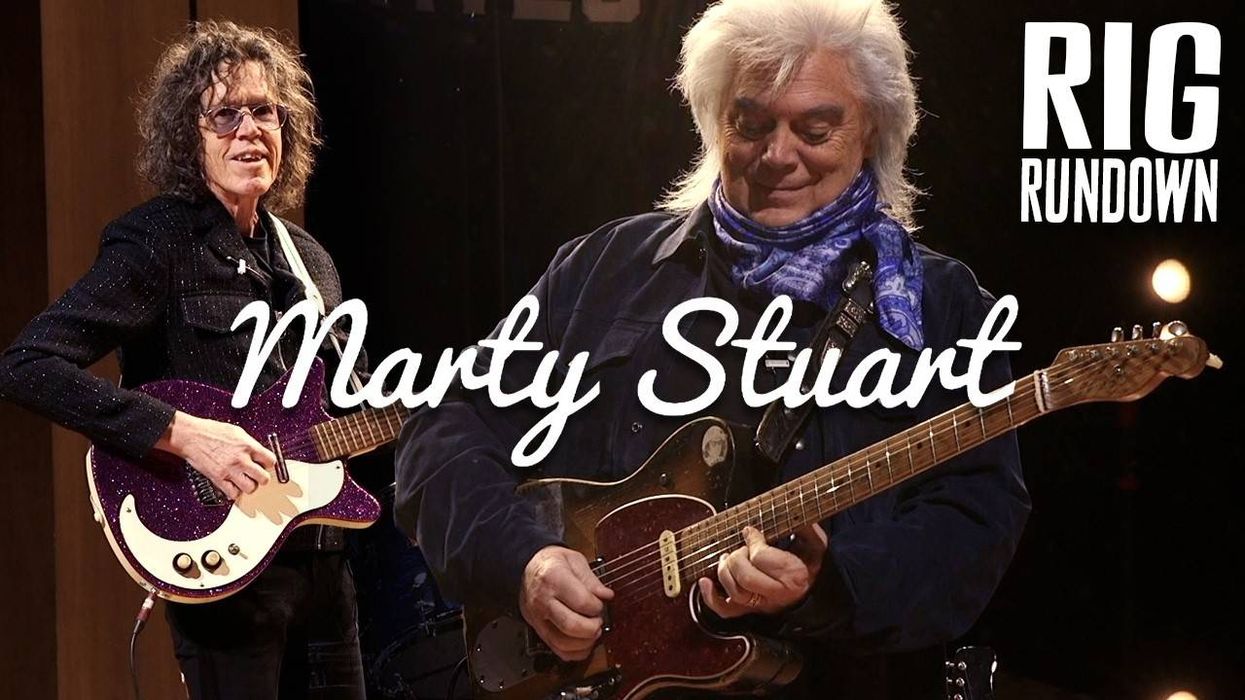
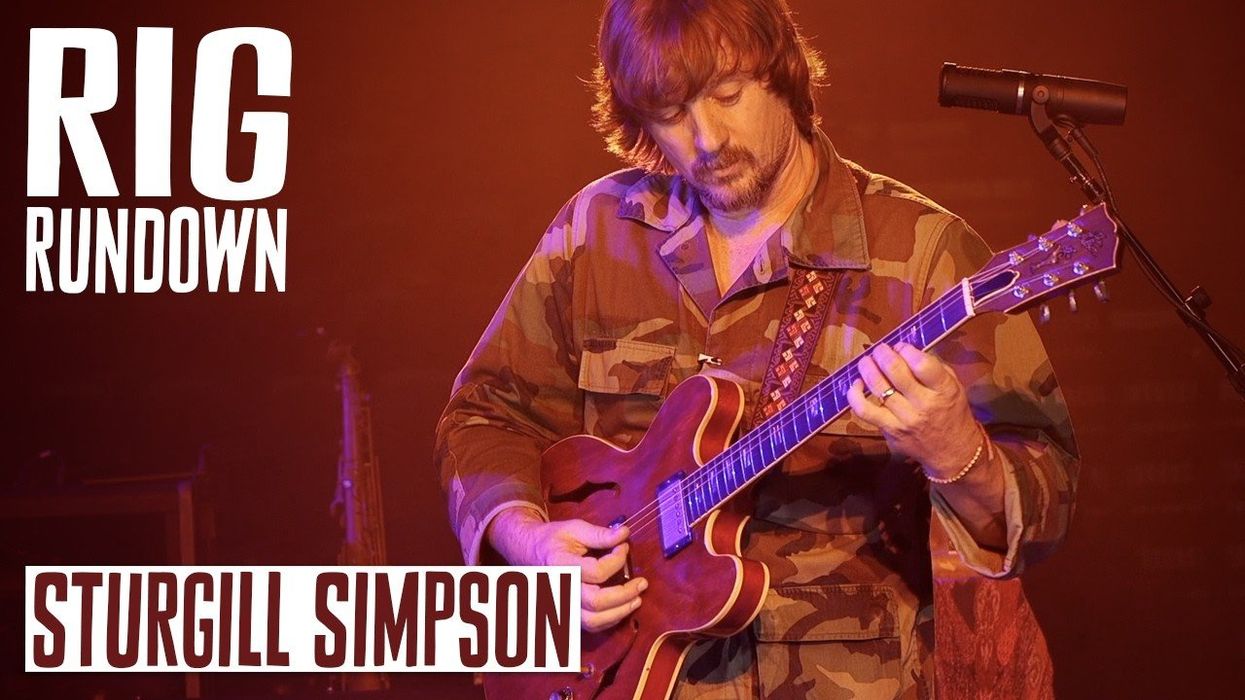
These guitarists stay mostly out of the spotlight, but with the growing world of media they are starting to get a little more exposure with great programs like Premier Guitar's Rig Rundown with Kenny Greenberg (shown below) or Zac Childs' Truetone Lounge episode with Derek Wells.
Videos like these let you inside the world of the pro session player, and are great resources for learning more from the best in the business. Next time you hear some tasty guitar on a radio hit, you'll know it's tasty for a reason and you're one step closer to being the guitarist who gets to play it.
- Everything You Need to Know About the Nashville Number System ... ›
- DIY: How to Convert a Flattop to Nashville Tuning - Premier Guitar ›
- Exploring Nashville Tuning - Premier Guitar ›
- Rig Rundown: Justin Johnson - Premier Guitar ›
- Nashville Session Guitarist for the Stars Kenny Greenberg & His New Album 'Blues For Arash' - Premier Guitar ›
- Derek Wells Rig Rundown - Premier Guitar ›
- How To Be a Work-at-Home Session Guitarist ›
Featuring FET instrument inputs, "Enhance" switch, and innovative input stage, this pedal is designed to solve challenges like poor feel, setting levels, and ease of use.
When entering the world of audio interfaces, Blackstar wanted to offer a solution to musicians that answered many of the much-requested improvements they wanted when using audio interfaces. Through extensive research, we consistently pinpointed three primary challenges encountered by music creators when recording guitar directly through an interface.
- Poor feel and response
- Setting guitar input levels
- Ease of use
The POLAR 2 interface answers all of these challenges and excels beyond those hurdles to provide an incredible all-in-one solution to recording guitar.
Firstly, Polar features FET instrument inputs. The FET inputs give ultra-low noise and high headroom, which gives the recording musician the best sonic foundation for guitar tone, but we didn’t just include FET inputs, we took itone step further with the addition of the “Enhance” switch. When Enhance is switched on the instrument input, it engages a unique circuit that’s been meticulously designed to mimic the input stage of real valve amplifiers—including all its non-linear behaviors and characteristics. The “Enhance” switch restores the touch, the feel, and the response of playing through a real amp.
Secondly, Polar solves the issue with setting levels. Other interfaces often digital clipping due to the dynamic nature of guitar DI signals. With “Enhance” on, POLAR’s innovative input stage will never digitally clip. No more ruined recording takes, no more hassle or confusion around setting the ‘correct’ levels. POLAR allows the musician to drive the interface like the preamp section on a real valve amp.
Recording is made easy with Polar 2. By engaging the “Enhance” feature on the microphone inputs gently lifts the top end of your signal to add just the right amount of air and clarity that sounds great on vocals, acoustic guitars, and more. The microphone preamp has been based off one of the most renowned vintage studio preamps.
POLAR 2’s ultra-low noise and high headroom accommodates for a wide range of microphone and instrument types, empowering the musician to achieve studio-quality recordings in any environment. Included with all POLAR2 units is the POLAR Control app, which allows for fine-tuning of levels, panning, routing. The FET inputs combined with the Enhance switch make it really easy to get an amazing guitar tone. You don’t have to worry about any external hardware, no fancy DI’s—all of that is built right into POLAR.
With its innovative features, impressive headroom (24V), incredibly low noise floor (115db), powerful headphone amps, bus-powered capability, and approachable design, Blackstar’s POLAR 2 is easily the go-to audio interface for anyone that wants to play and record guitar. The POLAR 2 interface was created through the processes of Human-Centred Design, to help create a user-friendly solution to get musicians back to focusing on the most important part: the music.
MAP: $199.99
For more information, please visit blackstaramps.com.
Blackstar POLAR 2 | The USB audio interface designed by guitarists for guitarists
Traveling with a collection of spare essentials—from guitar and mic cables to extension cords, capos, tuners, and maybe even a mini-amp—can be the difference between a show and a night of no-go.
Anyone who’s seen a spy flick or caper movie knows about go bags—the always-packed-and-ready duffles or attachés filled with passports, a few weapons, and cash that’s ready to grab and run with when the hellhounds are on your trail. As guitar players, we also need go bags, but their contents are less dramatic, unless, maybe, you’re playing a Corleone-family wedding.
We need the essentials for gigs in our go bags, and that's somewhat subjective. At one point, for me, that included a bottle of Jameson, but no longer. I guess that’s a way of saying that our priorities change, so over time the contents of our go bags will, too.
Now, I have two go bags: a small one for local gigs or quick weekend runs, and a big, fat, roller-wheel bag for short tours or special event gigs, like album-release shows or festivals. The small bag is actually a silver box covered with stickers, and this is what it has inside: two sets of GHS Boomers .010 strings, a couple picks, a string winder and pointy-nose clippers for string replacements, two guitar cables, an extra clip-on tuner, a couple of 9V batteries, a slide, a capo, and a few 6" guitar pedal cables. If I’m not using a backline, I also tuck in an AmpRX BrownBox. (I’ve clocked 127 volts coming out of the walls in some Nashville clubs.)
The Big Black Bag, as it’s named, carries all of the above and a lot more. Ever been to a gig where an adequate number of mics were promised … and instead there were none? Or where a bandmate forgets a guitar strap or cables? Or the temperature’s pushing into the high 90s and there’s not a stage towel to be found? Those problems and more have fueled the packing of my Big Black Bag. Here’s what’s inside: six guitar cables, a half-dozen 9V batteries, six pedal cables, two guitar straps, an extra TU-3, five stage towels, a paint brush (for improv), four microphone cables, an XLR to RCA adaptor, an acoustic guitar soundhole plug, two rolls of duct tape, two SM58s, two SM57s, my BrownBox, four extension cords, a maraca (’cause why not?), a guitar multi-tool, pointy string-clippers, four sets of GHS Boomers, a wall-socket tester, string winders, capos, slides, two 2' instrument cables (for off-board pedal testing or emergency bypasses), $20, a flashlight, a replacement guitar-to-transmitter cable for my wireless, and several AC power cables should one be missing from an amp or other backline gear. And that doesn’t include the slides, capos, and vibrator I keep in my pedalboard case, along with an Ebow.
“When bandmates have forgotten cables, cords, capos, slides, or picks, I’ve had them covered.”
If that seems excessive … well, I’ve used all of it at one time or another. When bandmates have forgotten cables, cords, capos, slides, or picks, I’ve had them covered. When a PA went down in a funky little room—and I play as many funky little rooms as possible—I was able to plug a mic straight into an amp to finish a show. Mic or cable failures? I’ve had those covered, too, for the band and the house. No juice hitting the amp? Well, the wall tester showed a dead outlet.
I’ve played a lot of small towns where there either isn’t a guitar shop within an hour or simply isn’t a shop at all. And if there is, it usually closes at 5 p.m., just about when we’re getting ready to load into the gig. On co-bills, I’ve also bailed out other bands with cables, slides, capos, and even loaner guitars. ( I enjoy seeing other musicians play my 6-strings, to hear how different they sound on my very familiar gear.) All the times I didn’t have these extras and needed them over the years have taught me to pack like a Boy Scout.
There’s also the voodoo factor, which dictates that if you’re prepared for gear failures, they won’t happen. It’s only when you’re going to be caught off-guard that Baron Samedi sneaks in and fries a transformer or kills a switch in your favorite overdrive.
If you don’t have a go bag, it’s time to put yours together. It doesn’t have to be as extreme as the Big Black Bag, but I suggest you think about its contents carefully. A good go bag helps you keep going as a musician. And as you know, the show must go on—unless it really, absolutely can’t, and that’s sad for all the people you want to make happy, including yourself.
The Xact Tone Solutions chief pedal puzzle solver Barry O'Neal goes over the gear in Caleb Followill's rack and explains all the ins and outs of its configuration to pull off the Can We Please Have Fun tour hitting U.S. arenas this summer and fall.
The author’s PX-6131 model is an example of vintage-guitar evolution that offers nostalgic appeal in the modern world—and echoes of AC/DC’s Malcolm Young.
An old catchphrase among vintage dealers used to run: “All Gretsches are transition models.” While their near-constant evolution was considered confusing, today their development history is better understood. This guitar however is a true transition model, built just as the Jet line was undergoing major changes in late 1961.
It also has a personal connection. A guitarist in the band I toured with in the 1980s played a Jet Firebird from this batch extensively, but later sold it. At a decades-on reunion, it was sorely missed, leading me to obtain this one to provide the same “Great Gretsch Sound,” as the company’s ads trumpeted, and style.
Gretsch’s so-called “Jet Stream” models have been one of the company’s enduring creations. Spurred by Gibson’s 1952 Les Paul, Gretsch replied with a guitar of similar size and layout, but different construction. The single-cutaway Jets appeared in late 1953. Designated as solidbodies in the catalog, they were actually semi-solid, built on a mahogany body hollowed out from above and capped with an arched plywood top. This reduced weight and gave them a different sound and feel.
“Designated as solidbodies in the catalog, they were actually semi-solid, built on a mahogany body hollowed out from above and capped with an arched plywood top.”
By 1955, Gretsch fielded a line of Jets: the black-topped Duo Jet and Western-themed Round-Up were followed by the sparkle-top Silver Jet, the red-over-black Jet Firebird and Western orange 6121 Chet Atkins solidbody. Several sold well through the ’50s, but by the turn of the decade, sales seemed to slump, as with the Les Pauls that inspired them. In 1960–’61, Gibson redesigned the Les Paul into a slim-sculpted double-cutaway. In late ’61, Gretsch restyled the Jet body into a symmetrical double-cutaway, retaining the semi-solid construction while persisting in calling them solidbodies. The new catalog announced: “Out of this world.... Find yourself soaring through musical space and time … the epitome of solidbody construction.” The revised Jet Firebird listed at $325, soon raised to $350. The actual transition occurs in a batch bearing serial numbers in the 420XX series. At the time, Gretsch numbering usually allotted 100 pre-numbered labels to a production-year model, with all Jets lumped into one batch. The label is inside the control cavity; the serial number is also hand-etched onto the back plastic cavity cover.
Jets from 1961 retain the main features of their late-1950s predecessors: twin Filter’Tron humbucking pickups, master volume on the lower cutaway, individual pickup volumes on the lower quarter with the pickup selector and tone switch (aka “mud” switch) on the upper, bass side. The Jet’s evolution happened rapidly, moving through three stages over this one batch. The first 30 to 40 420XX examples are still single-cutaways. By 42043, the double-cut body appears, showing a notable eccentricity: the pickup selection and tone switches arrayed across the upper body in a straight line above the pickups, to the rear of the prior position. Unfortunately, this meant players could easily hit them while picking, inadvertently changing tones in mid song!
Note the chips in the headstock wood—signs of an earlier alteration of the tuning pegs, now restored to vintage spec.
Photo by George Aslaender
Shortly after this Jet Firebird bearing the number 42057 was made, the switch array was moved forward to the upper horn, mounted at an angle. This change appears by 42064, suggesting only around 20 to 30 of these first-style double-cuts exist. Known examples are mostly Duo Jets, with a few Jet Firebirds and a couple of rare Sparkle Jets. These also lack the 1961–’62 standby switch fitted on the lower bout. All came stock with a solid G-logo tailpiece, although Bigsby vibratos were often added. The next Jet batch introduced the top-mounted Burns of London vibrato unit as a stock fitting and an upgrade to gold hardware. While the double-cut body gave the Jets a new, modern look, it apparently did not improve sales. The balance suffered from the upper strap button moving back several inches, but otherwise they felt and sounded pretty much like their predecessors. This model is most associated with AC/DC’s Malcom Young, who powered the band with one right from the beginning, with that particular guitar heavily altered along the way.
The company’s Filter’Tron pickups have always had their own distinctive bark.
Photo by George Aslaender
This 1961 Jet Firebird survives in more original condition. The bridge and tuners previously went missing but have been restored to original. A driver’s license number is etched on the back of the headstock, and chips on the peghead face remain from the tuner alteration. A strap button was added to the heel, giving a better balance point. The playability is excellent and the Filter’Trons offer the classic ring and crunch, accentuated by the chambered body. The neck is slim and round-backed, with a bound-ebony fretboard inlaid in the company “neoclassic” pattern, retaining the original frets. Not being a heavy-handed strummer, the eccentric switch location has never bothered me. While in the early 1960s these pseudo-solidbodies seemed to fade from popularity, for me, this early example of Gretsch “jetting” its way into the 1960s remains a solid favorite.