
Stretch out those fingers and give your pick a rest with these twisted licks.
Advanced
Intermediate
- Strengthen your hammer-ons and pull-offs.
- Build fretting-hand stamina and fluidity.
- Create phrases that flow across bar lines.
Let’s take an in-depth look at how to incorporate legato techniques into your playing. In its most basic form, this is simply using various hammer-ons, pull-offs, and slides—collectively known as slurs—to create a smooth and fluid sound. Many guitarists use this technique to great effect, and Allan Holdsworth, Brett Garsed, Joe Satriani, and Eddie Van Halen are among those who have developed individual approaches to this technique.
They also play very fast and unusual note groupings that don’t have a strict regimented rhythm, which creates the effect of playing “across the beat.” Check out the legato lines on the classic Van Halen track “Drop Dead Legs.”
Drop Dead Legs (2015 Remaster)
Joe Satriani and Richie Kotzen have another approach to the technique, where they use diatonic lines based around three-note-per-string scale patterns. Satriani often plays shorts spurts of legato with long held notes, once again playing over the beat. Some great examples of this can be herd on “Flying in a Blue Dream.” Kotzen has a very strong fretting hand, and in addition to his scale-based lines, he uses his legato technique to play “outside” phrases and arpeggios.
Joe Satriani "Flying In A Blue Dream" At: Guitar Center
To my mind one of the best legato ambassadors is Brett Garsed, who uses the technique nearly exclusively. In conjunction with some hybrid picking, his legato fretwork produces a very full, rich sound. This approach takes a lot of dedication and discipline. Check out this video below of a solo Garsed performed in 1986 when he was only 23!
Brett Garsed Solo Live 1986
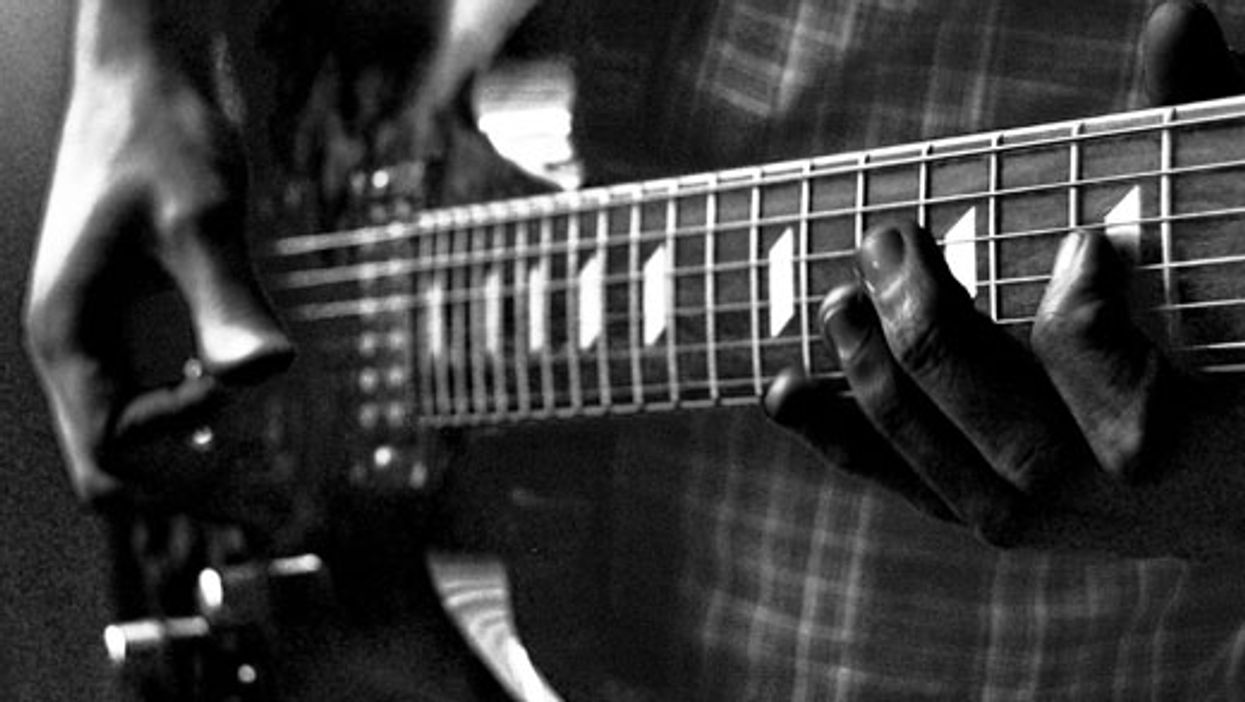
Fretting-hand position is very important when playing legato. I’d suggest positioning your thumb slightly lower on the back of the neck, rather than over the edge of the fretboard as you might when playing pentatonic ideas. Make sure that your fretting fingers are spaced out (roughly a finger per fret), and the notes are sounded with your fingertips. It’s also vital that you keep the fingers close to the fretboard because the pinky has a tendency to flap around slightly and is harder to control. Keeping it close means a more efficient left hand. This will also help with stamina, as your hand won’t become tired as quickly.
We should also consider the picking hand, as you will on occasion have to pick the first note in a run. It’s important not to pick too hard because you don’t want huge dynamic shifts between the plucked notes and those performed with hammer-ons and pull-offs. I’d suggest a light picking attack to match the volume of the notes initiated with your fretting hand. This is a great way to improve the interaction between the left and right hands when performing legato passages.
Another area that requires attention is muting open strings while playing legato lines. When working on the top strings, I mute the unused lower strings with the fleshy part of my palm, under the thumb. As I move my fretting hand across the strings, I gradually remove the picking-hand mute and transfer that duty to the first finger of my fretting hand.
Now let’s take a look at our examples, which include technical exercises to help you work on developing and improving the legato technique, as well as “real world” phrases based on the styles of various players.
Ex. 1 is a basic exercise that helps build strength and finger independence. It’s based around a hammer-on and pull-off idea with the first finger anchored at the 5th fret.
Ex. 1
Dig into Ex. 2 to develop both finger independence and endurance. The sequence can be tricky, so I’d suggest starting at a slow tempo and gradually building up speed. I’ve shown this pattern on the top four strings, but would encourage you to continue across the remaining strings.
Ex. 2
Ex. 3 is another timing and strength exercise that features an ascending and descending 16th-note triplet pattern. I’ve presented the sequence on the top three strings, and they should be repeated to build stamina. Practice these patterns with a metronome. You’ll really notice your fretting-hand strength improving.
Ex. 3
The goal with Ex. 4 is to be able to loop around a few times while keeping tone and time even. When ascending, use your first and second fingers, and when descending keep the fretting hands in the same position, but pull off between the fourth and second fingers. This is very tricky, but with perseverance you will achieve excellent finger independence and agility.
Ex. 4
We move on to three-note-per-string scales in Ex. 5. Although the scales are naturally arranged in groups of three, the 16th-note rhythm makes timing a bit trickier, but just as essential. When ascending, as you cross the strings start each new one with a downstroke. For the descending part of the lick, I like to start each new string with what Greg Howe calls a “hammer-on from nowhere.”
Ex. 5
Ex. 6 is another three-note-per-string exercise that’s based around two positions of G Dorian (G–A–Bb–C–D–E–F). This pattern also uses a 16th-note triplet rhythm with hammer-ons from nowhere on the descending part of the phrase.
Ex. 6
Now that some of the more technical exercises are out of the way, we can move to more stylistic legato examples. Ex. 7 is straight out of Richie Kotzen’s bag of tricks. The lick uses notes from A Aeolian (A–B–C–D–E–F–G) and moves up the 3rd string. This example is a real test for fretting-hand stamina, independence, and timing.
Ex. 7
We stick with Kotzen for Ex. 8, but this time we move to E Aeolian (E–F#–G–A–B–C–D). The phrase starts in the 8th position before shifting to the 5th, and finally ending in the 3rd position before resolving to the open 6th string.
Ex. 8
As you saw in the video above, Joe Satriani is an absolute master of legato and has made the technique a part of his signature sound. In Ex. 9, we call upon the C Lydian scale (C–D–E–F#–G–A–B) for something that could easily fit in “Flying in a Blue Dream.” Notice how we use fast flurries of notes, position shifts, and the sudden pauses on certain notes for emphasis.
Ex. 9
Ex. 10 is a John Petrucci-style phrase that’s based around the E Aeolian mode. An excellent addition to your vocabulary, this extended run features multiple position shifts and covers a large area of the fretboard.
Ex. 10
In Ex. 11, we combine arpeggios with pentatonics based in A minor. Pay attention to the wider pentatonic fingerings. Up to speed this is a great sounding lick!
Ex. 11
We move back to some Brett Garsed licks for Ex. 12. Here, we’re using notes from the A Aeolian scale on the top two strings. You’ll notice there are quite a few notes on each beat, so this is a real test of your agility.
Ex. 12
Finally in Ex. 13, we take some of Garsed’s stuff and stir in some Greg Howe. This lick makes use of three-note-per-string modal lines, string skipping, and pentatonic ideas in E minor. This is a very advanced lick, so be sure to break it down into bite-size chunks before gradually increasing the speed.
Ex. 13
- Cram Session: Pentatonic Power - Premier Guitar ›
- Future Rock: Tap This! - Premier Guitar ›
- Style Guide: Left-Hand Techniques - Premier Guitar ›
The range of clean, dirty, and complex tones available from this high-quality, carefully crafted Dumble modeler make it a formidable studio and performance device.
Fantastic variation in many delicious sounds makes it a bargain. High-quality. Easy to use and customize. Killer studio path to lively, responsive guitar sounds.
Price may be hard for some to swallow if they don’t leverage the whole of its potential.
$399
UAFX Enigmatic ’82 Overdrive Special
uaudio.com
I’ve never played a realDumble. I’d venture most of us haven’t. But given my experiences with James Santiago’s UAFX modeling pedals, most recently theUAFX Lion, I plugged in the new Dumble-inspired UAFX Enigmatic confident I’d taste at least the essence of that very rare elixir. You could argue there is no definitive Dumble sound. Each was customized to some extent for the customer, and they are renowned nearly as much for dynamic responsiveness and flexibility as their singing, complex, clean-to-dirty palettes.
The Enigmatic nails the flexibility, for sure. To my ears, its tone foundation lives somewhere on a sliver of Venn diagram where a black-panel Fender and a 50-watt Hiwatt intersect. It’s alive, dimensional, snappy, sparkly, massive, and, at the right EQ settings, hot and excitable. But the Enigmatic’s powerful EQ and gain controls, multiple virtual cab and mic pairings, rock, jazz, and custom voices, plus additional deep, bright, and presence controls enable you to travel many leagues from that fundamental tone. The customization work you can do in the app enables significant changes in the Enigmatic’s tone profile and responsiveness, too. All these observations are made tracking the Enigmatic straight to a DAW—making the breadth of its personality even more impressive. But the Enigmatic sounds every bit as lively at the front end of an amp, and black-panel Fenders are a primo pairing for its saturation and sparkly attributes. The Enigmatic is nearly $400, which is an investment. But considering the ground I covered in just a few days with it, and the quality and variety of sounds I could conjure with the unit just sitting on my desk, the performance-to-price ratio struck me as very favorable indeed.
This month’s mod Dan’s uses a 500k linear pot, a 1.5H inductor (L) with a 0.039 µF (39nF) cap (C), and a 220k resistor (R) in parallel.
This simple passive mod will boost your guitar’s sweet-spot tones.
Hello and welcome back to Mod Garage. In this column, we’ll be taking a closer look at the “mid boost and scoop mod” for electric guitars from longtime California-based tech Dan Torres, whose Torres Engineering seems to be closed, at least on the internet. This mod is in the same family with the Gibson Varitone, Bill Lawrence’s Q-Filter, the Gresco Tone Qube (said to be used by SRV), John “Dawk” Stillwells’ MTC (used by Ritchie Blackmore), the Yamaha Focus Switch, and the Epiphone Tone Expressor, as well as many others. So, while it’s just one of the many variations of tone-shaping mods, I chose the Torres because this one sounds best to me, which simply has to do with the part values he chose.
Don’t let the name fool you, this is a purely passive device—nothing is going to be boosted. In general, you can’t increase anything with passive electronics that isn’t already there. Period. But you can reshape the tone by deemphasizing certain frequencies and making others more prominent (so … “boost” in guitar marketing language). Removing highs makes lows more apparent, and vice versa. In addition, the use of inductors (which create the magnetic field in a guitar circuit) and capacitors will create resonant peaks and valleys (bandpasses and notches), further coloring the overall tone. This type of bandpass filter only allows certain frequencies to pass through, while others are blocked, and it all works at unity gain.
“You can’t increase anything with passive electronics that isn’t already there … but you can reshape the tone by deemphasizing certain frequencies and making others more prominent.”
All the systems I mentioned above are doing more or less the same thing, using different approaches and slightly different component values. They are all meant to be updated tone controls. Our common tone circuit is usually a variable low-pass filter (aka treble-cut filter), which only allows the low frequencies to pass through, while the high frequencies get sent to ground via the tone cap. Most of these systems are LCR networks, which means that there is not only a capacitor (C), like on our standard tone controls, but also an inductor (L) and a resistor (R).
In general, all these systems are meant to control the midrange in order to scoop the mids, creating a mid-cut. This can be a cool sounding option, e.g. on a Strat for that mid-scooped neck and middle tone.
Dan Torres offered his “midrange kit” via an internet shop that is no longer online, same with his business website. The Torres design is a typical LCR network and looks like the illustration at the top of this column.
Dan’s design uses a 500k linear pot, a 1.5H inductor (L) with a 0.039 µF (39nF) cap (C), and a 220k resistor (R) in parallel. Let’s break down the parts piece by piece:
Any 500k linear pot will do the trick, in one of the rare scenarios where a linear pot works better in a passive guitar system than an audio pot.
(C) 0.039µF cap: This is kind of an odd value. Keeping production tolerances of up to 20 percent in mind, any value that is close will do, so you can use any small cap you want for this. I would prefer a small metallized film cap, and any voltage rating will do. If you want to stay as close as possible to the original design, use any 0.039 µF low-tolerance film cap.
(L) 1.5H inductor: The original design uses a Xicon 42TL021 inductor, which is easy to find and fairly priced. This one is also used in the Bill Lawrence Q-Filter design, the Gibson standard Varitone, and many other systems like this. It’s very small, so it will fit in virtually every electronic compartment of a guitar. It has a frequency range of 300 Hz up to 3.4 kHz, with a primary impedance of 4k ohms (that’s the one we want to use) and a secondary impedance of 600 ohms. Snip off the three secondary leads and the center tap of the primary side and use the two remaining outer primary leads; the primary side is marked with a “P.” On the pic, you can see the two leads you need marked in red, all other leads can be snipped off. You can connect the two remaining leads to the pot either way; it doesn’t matter which of them is going to ground when using it this way.
Drawing courtesy of singlecoil.com
(R) 220k: use a small axial metal film resistor (0.25 W), which is easy to find and is the quasi-standard.
Other designs use slightly different part values—the Bill Lawrence Q-filter has a 1.8H L, 0.02 µF C and 8k R, while the old RA Gresco Tone Qube from the ’80s has a 1.5H L, 0.0033 µF C, and a 180k R, so this is a wide field for experimentation to tweak it for your personal tone.
This mid-cut system can be put into any electric guitar not only as a master tone, but also together with a regular tone control or something like the Fender Greasebucket, or it can be assigned only to a certain pickup. It can be a great way to enhance your sonic palette, so give it a try.
That’s it! Next month, we’ll take a deeper look into how to fight feedback on a Telecaster. It’s a common issue, so stay tuned!
Until then ... keep on modding!
The two-in-one “sonic refractor” takes tremolo and wavefolding to radical new depths.
Pros: Huge range of usable sounds. Delicious distortion tones. Broadens your conception of what guitar can be.
Build quirks will turn some users off.
$279
Cosmodio Gravity Well
cosmod.io
Know what a wavefolder does to your guitar signal? If you don’t, that’s okay. I didn’t either until I started messing around with the all-analog Cosmodio Instruments Gravity Well. It’s a dual-effect pedal with a tremolo and wavefolder, the latter more widely used in synthesis that , at a certain threshold, shifts or inverts the direction the wave is traveling—in essence, folding it upon itself. Used together here, they make up what Cosmodio calls a sonic refractor.
Two Plus One
Gravity Well’s design and control set make it a charm to use. Two footswitches engage tremolo and wavefolder independently, and one of three toggle switches swaps the order of the effects. The two 3-way switches toggle different tone and voice options, from darker and thicker to brighter and more aggressive. (Mixing and matching with these two toggles yields great results.)
The wavefolder, which has an all-analog signal path bit a digitally controlled LFO, is controlled by knobs for both gain and volume, which provide enormous dynamic range. The LFO tremolo gets three knobs: speed, depth, and waveform. The first two are self-explanatory, but the latter offers switching between eight different tremolo waveforms. You’ll find standard sawtooth, triangle, square, and sine waves, but Cosmodio also included some wacko shapes: asymmetric swoop, ramp, sample and hold, and random. These weirder forms force truly weird relationships with the pedal, forcing your playing into increasingly unpredictable and bizarre territories.
This is all housed in a trippy, beautifully decorated Hammond 1590BB-sized enclosure, with in/out, expression pedal, and power jacks. I had concerns about the durability of the expression jack because it’s not sealed to its opening with an outer nut and washer, making it feel more susceptible to damage if a cable gets stepped on or jostled near the connection, as well as from moisture. After a look at the interior, though, the build seems sturdy as any I’ve seen.
Splatterhouse Audio
Cosmodio’s claim that the refractor is a “first-of-its-kind” modulation effect is pretty grand, but they have a point in that the wavefolder is rare-ish in the guitar domain and pairing it with tremolo creates some pretty foreign sounds. Barton McGuire, the Massachusetts-based builder behind Cosmodio, released a few videos that demonstrate, visually, how a wavefolder impacts your guitar’s signal—I highly suggest checking them out to understand some of the principles behind the effect (and to see an ’80s Muppet Babies-branded keyboard in action.)
By folding a waveform back on itself, rather than clipping it as a conventional distortion would, the wavefolder section produces colliding, reflecting overtones and harmonics. The resulting distortion is unique: It can sound lo-fi and broken in the low- to mid-gain range, or synthy and extraterrestrial when the gain is dimed. Add in the tremolo, and you’ve got a lot of sonic variables to play with.
Used independently, the tremolo effect is great, but the wavefolder is where the real fun is. With the gain at 12 o’clock, it mimics a vintage 1x10 tube amp cranked to the breaking point by a splatty germanium OD. A soft touch cleans up the signal really nicely, while maintaining the weirdness the wavefolder imparts to its signal. With forceful pick strokes at high gain, it functions like a unique fuzz-distortion hybrid with bizarre alien artifacts punching through the synthy goop.
One forum commenter suggested that the Gravity Well effect is often in charge as much the guitar itself, and that’s spot on at the pedal's extremes. Whatever you expect from your usual playing techniques tends to go out the window —generating instead crumbling, sputtering bursts of blubbering sound. Learning to respond to the pedal in these environments can redefine the guitar as an instrument, and that’s a big part of Gravity Well’s magic.
The Verdict
Gravity Well is the most fun I’ve had with a modulation pedal in a while. It strikes a brilliant balance between adventurous and useful, with a broad range of LFO modulations and a totally excellent oddball distortion. The combination of the two effects yields some of the coolest sounds I’ve heard from an electric guitar, and at $279, it’s a very reasonably priced journey to deeply inspiring corners you probably never expected your 6-string (or bass, or drums, or Muppet Babies Casio EP-10) to lead you to.
Kemper and Zilla announce the immediate availability of Zilla 2x12“ guitar cabs loaded with the acclaimed Kemper Kone speaker.
Zilla offers a variety of customization to the customers. On the dedicated Website, customers can choose material, color/tolex, size, and much more.
The sensation and joy of playing a guitar cabinet
Sometimes, when there’s no PA, there’s just a drumkit and a bass amp. When the creative juices flow and the riffs have to bounce back off the wall - that’s the moment when you long for a powerful guitar cabinet.
A guitar cabinet that provides „that“ well-known feel and gives you that kick-in-the-back experience. Because guitar cabinets can move some serious air. But these days cabinets also have to be comprehensive and modern in terms of being capable of delivering the dynamic and tonal nuances of the KEMPER PROFILER. So here it is: The ZILLA 2 x 12“ upright slant KONE cabinet.
These cabinets are designed in cooperation with the KEMPER sound designers and the great people from Zilla. Beauty is created out of decades of experience in building the finest guitar cabinets for the biggest guitar masters in the UK and the world over, combined with the digital guitar tone wizardry from the KEMPER labs. Loaded with the exquisit Kemper Kone speakers.
Now Kemper and Zilla bring this beautiful and powerful dream team for playing, rehearsing, and performing to the guitar players!
ABOUT THE KEMPER KONE SPEAKERS
The Kemper Kone is a 12“ full range speaker which is exclusively designed by Celestion for KEMPER. By simply activating the PROFILER’s well-known Monitor CabOff function the KEMPER Kone is switched from full-range mode to the Speaker Imprint Mode, which then exactly mimics one of 19 classic guitar speakers.
Since the intelligence of the speaker lies in the DSP of the PROFILER, you will be able to switch individual speaker imprints along with your favorite rigs, without needing to do extensive editing.
The Zilla KEMPER KONE loaded 2x12“ cabinets can be custom designed and ordered for an EU price of £675,- UK price of £775,- and US price of £800,- - all including shipping (excluding taxes outside of the UK).
For more information, please visit kemper-amps.com or zillacabs.com.