Electric Guitars Kramer Summer 2020 Guitars - Summer Gear Slam 2020 PremierGuitar Default Jul 14, 2020
Effects EVH Launches Wolfgang Standard Series and Revamps Wolfgang Special Series The EVH Wolfgang WG Standard is the most affordable Wolfgang model yet. News Sep 16, 2014
Bass Rig Rundown: Def Leppard Vivian Campbell and Phil Collen take PG through their surprisingly tube-free rigs. John Bohlinger Aug 20, 2014
Gear NAMM '14 - PRS Guitars Archon Amp, S2 Custom 22, S2 Single Cut, and Custom 24 Floyd Rose Demos See and hear Paul Reed Smith's new high-gain amp, affordable versions of company's classic guitars, and a dive-bombing machine. Charles Saufley Jan 28, 2014
Effects PRS Guitars Introduces the SE Custom 24 Series The newest addition to the SE Custom 24 family is the SE "Floyd" Custom 24. News Jan 26, 2014
Effects Washburn Announces 2014 Lineup–Including Ola Englund Signature Model, Idol Series, and Parlor Guitars Originally introduced 15 years ago, the WI64 was the very first Idol model. News Jan 22, 2014
Effects Schecter Guitar Research Announces Blackjack ATX Series The Blackjack ATX is offered as 6-, 7-, and 8-string models all loaded with Seymour Duncan Blackout pickups and equipped with glow in the dark side dot inlays. News Jan 17, 2014
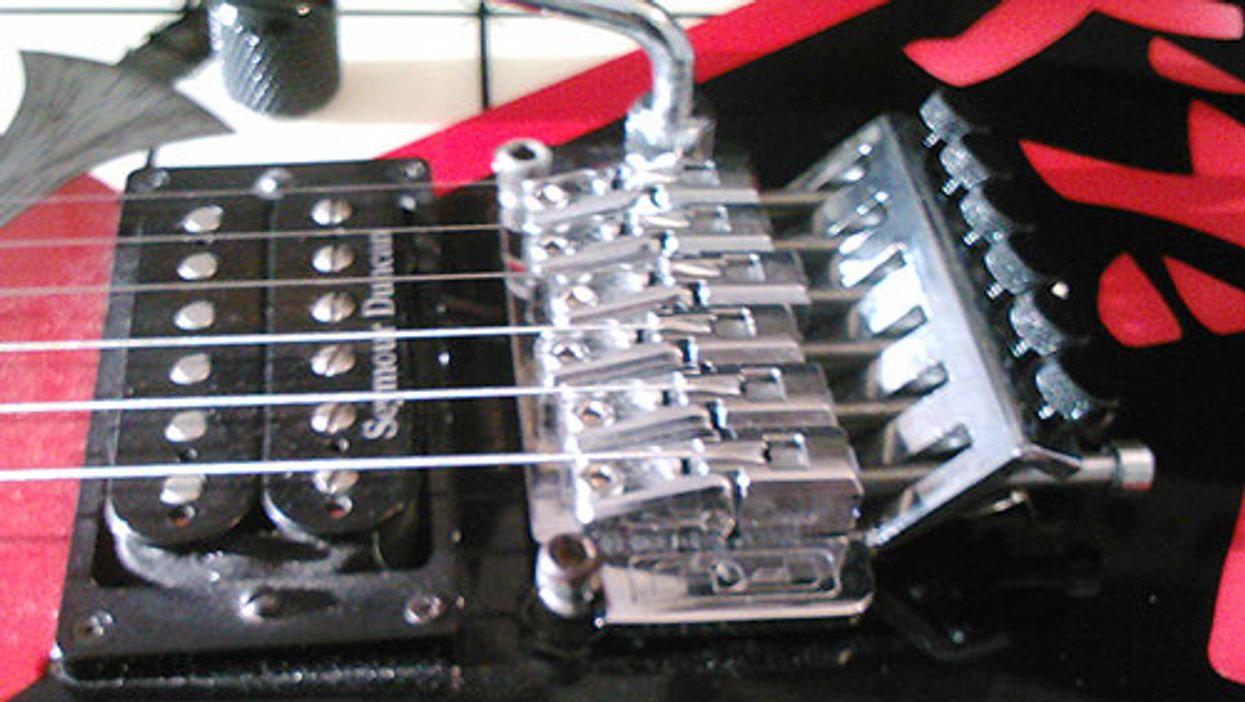
Guitar Shop 101 How to Set Up a Floyd Rose-Style Trem When a Floyd Rose-style tremolo is tilted back against the body—as shown here—you can’t use the system to its full potential. John LeVan Jun 29, 2013
Effects Cort Announces Limited Edition Stephen Jensen Models Cort Guitars announces a limited edition series of guitars featuring the custom artwork of artist Stephen Jensen. News Jun 17, 2013
Gear FU-Tone.com High Performance Titanium and Brass Bridge Package Reviews By using stainless steel and titanium in critical parts of the unit, FU-Tone has indeed taken the Floyd Rose concept in several new directions. Gerry Ganaden Jun 17, 2013
Effects Charvel Annouces Return of Pro-Mod Series Charvel is proud to announce the reintroduction of the Pro-Mod series of guitars. News Apr 11, 2013