
Steve Carr’s first amp build was a Fender Champ clone. It didn’t work on the first try. Luckily, that didn’t stop him.
The North Carolina amp builder is famous for his circuit-blending soundboxes, like the Rambler, Sportsman, and Telstar. Here, he tells us how he got started and what keeps him pushing forward.
Steve Carr started building amps because he loved playing guitar. He and his friends cobbled together a band in Michigan City, Indiana, in high school in the mid-’70s, and the gear they played with seemed like a black box. In the pre-internet days, getting information on amp voicings and pickup magnets was difficult. Carr was fascinated, and always wanted to know what made things tick.
After college, he moved to Chapel Hill, North Carolina, where he met an amp repairman that he started hanging around. He wanted to apprentice under the fellow and soak up his wisdom, but the guy wasn’t interested in taking on a student. “Finally, he said, ‘I don’t have time to have anybody around here, but you should do what I did when I was a kid, which is build a Fender tweed Champ,’” remembers Carr. He’d have to track down the schematic, figure out how to read it, source the necessary parts, then assemble the amp. Flipping through issues of Vacuum Tube Valley and Angela’s Instruments, he got on his way.
Building that Champ clone taught him how to navigate industrial parts suppliers, valuable know-how that would come in handy later on. At the end of the build, he flicked it on, and nothing happened. The amp wouldn’t sing. “I was super depressed,” Carr says. “I couldn’t believe it.” But he didn’t quit—he spent the next few weeks troubleshooting the circuit and got it to go. By then, in his mind, he was a bona fide amp repairman. Between Chapel Hill, Raleigh, Durham, and Greensboro, there were tons of young gigging bands who needed their amps in working order, so Carr got a breakneck crash course in amp repair over a few years. It wasn’t long before he thought: “Maybe I can make my own amp.”
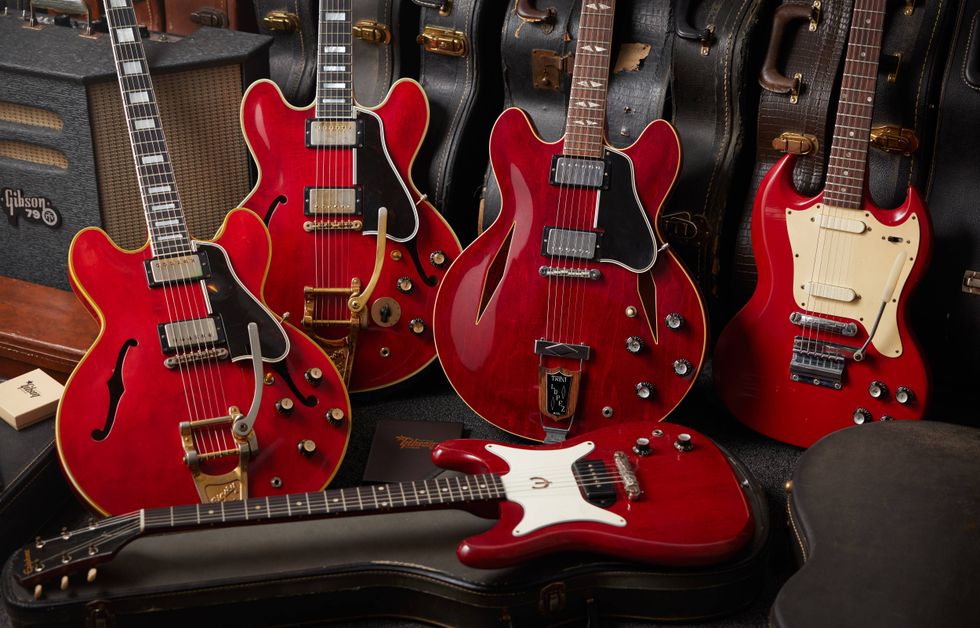
Carr’s lineup has included 22 different amplifier models over its 26 years of business. Clockwise from top left, we have the Skylark, Rambler, and two Mercury Vs.
Photo by Tim Coffey
His initial idea was to combine two amps that he loved, his black-panel Fender Deluxe Reverb and 50-watt non-master-volume Marshall. He wanted to marry the Fender’s cleans and reverb with the roaring drive of the Marshall. The Frankenstein experiment produced Carr Amplifiers’ first amp: the Slant 6V. It was just intended for Carr’s personal use. But it wasn’t too long until his friends encouraged him to build more, and in the fall of 1998, he made his first two sales.
Eddie Berman was working at the Music Loft in Wilmington, North Carolina, when a local musician called him up to say that a friend of his was building amplifiers, and wanted to bring one by the shop. Carr brought those first two Slant 6Vs by, and Berman and his colleagues jammed on them at rehearsal that evening. “I went, ‘Oh my goodness, we have to have these amplifiers,’” says Berman. The clean channel was unbelievable, Berman continues—broad, cinematic, and sweet-sounding, free from any top-end harshness or “nails on the chalkboard” overtones. It was so intoxicating that he used to tease Carr: The clean channel was so good, why did he bother to put a dirty channel on, too?
There was more to the amps than just rich tone. Berman remembers that the first amp had the same electrical plug as one might find on hospital emergency room equipment. “We know anything that he touches is going to be golden,” says Berman. There was one other element, too: Steve Carr was just a good dude. Ph
From his very first build, Carr has manufactured his amps to impressive, durable specs—two different sources mentioned independently how robust and secure that even the amplifiers’ power cords are.
Photo by Tim Coffey
That was more than 26 years ago. Carr Amplifiers, located in Pittsboro, North Carolina, has grown into one of the most respected companies in the boutique amplification market, thanks to their versatility, exacting construction, and, of course, beautiful sounds.
In his first builds, Carr pioneered a combination that would become a signature for all his models: expensive polypropylene capacitors and more classic, old-school components like carbon-composition resistors. “Those two items have a certain sound that is a family trait in the amps, which is a very dynamic, open, transparent, but also a very warm and liquid sound, at once,” says Carr. “They’re sort of in a way opposite concepts, but they come together.”
Carr attributes his success in part to the initial demise of Matchless, the amp builder that helped carve out the beginnings of the boutique amp niche in the 1990s. When Matchless went out of business in 1998 (they returned some years later), Carr realized that their dealers would probably be looking for replacement amps in their shops to appease the boutique crowd, so he phoned them up and pitched his amps.
“Those two items have a certain sound that is a family trait in the amps, which is a very dynamic, open, transparent, but also a very warm and liquid, sound at once.” - Steve Carr
The business grew, and in May 1999, the Carr brand launched its second amp, the Rambler. Carr describes it as “a collage” of a black-panel Princeton Reverb and a tweed Pro. By this point, the rising amp-maker had solidified another characteristic: He liked squeezing two amps into one box, without sacrificing fidelity on either end. “At first, they don’t really want to work well together,” says Carr. There’s a whole lot of prototyping to get to the point where the circuits can behave copacetically, and represent both elements of their parent amplifiers without causing problems. But succeeding in that analog alchemy is one of Carr’s greatest achievements. “It’s got influences,” he continues, “but it becomes a new, unique amp.”
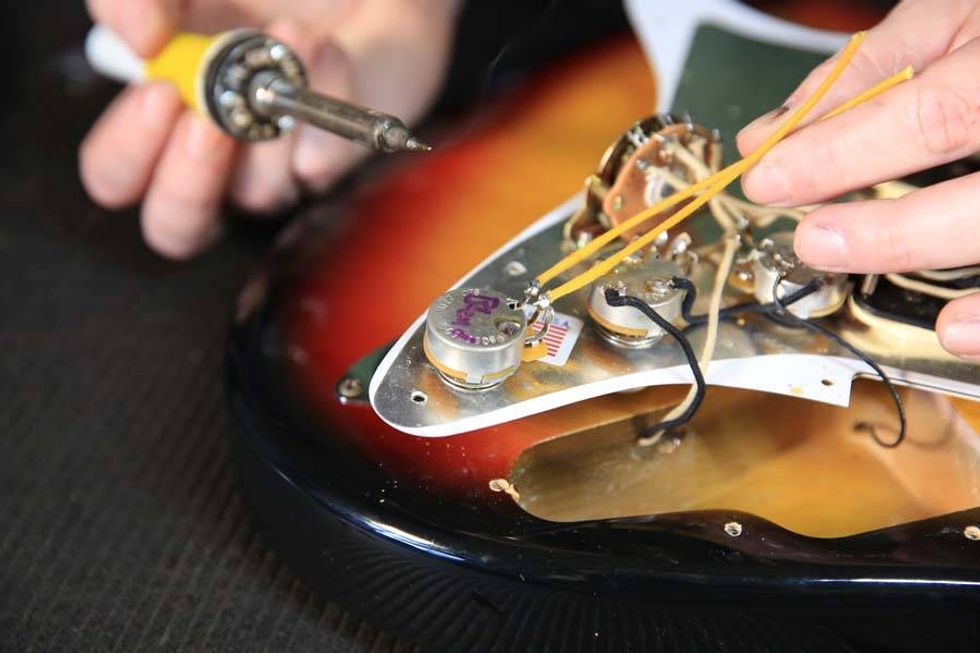
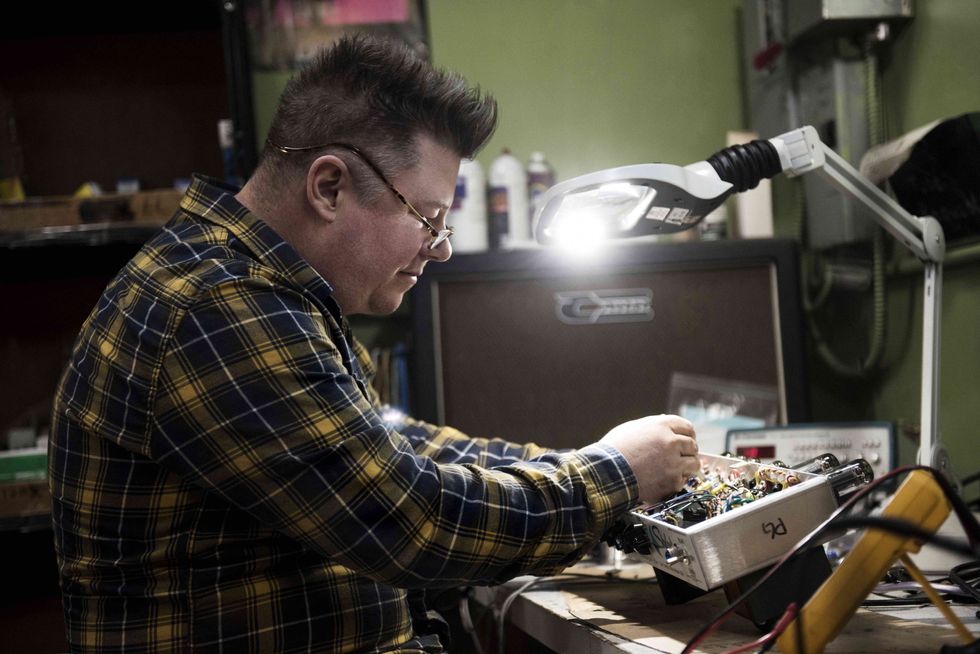
Working with expensive components, like choice capacitors and near-obsolete resistors, drives the price of Carr amps up, but Steve Carr insists that they make an audible difference. Here, Carr builder David Quick assembles a Mercury V.
Photo by Tim Coffey
Carr started building his noiseboxes out of the spare bedroom of his wife’s home in southern Chapel Hill, and after his first sales, he sprang for a wooden-floored barn in the woods. It had electricity, but that was about it: no HVAC, no water, no bathrooms. But the price was right, so he rented the spot and hired his first employee. The operation lasted a year there, where they built Slant 6Vs and Ramblers, the latter of which became the company’s first perennial seller and a favorite of Nashville session players. “The names of these folks, people may not know, but you’ve probably heard a lot of these session guys who’ve got Ramblers,” says Carr.
The “barn era” lasted about a year and a half, until Carr and his wife relocated to Pittsboro. He got a tip that some space was up for rent in an old chicken hatchery downtown, where they leased two rooms initially. When the business in the neighboring units moved out, Carr Amplifiers expanded to 4,500 square feet. They’ve remained in that building since, growing the operation to fill the high ceilings and spacious rooms.
One of the major additions to the business was in-house cabinetry building. In the early years, Carr hired carpenters from around the state who built cabinets for the amps. At one point, he was picking up cabs from a woodworker named Peter Mather in Virginia Beach, Virginia, loading up a van with 30 of the wooden frames. Even though it was wintertime, Carr drove with the windows down, because the glue applied to adhere the Tolex to the wood was still fresh, and the fumes were potent. Eventually, Mather, who passed away in 2023, offered to travel to Pittsboro to teach Carr and his staff how to manufacture the boxes. The onsite cabinet-making started in 2003, and in the two-decades-plus since, the team has developed their distinctive cabinet design into a key piece of their identity. It’s important that Carr cabs both look great and fit the physical needs of the circuitry inside.
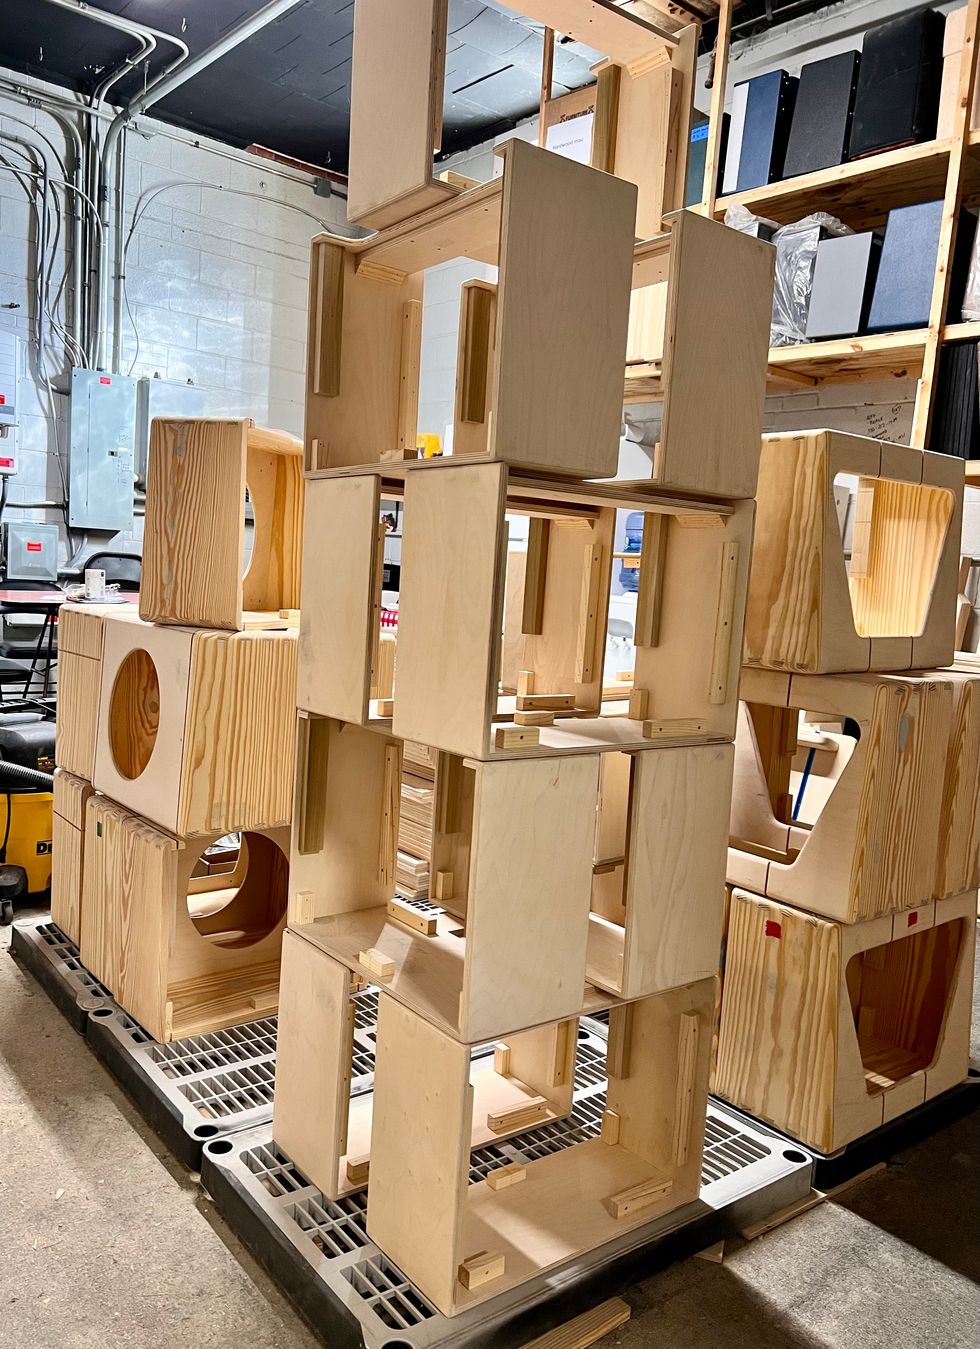
At Carr, the name of the game is cutting cabs, not corners. Here, a stack of naked Bel-Ray frames show off the shop’s woodworking and design prowess.
Photo courtesy of Carr Amplifiers
“We have a certain aesthetic sense,” says Carr, naming 1920s through ’60s design and art trends, chiefly art deco, as major influences. “I’ve always wanted to have that in the cabinets, because so many guitar amps are very basic-looking, and if somebody’s buying something that’s handmade with great care, it seems to me that you want to make it fun-looking, too. You want to take that same care with the whole aesthetic look of it and make it a real pleasure to have. That’s been a goal from the beginning, and it’s part of why we decided to take the extra expense. There are a lot of machines you’ve got to buy to create a cabinet shop. But now we have control over the beauty of the design.”
But the box is only as good as what comes out of it. Carr says it takes roughly nine months of process between when he brainstorms a design and when it comes to life, but it always starts with a classic amp—or a few. “I often joke that it’s kind of a sonic divining rod, where I’ll start off somewhere and the amp eventually becomes what it wanted to become,” says Carr. “I’m just along for the ride.”
“I often joke that it’s kind of a sonic divining rod, where I’ll start off somewhere and the amp eventually becomes what it wanted to become. I’m just along for the ride.” - Steve Carr
The Bel-Ray, released earlier this year, is Carr’s most ambitious design yet. Previous builds like the Super B and Mercury V incorporated rotary switches that allowed users to change between specific voicings—already a mean feat in a small combo with analog circuitry. But Carr wanted to take it a step further and create a combo amp with a “triumvirate of British amp voices”: classic Vox, Marshall, and Hiwatt noisemakers. It was a big challenge, he admits. The output section was fairly simple—two EL84 tubes—but Carr wanted to incorporate an EF86 pentode in the preamp. It has a distinct flavor from the two other 12AX7s in the preamp, but is so dynamic that the potential for microphonic problems is elevated. That took some finessing.
The tone stacks, though, were the most labor-intensive code to crack. It took Carr a long time to get the feel for Hiwatt’s midrange and treble signatures, which he likens to those of old Valco and Supro amps. While the Marshall and Vox tone architecture were similar enough in structure, the Hiwatt’s was trickier to squeeze in. “The parts just don’t connect in the same places or in the same way, so you’re not able to just change a value here and there; you have to change how it’s all hooked up,” he explains. To accomplish the complex maneuvering, the Bel-Ray uses a number of dual, stacked pots, and the rotary switch changes not just capacitor values, but also which deck of the dual pots the user is manipulating. “There was a lot of massaging and tweaking and thinking to get all three of those vibes there,” he says. “And then, the amp became its own thing. It has characteristics of all those [amps], but it’s not exactly those.”
Carr Bel-Ray Amp Demo | First Look
PG’s John Bohlinger takes the Carr Bel-Ray through its paces in this First Look demo.
Search terms: Carr Bel-Ray Amp Demo First Look
Part of Carr Amplifiers’ “mojo” comes from Carr’s exacting standards for individual components, which contribute to the significant price tag on his amps. He favors U.S.-made signal capacitors from Ohio-based Jupiter Condenser Co., which are patterned after ’50s and ’60s caps but can cost 10 to 20 times more than the average capacitor. Another parts vendor sources him with his treasured, near-obsolete carbon-comp resistors. Unless you have a backstock (which he has amassed), Carr estimates you won’t be able to find them within a few years. This all might sound a bit over-the-top; how much difference can one tiny component make? Carr insists that when he’s testing components in the circuits, the value (pun intended, I guess) becomes clear.
“There’s a lot of really great amps out there, and I love a lot of amps. I’m not saying this is the only one, but it sure is a good one.” - Bill Frisell
It’s obvious that he’s onto something. In the early 2000s, Bill Frisell was in Nashville recording with bassist Viktor Krauss when Krauss loaned him a Carr Rambler to record with. He loved it. A while later, he played a Carr Mercury during a session in Portland, Oregon. “That’s where I really was like, ‘Oh man, I gotta check this out more,’” says Frisell. His parents were living in Chapel Hill, so during a visit, he popped down to Steve’s shop and picked up a Mercury of his own. When the Sportsman came out, Frisell bought one of those, too.
On the road, Frisell uses mostly Fender amps, but at home, he keeps his prized amplifiers: a small Gibson combo amp from the early ’60s, an early ’60s Fender Princeton, and his Carr Sportsman. “There’s this thing with these older amps,” says Frisell. “There’s a clarity and warmth that’s happening at the same time. I can’t put my finger on it when I try to describe the sound. Whatever it is with the Sportsman, that’s the one for me that has these qualities, these older amps that I love.
“There’s a lot of really great amps out there, and I love a lot of amps. I’m not saying this is the only one, but it sure is a good one.”- Ask Amp Man: Revisiting the Dawn of the Sundown Artist ›
- Getting Back In-Phase ›
- Pairing Amps for Golden Tones ›
In a career defined by evolution, Joe Bonamassa is ready to turn the page once again. The blues-rock virtuoso has just announced Breakthrough, his most adventurous and genre-blending studio album to date, out July 18th via his own J&R Adventures.
At the heart of the announcement is the release of the album’s powerful title track—“Breakthrough' —a soulful, hard-hitting anthem about letting go, moving forward, and finding your fire again, available today on all streaming platforms.
Crafted across multiple continents and infused with a world’s worth of inspiration, Breakthrough marks a bold new chapter for Bonamassa—one that leans on fiery solos, emotionally rich storytelling, groove-driven arrangements, and stylistic exploration. Produced by longtime creative partner Kevin Shirley (Iron Maiden, The Black Crowes, Journey), the album was shaped by sessions in Greece, Egypt, Nashville, and Los Angeles, resulting in a vibrant sonic tapestry that shifts effortlessly from funky blues and Texas swing to acoustic ballads and swaggering hard rock.
Joe Bonamassa “Breakthrough” - Official Lyric Video
Watch the official lyric video for "Breakthrough" by Joe Bonamassa
“I think this album, Breakthrough, marks a shift in the styling of Joe Bonamassa’s recording output,” says Shirley. “While there are plenty of guitar solos on this record, his emphasis has been on songs primarily. Each time Joe undertakes a new recording project, he seems to access a different part of his vast library of music genre from the jukebox-in-his-head! This album is a round-the-world musical trip—from Little Feat funkiness to Texas swing, from hard rock power to acoustic singer/songwriter-style songs.”
The newly released single “Breakthrough,” co-written with longtime collaborator Tom Hambridge (Buddy Guy, ZZ Top, Lynyrd Skynyrd), captures the emotional core of the record—an uplifting anthem about transformation, persistence, and letting go of the weight that holds us back. With gritty vocals, melodic guitar lines, and lush instrumentation, the track embodies Bonamassa’s signature blend of power and finesse while ushering in a bold new direction.
“Breakthrough” follows the success of Bonamassa’s recent singles “Still Walking With Me” and “Shake This Ground,” both of which hinted at the adventurous spirit behind the full album. “Shake This Ground” delivered a moody, introspective edge, while “Still Walking With Me” leaned into warmth, gratitude, and classic soul. Each track reflects a different facet of Bonamassa’s evolving songwriting approach, rooted in emotional honesty and anchored by his unmistakable guitar work.
The album announcement caps a stretch of extraordinary momentum for Bonamassa. Next up, Bonamassa recently began his extensive *European Spring Tour, followed by a June run with his powerhouse supergroup Black Country Communion* (featuring Glenn Hughes, Jason Bonham, and Derek Sherinian). After another round of summer dates across Europe—including sold-out shows in Ireland—he’ll return stateside for his just-announced* 2025 U.S. Summer Tour*, a limited amphitheater run featuring stops at The Greek Theatre, Red Rocks, and more iconic venues.
With over 50 albums, 28 #1 Billboard Blues albums, and a lifelong commitment to evolving the genre, Bonamassa shows no signs of slowing down. Whether headlining iconic venues, mentoring rising artists through Journeyman Records, or supporting music education via his Keeping the Blues Alive Foundation, Bonamassa continues to shape the future of blues-rock with every note.
For more information on Breakthrough, tour dates, and VIP packages, visit jbonamassa.com.
Patterns can be viewed as boring or trite, but a little bit of creativity can turn them into bits of inspiration.
Chops: Intermediate Theory: Intermediater Lesson Overview: • Learn different ways to arrange scales. • Combine various sequences to create more intersting lines. • Solidify your technique by practicing unusual groupings of notes. Click here to download a printable PDF of this lesson's notation. |
I want to offer some food for thought on making sequences musical. Using sequences in our playing helps develop our musicianship in various ways. It can help us tune into the fretboard, develop melodic ideas all around the neck, and further our improvisation and compositional skills. So, spending time with sequences is certainly not time wasted. Please note that I sometimes use the word “rule" in this column, this is only a pointer to keeping on track of our exploration of these concepts. The intellect is very useful, but intuition is where the creativity comes from. When in balance lots of great things can be done. Let's get stuck in!
It's simple to play a scale from bottom to top, or top to bottom, but we can develop a sequence by shuffling these notes around. In Ex. 1 we have a C Major scale (C–D–E–F–G–A–B) played in thirds followed by a sequence highlighting the diatonic triads of the major scale. By following a “rule" we can develop many different sequences. The options are endless and a little overwhelming.
Click here for Ex. 1
Lets start by simply combining an interval sequence with an arpeggio sequence. In Ex. 2, the first two beats of the first measure feature ascending thirds. This is then followed by a triad arpeggio starting from the third note on the string. The next set of thirds then starts on the “and" of beat 4. The entire sequence is a seven-note pattern that is created by combining two thirds and a triad. It gives us a nice bit of rhythmic displacement as the phrase is now starting in a different place in the measure.
Click here for Ex. 2
Ex. 3 is a descending idea in A minor that basically flips the sequence we looked at in Ex. 2. Here, we are starting with two descending thirds before the triad. I'm using pull-offs and economy picking to articulate the triads. This one works well over D minor as well if you want a D Dorian (D–E–F–G–A–B–C) flavor.
Click here for Ex. 3
You can see the effectiveness of combining different sequences and groupings of notes to create interesting runs. It's also really effective for making phrases. In Ex. 4 we take a small fragment from Ex. 3 and change the rhythm. In the sound example I repeat this a few times over some implied chords in my bass line: Am, F, and Dm. It's great to get more from one line by seeing the different chord types you can play it over.
Click here for Ex. 4
In Ex. 5 we're going to start using fourths and fifths. It starts with an ascending A minor triad (A–C–E) before leaping to the 9 (B) and then hitting a G major triad (G–B–D). A similar pattern leads into the C major triad (C–E–G). Throwing in these wider intervals alongside triads is very effective for creating a dramatic sounding runs.
Click here for Ex. 5
For our next example (Ex. 6), we will take fragments from Ex. 5 and space them out a bit. I wanted once again to show how these sequence ideas can also be helpful for developing melodic phrases. Once we have a cool sequence or fragment, all we need to do is be creative with how we play it. We can change the rhythm, harmonic context, dynamic, and much more.
Click here for Ex. 6
Before we move on, it's important to remember that we can add colorful notes to our triads. Let's begin with some seventh-chord arpeggios. Ex 7 features are diatonic seventh arpeggios in G minor (functioning as a IIm chord) to get a Dorian sound.
Click here for Ex. 7
Ex. 8 is a little gratuitous of me. It begins with an idea made of several different concepts. First, we start with an Am7 arpeggio (A–C–E–G), then descend down an A5 arpeggio. I follow that up with diatonic thirds and end with a pedal-point sequence. If that's not enough, we then take this bigger idea and fit it around a chord progression. I move it to G7, Dm7 and then I break my “rule" slightly and outline notes of a C6 arpeggio (C–E–G–A). However, it does keep the same melodic contour of the initial idea. I used my ear and fretboard to guide me. It's always healthy to have a fine balance between intellect and intuition.
Click here for Ex. 8
We dig into C harmonic minor (C–D–Eb–G–Ab–B-C) for Ex. 9's monster two-measure lick. It sounds evil! In composing this phrase, I kept to the basic concept of finding seventh-chord arpeggios within C harmonic minor in the 8th position. I followed my ear as well as my slowly developing intellect. However, if you look closely you can see I was following a mini chord progression through this line. We start out with a CmMaj9 arpeggio (C–Eb–G–B–D) in the first beat, followed by a G7b9 arpeggio (G–B–D–F–Ab). Here we have a very strong Im-V7 movement in C minor. I then move back to our CmMaj9 arpeggio and in the second measure we start descending down an Eb augmented triad (Eb–G–B). This is then followed by more CmMaj9 goodness.
Click here for Ex. 9
Ex. 10 is now taking Ex. 9 and extending it into a cool flamenco-inspired melody. The rhythms in this were inspired by the incredible Paco De Lucia. I follow the sequence from the previous example almost exactly, but I use a bit of artistic license to repeat certain fragments to fit into a “top line" or “head"-style melody.
Click here for Ex. 10
My aim here isn't to give you one rule to follow but instead to encourage you to take the sequences you know and love and start getting more out of them. Enjoy and stay safe!
Neutrik’s Timbre plug, made for toggling between capacitors.
This follow-up to May 2025’s column shows you a few basic techniques to inject some capacitance into your rig.
Hello, and welcome back to Mod Garage. This month, we will dive into the details of how to add additional guitar-cable capacitance—the right way. Time to get started!
Let’s begin with some typical additional capacitance values that certain lengths of cable (or capacitors) can bring to your system:
• 10’ vintage coiled cable (approx. 3 meters) -> 1 nF
• 15’ vintage coiled cable (approx. 4.5 meters) -> 1.5 nF
• 20’ vintage coiled cable (approx. 6 meters) -> 2.2 nF
• 30’ vintage coiled cable (approx. 9 meters) -> 3.3 nF
• Ritchie Blackmore-style, ultra-long vintage coiled cable -> 4.7 nF
I listed standard values here, so you should have no problem getting caps to match them in any local electronics store or online; the type of cap doesn’t really matter and will mostly be dominated by size, but I’ll share more about this in a minute.
Let’s quickly summarize the first installment of this column from last month’s issue: From a technical point of view, added capacitance shifts down the resonance frequency of the pickups, so they sound fatter, especially when using overdrive. This is exactly the reason why a lot of distortion and fuzz boxes with a vintage voicing use an additional cap at the input section; the resulting overdriven tone is fat and warm.
This month’s mod, which involves adding a capacitor to your signal, works best with vintage-flavored single-coil pickups (approximately 2.4 H inductance) or a typical old-school PAF-style pickup (approximately 3.8 H inductance). Modern high-output pickups are often sporting inductances of 6 H to 8 H, and don’t sound very good with this mod—when adding more cable capacitance to such pickups, the result is a dull and wooly tone without any clearness and definition. If you want to make your single-coil guitar sound more Les Paul-ish, you should try a 4.7n capacitor. It will shift the resonance frequency of your single-coil pickups down to the typical PAF ballpark, making for a very cool and usable old-fashioned guitar tone. It might feel a little muffled when playing clean, but ultra fat and punchy when using overdrive! In general, values higher than 4.7n are not recommended.
We have two options for where to install our cap.
On the Guitar Cable
This is the easiest location to add additional capacitance to your system, with several mod options:
1. The lightest mod ever isn’t a mod at all—it’s to simply buy a vintage guitar cable and plug it in whenever you need it! I don’t know of any company that offers modern guitar cables with intentionally high capacitance.
2. The Neutrik company offers a special angled plug, called the Timbre Plug, that you can solder to any guitar cable of your choice. The plug has a 4-way rotary knob on top to toggle between different capacitors. In addition to a bypass setting, the plug offers capacitances of 1nF, 2.2nF, and 3.3nF, letting you simulate different cable lengths on the fly.
3. You can add an additional capacitor to any guitar cable of your choice to convert it into a “longer-sounding” cable. You simply open one of the plugs to solder the cap between the hot and ground—that’s it. Small, 2.5 mm contact spacing ceramic caps are easy to put into a standard plug and are your weapon of choice here. It’s essential to only add the additional cap to one of the two plugs, but it doesn’t matter if you plug this side into your guitar, an effect, or your amp. This method allows you to build yourself some cables that simulate their older, longer relatives.
You can add an additional capacitor to any guitar cable of your choice to convert it into a “longer-sounding” cable.
Photo courtesy SINGLECOIL (https://singlecoil.com)
Inside the Guitar
You can also add a cap (or several) inside your guitar if you only need this mod for one instrument. If you’re looking for added capacitance with all your guitars, you’d be better off choosing one of the techniques mentioned above.
1. The easiest way is to solder your additional capacitor directly to your volume pot; this way it has a fixed value that can’t be changed and is always engaged. This operation is very simple to do, and you can use regular-sized caps for this.
You can add a cap (or several) inside your guitar if you only need this mod for one instrument.
Illustration courtesy SINGLECOIL (https://singlecoil.com)
2. If you want to make the cap switchable, such that you can run it either bypassed or engaged, you can install a SPST mini toggle switch or use half of a push-pull or push-push pot, which usually sport a DPDT switch underneath.
This drawing shows how to make your additional cap switchable.
Illustration courtesy SINGLECOIL (https://singlecoil.com)
3. If you want to use more than one cap to simulate different cable lengths, your weapon of choice is a rotary switch, setting up a kind of Gibson Varitone wiring without the inductor. Because we are switching capacitances, it is essential to run an additional 10 meg resistor in parallel to each of the caps, and to use a make-before-break, not a break-before-make, rotary switch to prevent loud popping noises when using the switch while your guitar is plugged into an amp. Leave the first lug of the rotary switch open for the bypass position without an additional cap.
If you want to use more than one cap to simulate different cable lengths, use a rotary switch.
Illustration courtesy SINGLECOIL (https://singlecoil.com)
4. If you want to make this mod even more flexible, you can add an additional “cable simulator pot” to your system. The pot should have the same resistance as your volume pot, and should be wired to your volume pot. This way, for example, you can add a 3.3nF or 4.7nF cap to the extra pot, and dial in as much cable capacitance as you like.
You can also add an additional “cable simulator pot” to your system.
Illustration courtesy SINGLECOIL (https://singlecoil.com)
On the Pedalboard
The idea of putting a rotary switch or cable-simulator-pot solution into an external unit to create a kind of extra-capacitance stompbox to use with all of your instruments is just around the corner, and yes, it’s possible! However, I don’t recommend this, because it’s physically located after the volume pot in the guitar, which means less volume (no unity gain) and less high end. But don’t worry: If you are looking for a pedalboard solution to simulate different cable lengths (which, as we defined earlier, means to shift the resonance frequency of the pickups), there are some active solutions on the market offering such a feature, usually in combination with a boost or buffer functionality. To name just a few, you should look into the Seymour Duncan Pickup Booster, Stellartone Micro Pedal, or the i2e Audio AG1.0 The PURR. Along with some other brands, these pedals will do the trick, and they’re not difficult to build if you are looking for a DIY solution.
So far, I’ve received several emails from readers asking for some more DIY guitar tools, so next month, we will look into some sustainable and environmentally friendly DIY guitar helpers—all of which you can build yourself easily by upcycling things you already have at home. Stay tuned!
Until then... keep on modding!
MayFly Le Habanero Review
Great versatility in combined EQ controls. Tasty low-gain boost voice. Muscular Fuzz Face-like fuzz voice.
Can be noisy without a lot of treble attenuation. Boost and fuzz order can only be reversed with the internal DIP switch.
$171
May Fly Le Habanero
A fuzz/boost combo that’s as hot as the name suggests, but which offers plenty of smoky, subdued gain shades, too.
Generally speaking, I avoid combo effects. If I fall out of love with one thing, I don’t want to have to ditch another that’s working fine. But recent fixations with spatial economy find me rethinking that relationship. MayFly’s Le Habanero (yes, the Franco/Spanish article/noun mash-up is deliberate) consolidates boost and fuzz in a single pedal. That’s far from an original concept. But the characteristics of both effects make it a particularly effective one here, and the relative flexibility and utility of each gives this combination a lot more potential staying power for the fickle.
“Le Habanero’s fuzz circuit has a deep switch that adds a little extra desert-rock woof.”
The fuzz section has a familiar Fuzz Face-like tone profile—a little bit boomy and very present in that buzzy mid-’60s, midrangey kind of way. But Le Habanero’s fuzz circuit has a deep switch that adds a little extra desert-rock woof (especially with humbuckers) and an effective filter switch that enhances the fuzz’s flexibility—especially when used with the boost. The boost is a fairly low-gain affair. Even at maximum settings, it really seems to excite desirable high-mid harmonics more than it churns out dirt. That’s a good thing, particularly when you introduce hotter settings from the boost’s treble and bass controls, which extend the boost’s voice from thick and smoky to lacerating. Together, the boost and fuzz can be pushed to screaming extremes. But the interactivity between the tone and filter controls means you can cook up many nuanced fuzz shades spanning Jimi scorch and Sabbath chug with tons of cool overtone and feedback colors.