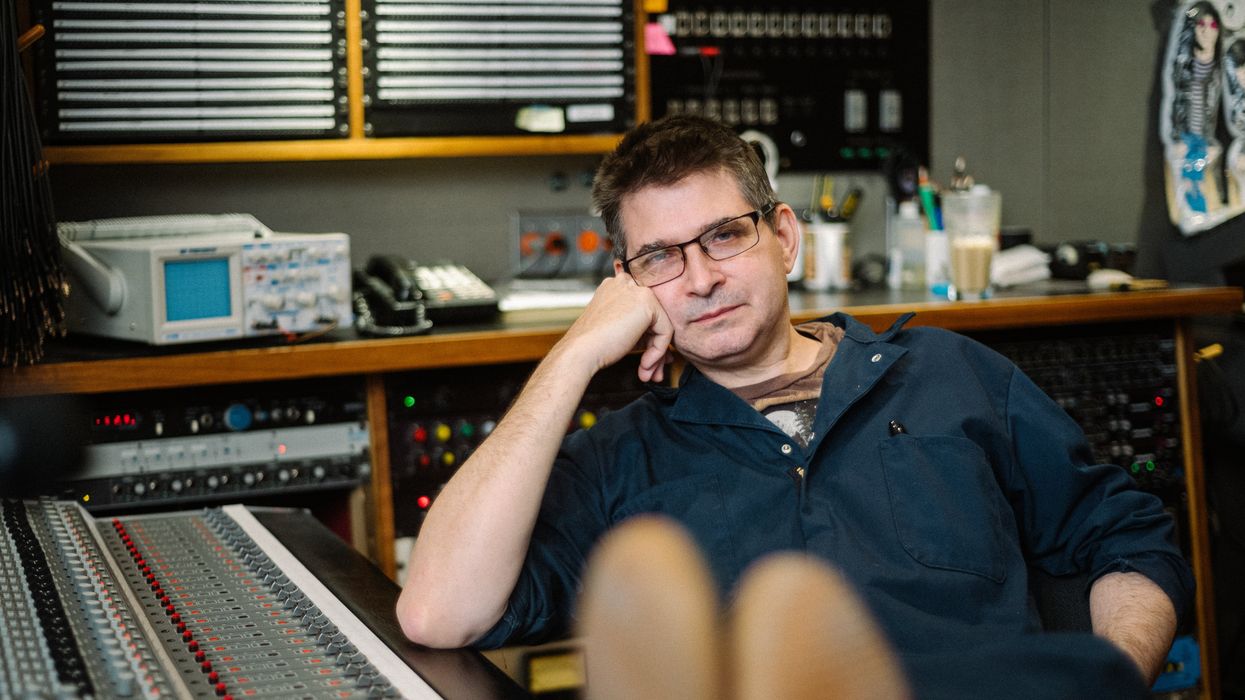

“All day every day, we’re grinding it out,” says engineer Steve Albini of his team at Electrical Audio, the Chicago studio he built and has run since 1997. “We’re constantly in session, constantly under fire.”
While it might be tempting to geek out and ask Albini about all the iconic albums that he’s recorded with the utmost finesse—and surely, there would be value in rapping about recording some of the biggest names in guitar music—that’s all been done.
What’s much more interesting is the work that goes on every single day at the studio. So, when he tells me, “My colleagues at Electrical Audio and I are constantly having to interrogate our methods and validate the things that we’re doing and come up with arguments for why we should do things this way or that,” that’s the stuff I want to know about. If you want to learn about how he recorded In Utero, go listen to Conan’s podcast. (Albini was a guest, along with Dave Grohl and Krist Novoselic, on the October 23, 2023 episode of Conan O’Brien Needs a Friend, and it’s a thorough discussion that is totally worth checking out.)
The fact is, Albini has recorded countless records. I’m sure he has a tally in his books somewhere, but it would be exceedingly difficult to know for sure how many albums he’s engineered. That’s because, as extensive as his credits are in various record-collecting resources, he’s also impressively accessible as a for-hire engineer. All levels of artists—from superstars to harder-to-track, mostly unknown road dogs—have carved out their time with him. Plus, he’s been at it since he started renting four-track demo packages on the weekends during his high school years in Missoula, Montana.
The body of engineering work that Albini has amassed is monumental not just in size, but also in musical scope, which extends further than from Sunn O))) to Magnolia Electric Company, Cheap Trick to Neurosis, or Low to The Thing. And with those artists, he often helps capture a landmark album, or at least the record that fans refer to as “the one they recorded with Albini.”
Aside from his day job, there’s also his guitar playing. Albini serves as the compass for cutting, brutal tone in the punk and underground rock scenes. Since his early days in the hard-hitting Big Black through his continuing work alongside bassist Bob Weston and drummer Todd Trainer in the band Shellac—whose soon-to-be six (no info yet, but a new one is confirmed to be on the way) full-length albums and some other recorded odds and ends are maybe the purest documents of his overall sonic aesthetic—he’s used a fairly concise rig of well-suited esoteric gear to shape his incisive, metallic, and esoterically personal guitar sound in the creation of angular riffage and gnarly feedback.
Albini’s sonic mastery seems to know no bounds: He’s probably the most-cited proponent of analog recording. His live-band-in-a-room sound is unparalleled. And his drum sounds are peerless. But, while it’s not as if he never talks about guitar, it’s rare to see him dive deep on his guitar-specific processes.
So, we called up Electrical Audio and had a chat about his methods on recording guitars and how they’ve evolved, his take on modern guitar culture, and the definitive details of his sound.

In addition to his gear collection, Albini is also a good-bandname-T-shirt collector. (If this isn’t proof enough, go look up a photo from when he won his first gold bracelet in the World Series of Poker.)
Photo by Daniel Bergeron
When you’re going to record a guitarist, what’s your process of deciding how you’re going to choose a microphone, and how you’re going to mic their amp or cabinet?
Steve Albini: You have a conversation—what kind of sound are they shooting for? Who are some guitarists whose sound would be appropriate for their music? That sort of thing. And sometimes that’ll give you a clue about how to get started.
If they like a thick, bass-y, chewy, distorted sound, you want to make sure you’re using mics that capture that low-frequency stuff with good definition and not get muddy or soft. If the kind of guitar sound they’re shooting for is very bright and very crisp and dry, you’ll want to make sure to avoid using mics that can have some resonance or bloom to them that will soften that sort of precision.
I think it’s a bad idea to have a standard method where when whatever guitarist walks in you stick an SM57 on it and call it good. A lot of people do that as a default just because it resolves the issue quickly, and they can get on with their day and do more fancy stuff. But I think it’s absolutely critical to pair the microphone with the actual sound that’s coming out of the amp.
After having a conversation with the guitar player, understanding what their aesthetic is, I have them set up their gear and just play a bit, to get a feel what their playing style is like. Are they using a lot of feedback and sustain or are they hopping on a bunch of different pedals all the time? Is the sound derived from their playing style or from particular layering of pedals? Getting intimate with the exact specifics of the guitar style and sound and aesthetic guides you on what microphones to use and physically where to put them.
The main thing is not to have a preconceived notion about what mics are good for guitar. I’ve used everything from vocal-caliber condenser microphones to quite limited electret microphones to high-quality ribbon microphones to pawnshop junk microphones—I’ve used absolutely everything you can imagine on a guitar amp, and that selection is always based on the aesthetic of the person playing and then the actual sound that’s coming out of the cabinet. In your mind, you might have an idealized notion of what a heavy guitar sounds like or what a clean guitar sounds like, but until you get down on all fours and listen to the sound coming out of the speakers, you don’t really know what you’re dealing with.
“When you listen to the speaker when the guitar player is playing, the sound that’s coming off—you should consider that the goal. What you’re trying to do is you’re trying to make that sound happen in people’s homes.”
How do you interpret what you’re hearing then?
Albini: When you’re down on all fours listening, you need to be forming a mental image of what that sound is like. Are there spikes and dips in the frequency response? Is there a lot of granular treble detail? Is it a really smooth sound? Does it have a sort of billowing quality, like a trombone-like fundamental, or is it really dry and raspy? Even using wine-tasting words like that, it helps you form an internal image of what that guitar is supposed to sound like when you hear it on playback, and from your experience with your mic collection, you’ll know what microphones are best suited to sounds like that, or you’ll know where to start anyway.
When you listen to the speaker when the guitar player is playing, the sound that’s coming off—you should consider that the goal. What you’re trying to do is you’re trying to make that sound happen in people’s homes.
Steve Albini's Gear
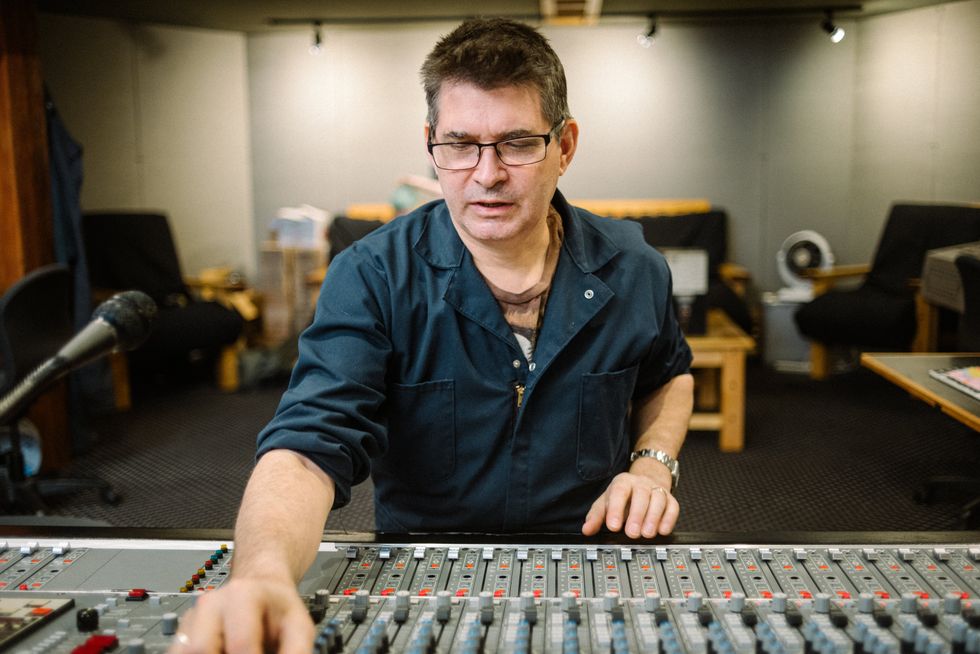
Hands on faders, Albini and his team at Electrical Audio are “constantly in session, constantly under fire.”
Photo by Kevin Tiongson
Guitars
- Travis Bean TB500
Amps
- Tapco/Intersound IVP Preamp
- Fender Bassman
- Custom homemade speaker enclosure based on Electro-Voice TL Series plans with 10" and 12" Celestion Greenbacks
Effects
- Interfax Harmonic Percolator
- MXR Smartgate
Strings and Picks
- Ice picks with the points cut off
- D’Addario XLs (.012–.016–.020w–.028–.038–.048)
Once you’ve chosen a mic, what’s next in the decision-making process?
Albini: One thing that I do that I think is probably distinctly different from what a lot of other engineers do, I tend to have whatever microphone I’m using on the guitar in the middle of the speaker cone, and I don’t generally use microphones pressed up close to the grille cloth right next to the speaker. I tend to use microphones at a working distance of between eight and 14 inches from the cabinet.
A lot of engineers made their bones as live engineers, where they’re trying to get isolation on stage, so they have the mics as close as possible to the speaker cabinet, and that practice translated into the studio. I experimented with that technique because I saw everybody else doing it, but I just never got good results with it. It always sounded slightly tweaked and muffled and weird. I found that when I put the microphone dead center on the speaker, then the sound hitting the microphone sounded more like what I heard when I was down on all fours listening to the speaker myself.
Working distance has a big effect on the sound quality. If the microphone is choked up tight on the speaker, you get a lot more low-frequency energy. You get a lot more muscular pumping low end from the proximity effect of the microphone, and, especially with ribbon microphones that are bi-directional and have a fairly exaggerated proximity effect, you can really use that to tune the response of the microphone. So, I say that I use a working distance of between eight and 14 inches. If I’m in the closer part of that range, six to eight inches from the speaker, there’s going to be a lot more of the sub low end emphasized in a bi-directional ribbon microphone, and that can be great to add weight and heaviness to a heavy guitar.
Then, if the microphone is backed off more like 12 to 14 inches, then you get much more of an overall picture of the sound of the cabinet, where it’s not emphasizing any particular region, for lack of a better word. It’s a flatter representation of the sound coming off the speaker. Being able to tune the behavior of the microphone by moving the microphone in and out just by a matter of inches can make a noticeable difference in the sound quality.
At this point in your career, do you know what mic to use as soon as you listen to someone’s playing?
Albini: It’s really rare for me to listen to a speaker, listen to somebody playing guitar, grab a microphone, put it up, and have it be right in the first instance. When that does happen sometimes, you feel like a fucking genius. That’s really satisfying. That means the first 30 years of your career weren’t wasted, but it doesn’t happen often.
Often, you have to move the microphone, or sometimes you have to swap the microphone out completely, like this microphone just can’t handle that much high end, it sounds too raspy, it’s just too midrange forward, it starts to sound nasal and different parts of the playing vocabulary can sound different as well. Sometimes, you’ll have a setup that sounds amazing when the guitarist is just playing rhythm stuff, but then when they go up the strip and start showing off, it can be too piercing or too woolly sounding, so it’s often a good idea to have a complement microphone.
“It’s really rare for me to listen to a speaker, listen to somebody playing guitar, grab a microphone, put it up, and have it be right in the first instance. When that does happen sometimes, you feel like a fucking genius.”
You’ll have a couple of microphones in the same position, one that is maybe a brighter, drier sound and one that’s maybe a fatter, darker sound. And that way you can either balance those microphones against each other for a composite sound or use them in stereo to synthesize a stereo image. Or when the lead kicks in, you can nudge the brighter microphone for a little bit more bite and attack.
I think having an ambient character available on the recording often helps with the sense of realism. If you’re just using a single guitar, for example, then having an ambient microphone that you can use to create a stereo image helps add to the sensation of hearing the sound in a room, even if it’s a very dry room. Having close mics on the amp and then also having a distant mic out in the room eight or 10 feet away gives you a little bit of air on that secondary mic, which you can then use to create a stereo image to help localize the guitar in the stereo image of the whole thing.
All of those little things, if you don’t have it set up so you have those kinds of options available, then you can’t make those choices down the road. I have been in sessions where some engineers have an array of microphones around a speaker cabinet. They’ll have eight or 10 microphones in a sort of swarm around a speaker cabinet. And that, to me, just speaks of really poor decision making. If you’re recording eight or 10 microphones at once and with the idea that you’ll sort it all out later, that just puts all your critical decisions off until the last minute and means that you’re going to make those decisions poorly. I think it’s much, much better to listen to it on the first playback and decide if you are on the right track or not. And if you’re not, just stop and fix it. Don’t just carry on with the plan to deal with it later, because when you get to later, you just have way too much shit to deal with.
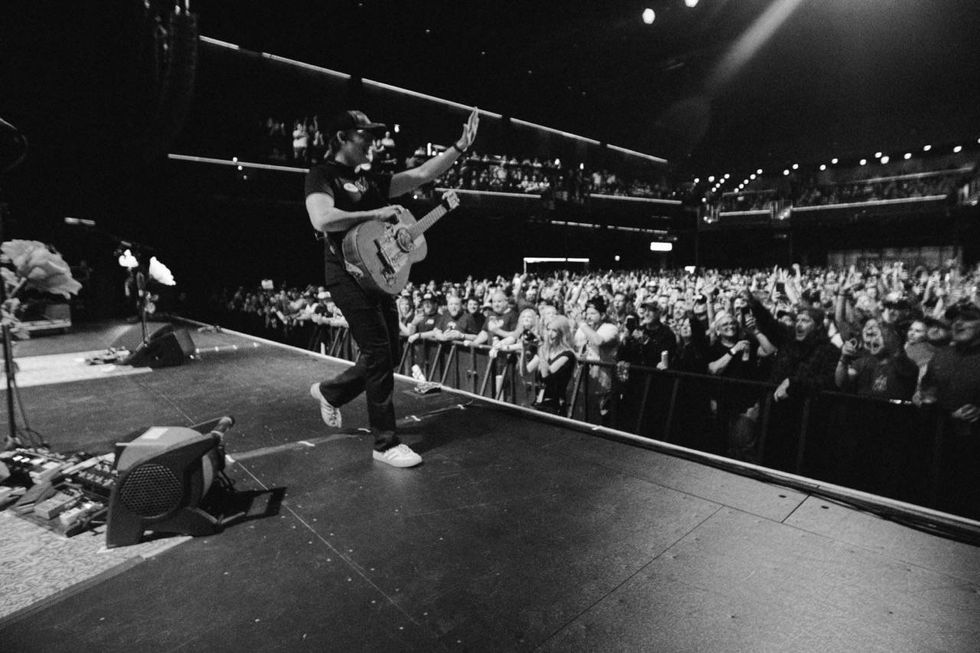
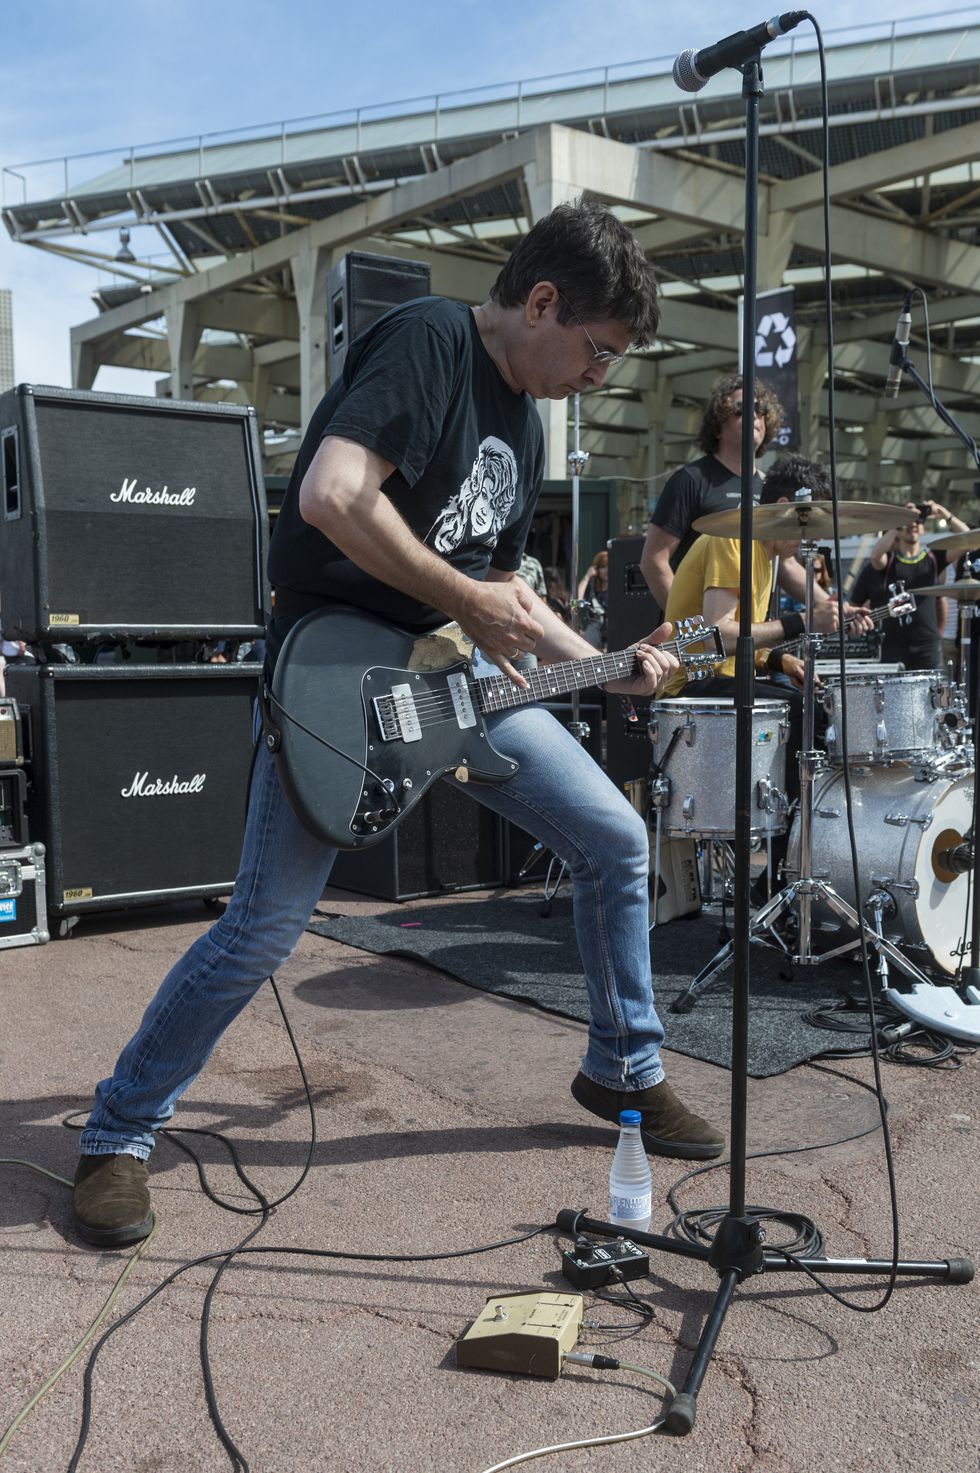
Onstage with Shellac, Albini wields “Old Ironsides,” his Travis Bean TB500. Behind the guitarist lurks his customized amp head, which contains a Tapco/Intersound IVP Preamp and Fender Bassman, and his homemade speaker cabs.
Photo by Tim Bugbee
It’s like it creates option anxiety, and at that point, you’re just making the mix all that much longer.
Albini: Yeah, it’s not even the amount of effort that it takes. I don’t think it’s possible to make 10,000 critical decisions simultaneously and have them all be as valid as if you were to make those decisions one at a time as they came up with all your attention and full consideration. So, while you’re setting up the guitar, figure out which microphones you want to use and commit to them, and once you’ve committed to them, then that decision is made, and you can just get on with your day and you don’t ever need to re-litigate those decisions.
I also feel like over the course of working on a record, you get acclimated to the sound that you’re listening to, and then that becomes the basis on which you make other decisions. If you pull the plug on that by changing the sound around at the last minute, then all of those predicate decisions that were made based on that original place keeper have somewhat been invalidated. And I think that’s a dangerous thing as well.
In one of the videos on the Electrical Audio YouTube page, you talk about developing your practices through an iterative process of trial and error. Is experimentation still a part of your process?
Albini: I actively question myself and verify my preconceptions or challenge my preconceptions. One nice way to do that in a kind of a programmatic way is something I stole from Bob Weston, the bass player in the band Shellac that I’m in. He’s also a fine recording engineer and mastering engineer. I read an interview with him maybe 15 years ago where he said that on every session he does, he tries to do just one thing that he’s never done before. It might be the choice of microphone or positioning a microphone or a processing choice or a routing, just something, and that seemed brilliant to me. Just a very simple way to make sure that you’re always expanding your repertoire and always expanding your knowledge base. You don’t get set in your habits. And so, I stole that, and I do that to this day.
“While you’re setting up the guitar, figure out which microphones you want to use and commit to them, and once you’ve committed to them, then that decision is made, and you can just get on with your day and you don’t ever need to re-litigate those decisions.”
Also, microphones come in over the transom. There are microphones being designed and invented every day, and we get a chance to hear a lot of those either as trial or because people want our opinions on them. They’ll send them to us to put them in use for a while and play around with them. So, I get to play around with stuff that I’ve never heard before pretty regularly, and I like to try microphones I’ve never heard before.
This has proven enormously valuable over the course of the last 15 or 20 years. My routine behaviors have changed quite a bit as a result of these little, tiny experiments that I’ve done one at a time.
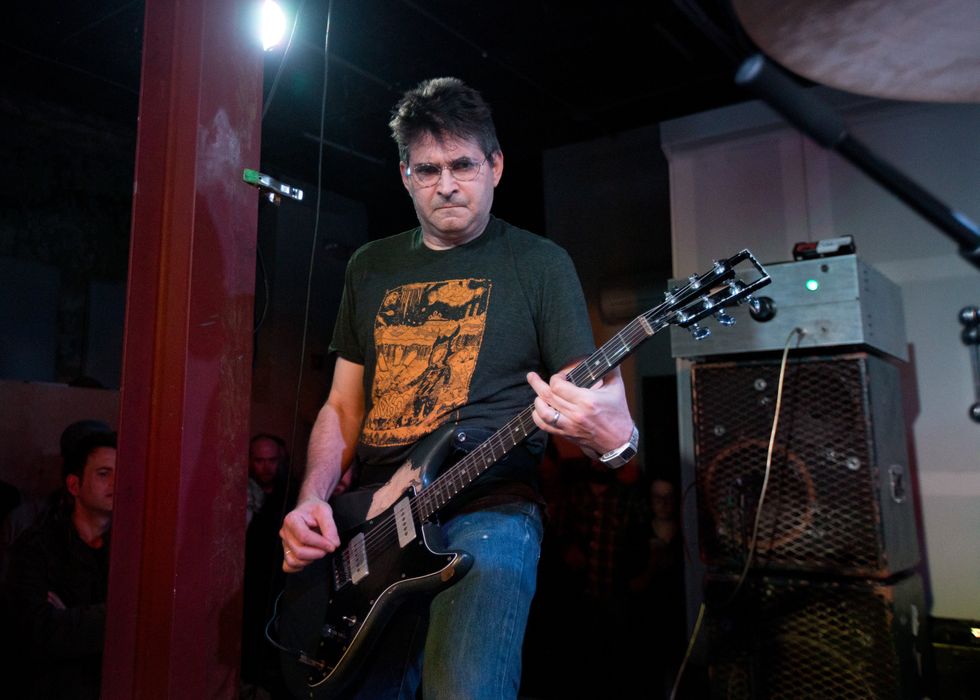
With Shellac bandmates Todd Trainer (drums) and Bob Weston (bass) in view, the most legendary Harmonic Percolator is at Steve’s feet, next to his MXR Smart Gate. If you’re wondering, Albini uses a waist strap for his guitar.
Photo by Jordi Vidal
I would imagine that, making as many records as you do, that’s like constant revision.
Albini: I promise you, the moment you get complacent about how you do things, someone will show up with a rig that’s freakish in a way you’ve never encountered before.
I did an album with the group Sunn O))). Their music is really slow-moving, impossibly heavy riffs, but the sound is really minimal. It’s just two guitars most of the time. In the studio, they added a few guests. One of is Hildur Guðnadóttir; she plays the cello.
There’s an instrument that was invented for her by a friend of hers called the halldorophone. It’s an electric cello that has built into it an amplifier and loudspeaker, so it’s a self-resonating, self-feeding-back, infinite-sustain cello. It’s a super bizarre thing, but she’s an expert. There’s one in the world and I’m staring at it and I have to figure out how to record it.
The fact that I am confronted with these new and different things all the time means that my vocabulary and my skillset and my facilities are constantly being tested and improved. And that’s one of the great joys, for me anyway, of doing what I do for a living, that I do get to do these freakish things once in a while.
You use a small pedal setup as a player, but you’re engaging with different kinds of players all the time. What do you think about modern pedal technology?
Albini: The stage that we are at now, where every player in every band has a pedalboard and have this sort of a curated collection of sounds that they come up with, I actually got a preview of that in the late ’80s. The first time I went to Japan, most guitarists that I worked with had a pedalboard with a half a dozen pedals on it, and that’s how they would craft their sound. They could bring that anywhere and plug it into any amp and they’d be happy.
Something very similar is happening now in the U.S. where a lot of people are doing demo recording at home through modeling amps or through interfaces, and rather than using an amplifier for its inherent qualities, they’re kind of defeating the amplifier by using pedals as the principal source of their sound. It’s a trend. I don’t really have an opinion about it.
“I promise you, the moment you get complacent about how you do things, someone will show up with a rig that’s freakish in a way you’ve never encountered before.”
There are some people who are more adept at it than others, but it’s absolutely the case that most players in most bands now have multiple pedals that they’re using, and the songs are arranged in a way where you use this combination for this part and this combination for this part. And nothing about it seems bad to me. It’s a little more cumbersome, especially when you’re in the studio and you’re trying to track down problems. But when you see somebody who’s really put some thought and attention into it and they’re really using the pedals in an expressive way….
I did a session with Reba Myers from Code Orange. She has this really expansive pedal setup where she’s got a main soundboard where the general tone for a given song comes from, and then she’s got a kind of an expression board, which is just all the crazy shit, and she’s constantly going back and forth. She’s an example of someone who’s put a lot of thought and attention into the specifics of the pedalboard and is using it as a creative tool. I’ve seen other people where it’s kind of pro forma—like, Kiss wore funny outfits on stage, and so for a while a lot of bands felt obliged to wear funny outfits on stage.
I know some old school guys are like, ‘Plug the guitar straight into the amp, and if you can’t get it done with that, you’re not a real musician,’ or whatever. That’s horse shit. That’s just boomer shit. I’m not into that at all.
How Steve Albini Gets His Guitar Sound
How did your personal guitar sound develop over the years?
Albini: When I was in Big Black, that band was predicated on the do-it-cheap, do-it-quick, take-no-prisoners approach. That was very much the cornerstone of the behavior in the punk rock scene. Don’t try to get it perfect, just get it. So, everything about that band was done sort of extemporaneously. I made the first Big Black record on my own in my apartment, so I needed an amplifier that I could use for either guitar or bass. I stumbled onto this bizarre preamp called the Tapco/Intersound IVP. It had a clean channel and a distorted channel. I didn’t find much use for the clean channel, but the distorted channel sounded great on either bass or guitar—or great toward my aesthetic at the moment, which was a pretty brutal one.
When Shellac started, I was looking for a fatter, fuller sound than the scrabble-scratchy sound I had with Big Black. I eventually gravitated toward the Fender Bassman as the perfect tube amp for me. But when I would play just the Bassman, I missed a little bit of the bite and the sizzle from the old transistor days. So, I ended up making a hybrid setup with the Tapco IVP preamp, typically recorded direct. And then on stage, I’ll have a monitor cabinet for it that has a horn in it, so it’s like a full-range speaker, and the Fender Bassman going into a fairly bass-y cabinet, typically a 4x12 when we’re on tour in Europe and we’re using backline.
The cabinets that Bob and I made for our amps—I have two Celestion greenbacks in that, a 10" and a 12"—are based on the TL series cabinet that are the published plans that Electro-Voice made available for using their speakers in an enclosure. If you just built a cabinet along those published plans, you would end up with exactly what Bob and I use for our speaker setups.
When you record yourself for a Shellac album, do you always use the same gear?
Albini: No, it has been different on literally every session. I often use the amp that I use on stage. Often, I do not. Often, I’ll use some other transistor amp and some other tube amp as the two complement signals. It’s essentially always two amplifiers, a transistor amp and a tube amp. The transistor amp is typically being recorded direct, and the tube amp is always recorded acoustically through a speaker cabinet with microphones and stuff.
But I have used an Orange OR80. There’s an amp that was made by a company called Sam Amp, and I believe there are very few of them in the world, but I ended up with one of them, and I’ve used the Sam Amp. I’ve used the Traynor YBA-3, Traynor YBA-1, a Marshall JTM-45. I’ve used a lot of different amplifiers for the studio recordings.
The Travis Bean that I use is such an indestructible sound. It’s weird that I’m so fussy about my amp because I’ve demonstrated myself that it kind of doesn’t matter what amp I play through, I can always get something that I like out of it.
We did a tour of Japan very early in the band’s tenure, right after we started. In Japan, it’s normal practice for the venue to have a backline. Every night it was a different, quite crappy by our standards, amplifier on stage. One night, it was a Roland Jazz Chorus. I used a Guyatone amplifier several times, and other Japanese brand names that I was unfamiliar with. Every night sounded fine. As specific as I am about what I like and don’t like, I have sort of taught myself that it’s not that important and that I can zero in on what I like and don’t like about even an imperfect setup.
For pedals, do you use anything other than the Harmonic Percolator, which you’re most known for using?
Albini: I’ve used a noise gate since I first started playing on stage. For many, many years it was just one of the original old-school MXR noise gates. They’ve all crapped out and been repaired and crapped out again many times. There’s an updated version of that MXR called the Smart Gate. I switched over to that. It’s set so that I can just touch the guitar and it opens up, but if I’m not actively playing it, it doesn’t open.
The output of the noise gate goes into the fuzz tone. And the fuzz tone has been a Harmonic Percolator [made by Interfax] since, I want to say, 1986. My friend Jay Tiller from Milwaukee worked at a head shop, record shop, and pawn shop combo in Milwaukee called Record Head. When I was there one time, he said, ‘We have this cool fuzz tone this guy made here. You should try it out.’ And I loved it. So, I bought one from him, and then over the years, I’ve bought a couple more when he stumbled across them at record swap or whatever, or at guitar fairs or whatever, he’s picked them up and I got ’em from him.
I’ve referred to the Percolator as a labor-saving device, because as soon as you hit the switch, the guitar just starts playing. I don’t even need to tell it what notes or anything. It just goes, and that’s my favorite thing about the Percolator, how it’s completely unhinged using it for feedback or whatever. It will choose little melodies that it wants to play, and it’ll just whistle them for you. But you kind of need to be physically moving. I’ve noticed that if you stand in one spot, it just squeals. But if you’re moving around, if the distance between you and your amplifier changes, then the fundamental frequency changes from the physical distance, and you get these really great psychedelic melodies that it creates.
Have you played any of the Percolator clones?
Albini: They all sound very slightly different, but they’re all basically the same. Chuck Collins made a complete, meticulous resurrection of the Harmonic Percolator [through his company, Theremaniacs] a few years ago—those are absolutely perfect. They respond exactly the same way. They sound the same. Almost all the others that I have seen—people send them to me because they feel like I should pass my hands over their Percolator or whatever, I’ve had maybe six or eight others—I can’t use any of ’em. They all behave differently somehow.
I think one of the perversions of my setup is that coming out of the noise gate, the signal into the Percolator is buffered, so it sounds different if you just plug your guitar straight into it, and I never do that.