
Learn to craft workable arrangements on the fly with these simple patterns.
Intermediate
Beginner
- Understand the elements that go into a fingerstyle arrangement.
- Develop your forward and backward banjo rolls.
- Create space for vocalists as well as other instrumentalists.
It's great to have polished songs memorized note-for-note and stored neatly in your gigging repertoire, but there's probably just as much value to being able to fly by the seat of your pants and pull an arrangement out of thin air. Knowing the building blocks of fingerstyle guitar is a great way to accomplish this.
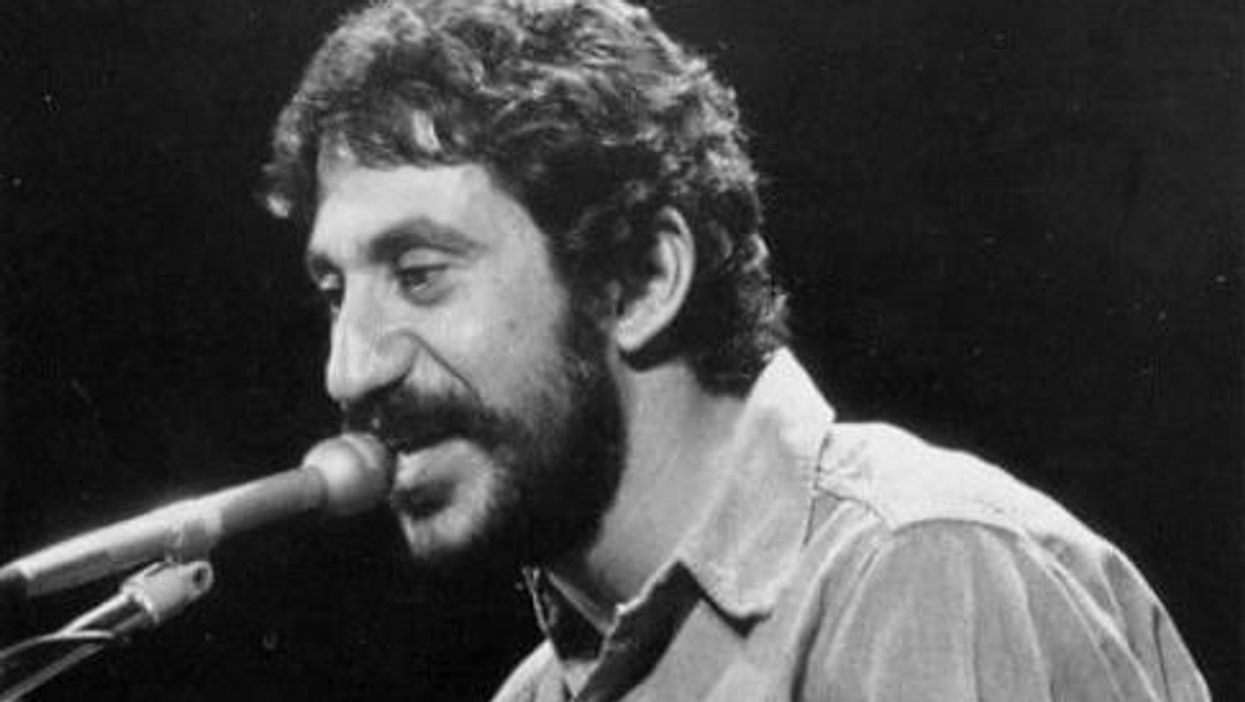
Since fingerstyle is so closely linked with the singer-songwriter and Americana genres, we'll be looking at chord movements and voicings loosely inspired by Jim Croce's sound in songs like "Operator" or "These Dreams," as well as other related fills that could be used in similar circumstances.
Operator (That's Not The Way It Feels)
These Dreams
We're not exactly reinventing the wheel by arranging fingerstyle parts on the fly. There are some harmonic principles, riffs, patterns, and fills, applicable in many keys, that can come in handy to help us do this. For now, we'll focus on approachable riffs that can be used as a foundation for a fingerstyle arrangement, while also integrating some harmonic nuance and rhythmic textures to imply movement.
How to Reharmonize Using Open Strings
Our first few examples demonstrate common passing chords you can use to navigate between the main chords in a typical pop ballad. Notice how we are playing open strings where we can to add interest to the chords. In Ex. 1 you can see how a simple walkdown can get you from Em to G while keeping the 3rd string open.
Jim Croce Ex. 1
Generally, I like using an open string if it's a root, 2, 3, or 6 of the chord that is being played. There's a lot of room to play around with this, and there aren't necessarily any wrong answers—but it really matters that you're mindful of the context.
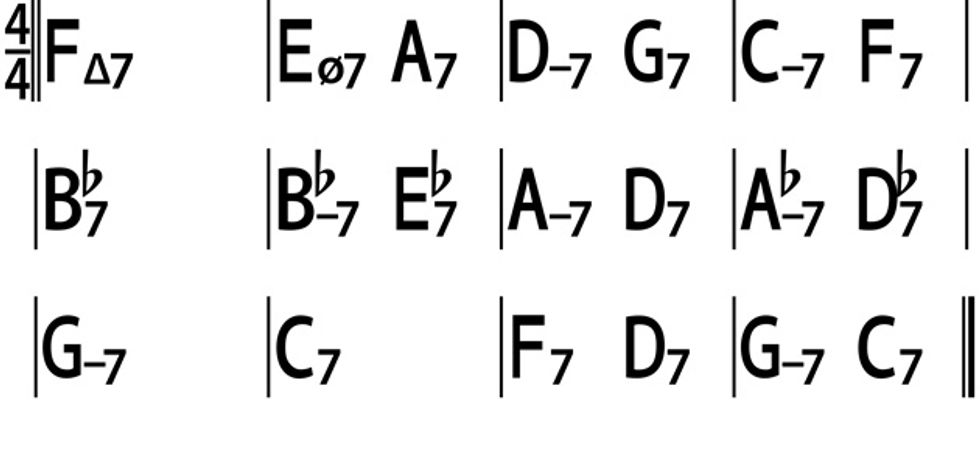
In Ex. 2, I show how to approach a V7 chord from a minor root triad, in this case D minor. I keep the top three strings the same while adding in a descending bass movement that lands perfectly on the A7.
Jim Croce Ex. 2
Finally, in Ex. 3 I've notated a handy way to do a walkdown in the key of D that hits the VIm (Bm) and IV (G) chords before resolving back to where we started with a Dadd9 shape. Playing a couple of notes from the scale in the bass will help make the chord feel like it's moving, even though, theoretically, it might not be. Between mixing up the bassline, knowing a little bit about how to flavor a chord, and learning to incorporate open strings here and there, you've just figured out the initial steps in reharmonizing a chord progression.
Jim Croce Ex. 3
Syncopations and Fingerstyle Rolls
Next up we'll focus on different fingerpicking rolls and syncopations to create movement. Not all fingerstyle fits into the standard Merle Travis "boom-chick" style where the bass is alternating quarter-notes and states the root of each chord on the first beat of each measure. There are more subtle ways to imply rhythm in a progression. We'll explore this in the following examples using some of the chords and progressions from earlier.
The simple pattern in Ex. 4 moves through the progression we looked at in Ex. 1. Keep the 1st string ringing throughout and the chord shape in place while you pick the notes. Notice how some of the open strings allow those arpeggios to feel like they're creating a melody of their own, and how changing the order of the picking pattern changes those melodies? If we were using very simple chords, it would be harder to achieve this effect.
Jim Croce Ex. 4
For Ex. 5 I've altered the pattern a bit so that the bassline moves around while the remaining chord shape rings out.
Jim Croce Ex. 5
I introduce the banjo roll in Ex. 6. Simply put, a banjo roll is when you play a pattern that goes either forward or backwards across the strings. In this case, we are using a reverse banjo roll to flesh out the harmony.
Jim Croce Ex. 6
Ex. 7 is another reverse-banjo pattern that builds on the moving bassline example we looked at in Ex. 3. If you are having difficulty playing any of these exercises with clarity, try slowing down, making sure you've got the fingerings right, and take turns isolating the bass line.
Jim Croce Ex. 7
If you're up for a challenge, Ex. 8 is a forward-roll pattern that's rather involved. But remember, slow and steady will get you to where you need to be.
Jim Croce Ex. 8
One of the benefits of playing arpeggios and syncopations is that it makes it easier to go between fretted chord shapes. Try minimizing string squeaks by picking your hand up from the chord to move to another, rather than sliding from one into another (easier said than done). A trick that Chet Atkins used was sliding down with the fingers that are placed on the unwound strings, while lifting up the fingers that were on the wound strings. This doesn't apply if you're going between chords that have very different fingering configurations, but for chords with similar fingerings it really helps to polish those transitions. In our final two examples, we'll incorporate hammer-ons, pull-offs, and slides to our pre-existing fingerpicking patterns.
Check out the subtle variations and hammer-ons in Ex. 9. If you're accompanying another artist you may want to use these sparingly, maybe more for transitions than for verses and choruses. However, if you're the center of attention at any point during the song, these types of fills can provide a bigger sound.
Jim Croce Ex. 9
Our final example pulled from Croce's bag of tricks is Ex. 10. It's a flowing culmination of the techniques we've covered so far. Dig into those hammer-ons that don't have to connect neighboring scale tones.
Jim Croce Ex. 10
I can count multiple times playing gigs where, with literally a minute's notice or less, I've been expected to join in on a song with nothing more than a memory of the melody, key, and the corresponding Nashville numbers. And guess what? I'm happy to say that I've rarely bombed (at least in my own estimation). In fact, those have been some of my favorite moments onstage. The techniques and theory in this lesson have played a big part in that and can hopefully help you as well.
- Dave Rawlings: Harmonic Monster - Premier Guitar ›
- Spice Up Your Cowboy Chords - Premier Guitar ›
- Martin Introduces the D-35 Seth Avett Custom Signature Edition ... ›
The range of clean, dirty, and complex tones available from this high-quality, carefully crafted Dumble modeler make it a formidable studio and performance device.
Fantastic variation in many delicious sounds makes it a bargain. High-quality. Easy to use and customize. Killer studio path to lively, responsive guitar sounds.
Price may be hard for some to swallow if they don’t leverage the whole of its potential.
$399
UAFX Enigmatic ’82 Overdrive Special
uaudio.com
I’ve never played a realDumble. I’d venture most of us haven’t. But given my experiences with James Santiago’s UAFX modeling pedals, most recently theUAFX Lion, I plugged in the new Dumble-inspired UAFX Enigmatic confident I’d taste at least the essence of that very rare elixir. You could argue there is no definitive Dumble sound. Each was customized to some extent for the customer, and they are renowned nearly as much for dynamic responsiveness and flexibility as their singing, complex, clean-to-dirty palettes.
The Enigmatic nails the flexibility, for sure. To my ears, its tone foundation lives somewhere on a sliver of Venn diagram where a black-panel Fender and a 50-watt Hiwatt intersect. It’s alive, dimensional, snappy, sparkly, massive, and, at the right EQ settings, hot and excitable. But the Enigmatic’s powerful EQ and gain controls, multiple virtual cab and mic pairings, rock, jazz, and custom voices, plus additional deep, bright, and presence controls enable you to travel many leagues from that fundamental tone. The customization work you can do in the app enables significant changes in the Enigmatic’s tone profile and responsiveness, too. All these observations are made tracking the Enigmatic straight to a DAW—making the breadth of its personality even more impressive. But the Enigmatic sounds every bit as lively at the front end of an amp, and black-panel Fenders are a primo pairing for its saturation and sparkly attributes. The Enigmatic is nearly $400, which is an investment. But considering the ground I covered in just a few days with it, and the quality and variety of sounds I could conjure with the unit just sitting on my desk, the performance-to-price ratio struck me as very favorable indeed.
This month’s mod Dan’s uses a 500k linear pot, a 1.5H inductor (L) with a 0.039 µF (39nF) cap (C), and a 220k resistor (R) in parallel.
This simple passive mod will boost your guitar’s sweet-spot tones.
Hello and welcome back to Mod Garage. In this column, we’ll be taking a closer look at the “mid boost and scoop mod” for electric guitars from longtime California-based tech Dan Torres, whose Torres Engineering seems to be closed, at least on the internet. This mod is in the same family with the Gibson Varitone, Bill Lawrence’s Q-Filter, the Gresco Tone Qube (said to be used by SRV), John “Dawk” Stillwells’ MTC (used by Ritchie Blackmore), the Yamaha Focus Switch, and the Epiphone Tone Expressor, as well as many others. So, while it’s just one of the many variations of tone-shaping mods, I chose the Torres because this one sounds best to me, which simply has to do with the part values he chose.
Don’t let the name fool you, this is a purely passive device—nothing is going to be boosted. In general, you can’t increase anything with passive electronics that isn’t already there. Period. But you can reshape the tone by deemphasizing certain frequencies and making others more prominent (so … “boost” in guitar marketing language). Removing highs makes lows more apparent, and vice versa. In addition, the use of inductors (which create the magnetic field in a guitar circuit) and capacitors will create resonant peaks and valleys (bandpasses and notches), further coloring the overall tone. This type of bandpass filter only allows certain frequencies to pass through, while others are blocked, and it all works at unity gain.
“You can’t increase anything with passive electronics that isn’t already there … but you can reshape the tone by deemphasizing certain frequencies and making others more prominent.”
All the systems I mentioned above are doing more or less the same thing, using different approaches and slightly different component values. They are all meant to be updated tone controls. Our common tone circuit is usually a variable low-pass filter (aka treble-cut filter), which only allows the low frequencies to pass through, while the high frequencies get sent to ground via the tone cap. Most of these systems are LCR networks, which means that there is not only a capacitor (C), like on our standard tone controls, but also an inductor (L) and a resistor (R).
In general, all these systems are meant to control the midrange in order to scoop the mids, creating a mid-cut. This can be a cool sounding option, e.g. on a Strat for that mid-scooped neck and middle tone.
Dan Torres offered his “midrange kit” via an internet shop that is no longer online, same with his business website. The Torres design is a typical LCR network and looks like the illustration at the top of this column.
Dan’s design uses a 500k linear pot, a 1.5H inductor (L) with a 0.039 µF (39nF) cap (C), and a 220k resistor (R) in parallel. Let’s break down the parts piece by piece:
Any 500k linear pot will do the trick, in one of the rare scenarios where a linear pot works better in a passive guitar system than an audio pot.
(C) 0.039µF cap: This is kind of an odd value. Keeping production tolerances of up to 20 percent in mind, any value that is close will do, so you can use any small cap you want for this. I would prefer a small metallized film cap, and any voltage rating will do. If you want to stay as close as possible to the original design, use any 0.039 µF low-tolerance film cap.
(L) 1.5H inductor: The original design uses a Xicon 42TL021 inductor, which is easy to find and fairly priced. This one is also used in the Bill Lawrence Q-Filter design, the Gibson standard Varitone, and many other systems like this. It’s very small, so it will fit in virtually every electronic compartment of a guitar. It has a frequency range of 300 Hz up to 3.4 kHz, with a primary impedance of 4k ohms (that’s the one we want to use) and a secondary impedance of 600 ohms. Snip off the three secondary leads and the center tap of the primary side and use the two remaining outer primary leads; the primary side is marked with a “P.” On the pic, you can see the two leads you need marked in red, all other leads can be snipped off. You can connect the two remaining leads to the pot either way; it doesn’t matter which of them is going to ground when using it this way.
Drawing courtesy of singlecoil.com
(R) 220k: use a small axial metal film resistor (0.25 W), which is easy to find and is the quasi-standard.
Other designs use slightly different part values—the Bill Lawrence Q-filter has a 1.8H L, 0.02 µF C and 8k R, while the old RA Gresco Tone Qube from the ’80s has a 1.5H L, 0.0033 µF C, and a 180k R, so this is a wide field for experimentation to tweak it for your personal tone.
This mid-cut system can be put into any electric guitar not only as a master tone, but also together with a regular tone control or something like the Fender Greasebucket, or it can be assigned only to a certain pickup. It can be a great way to enhance your sonic palette, so give it a try.
That’s it! Next month, we’ll take a deeper look into how to fight feedback on a Telecaster. It’s a common issue, so stay tuned!
Until then ... keep on modding!
The two-in-one “sonic refractor” takes tremolo and wavefolding to radical new depths.
Pros: Huge range of usable sounds. Delicious distortion tones. Broadens your conception of what guitar can be.
Build quirks will turn some users off.
$279
Cosmodio Gravity Well
cosmod.io
Know what a wavefolder does to your guitar signal? If you don’t, that’s okay. I didn’t either until I started messing around with the all-analog Cosmodio Instruments Gravity Well. It’s a dual-effect pedal with a tremolo and wavefolder, the latter more widely used in synthesis that , at a certain threshold, shifts or inverts the direction the wave is traveling—in essence, folding it upon itself. Used together here, they make up what Cosmodio calls a sonic refractor.
Two Plus One
Gravity Well’s design and control set make it a charm to use. Two footswitches engage tremolo and wavefolder independently, and one of three toggle switches swaps the order of the effects. The two 3-way switches toggle different tone and voice options, from darker and thicker to brighter and more aggressive. (Mixing and matching with these two toggles yields great results.)
The wavefolder, which has an all-analog signal path bit a digitally controlled LFO, is controlled by knobs for both gain and volume, which provide enormous dynamic range. The LFO tremolo gets three knobs: speed, depth, and waveform. The first two are self-explanatory, but the latter offers switching between eight different tremolo waveforms. You’ll find standard sawtooth, triangle, square, and sine waves, but Cosmodio also included some wacko shapes: asymmetric swoop, ramp, sample and hold, and random. These weirder forms force truly weird relationships with the pedal, forcing your playing into increasingly unpredictable and bizarre territories.
This is all housed in a trippy, beautifully decorated Hammond 1590BB-sized enclosure, with in/out, expression pedal, and power jacks. I had concerns about the durability of the expression jack because it’s not sealed to its opening with an outer nut and washer, making it feel more susceptible to damage if a cable gets stepped on or jostled near the connection, as well as from moisture. After a look at the interior, though, the build seems sturdy as any I’ve seen.
Splatterhouse Audio
Cosmodio’s claim that the refractor is a “first-of-its-kind” modulation effect is pretty grand, but they have a point in that the wavefolder is rare-ish in the guitar domain and pairing it with tremolo creates some pretty foreign sounds. Barton McGuire, the Massachusetts-based builder behind Cosmodio, released a few videos that demonstrate, visually, how a wavefolder impacts your guitar’s signal—I highly suggest checking them out to understand some of the principles behind the effect (and to see an ’80s Muppet Babies-branded keyboard in action.)
By folding a waveform back on itself, rather than clipping it as a conventional distortion would, the wavefolder section produces colliding, reflecting overtones and harmonics. The resulting distortion is unique: It can sound lo-fi and broken in the low- to mid-gain range, or synthy and extraterrestrial when the gain is dimed. Add in the tremolo, and you’ve got a lot of sonic variables to play with.
Used independently, the tremolo effect is great, but the wavefolder is where the real fun is. With the gain at 12 o’clock, it mimics a vintage 1x10 tube amp cranked to the breaking point by a splatty germanium OD. A soft touch cleans up the signal really nicely, while maintaining the weirdness the wavefolder imparts to its signal. With forceful pick strokes at high gain, it functions like a unique fuzz-distortion hybrid with bizarre alien artifacts punching through the synthy goop.
One forum commenter suggested that the Gravity Well effect is often in charge as much the guitar itself, and that’s spot on at the pedal's extremes. Whatever you expect from your usual playing techniques tends to go out the window —generating instead crumbling, sputtering bursts of blubbering sound. Learning to respond to the pedal in these environments can redefine the guitar as an instrument, and that’s a big part of Gravity Well’s magic.
The Verdict
Gravity Well is the most fun I’ve had with a modulation pedal in a while. It strikes a brilliant balance between adventurous and useful, with a broad range of LFO modulations and a totally excellent oddball distortion. The combination of the two effects yields some of the coolest sounds I’ve heard from an electric guitar, and at $279, it’s a very reasonably priced journey to deeply inspiring corners you probably never expected your 6-string (or bass, or drums, or Muppet Babies Casio EP-10) to lead you to.
Kemper and Zilla announce the immediate availability of Zilla 2x12“ guitar cabs loaded with the acclaimed Kemper Kone speaker.
Zilla offers a variety of customization to the customers. On the dedicated Website, customers can choose material, color/tolex, size, and much more.
The sensation and joy of playing a guitar cabinet
Sometimes, when there’s no PA, there’s just a drumkit and a bass amp. When the creative juices flow and the riffs have to bounce back off the wall - that’s the moment when you long for a powerful guitar cabinet.
A guitar cabinet that provides „that“ well-known feel and gives you that kick-in-the-back experience. Because guitar cabinets can move some serious air. But these days cabinets also have to be comprehensive and modern in terms of being capable of delivering the dynamic and tonal nuances of the KEMPER PROFILER. So here it is: The ZILLA 2 x 12“ upright slant KONE cabinet.
These cabinets are designed in cooperation with the KEMPER sound designers and the great people from Zilla. Beauty is created out of decades of experience in building the finest guitar cabinets for the biggest guitar masters in the UK and the world over, combined with the digital guitar tone wizardry from the KEMPER labs. Loaded with the exquisit Kemper Kone speakers.
Now Kemper and Zilla bring this beautiful and powerful dream team for playing, rehearsing, and performing to the guitar players!
ABOUT THE KEMPER KONE SPEAKERS
The Kemper Kone is a 12“ full range speaker which is exclusively designed by Celestion for KEMPER. By simply activating the PROFILER’s well-known Monitor CabOff function the KEMPER Kone is switched from full-range mode to the Speaker Imprint Mode, which then exactly mimics one of 19 classic guitar speakers.
Since the intelligence of the speaker lies in the DSP of the PROFILER, you will be able to switch individual speaker imprints along with your favorite rigs, without needing to do extensive editing.
The Zilla KEMPER KONE loaded 2x12“ cabinets can be custom designed and ordered for an EU price of £675,- UK price of £775,- and US price of £800,- - all including shipping (excluding taxes outside of the UK).
For more information, please visit kemper-amps.com or zillacabs.com.