Intermediate
Intermediate
•Provide more structure to your lead lines.
•Give your solos a sense of movement with approach notes.
•Learn how to apply scales and arpeggios for a more intentional sound.
Do you feel like your solos lack focus or that there isn’t any underlying structure to your lines? Does it seem that you are wandering around the neck, hoping that what you are playing “looks like it sounds cool”? Would pushing peas around a dinner plate with a knife be more riveting than the last lick you played? If any of these statements are true, then you need some guide tones, my friend.
Guide tones, also known as target notes, are commonly used in jazz improvisation and usually refer to only the 3rd and 7th of a chord. But, for our purposes, we’re going to apply a more generous definition where all notes of a chord can be used. There are two benefits to using guide tones: They create a predetermined melodic structure that serves as a framework for your solo, and they provide an inner melody to your lines that carry the sound of the chord changes.
The first two examples show a couple of possibilities when building a guide tone melody over a ii-V-I chord progression in the key of C major. The only requirement is that the guide tones should be played on the strong beats of the measure (beats 1 and 3). Next, spell each chord to see what notes you have to work with. For our progression, our choices will come from Dm7 (D-F-A-C), G7 (G-B-D-F), and Cmaj7 (C-E-G-B). Since these examples have one chord per measure, I have chosen to use only one guide tone in each measure. But, I could have used two guide tones in a measure, one on beat 1 and the other on the beat 3. Other than what has already been discussed, there is no right or wrong way to do this. Basically, pick some chord tones, put them on the strong beat(s), and see how it sounds. Change or edit as you see fit!
Take a listen to Ex. 1. The guide tones create a descending melody that leaps up at the end. Using one note per measure, the line starts with C (the 7th of Dm7), then to B (the 3rd of G7), to G (the 5th of Cmaj7) and finally E (the 3rd of Cmaj7). Ex. 2 has a guide tone line similar to the first example, descending for the first three measures and a leap up at the end. It begins with F (the 3rd of Dm7), to D (the 5th of G7), to B (the 7th of Cmaj7), and then to E (the 7th of Cmaj7).
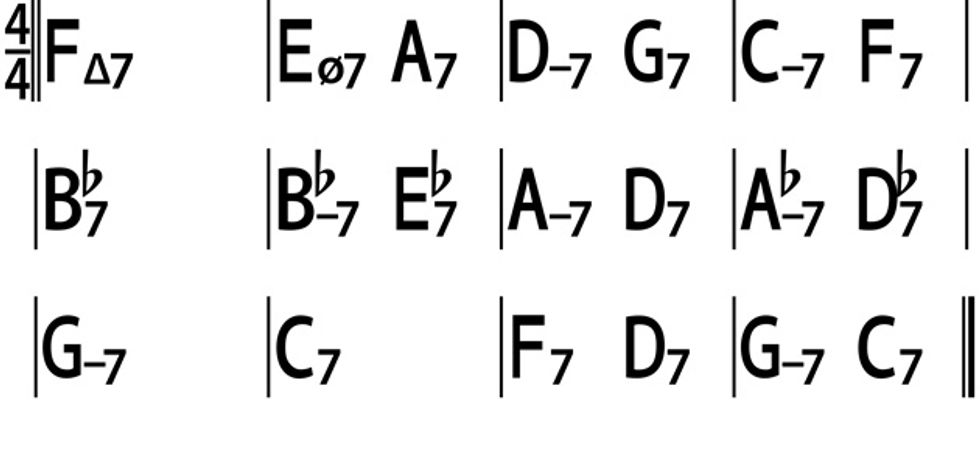
Ex. 3 is an eight measure progression, similar in structure to a popular jazz standard. Harmonically, the first half is a ii-V-I-IV in C major and the second half is a ii-V-i in the key of A minor. In the first six bars, there is one guide tone per measure, and then concludes with two guide tones in each of the last two bars.
Once you have decided on a framework for your solo, use scales and arpeggios to add notes before each guide tone. By doing so, you create motion in your line that sounds musical, and not like you’re choosing notes at random. Listen to Ex. 4 where each guide tone is approached from above by a scale step. Since all the chords are in the key of C, my approach notes are from the C major scale. I can also think in modal terms, where I would use D Dorian in bar 1 to approach the G7 in bar 2. Then, I can use G Mixolydian in bar 2 to approach the Cmaj7 in bar 3, and C Ionian to approach the next Cmaj7 in bar 4. Ex. 5 is the same scalar concept, this time approaching the guide tones from below.
Ex. 6 and Ex. 7 use arpeggios to approach the guide tones from above and below, respectively. I prefer to do this by using the arpeggio of the chord I am going to, not the one I am playing over. So, when I am playing over the Dm7 in the first measure, I will use the G7 arpeggio to approach the guide tone in bar 2. Then, when playing over G7 in the second measure, use the Cmaj7 arpeggio to approach the guide tone in bar 3. This concept is a little easier to see in Ex.7. Dm7 is the chord in bar 1. You approach the guide tone in bar 2 with a G, which is not in a Dm7 chord, but it is in G7.
To get longer lines, use two, three, or more notes from the scale or arpeggio when approaching the guide tones. Ex. 8 approaches the guide tone from above and below, using two and three notes from the scale. Ex. 9 shows the same approach methods, but with notes from the arpeggio.
After you get a handle on the guide tone concepts, experiment with rhythms, rests, and an ever-increasing number of approach notes. Check out Ex. 10 as an example of what is possible. It’s the guide tone line from Ex. 2 fleshed out with a mixture of scale and arpeggio approach notes of various lengths. Ex. 11 is an expansion of the guide tone line from Ex. 3. I used an increasing number of approach notes in the first half of the line. The second half is more rhythmically complex, ending with the triplet figures in the last two measures.
Applying these concepts to something more familiar, Ex. 12 is one possible guide tone melody over an A minor blues. Give it a listen to hear how the first two phrases are relatively scalar, but the last phrase has more of a “sawtooth” vibe. Ex. 13 is the completed solo, using the ideas discussed previously. Throwing everything into the guide-tone blender yielded different types of approaches combined with a variety of rhythms and rests.
Once you get a foothold, substitute different modes, scales, arpeggios, chords, and time signatures to achieve some different sonic flavors. Remember that you are restricting yourself to these few concepts in order to get a more melodic and meaningful solo. If you practice it enough, your brain will start working this way on its own!

For anyone serious about mixing their own recordings, it’s a tool worth considering.
In the world of music production, the tools we choose profoundly influence the final sound of our recordings. I want to make the case for adding one tool that is rarely, if ever, in the “must have” or “sexy gear” spotlight but can deliver huge results to your mixes: the console summing mixer. Tighten up your belts—the Dojo is now open.
While digital audio workstations (DAWs) have revolutionized music production, offering unparalleled editing and flexibility, many producers, including me, still mix back into an analog console for the sonic character and three-dimensionality that it imparts. But buying a professional console isn’t cheap! This is where console summing boxes come into play, offering a unique way to enhance your mixes and elevate them to a professional level.
How Does It Work?
Very simply put, recording consoles have two basic sections: an input section (all the channels of mic pres, and EQ) and a center section (that sums all of the channels together and routes those signals to various configurable outputs such as inserts and aux buses). A console summing mixer is essentially the center section of a console and is designed to sum the individual audio channels, aux buses, stems, and submixes from your DAW in an analog domain.
In a DAW, digital summing—the process of combining multiple tracks and buses into a stereo mix—is handled through complex binary algorithms that, while precise, can sometimes lead to a mix that feels lifeless and one-dimensional, lacking the warmth, depth, and cohesion that analog consoles impart.
One of the most significant advantages of using a summing box is the introduction of harmonic distortion, a natural byproduct of analog circuitry. This isn’t like amp or pedal distortion, but rather a subtle harmonic saturation that adds richness and character to the sound. Low-end frequencies gain girth and definition, while high frequencies have a smooth, silky quality. You can achieve natural compression through subtle variations in phase and amplitude, but that depends on how hard you push the summing mixer box.
But the best benefit, in my opinion, is its ability to produce an undeniably open stereo image. Digital summing, while accurate, often lacks dimension or a sense of space. Analog summing introduces subtle variations in phase and amplitude, creating a sense of width and depth that makes each instrument feel like it occupies its own space in a more 3-D stereo field, which results in a more engaging and polished mix. I’ve also found summing boxes encourage a more deliberate and thoughtful approach to mixing, as it requires submixing certain elements.
API’s ASM164 ($3,195 street) is wildly flexible, offering VU meters, multiple inserts, two separate stereo mix options, and more.
For those who work “in-the-box” and aren’t in the market for a summing box, let alone a console, incorporating a summing box can also serve as a valuable learning tool. By running stems through a summing box and comparing the results to an entirely digital mix, you can train your ear to recognize the subtle qualities that make a mix feel warm, cohesive, spatial, and dynamic. This heightened awareness can then inform your in-the-box mixing decisions, even when you’re not using a summing box.
“Whether you want to add depth and dimension to your tracks, enhance your stereo image, or bring a touch of analog magic to your mixes, a summing box can be a gamechanger."
It’s important to choose the right summing box for your needs and budget, as different models offer varying sonic characteristics. Good summing mixers typically start around $2,000, such as Rupert Neve Design’s 5057 Orbit Summing Mixer. While more expensive, API’s ASM164 ($3,195 street) is wildly flexible, offering VU meters, multiple inserts, two separate stereo mix options, and more. The key here is to understand your needs.
Pairing a summing box with high-quality outboard processors, such as compressors or EQs, will allow you to shape your mix in ways that are impossible within a purely digital setup.
Whether you want to add depth and dimension to your tracks, enhance your stereo image, or bring a touch of analog magic to your mixes, a summing box can be a gamechanger. For anyone serious about mixing, it’s a tool worth considering—one that can make the difference between a mix that’s good and one that’s truly exceptional. Until next month, namaste
Introducing the new Firebird Platypus, a tribute to the rare transitional models of 1965.
In early 1965, the original Firebird design transitioned through several different iterations. One of the significant transitions that occurred flipped the headstock to the Non-Reverse shape. Unlike the original Reverse Firebird headstock design, which featured a two-layered headstock with a holly veneer, the new headstock was flat, like the bill of a platypus.
Mahogany body and glued-in mahogany neck
The Firebird Platypus has a mahogany body with the appearance of a traditional neck-through Reverse Firebird body for that classic Reverse Firebird appearance, while the neck of the Firebird Platypus uses glued-in, set neck construction like the Les Paul and SG and delivers outstanding sustain and resonance.
Platypus transitional headstock design
The headstock features the flat, transitional style “platypus” design that was found only on rare models from the 1965 transitional period when the Firebird was gradually switching over from the features found on the original models that were released in 1963 to the features that were used for the later Non-Reverse Firebird models.
Firebird humbucker pickups
It’s outfitted with two Firebird humbucker pickups. These pickups are equipped with Alnico 5 magnets and have a unique sound that is not quite like any other humbucking pickup, with unmatched clarity, chime, and bite. They sound great for both clean and overdriven tones.
Exclusive Cherry Sunburst finish
This exclusive Cherry Sunburst finish is available only on Gibson.com and at the Gibson Garage.
For more information, please visit gibson.com.
The exquisite BilT Brothers collaborative guitar: a Frank Brothers Ultra Light in BilT eggplant sparkleburst with Arcane 3x3 Gold Foil Humbuckers and loaded with a Caroline Custom Cannonball Distortion.
This forward-thinking custom guitar commissioned by our columnist makes a special case for partnership in the guitar building community.
Owning a guitar shop, your brain is full of to-do lists, questions, and plenty of compulsive thoughts over details. And when you run a shop that specializes in custom builds that you spec out from boutique companies, the ideas for these guitars often come at the most random times of day (and night). While I don’t subscribe to the notion of fate, the following makes a case for its existence.
It was like any other random day at work: We had customers coming in, items shipping out, services on the bench. I was simultaneously working on a pedalboard for a customer and making plans with some vendors. I was on the phone with Brandon Darner of BilT Guitars when DHL dropped off our latest Frank Brothers guitar. Now, I’m never shy about talking up builds from any of our vendors. Spec’ing guitars for our shop, seeing their execution exceed my expectations, and then getting it into the hands of its new owner is one of my absolute favorite parts of my job. So, naturally I mentioned that we just got a new Frank Brothers in. Brandon told me how much he loved their stuff—sort of a “game recognizing game” kind of thing.
After we unboxed the guitar, I called Tim Frank to let him know how we continue to be impressed with their work and how much we loved the new arrival. I also mentioned Brandon had some very nice things to say about their work. Tim’s response was something like, “Oh wow! That’s really cool. Their stuff is amazing and we have a lot of respect for those guys.” At first, I thought he was just being polite, but I’ve gotten to know him pretty well. I knew that the compliment and sentiment was genuine and past the point of his wonderful Canadian pleasantness. One thing led to another, and I started a group text. Very quickly, they became friends. In fact, Brandon even ordered a Frank Brothers shortly after the introduction.
The Frank Brothers and BilT team, left to right: Tim Frank, Tim Thelen (BilT), Nick Frank, and Brandon Darner (BilT).
My last call of the day was to Philippe Herndon from Caroline Guitar Company. As we talked, he was glowing about the pedal building community and how friendly and collaborative it is, and obvious questions popped into my head: “Why aren’t guitar companies like that?” “Why can’t we do a collab guitar?”
Long story extremely short, with tons of excitement, I got Brandon and Tim on the phone and proposed the idea of doing a guitar together. Without hesitation, the response from both was “Hell yeah, let’s do it!” and it was time for us to spec it. We decided on a Frank Brothers Ultra Light. BilT would apply their world-class fit/finish as well as their signature effects treatment. I picked my favorite finish in the BilT repertoire called eggplant sparkleburst, selected Arcane 3x3 Gold Foil Humbuckers, and tapped Philippe on the shoulder to ask if he had any Custom Cannonball Distortions—the first pedal I bought from Caroline in 2013—that he could provide for the build, to which he happily obliged.
A year or so later, the BilT Brothers was born. Of course, it is exceptional beyond words and is a true testament to the results of these incredible companies working together to produce something truly remarkable. We decided, with custom shirts and all, to proudly debut our creation at Fretboard Summit in Chicago. The reaction from everyone exceeded our expectations and showed me that the level of mutual respect and admiration in this business can lead to phenomenal results.
This project has opened a lot of doors that I’m not sure anyone knew existed. For me, the most exciting part of all of this is the fact that, like the smaller pedal companies, there is an actual community here filled with like-minded, pure enthusiasts who also happen to be master craftsmen—and who truly geek out over each other’s work.
Never was this more evident than at the Wood Wire Volts show this January, where not only did the BilT and Frank Brothers crews travel and stay together, they were also often in deep chats with fellow luminaries Sacha Dunable (Dunable Guitars) and Carlos Lopez (Castedosa Guitars), discussing the trade, the work, and ideas for the future. If the vibe is any indicator, we can safely assume that while the BilT Brothers was, by all accounts, the first ever collab guitar of its kind, it will not be the last.
This entire experience is reminiscent of the DIY community ethos that I’ve clung to and has inspired me for most of my life. There is a cliché about the journey being greater than the destination, and while the destination in this case is one of the finest guitars I’ve ever laid my hands on, I’d have to say it holds true
Introducing the new Gibson Acoustic Special models, handcrafted in Bozeman, Montana, featuring solid wood construction, satin nitrocellulose lacquer finishes, and L.R. Baggs electronics.
Solid Wood Construction
Each of the three Acoustic Special models from Gibson are crafted using solid mahogany for the back and sides, solid Sitka spruce for the tops, utile for the necks, and rosewood for the fretboards for a sound that will only get better and better as they age.
Satin Nitrocellulose Lacquer Finishes
All three Gibson Acoustic Special models are finished in satin nitrocellulose lacquer for a finish that breathes, ages gracefully, and lets the natural beauty–both in sound and appearance–of the quality tonewoods come through.
L.R. Baggs Electronics
The Gibson Acoustic Special guitars come with L.R. Baggs Element Bronze under-saddle piezo pickups and active preamps pre-installed, making them stage and studio-ready from the moment you pick them up.
For more information, please visit gibson.com.