Premier Guitar joined the prog-rockers inside Steve Albini’s Electrical Audio studio in Chicago to watch them create their most experimental album to date. Plus, we look at the drool-inducing boutique and custom gear they used while recording.
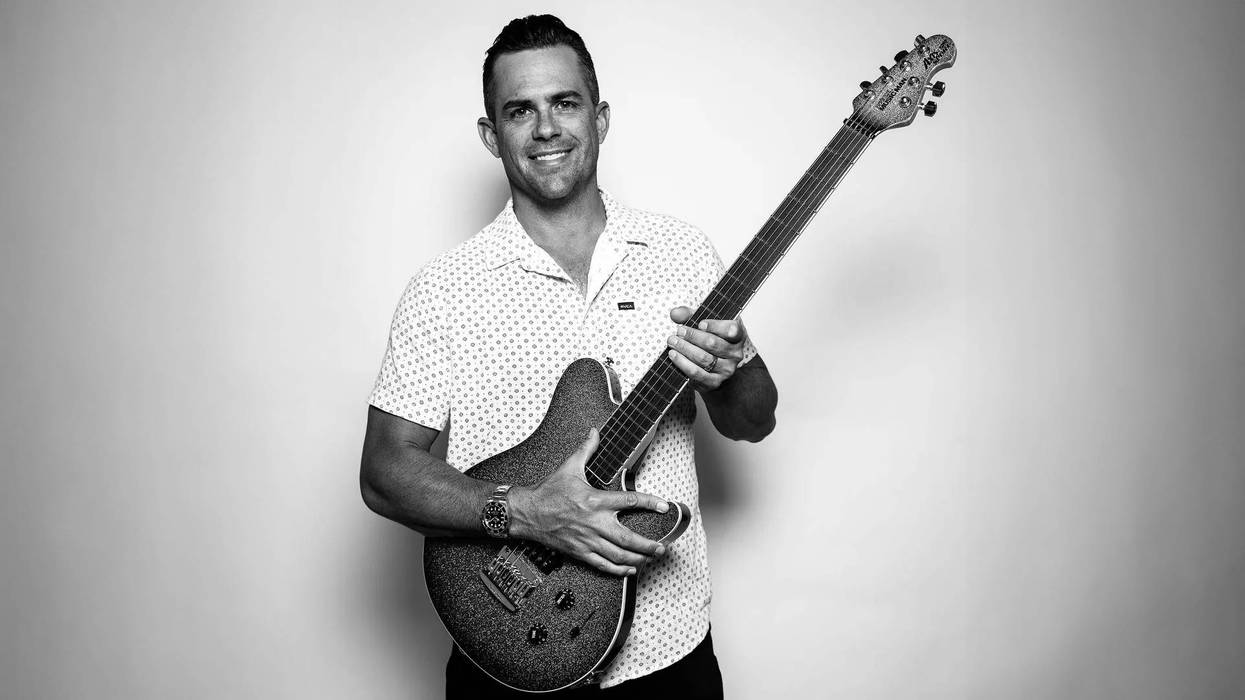
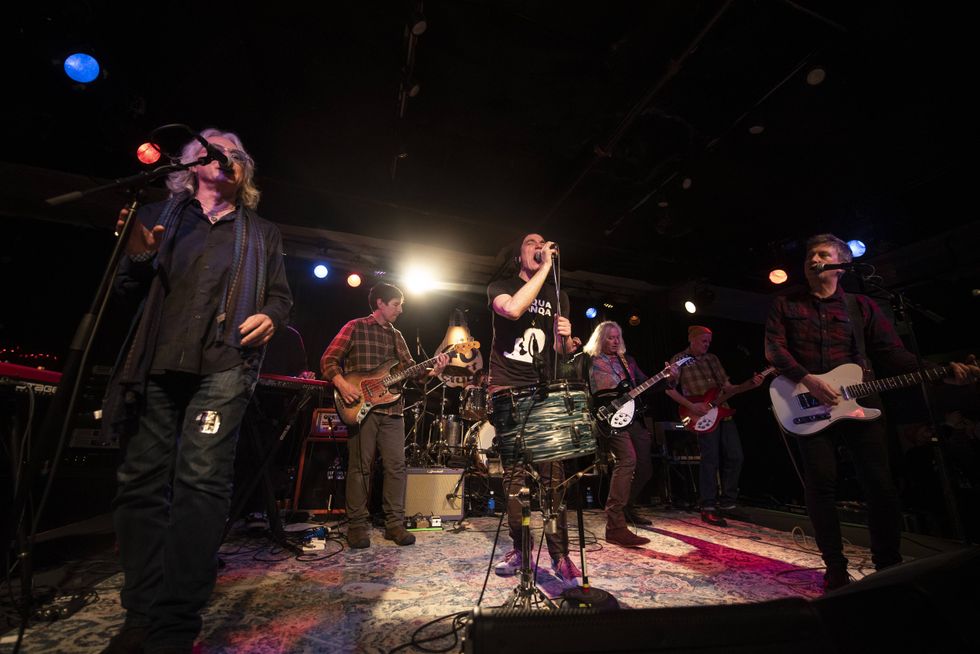
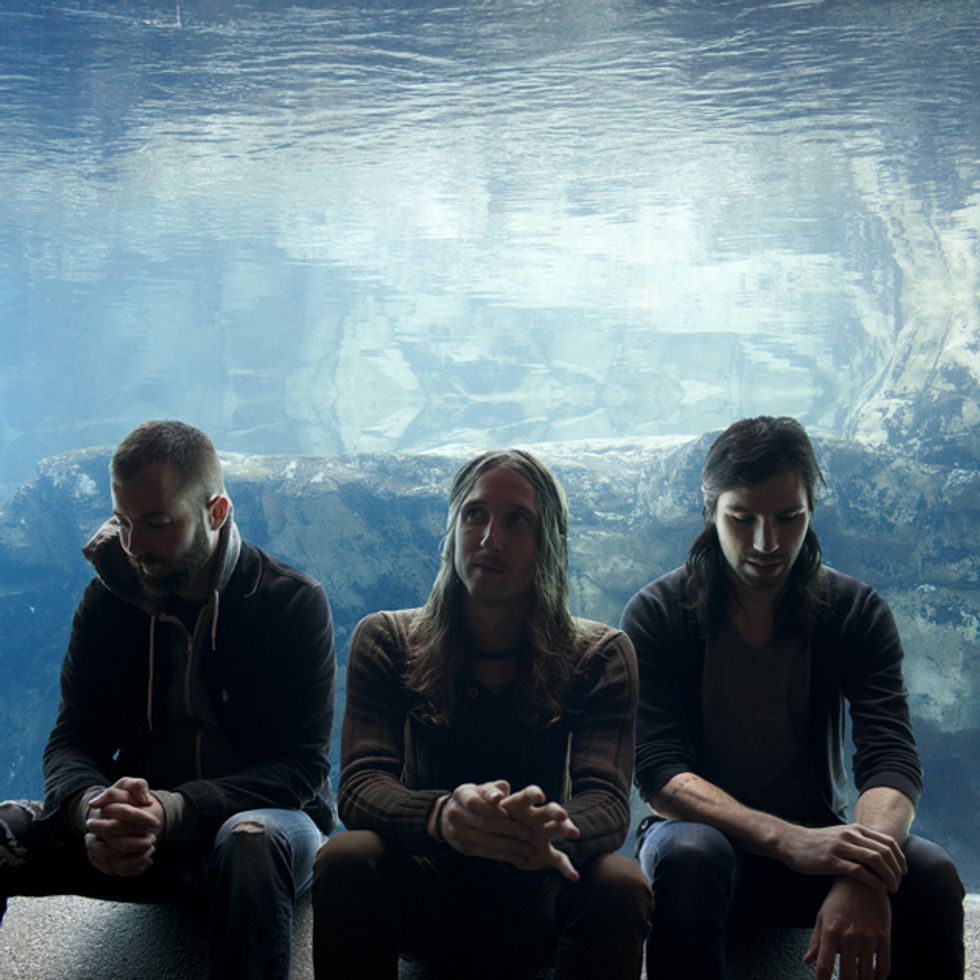
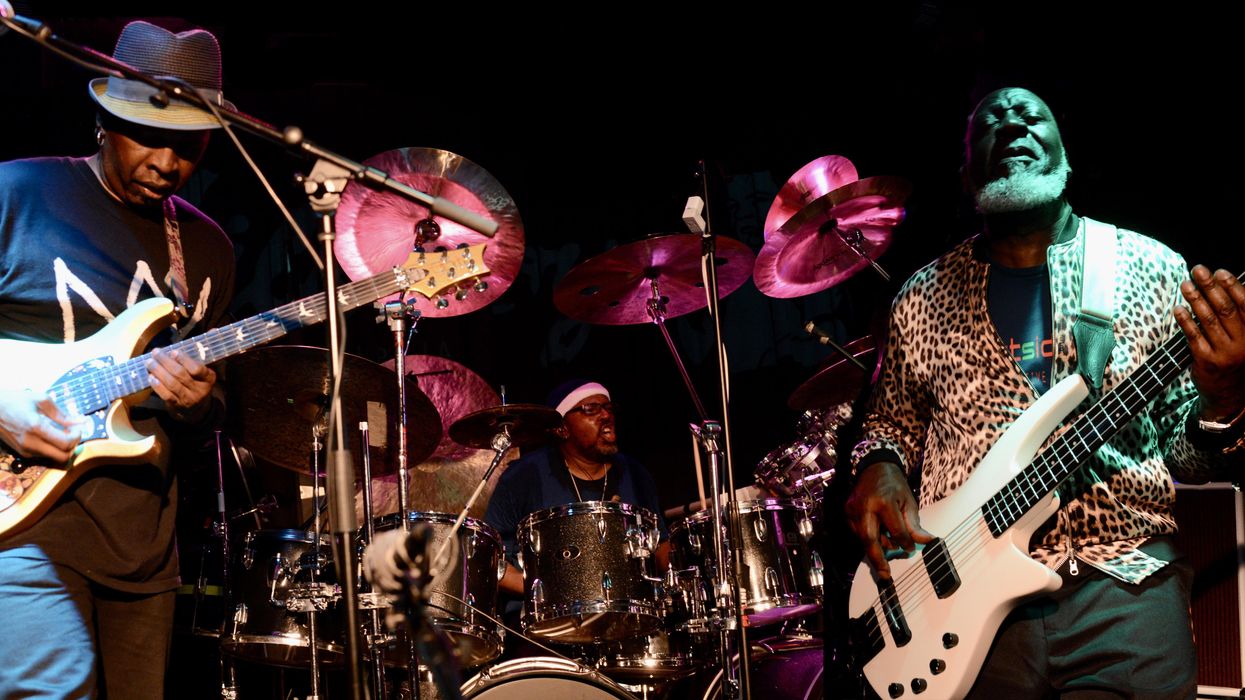
Chicago's prog power trio Russian Circles' consists of bassist Brian Cook,
guitarist Mike Sullivan, and drummer Dave Turncrantz.
Last spring, in an unassuming building on Chicago’s West Belmont Street, acclaimed instrumental rockers Russian Circles were busy crafting their fifth studio album, Memorial. They developed their new opus in Studio A of Steve Albini’s Electrical Audio Studios, which offers three tracking spaces: Center Field, the Kentucky Room, and the Alcatraz Room.
Each room is specifically designed to help capture tones associated with particular instruments. The spacious Center Field room provided natural acoustics for Dave Turncrantz’s drums, and the Kentucky Room’s liveliness made it ideal for guitarist Mike Sullivan’s dark-sounding amp setup. Brian Cook’s bass rig sat in the controlled isolation of the Alcatraz Room, which uses a brilliant combination of perimeter venting and membrane absorbers to deaden the space.
—Russian Circles guitarist Mike Sullivan
With the recording prowess of acclaimed engineer Greg Norman, intimate production guidance by Brandon Curtis (The Secret Machines), and a mountain of rare, custom, and boutique guitars, amps, effects, and recording equipment at the ready, Russian Circles produced its most diverse release yet—one that deftly weaves metal, classical, prog, post rock, industrial, and a slew of other influences into a heaving, breathing mass of ethereal power.
Russian Circles graciously invited Premier Guitar into the studio to get a first-hand look at the recording process, peek at Electrical Audio’s amazing gear, and watch Curtis (who produced the band’s 2009 album, Geneva) steer the project to completion.
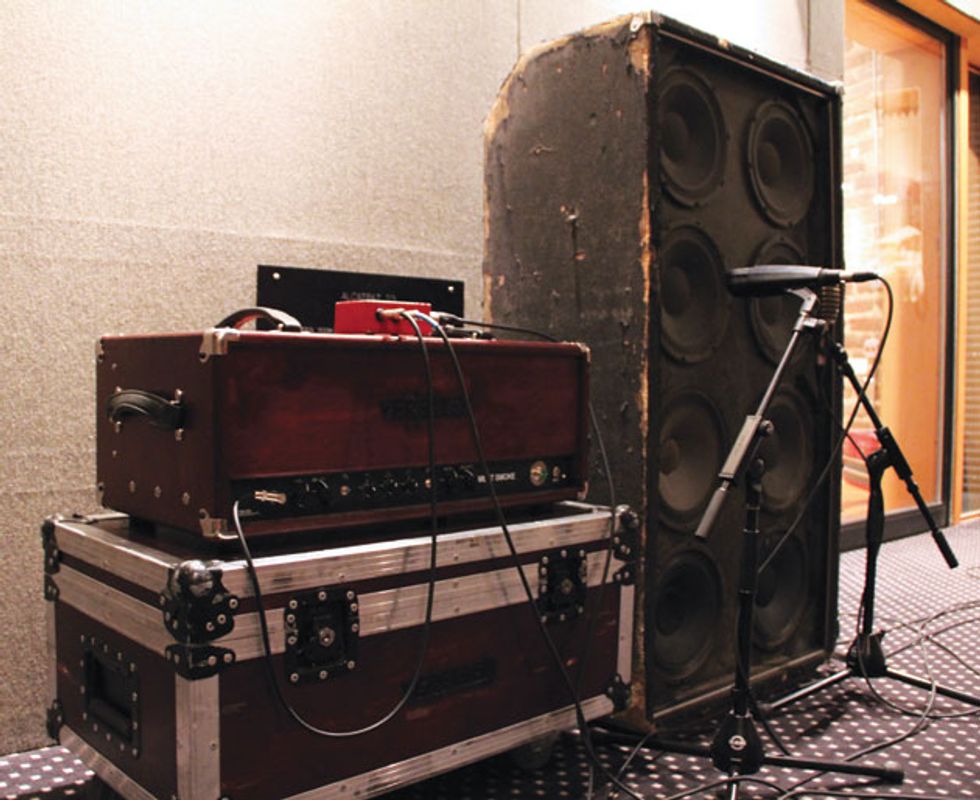
Brian Cook’s bass rig consists of a 6550-powered Verellen Meat Smoke head paired with an Ampeg 8x10 cabinet.
Laying the Groundwork Both Sullivan and Cook say that almost all of Memorial was written before entering the studio. Still, the band wanted the freedom to experiment with ideas and gear while recording, so there was consensus that parts would change along the way.
Capturing the band’s dense, complex music was no easy task, and according to Sullivan, working with Curtis again was the best choice in terms of production. “He’s really good at throwing the ball in your court and letting you think about what could happen there, guitar-wise,” explains Sullivan. “We’ll have a song’s arrangement done, and while he won’t try to change it, he’ll ask questions to get us second-guessing certain things.”
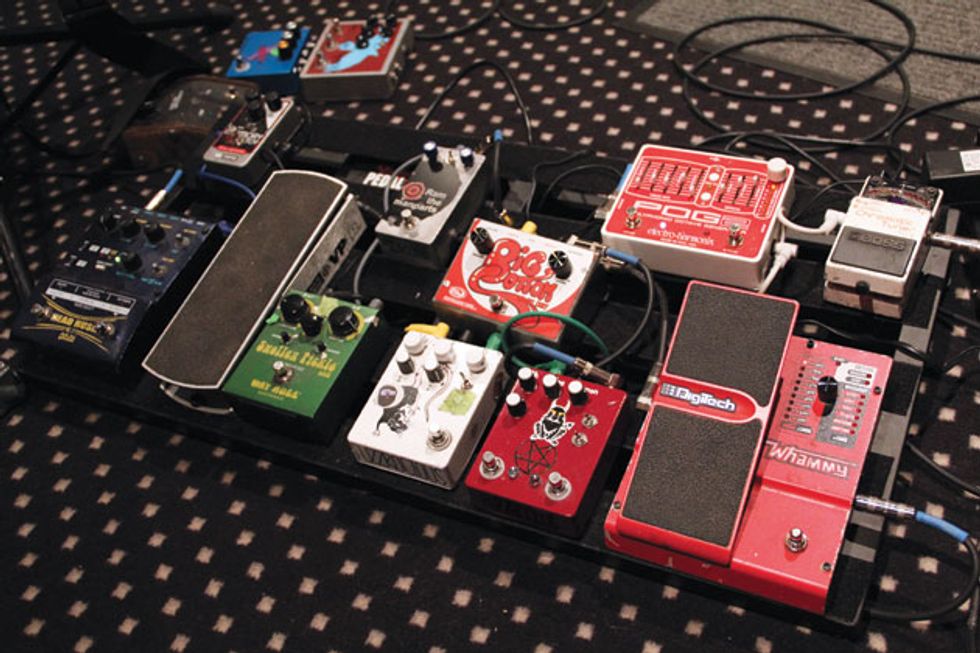
Though he altered his pedalboard a bit during the sessions, Cook primarily used what’s shown here: Boss TU-2 tuner, DigiTech Whammy IV, Electro-Harmonix POG 2, Way Huge Swollen Pickle, Fuzzrocious Ram the Manparts, Fuzzrocious Oh See Demon, Fuzzrocious Rat Tail, Tym Guitars Big Bottom, Akai E2 Headrush, and Ernie Ball VP Jr. volume pedal.
Curtis’ musical training and perceptive ears were also very helpful in ensuring that Memorial flowed naturally from track to track. Like most bands, Russian Circles pull tonal and musical reference points from their influences—Don Caballero, Melvins, Neurosis, Shellac—and working with Curtis add space rock and psychedelic music to the mix. Cook describes the approach as “a different idea of what heavy can sound like.” Knowing the band’s sound, gear, and internal chemistry also helped Curtis translate their sonic vision to Norman.
“He understands what we want, and he also knows the proper lingo and the recording process a lot better than we do,” Cook says of Curtis. “So when we say things like, ‘Make it sound more squishy,’ he knows how to translate that.”
The band enjoyed the sonic style Norman brought to two previous Russian Circles releases, 2006’s Enter and Geneva, and his ability to capture the band’s live energy played a big part in their decision to enlist his services again for the new album. “[Geneva] is a pretty faithful testament to who we were at that point,” Cook recalls. “That’s Greg’s M.O.—get great sounds that are honest to the source.”
In the band’s early days, Sullivan mostly relied on Sunn Model-T reissue heads. Following a van accident that destroyed much of the band’s equipment, he began testing his pedals for damage through Cook’s Verellen Meat Smoke head. “I plugged in my pedals and was floored,” Sullivan recalls. “I didn’t even touch a dial—the amp sounded great immediately. It gave me headroom for days, and the high- and low-boost switches provided a lot of sonic options. It was the tone I’d wanted for years.”
Behind the Wheel: Electrical Audio’s Greg Norman on Recording Memorial
Memorial is engineer Greg Norman’s third album with Russian Circles. “I like the space they create for all sorts of textures and harmonics,” he says. “They can obviously pull off the loud, tight, and fast bits, but the vacuum between those moments leaves room for really cool parts. And the soaring pretty parts make the explosions sound much more intense. When it’s done just right, I think of meteors cutting through apartment buildings.”
Norman’s role in making Memorial was similar to the Geneva sessions, except this time the mixing duties were handed to producer Brandon Curtis. “He’s smart, super-easy to work with, positive, and patient,” Norman says of counterpart Curtis. “Those are good, rare traits for someone working in the studio.”
Curtis’s background as a classically trained musician also helped. “Many times his knowledge of music theory would dovetail nicely with my techy, noisy-brained perspective,” Norman recalls. “I think that mix helped things out.”
In addition to being tech-savvy, Norman is a meticulous note-taker who’s able to give a detailed account of the equipment and techniques he used to record Sullivan and Cook. In his own words:
The guitar amps were set up in the smaller of the two live rooms, which is named the Kentucky Room. This room has a short, full-sounding natural reverb that’s great for drums and loud guitar amps. The walls are made of adobe brick, which has an irregular, porous surface that’s flattering for higher-frequency reflections.
I always need to hear the rig I’m recording before choosing the proper mics, but the placement is generally the same. I usually have the diaphragm or ribbon pointed directly at the speaker’s dust cover, about 4–8" away from the grille. It really depends on how much low end I want to capture via proximity effect. If I’m using a fragile ribbon mic like a Coles 4038 or RCA 74 on a loud amp, I’ll back off a foot or more.
Mike’s Verellen Loucks and Emperor 4x12 half-stack were mic’d with a Beyerdynamic M88, which is my favorite dynamic mic for big and heavily distorted guitar. That was going through our custom mic preamp, the Electrical Audio EApreq. This part of the rig was the most useful in the mix of the two “heavy” amps. I mic’d the Verellen Meat Smoke and Emperor 4x12 half-stack with a Shure KSM44, which also happened to be running through the EApreq preamp. Since the Meat Smoke is such a dark amp, I grabbed a mic that would catch all of that low end without overdoing it. I always use a room mic, usually a Sennheiser 421 or an AKG 451 with an omni capsule. The idea is to get a powerful stereo sound from one guitar, as if it were the only one to end up on the record. It also helps add depth and can really help convey how loud things are.
We also had a Hiwatt 4x12 set up with various heads, such as a 1965 blonde Fender Bassman, a pics-only Orange OR80 from the ’70s, two prototype amps from Emperor, and a 15-watt Fender Pro Jr. 1x10 combo we used as a head. This was mic’d up with a Sony C48, but at some points the Pro Jr. was mic’d with either a RCA BK-5 or a Shure KSM44, running into a John Hardy M-2 preamp. I like bringing that amp in for really dark, heavy-sounding setups like Mike has. It’s a dead-simple amp that sounds great on its own, or even powering another cab. It distorts in a good way that cuts straight through the mud, while not sounding thin. It blended nicely with his other amps while reinforcing the overall upper midrange.
For bass, I generally try to get a high-low mic setup. Brian’s Verellen Meat Smoke and Ampeg SVT 8x10 were mic’d with a Beyer M380 for the low end, and a Sennheiser 421 to catch the mids and highs. In that occasional instance when we wanted a more midrange-heavy distortion option, we’d have a Traynor TS-50B go through one of our custom 1x15 cabinets mic’d with a Josephson e22. All of the mics went through the EApreq, then to a GML 8900 for compression. I think I added one notch of bass shelf for the M380 on the EApreq. For catching some of the pure bass tones from his Moog Taurus, I used a custom Electrical Audio DI box. I rarely use a DI, but Brian had some presets on his Taurus that had some serious sub presence, so I used a DI for that.
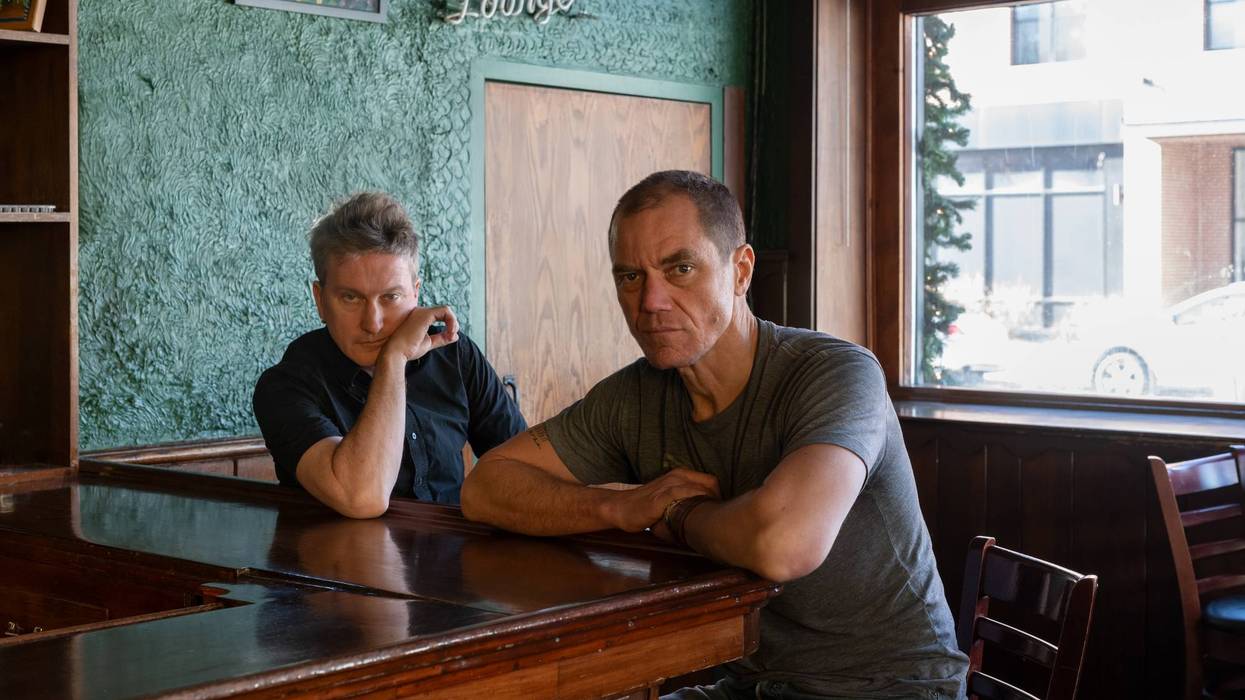
Brandon Curtis (left) works with Sullivan in the control room
on a deeply layered section of Russian Circles’ new album.
Sullivan generally cranks the highs and mids on his Meat Smoke to counteract its bass-heavy sound and blend well with his Loucks. And even though the Meat Smoke was originally designed for bass, Sullivan champions its use as a guitar amp. “I’ve never found myself wishing I had more of something,” he says. “Whatever I want sonically is always there—highs or lows, dirt or clarity. It just depends on how you dial it up.”
Cook’s main stage and recording amplifier is a custom 300-watt Verellen Meat Smoke connected to a well-worn Ampeg SVT810E cabinet that he used for years in underground bands Botch and These Arms Are Snakes. Cook has a personal connection to Verellen amps—he and Ben Verellen have been good friends since junior high.
“Ben has always been very tone-minded and particular about his gear,” recalls Cook. “When he really got into tube amps, he went to school to learn how to build them. He made me a little 30-watt Bassman knockoff, which is actually the very first Verellen amp. I still have it and it sounds awesome.”
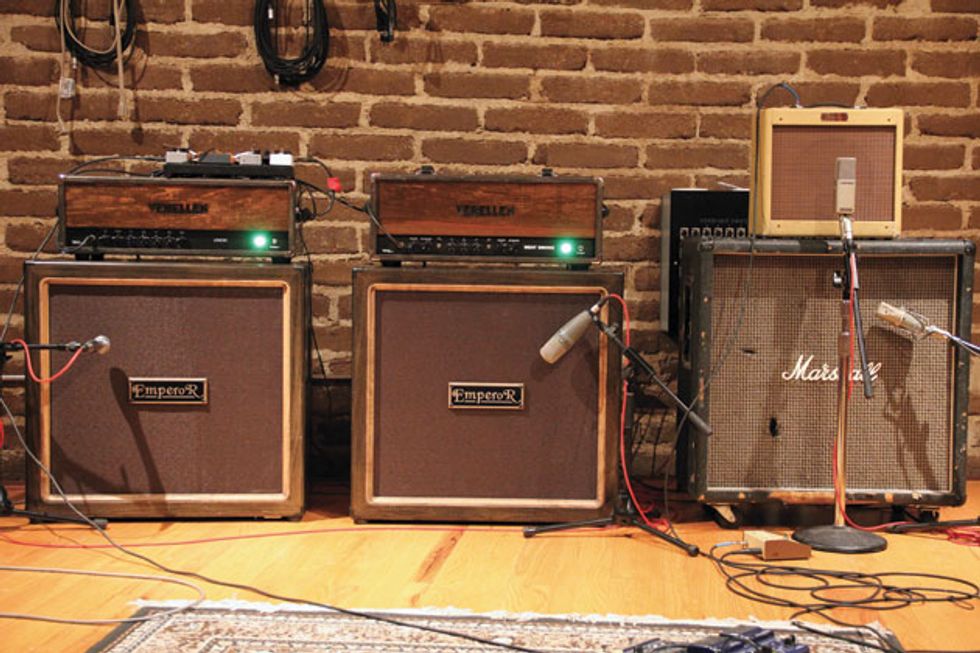
Mike Sullivan recorded his guitar tracks through a massive tri-amp rig. Pictured: Verellen Loucks and Meat Smoke heads on two Emperor 4x12 cabinets, Fender Pro Jr., ’70s Marshall 1982B 4x12.
Mike Sullivan's Studio Gear
Guitars
1957 Reissue Gibson
Les Paul Custom, wine red
1957 Reissue Gibson Les Paul Custom, black
1967 Reissue Gibson Flying V
with Maestro vibrato tailpiece
Custom Fano RB6
Amps
300-watt Verellen Meat Smoke head
100-watt Verellen Loucks head
Fender Pro Jr. 1x10 combo
160-watt Emperor head (prototype)
16-watt Emperor head (prototype)
Hiwatt DR-103 Custom 100 head
Emperor 4x12 cabinets with Weber C1265 speakers
Effects
Ernie Ball Volume Jr.
TC Electronic PolyTune Mini
Maxon CS-9
Xotic Effects BB Preamp
Xotic Effects BB Preamp Mid Boost
Xotic Effects RC Booster
Reaper Deceived Delay/Reverb
Interfax Harmonic Percolator
Fulltone Secret Freq
Z.Vex Fuzz Factory
with custom hockey graphics
Mesa/Boogie Tone-Burst
Mesa/Boogie Flux Drive
MXR Micro Amp
DigiTech Whammy IV
EarthQuaker Devices Grand Orbiter Phaser
Electro-Harmonix Holy Grail Nano
Electro Harmonix Memory Boy (for slight slapback on Loucks)
Strymon El Capistan
Strymon Flint
Akai E2 Headrush
Lehle Splitter
Strings, Picks, and Misc.
Gibson 498T bridge humbuckers (neck position of both Les Pauls)
Gibson Dirty Fingers humbuckers (bridge position of both Les Pauls)
Lollar P-90 pickups (Fano RB6)
Dean Markley custom-gauge .012-.056 strings (occasionally .058 for the 6th string)
glass slide
It was apparent from the beginning that Memorial would have many layered tracks, so Curtis took pains to ensure that the bass and guitar amps sat evenly in the overall mix. And sometimes he’d propose ideas to enhance a song’s mood. For example, his suggestion that Sullivan dig harder into the lower strings while picking the delicate melody in “Cheyenne” led to adding eerie harmonic overdubs. Sullivan played these harmonics through a Fender Twin positioned in the middle of the Kentucky Room, yet pointed into the large Center Field space with its two room mics. Curtis also suggested adding a Whammy pedal, and after a few takes, Sullivan nailed what would become the song’s haunting, interweaving overdub. To create these eerie sounds, he used a glass slide while Curtis manipulated the Whammy’s treadle.
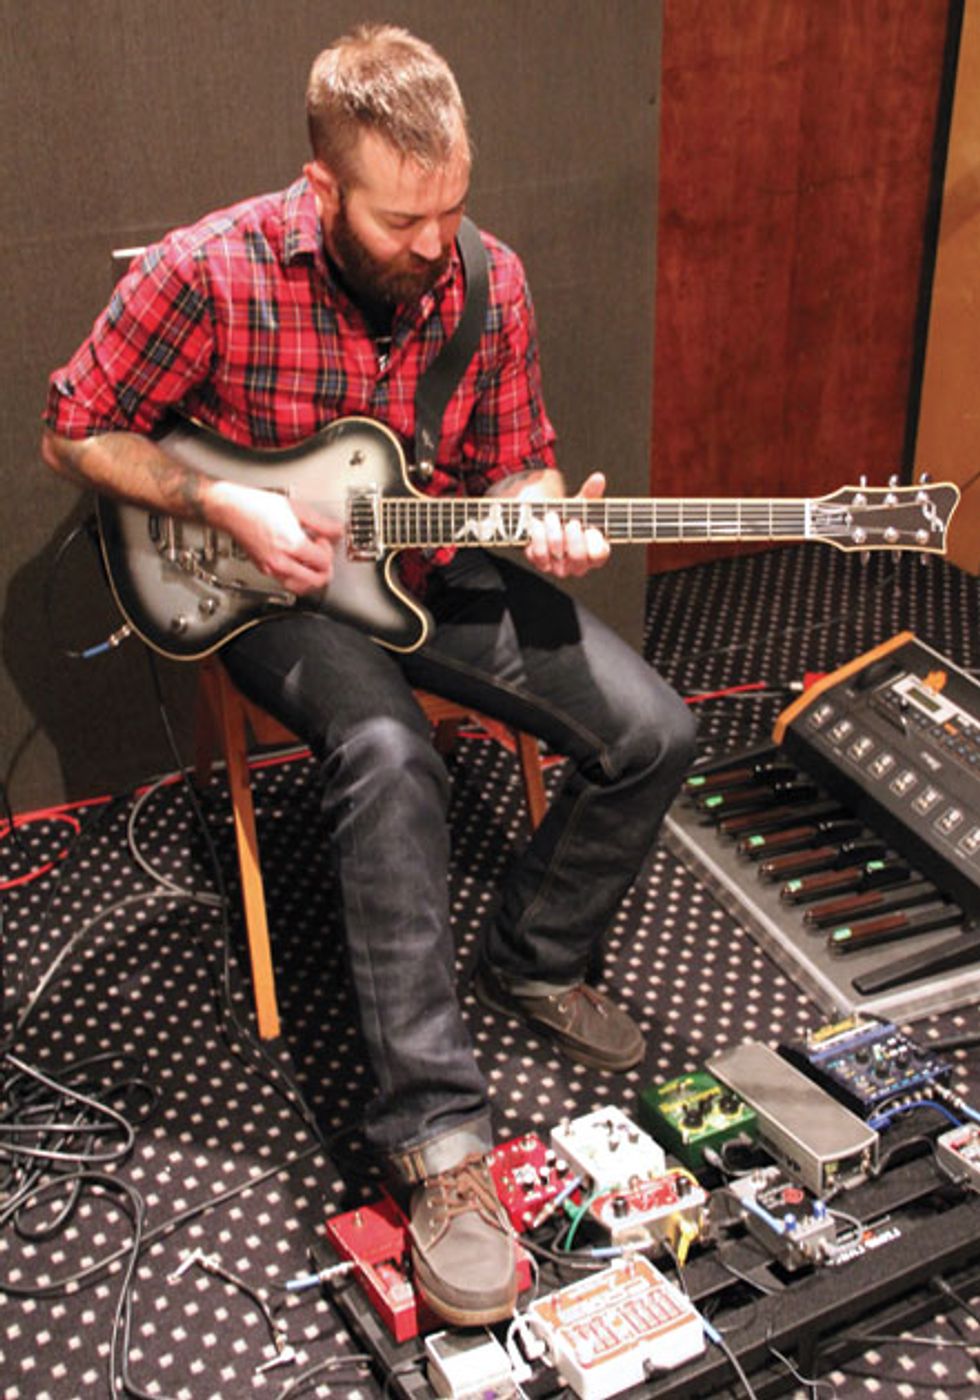
Sullivan’s main studio axes were two ’57 Reissue Les Paul Customs. He says these guitars let him transition smoothly between the album’s softer and heavier moments. They also help him build sustain for the dramatic crescendos that have become hallmarks of his sound, a technique he put to good use in “Deficit” and “Burial” on the new album.
“I’ve never really thought of another primary guitar for this music,” says Sullivan. “With its ebony fretboard and mahogany body, there’s just something about a Les Paul Custom that really gets the most out of each note, in terms of sustain and clarity. No other guitar I’ve played has that much precision.”
Sullivan replaced the stock humbuckers in both Les Pauls, opting for a Gibson Dirty Fingers at the bridge and a Gibson 498T bridge pickup in the neck position. An inherently bright pickup, the 498T tightens the lows and adds sparkle to the darker tones typically generated by a neck humbucker.
Sullivan’s modding doesn’t end there: To give his Customs a satin-like look and reduce friction on the back of their necks, he used a Brillo pad to dull the sheen of the guitars’ shiny finish.
In addition to his Les Paul Customs, Sullivan also played a Fano RB6. Initially he was skeptical about how the guitar’s vintage-output Lollar P-90s would handle heavier tones, but he immediately fell in love with them.
“It comes down to the clarity thing—hit a chord and you hear every note,” explains Sullivan. “There’s nothing to hide behind when I use the Fano. It’s just a pure, organic tone. And combined with its Gibson-like 24 3/4" scale and C-shaped neck, it’s a guitar I’m really comfortable playing.”
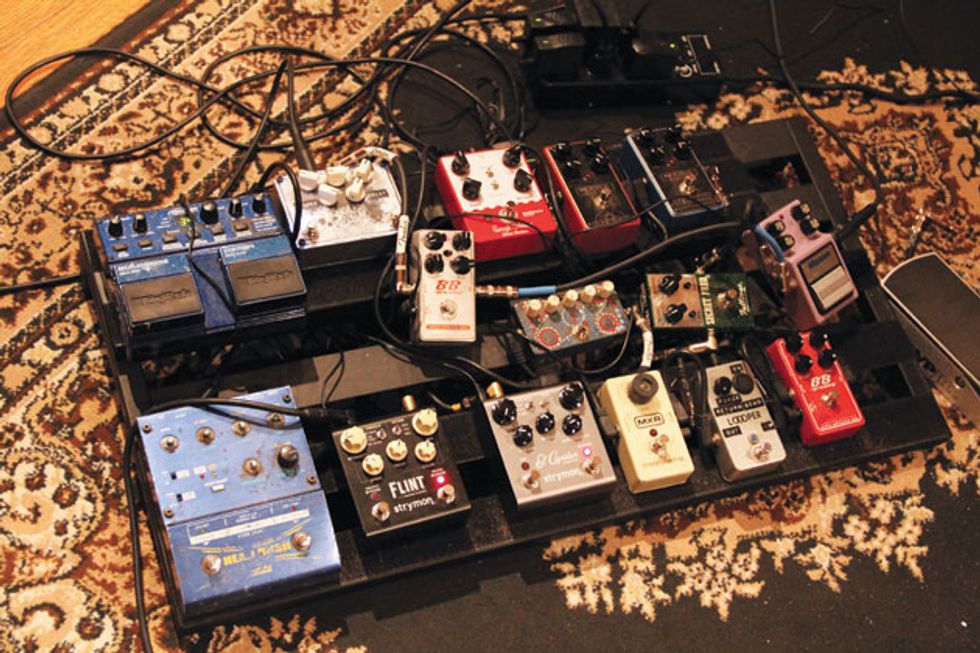
Sullivan’s session pedalboard: Ernie Ball VP Jr. volume pedal, TC Electronic PolyTune Mini tuner, Mesa/Boogie Tone-Burst and Flux Drive, Fulltone Secret Freq, Maxon CS-9 Chorus, Xotic Effects BB Preamp and BB Preamp Mid Boost, custom effects-loop pedal, Strymon El Capistan and Flint, Z.Vex Fuzz Factory, Reaper Deceived Delay/Reverb, Akai E2 Headrush, DigiTech JamMan.
Cook plays his massive bass lines on a Gibson Grabber II, but for even thicker textures, he’ll often augment the lows with a custom First Act baritone guitar and a Moog Taurus bass synth. After watching Nick Sadler (Daughters) play a First Act Delgada baritone, Cook decided to order a custom baritone and set about designing the “Bearitone.” It features a silverburst finish, Kent Armstrong pickups, and two fat, bearded guys in a “mudflap girl” motif inlayed on the fretboard. The baritone’s ferocious sound was effective for thickening the album’s guitar-heavy sections, and Cook often used it to add contrast to his unorthodox, fuzz-drenched tones.
The pedal collection Sullivan and Cook had at their disposal was mindboggling, to say the least. Many of the pedals Sullivan used for his core sound—an Ernie Ball VP Jr. volume pedal for swells, a TC Electronic PolyTune Mini, a Z.Vex Fuzz Factory (with a custom paint job depicting the hockey routine the band is named after), and a Fulltone Secret Freq, to name a few—were from his own personal stash. Much of the guitar’s immense reverb on Memorial was tracked using his Reaper Deceived Delay/Reverb and Strymon Flint.
The Flint has become one of Sullivan’s favorite pedals. “They’re sonically remarkable and they don’t take up a lot of room on my pedalboard,” Sullivan explains, adding that he also has an affinity for his Strymon El Capistan delay. “Just today, I was comparing the El Capistan to my vintage Memory Man. It can nail every delay tone you could possibly think of. The Flint’s tremolo is very useful, the reverb’s decay is so natural, and the tap tempo makes them great for live playing. Compared to other digital pedals I’ve tried, they sound absolutely perfect to me.”
Cook tracking parts in the Alcatraz Room with his custom First Act “Bearitone.”
Many bassists shy away from effects, but Cook wholeheartedly embraces them for both subtle and drastic timbral changes. His studio pedalboard was loaded with eight fuzz and distortion devices from the likes of Fuzzrocious, Verellen, Dwarfcraft, Tone Butcher, and Way Huge.
Brian Cook's Studio Gear
Basses/Guitars
Custom First Act “Bearitone” baritone
Custom First Act Delgada bass
Gibson Ripper II
Amps and Cabs
Verellen Meat Smoke
Ampeg 8x10 Cabinet
Effects
Boss TU-2
Electro-Harmonix POG 2
DigiTech Whammy IV
Tym Guitars Big Bottom
Fuzzrocious Oh See Demon
Fuzzrocious Rat Tail
Fuzzrocious Ram the Manparts
Dwarfcraft Eau Claire Thunder Fuzz
Dwarfcraft Pitch Grinder
Way Huge Swollen Pickle Jumbo Fuzz
Ernie Ball Volume Jr.
Verellen Big Spider
Akai E2 Headrush
Tone Butcher Blue Whale
Tone Butcher Pocket Puss
Lehle Splitter
Strings and Picks
Dean Markley strings
On many of the tracks, Cook’s skilled use of fuzz and industrial-tinged distortion gave his baritone and bass tones a distinct presence. With his Dwarfcraft Pitchgrinder, for instance, he generated the robot-like wail during the drum breakdown and outro on “1777.” Cook manually cycled through the pedal’s arpeggiator while increasing the amount of steps until the sound swelled into oscillating chaos.
Another standout moment in “1777” occurs during the second half of the piece. While watching a hockey game on his iPad, Turncratz inadvertently recorded the sounds of hockey players’ skates cutting across the ice. Seeing an opportunity for sonic experimentation, the band had Norman layer these scraping sounds below the track. This moment illustrates the kind of free-form thinking that allowed Russian Circles and their studio partners to break free of rock’s rulebook and explore exciting new textures. With its massive layering and extreme contrasts between ethereal cleans and vicious overdrive, Memorial documents the band’s creative evolution.
Delicious, dynamic fuzz tones that touch on classic themes without aping them. Excellent quality. Super-cool and useful octave effect.
Can’t mix and match gain modes.
$349
Great Eastern FX Co. Focus Fuzz Deluxe
Adding octave, drive, and boost functions to an extraordinary fuzz yields a sum greater than its already extraordinary parts.
One should never feel petty for being a musical-instrument aesthete. You can make great music with ugly stuff, but you’re more likely to get in the mood for creation when your tools look cool. Great Eastern FX’s Focus Fuzz Deluxe, an evolution of their très élégantFocus Fuzz, is the sort of kit you might conspicuously keep around a studio space just because it looks classy and at home among design treasures likeRoland Space Echoes, Teletronix LA-2As, andblonde Fender piggyback amps. But beneath the FFD’s warmly glowing Hammerite enclosure dwells a multifaceted fuzz and drive that is, at turns, beastly, composed, and unique. Pretty, it turns out, is merely a bonus.
Forks in the Road
Though the Cambridge, U.K.-built FFD outwardly projects luxuriousness, it derives its “deluxe” status from the addition of boost, overdrive, and octave functions that extend an already complex sound palette. Unfortunately, a significant part of that fuzzy heart is a Soviet-era germanium transistor that is tricky to source and limited the original Focus Fuzz production to just 250 units. For now, the Focus Fuzz Deluxe will remain a rare bird. Great Eastern founder David Greaves estimates that he has enough for 400 FFDs this time out. Hopefully, the same dogged approach to transistor sourcing that yielded this batch will lead to a second release of this gem, and on his behalf we issue this plea: “Transistor hoarders, yield your troves to David Greaves!”
The good news is that the rare components did not go to waste on compromised craft. The FFD’s circuit is executed with precision on through-hole board, with the sizable Soviet transistor in question hovering conspicuously above the works like a cross between a derby hat and B-movie flying saucer. If the guts of the FFD fail to allay doubts that you’re getting what you paid for, the lovingly designed enclosure and robust pots and switches—not to mention the pedal’s considerable heft—should take care of whatever reticence remains.
Hydra in Flight
Just as in the original Focus Fuzz, the fuzz section in the Deluxe deftly walks an ideal path between a germanium Fuzz Face’s weight and presence, a Tone Bender’s lacerating ferocity, and the focus of a Dallas Rangemaster. You don’t have to strain to hear that distillate of elements. But even if you can’t easily imagine that combination, what you will hear is a fuzz that brims with attitude without drowning in saturation. There’s lots of dynamic headroom, you’ll feel the touch responsiveness, and you’ll sense the extra air that makes way for individual string detail and chord overtones. It shines with many different types of guitars and amps, too. I was very surprised at the way it rounded off the sharp edges made by a Telecaster bridge pickup and AC15-style combo while adding mass and spunk. The same amp with a Gibson SG coaxed out the Tony Iommi-meets-Rangemaster side of the fuzz. In any combination, the fuzz control itself, which boosts gain while reducing bias voltage (both in very tasteful measure) enhances the vocabulary of the guitar/amp pairing. That range of color is made greater still by the fuzz’s sensitivity to guitar volume and tone attenuation and touch dynamics. Lively clean tones exist in many shades depending on your guitar volume, as do rich low-gain overdrive sounds.
The drive section is similarly dynamic, and also quite unique thanks to the always versatile focus control, which adds slight amounts of gain as well as high-mid presence. At advanced focus levels, the drive takes on a fuzzy edge with hints of Fender tweed breakup and more Black Sabbath/Rangemaster snarl. It’s delicious stuff with Fender single-coils and PAFs, and, just as with the fuzz, it’s easily rendered thick and clean with a reduction in guitar volume or picking intensity. The boost, meanwhile, often feels just as lively and responsive—just less filthy—lending sparkle and mass to otherwise thin and timid combo amp sounds.
Among this wealth of treats, the octave function is a star. It works with the fuzz, drive, or boost. But unlike a lot of octave-up effects, you needn’t approach it with caution. Though it adds plenty of the buzzing, fractured, and ringing overtones that make octave effects so wild and distinct, it doesn’t strip mine low end from the signal. The extra balance makes it feel more musical under the fingers and even makes many chords sound full and detailed—a trick few octave effects can manage. With the fuzz, the results are concise, burly, and articulate single notes that lend themselves to lyrical, melodic leads and power chords. In drive-plus-octave mode, there are many hues of exploding practice-amp trash to explore. The boost and the octave may be my favorite little gem among the FFD’s many jewels, though. Adding the octave to boosted signals with a generous heap of focus input yields funky, eccentric electric-sitar tones that pack a punch and are charged with character in their fleeting, flowering state.
The Verdict
It’s hard to imagine adding extra footswitches to the Focus Fuzz Deluxe without sacrificing its basic elegance and proportions, and without elevating its already considerable price. Certainly, there would be real utility in the ability to mix and match all three excellent gain modes. On the other hand, the output level differences between fuzz, drive, and boost are pretty uniform, meaning quick switches on the fly will shift texture and attitude dramatically without delivering an ear-frying 30 dB boost. And though it’s hard not be tantalized by sounds that might have been, from combining the fuzz and/or boost and drive circuits, the myriad tones that can be sourced by blending any one of them with the superbly executed octave effect and the varied, rangeful focus and output controls will keep any curious tone spelunker busy for ages. For most of them, I would venture, real treasure awaits.
Patterns can be viewed as boring or trite, but a little bit of creativity can turn them into bits of inspiration.
Chops: Intermediate Theory: Intermediater Lesson Overview: • Learn different ways to arrange scales. • Combine various sequences to create more intersting lines. • Solidify your technique by practicing unusual groupings of notes. Click here to download a printable PDF of this lesson's notation. |
I want to offer some food for thought on making sequences musical. Using sequences in our playing helps develop our musicianship in various ways. It can help us tune into the fretboard, develop melodic ideas all around the neck, and further our improvisation and compositional skills. So, spending time with sequences is certainly not time wasted. Please note that I sometimes use the word “rule" in this column, this is only a pointer to keeping on track of our exploration of these concepts. The intellect is very useful, but intuition is where the creativity comes from. When in balance lots of great things can be done. Let's get stuck in!
It's simple to play a scale from bottom to top, or top to bottom, but we can develop a sequence by shuffling these notes around. In Ex. 1 we have a C Major scale (C–D–E–F–G–A–B) played in thirds followed by a sequence highlighting the diatonic triads of the major scale. By following a “rule" we can develop many different sequences. The options are endless and a little overwhelming.
Click here for Ex. 1
Lets start by simply combining an interval sequence with an arpeggio sequence. In Ex. 2, the first two beats of the first measure feature ascending thirds. This is then followed by a triad arpeggio starting from the third note on the string. The next set of thirds then starts on the “and" of beat 4. The entire sequence is a seven-note pattern that is created by combining two thirds and a triad. It gives us a nice bit of rhythmic displacement as the phrase is now starting in a different place in the measure.
Click here for Ex. 2
Ex. 3 is a descending idea in A minor that basically flips the sequence we looked at in Ex. 2. Here, we are starting with two descending thirds before the triad. I'm using pull-offs and economy picking to articulate the triads. This one works well over D minor as well if you want a D Dorian (D–E–F–G–A–B–C) flavor.
Click here for Ex. 3
You can see the effectiveness of combining different sequences and groupings of notes to create interesting runs. It's also really effective for making phrases. In Ex. 4 we take a small fragment from Ex. 3 and change the rhythm. In the sound example I repeat this a few times over some implied chords in my bass line: Am, F, and Dm. It's great to get more from one line by seeing the different chord types you can play it over.
Click here for Ex. 4
In Ex. 5 we're going to start using fourths and fifths. It starts with an ascending A minor triad (A–C–E) before leaping to the 9 (B) and then hitting a G major triad (G–B–D). A similar pattern leads into the C major triad (C–E–G). Throwing in these wider intervals alongside triads is very effective for creating a dramatic sounding runs.
Click here for Ex. 5
For our next example (Ex. 6), we will take fragments from Ex. 5 and space them out a bit. I wanted once again to show how these sequence ideas can also be helpful for developing melodic phrases. Once we have a cool sequence or fragment, all we need to do is be creative with how we play it. We can change the rhythm, harmonic context, dynamic, and much more.
Click here for Ex. 6
Before we move on, it's important to remember that we can add colorful notes to our triads. Let's begin with some seventh-chord arpeggios. Ex 7 features are diatonic seventh arpeggios in G minor (functioning as a IIm chord) to get a Dorian sound.
Click here for Ex. 7
Ex. 8 is a little gratuitous of me. It begins with an idea made of several different concepts. First, we start with an Am7 arpeggio (A–C–E–G), then descend down an A5 arpeggio. I follow that up with diatonic thirds and end with a pedal-point sequence. If that's not enough, we then take this bigger idea and fit it around a chord progression. I move it to G7, Dm7 and then I break my “rule" slightly and outline notes of a C6 arpeggio (C–E–G–A). However, it does keep the same melodic contour of the initial idea. I used my ear and fretboard to guide me. It's always healthy to have a fine balance between intellect and intuition.
Click here for Ex. 8
We dig into C harmonic minor (C–D–Eb–G–Ab–B-C) for Ex. 9's monster two-measure lick. It sounds evil! In composing this phrase, I kept to the basic concept of finding seventh-chord arpeggios within C harmonic minor in the 8th position. I followed my ear as well as my slowly developing intellect. However, if you look closely you can see I was following a mini chord progression through this line. We start out with a CmMaj9 arpeggio (C–Eb–G–B–D) in the first beat, followed by a G7b9 arpeggio (G–B–D–F–Ab). Here we have a very strong Im-V7 movement in C minor. I then move back to our CmMaj9 arpeggio and in the second measure we start descending down an Eb augmented triad (Eb–G–B). This is then followed by more CmMaj9 goodness.
Click here for Ex. 9
Ex. 10 is now taking Ex. 9 and extending it into a cool flamenco-inspired melody. The rhythms in this were inspired by the incredible Paco De Lucia. I follow the sequence from the previous example almost exactly, but I use a bit of artistic license to repeat certain fragments to fit into a “top line" or “head"-style melody.
Click here for Ex. 10
My aim here isn't to give you one rule to follow but instead to encourage you to take the sequences you know and love and start getting more out of them. Enjoy and stay safe!
Neutrik’s Timbre plug, made for toggling between capacitors.
This follow-up to May 2025’s column shows you a few basic techniques to inject some capacitance into your rig.
Hello, and welcome back to Mod Garage. This month, we will dive into the details of how to add additional guitar-cable capacitance—the right way. Time to get started!
Let’s begin with some typical additional capacitance values that certain lengths of cable (or capacitors) can bring to your system:
• 10’ vintage coiled cable (approx. 3 meters) -> 1 nF
• 15’ vintage coiled cable (approx. 4.5 meters) -> 1.5 nF
• 20’ vintage coiled cable (approx. 6 meters) -> 2.2 nF
• 30’ vintage coiled cable (approx. 9 meters) -> 3.3 nF
• Ritchie Blackmore-style, ultra-long vintage coiled cable -> 4.7 nF
I listed standard values here, so you should have no problem getting caps to match them in any local electronics store or online; the type of cap doesn’t really matter and will mostly be dominated by size, but I’ll share more about this in a minute.
Let’s quickly summarize the first installment of this column from last month’s issue: From a technical point of view, added capacitance shifts down the resonance frequency of the pickups, so they sound fatter, especially when using overdrive. This is exactly the reason why a lot of distortion and fuzz boxes with a vintage voicing use an additional cap at the input section; the resulting overdriven tone is fat and warm.
This month’s mod, which involves adding a capacitor to your signal, works best with vintage-flavored single-coil pickups (approximately 2.4 H inductance) or a typical old-school PAF-style pickup (approximately 3.8 H inductance). Modern high-output pickups are often sporting inductances of 6 H to 8 H, and don’t sound very good with this mod—when adding more cable capacitance to such pickups, the result is a dull and wooly tone without any clearness and definition. If you want to make your single-coil guitar sound more Les Paul-ish, you should try a 4.7n capacitor. It will shift the resonance frequency of your single-coil pickups down to the typical PAF ballpark, making for a very cool and usable old-fashioned guitar tone. It might feel a little muffled when playing clean, but ultra fat and punchy when using overdrive! In general, values higher than 4.7n are not recommended.
We have two options for where to install our cap.
On the Guitar Cable
This is the easiest location to add additional capacitance to your system, with several mod options:
1. The lightest mod ever isn’t a mod at all—it’s to simply buy a vintage guitar cable and plug it in whenever you need it! I don’t know of any company that offers modern guitar cables with intentionally high capacitance.
2. The Neutrik company offers a special angled plug, called the Timbre Plug, that you can solder to any guitar cable of your choice. The plug has a 4-way rotary knob on top to toggle between different capacitors. In addition to a bypass setting, the plug offers capacitances of 1nF, 2.2nF, and 3.3nF, letting you simulate different cable lengths on the fly.
3. You can add an additional capacitor to any guitar cable of your choice to convert it into a “longer-sounding” cable. You simply open one of the plugs to solder the cap between the hot and ground—that’s it. Small, 2.5 mm contact spacing ceramic caps are easy to put into a standard plug and are your weapon of choice here. It’s essential to only add the additional cap to one of the two plugs, but it doesn’t matter if you plug this side into your guitar, an effect, or your amp. This method allows you to build yourself some cables that simulate their older, longer relatives.
You can add an additional capacitor to any guitar cable of your choice to convert it into a “longer-sounding” cable.
Photo courtesy SINGLECOIL (https://singlecoil.com)
Inside the Guitar
You can also add a cap (or several) inside your guitar if you only need this mod for one instrument. If you’re looking for added capacitance with all your guitars, you’d be better off choosing one of the techniques mentioned above.
1. The easiest way is to solder your additional capacitor directly to your volume pot; this way it has a fixed value that can’t be changed and is always engaged. This operation is very simple to do, and you can use regular-sized caps for this.
You can add a cap (or several) inside your guitar if you only need this mod for one instrument.
Illustration courtesy SINGLECOIL (https://singlecoil.com)
2. If you want to make the cap switchable, such that you can run it either bypassed or engaged, you can install a SPST mini toggle switch or use half of a push-pull or push-push pot, which usually sport a DPDT switch underneath.
This drawing shows how to make your additional cap switchable.
Illustration courtesy SINGLECOIL (https://singlecoil.com)
3. If you want to use more than one cap to simulate different cable lengths, your weapon of choice is a rotary switch, setting up a kind of Gibson Varitone wiring without the inductor. Because we are switching capacitances, it is essential to run an additional 10 meg resistor in parallel to each of the caps, and to use a make-before-break, not a break-before-make, rotary switch to prevent loud popping noises when using the switch while your guitar is plugged into an amp. Leave the first lug of the rotary switch open for the bypass position without an additional cap.
If you want to use more than one cap to simulate different cable lengths, use a rotary switch.
Illustration courtesy SINGLECOIL (https://singlecoil.com)
4. If you want to make this mod even more flexible, you can add an additional “cable simulator pot” to your system. The pot should have the same resistance as your volume pot, and should be wired to your volume pot. This way, for example, you can add a 3.3nF or 4.7nF cap to the extra pot, and dial in as much cable capacitance as you like.
You can also add an additional “cable simulator pot” to your system.
Illustration courtesy SINGLECOIL (https://singlecoil.com)
On the Pedalboard
The idea of putting a rotary switch or cable-simulator-pot solution into an external unit to create a kind of extra-capacitance stompbox to use with all of your instruments is just around the corner, and yes, it’s possible! However, I don’t recommend this, because it’s physically located after the volume pot in the guitar, which means less volume (no unity gain) and less high end. But don’t worry: If you are looking for a pedalboard solution to simulate different cable lengths (which, as we defined earlier, means to shift the resonance frequency of the pickups), there are some active solutions on the market offering such a feature, usually in combination with a boost or buffer functionality. To name just a few, you should look into the Seymour Duncan Pickup Booster, Stellartone Micro Pedal, or the i2e Audio AG1.0 The PURR. Along with some other brands, these pedals will do the trick, and they’re not difficult to build if you are looking for a DIY solution.
So far, I’ve received several emails from readers asking for some more DIY guitar tools, so next month, we will look into some sustainable and environmentally friendly DIY guitar helpers—all of which you can build yourself easily by upcycling things you already have at home. Stay tuned!
Until then... keep on modding!
MayFly Le Habanero Review
Great versatility in combined EQ controls. Tasty low-gain boost voice. Muscular Fuzz Face-like fuzz voice.
Can be noisy without a lot of treble attenuation. Boost and fuzz order can only be reversed with the internal DIP switch.
$171
May Fly Le Habanero
A fuzz/boost combo that’s as hot as the name suggests, but which offers plenty of smoky, subdued gain shades, too.
Generally speaking, I avoid combo effects. If I fall out of love with one thing, I don’t want to have to ditch another that’s working fine. But recent fixations with spatial economy find me rethinking that relationship. MayFly’s Le Habanero (yes, the Franco/Spanish article/noun mash-up is deliberate) consolidates boost and fuzz in a single pedal. That’s far from an original concept. But the characteristics of both effects make it a particularly effective one here, and the relative flexibility and utility of each gives this combination a lot more potential staying power for the fickle.
“Le Habanero’s fuzz circuit has a deep switch that adds a little extra desert-rock woof.”
The fuzz section has a familiar Fuzz Face-like tone profile—a little bit boomy and very present in that buzzy mid-’60s, midrangey kind of way. But Le Habanero’s fuzz circuit has a deep switch that adds a little extra desert-rock woof (especially with humbuckers) and an effective filter switch that enhances the fuzz’s flexibility—especially when used with the boost. The boost is a fairly low-gain affair. Even at maximum settings, it really seems to excite desirable high-mid harmonics more than it churns out dirt. That’s a good thing, particularly when you introduce hotter settings from the boost’s treble and bass controls, which extend the boost’s voice from thick and smoky to lacerating. Together, the boost and fuzz can be pushed to screaming extremes. But the interactivity between the tone and filter controls means you can cook up many nuanced fuzz shades spanning Jimi scorch and Sabbath chug with tons of cool overtone and feedback colors.