Classic Laney high-gain sounds become impressively configurable in this potent new 2-channel combo.
Clip 1: Ch. 1, Max Output
Clip 2: Ch. 2, Drive At 2 O'clock
Clip 3: Ch.2, Drive 4
Clip 4: Ch.2, Max Output, Medium Drive
Laney’s two-channel GHR amps are built on a philosophy that’s become less obvious in the modern stompbox era: that the circuit of an amp alone—when designed right—can offer as many tone colors as 10 overdrive pedals. But amps like the GH50R-212—which is based on a remarkably interactive control set—may once again make that path very appealing.
Hefty Build, Heavy Features At just under 70 pounds, the GH50R is a few pounds heavier than a Twin Reverb, but carting it around is made a bit easier by the handles recessed into its two top corners. The entire package looks very sharp in its oxblood-and-black vinyl and mirrored faceplate. Inside, four 12AX7s drive the preamp while two EL34s push a pair of Celestion Vintage 30s.
Overall the GH50R has a basically British accent, and just about any player used to a Boogie or a modern high-gain Marshall can probably leap into sorting out its nine-knob front panel with confidence. That said, the sensitivity with which the GH50R’s controls interact does demand a little more concentration during the get-to-know-you phase.
The huge range of drive on tap makes switching between the two channels an exhilarating experience.
Channel 1 will feel familiar to anyone accustomed to a master-volume amp, and the drive knob—which pulls out to yield brighter tones—works with the master output control in a more-or-less conventional master volume relationship. Channel 2 has a drive control, too, sans the bright function, but it also has a volume knob that lets you dial in how much of the preamp sound hits the output section. This is key to the amp’s versatility, as we’ll see.
The 3-band EQ serves both channels, and its mid knob pulls out to emphasize a tighter, more scooped profile. Additionally, there’s a master tone control that feels and functions a lot like a guitar tone pot. Both channels share a Laney-designed digital reverb circuit whose depth control features yet another pull function to tailor the ambient response.
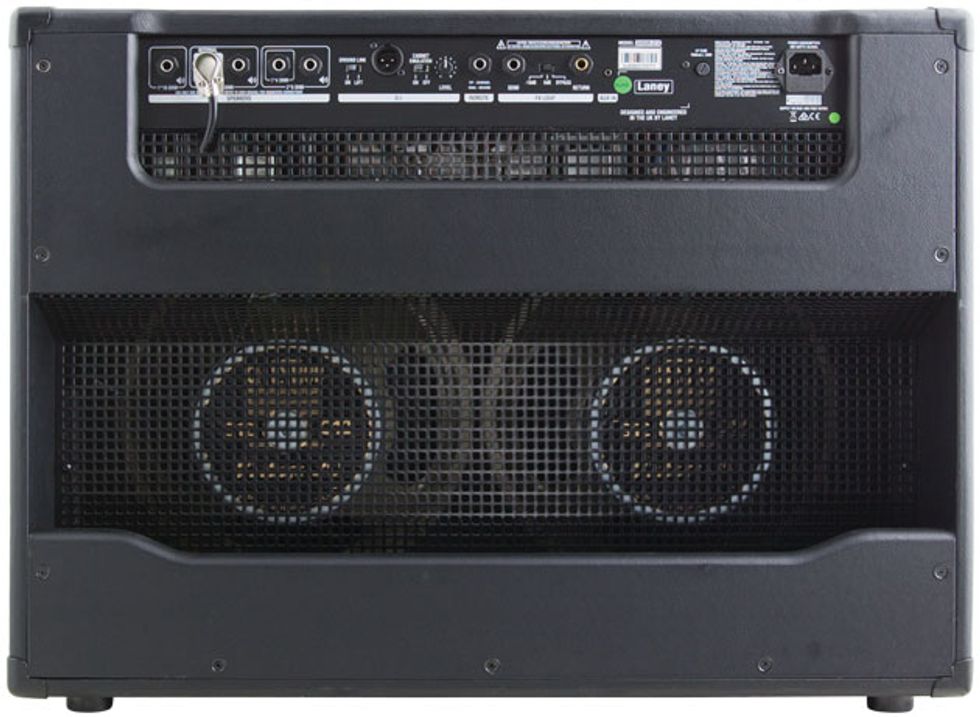
The back of the GH50R reveals yet more sound-sculpting tools: There’s an effects loop with variable gain, an auxiliary input, a DI output (with cabinet emulation and ground lift), a jack for the included two-button footswitch (which controls reverb and channel selection), and five jacks accommodating a multitude of speaker-output options ranging from one 4-ohm cab to one or two 8- or 16-ohm cabs.
Two-Headed Dragon If you’re in search of clean tones, the GH50R’s first channel is your best bet. Maxing the master output yields a hearty bellow that you can shape and saturate with the drive control. Even with a Gibson Les Paul and the drive around 9 o’clock, you perceive miles of headroom—it’s very loud before you’re even halfway to total saturation. Roll down the amp’s master tone a hair at these settings, and the output takes on some of the characteristics of a clean Fender—though the EL34s are almost always hotter in the midrange than a typical 6L6 circuit. In this case, the Laney’s British-ness is a cool, sparkling counterpoint to the Les Paul’s beefy output—especially when activating channel 1’s drive knob. This endows the output with a snappy top-end response that accentuates the picking dynamics humbuckers sometimes obscure.
But channel 2 is where you can really start shaping the relationship between preamp and output gain. In short, the range of achievable tube saturation is huge. Pushing the drive heats up the preamp section, and with the master output at noon and single-coil pickups driving the signal, breakup starts at around 10 o’clock. Bring up the master output, and individual notes start to bloom, low-end fills out, sustain increases, and the compression gets more intense and squishy.
Ratings
Pros:
Hugely satisfying tones at nearly every volume level. Highly dynamic and flexible.
If you want vintage-rock bite, you need to hit the GH50R’s power amp hard, and the channel volume enables you to throttle the EL34s and open up the output section without destroying your hearing. Better still, the amp remains very dimensional and deep sounding with the output dimed. From there the possibilities are many. I found a great, fuzz-like distortion with drive around 4 o’clock and master output around 10 o’clock, and I could tailor it to guitars with different EQ profiles using the push-pull mid control. Further, turning up the master output summons a heavier bottom end with an almost Big Muff-like boominess that’s perfect for stoner-metal rhythms. In all, the huge range of drive on tap makes switching between the two channels an exhilarating experience. Setting up channel 2 with a healthy dose of distortion and sustain while leaving channel 1 clean opens up a world of dramatic loud-then-quiet dynamic possibilities—particularly when you spice up the clean tones with ample effects in the loop.
Most of the effects I ran through the Laney worked very well through the front end, although modulation and time-based pedals sounded best through the effects loop—a very welcome addition, given the copious amounts of preamp saturation that could otherwise adversely affect their signals. The GH50R’s reverb sounds nice and is fairly configurable, with a basic character somewhere between a room and hall reverb. With the knob pushed in, the effect sits quite a bit lower in the mix, adding just an extra shade to your notes. Pulling it out tacks on a longer tail and darkens the voice a bit. Additionally, the DI output is a godsend for bedroom recording, with a variable output and 4x12 cabinet emulation.
The Verdict Considering the wide swath of excellent tones you can coax from the GH50R-212, its slightly higher-than-average street price seems quite reasonable. The unusual and uniquely interactive control array on channel 2 is stunningly versatile and, when dialed in right, a wonderfully bruising contrast to the clean channel’s sweet responsiveness. With a range of voices that moves from vintage mojo to modern swagger, the GH50R is a compelling option for players tasked with covering a wide variety of styles or working within dynamic arrangements.
Billy Gibbons tones are just the beginning in this drive with bite.
An overdrive offering amp-like feel and unique "Bite" control.
“This isn’t a copy of another circuit and it isn’t an amp in a box, but it may be our most versatile amp like feeling overdrive to date” says owner Chris Van Tassel. El Hombre is based off the legendary touch and tone of a certain long bearded Texan. “We set out to create a pedal that could capture amp-like sensitivity and really blend into your chain”. Chris continues “don’t be fooled by the simple controls."
When you bring the bite control up it becomes more aggressive, turn it down making it smoother and more reminiscent of Dumble tones. Push the gain and drop the volume for the smooth Carlton/Ford sounds. Bring the “Bite” control up and get a wide open “Plexi” feel”.
Luthier Dave Helmer shows you how to cure buzzy strings, bad intonation, gnarly frets, high action, and other common troubles with off-the-shelf axes.
Guitars are the best. We love them. It’s fun to fall in love with a guitar at a store, buy it, and proudly bring it home. But we’ve all been there … where after a month that new guitar is just not playing as good as it was before. As guitar players, we know what feels good and what feels bad when it comes to playability. Maybe you have setup preferences that you like on all your guitars, or maybe you want to experiment with changes to your setup?
With a few tools, you can perform a handful of tasks that will make your new axe play better and stay in tune. This article is for folks who already know how to tighten loose parts, raise and lower string saddles or bridges, and adjust their truss rods—though I’ll share a tip on how to check it with even more accuracy.
Is that big bulky stock nut uncomfortable on your hand? Let’s trim it down and reshape it. If the action feels high and the neck looks straight, I’ll show you how to lower the action. And haven’t we all swapped out pickups and wondered, “Do they really sound better, or do I think that just because they’re new?” Before you swap your pickups, I’ll share some pickup-height measurements that might make you change your mind.
But wait! There’s more. With everything feeling and playing great, does moving into the upper register start to sound out of tune? Intonation is very easy to check and adjust. When you go to vibrato or hold a note, do the frets feel “sandy”? Are the fret ends rubbing against your hand while you play? Let’s flush and polish those up.
To be clear, we’re not swapping out anything on your new guitar: We’re simply refining the setup. Be sure to go online to see eight videos I made showing various processes covered in this story.
Begin the Beguine
There is an order of operations for best results. Neck relief is the first item to dial in, followed by getting the nut slots cut to the proper depth. After that, setting your string and pickup heights is in order. The final step is setting intonation.
Fret polishing is its own event and can happen anytime between string changes. Getting the frets feeling comfortable and well-polished will take some time and attention. You’ll also need some specialized tools as well as some that can be found in most households. Check the box for my list.
Tools You’ll Need
All of the specialized tools in this list are available through online suppliers, including StewMac and Amazon.
6" Ruler with measures in 64ths
String action gauge [Photo 1]
Miscellaneous screwdrivers
Allen wrenches
Radius blocks
Understring radius gauges (with the radius on the bottom and the top)
Fret-end dressing file
Micro-Mesh sticks [Photo 2]
Tape (low tack)
Cotton swabs
Paper towels (blue shop towels preferred)
Clean cotton rags
Nut files [Photo 3]
Stikit sandpaper
Tri-Flow lubricant
Capo
Feeler gauges
Simichrome polish
Polishing the Frets
Let’s start with the most Zen of these tasks: fret polishing.
Tape off the fretboard using low-tack tape, exposing only the frets. De-tack each piece of tape on your clothing or maybe a rag—I use my jeans or my sweatshirt. Making it less sticky helps prevent pulling finish off a maple fretboard or the neck. Taping the fretboard also prevents putting any cross-grain scratches into it while you file and polish. You can choose to tape off the entire fretboard or work your way down one fret at a time. Dealer’s choice.
One thing to note about tape, any tape: Even when you de-tack it, you do not want to leave it on overnight. If that happens, rub the tape with your finger, which will break the surface tension. Then carefully pull the tape off from a corner, making sure you’re pulling it off at an angle and not at a straight line with the fretboard edge.
Photo 4
Every fret end has a small burr on the corner from the initial fret job. The fret-end dressing file has a non-marring smooth side for rounding the fret end, and a safe square edge for getting into the corner of the fret end. So, take the fret-end dressing file, use the squared off-side, and file both corners of the fret end [Photo 4].
How to Polish Frets
Here’s how easy it is to polish and smooth frets.
Photo 5
One or two strokes is all you’ll need. Then, using the non-marring side of the file, slightly round off the fret ends. [Photo 5].
Photo 6
With the file positioned vertically, file downward to make the fret end flush with the edge of the fretboard [Photo 6].
Photo 7
For a nice, rounded-off look, polish the frets using the same rounding motion from the previous step, working through all three grits of the Micro-Mesh stick [Photo 7].
Photos 8 (top) & 9 (bottom)
Then, polish both the sides and the top of the frets [Photos 8 and 9]. Using a soft cloth and Simichrome, buff every fret. This will give you a great shine and help prevent oxidation. Now it’s time to remove the tape and condition the fingerboard if it needs it.
Note: Every fret has two fret ends to clean up and polish along with the fret itself. This is a fair amount of handwork. If you’ve never done it, you will get tired and need a break. Take that break. Take multiple breaks. Let the process take however long it requires without rushing. If you’re new, do all the fret polishing over a weekend or a few days. It should be fun, not painful. If it is difficult, call your local luthier and hire them to do it for you.
Adjusting Neck Relief
Neck relief refers to the slight amount of concave bowing intentionally created in the neck of a guitar or bass by adjusting the truss rod. For the safety of the guitar, be sure to slack the strings before doing any adjustments to the truss rod. Neither you nor your guitar needs to be tense during this process.
Photo 10
Before whipping out an Allen wrench for the truss rod, start by sight-checking the neck’s straightness. You can sight the neck with the guitar on its back, but I like to put it on edge and look at it that way. It’s easier to see how much curve there is when the guitar is on its side. I feel like gravity plays tricks on my eyes when I sight the neck with the guitar on its back. When I play the guitar, it’s on its side anyway, so looking at it from this vantage point is best [Photo 10].
Photo 11
Tune the guitar to pitch, put a capo on the first fret, and press fret 15 with your left hand. With your right hand, take a feeler gauge and check the gap at frets 7 through 9 (left-handed players, flip your hands around) [Photo 11].
From the top of the fret to the bottom of the string, the gap is usually anywhere from .003" to .012", depending on the feel you are going for. The feeler gauge should fit just between the top of the fret and the bottom of the string. The string shouldn’t move. This will tell you how much “relief” is in the neck. If you find this challenging, keep going—this will take some practice.
When dialing in the relief, I go back and forth between adjusting the truss rod and the string action. Getting the strings low and playing clean on a budget axe can be a challenge. Usually the fretwork isn’t that great, and in the upper register the frets can be unlevel, causing buzzes and clanks. If you need to raise the string action to get the notes to play clean, some fret leveling may be in order. (For more on fret leveling, go online to our article “About Fret Leveling,” from the December 2007 issue.) For good energy transfer, the neck should be as straight as possible. If the neck is straight and the frets are not level, the strings will buzz with low action.
In general, the flatter the radius on the fretboard, the straighter you can get the neck with the truss rod adjustment. On a fretboard with a 12" radius, you should be able to get .005" relief, and on a vintage 7.25" radius board you may need as much as .014" relief. The only way to get better at checking and setting relief is practice.
Refining the Nut
String buzzes, pinging noises when you tune, strings sticking in the slots, and too much string motion in the nut slots are all indicators of trouble. Before getting out the sandpaper and Micro-Mesh sticks, be sure you know if your guitar’s nut is TUSQ or bone. TUSQ is softer, so you should leave TUSQ nut slots a little higher. This leaves room for the TUSQ to wear without causing buzzing on the first fret. With bone, you can cut the slots lower, because it holds up to string wear.
How to Shape Your Guitar's Nut
Watch as Dave Helmer sands down the back half of a nut and creates a smooth finish.
The back side of the nut is usually very bulky and could often stand to lose some material to be more comfortable on your hand. So, let’s start there. Tape off the neck and headstock around the nut using a few layers of tape to protect the headstock face and fretboard. Then, slack the strings and pull them to either side of the nut.
Photo 12
Sand a bevel into the backside—the side closest to the headstock—of the nut using P320 and P400 grit Stikit sandpaper on a flat sanding stick. The bevel should start at the back of the nut and come forward about one-third to one-half the thickness of the nut [Photo 12]. Use P320 for most of the sanding and switch to P400 for the last 5 to 10 strokes.
Photo 13
Next, take a fresh Micro-Mesh stick and work through the various grits to buff/round over the bevel you’ve sanded into back of the nut [Photo 13], so it looks and feels good.
Photos 14 (left) & 15 (right)
TUSQ nuts are often tall, and the strings sit deep in the slots. Wound strings require 50 percent of the diameter of the string to sit in the nut slot, with the other 50 percent above the top of the nut surface. The plain strings should be flush with the top of the nut. Take a look at the wrong appearance [Photo 14] and the correct look [Photo 15] for properly seated strings.
How to Sand Your Guitar's Nut
Our luthier shows you how to use a radius block and sand down a nut.
Photo 16
Use a radius block that matches the radius of your fretboard. With P320 and P400 grit Stikit sandpapers, use mild pressure to sand down the top of the nut. Sand a bit and check your progress by setting the strings in the slots and putting a little tension on them. Tuning to pitch isn’t necessary. Use the P320 for most of the sanding, and switch to P400 when you are close to the 50/50 height for the wound strings. The radius block sanding will leave a flat, sharp edge on each side of the TUSQ nut [Photo 16]. To round over the sharp edge, use the sanding block and Micro-Mesh stick.
Use the coarse grit of a Micro-Mesh stick to round over and blend the bevel from the back into the top of the nut. Work through the grit gauges until it’s smooth. There is a fine balance between the bevel at the back of the nut and the top radius of the nut. Go back and forth between the two steps to get a nice, finished look and a nut that functions at optimal levels.
… And Refining the Nut Slots
Nut height is the distance from the top of the first fret to the bottom of the string. A good height on the wound strings is about .020", and for the plain strings about .015". Measuring this gap with a feeler gauge can be tricky because of the fretboard radius. Many repair folks do this by eye and feel, based on experience. It takes some practice. A good check: At pitch, fret the third fret and check for a small gap between the string and the top of the first fret.
How to Widen Your Guitar's Nut Slots
A diamond file can make quick work of deepening and widening nut slots.
Photo 17
The bottom of the string should be sitting on the bottom of the front half of the nut slot [Photo 17]. File down each nut slot to its proper depth using the corresponding nut file. There are diamond nut files on the market in multiple sizes to accommodate many string gauges. Make sure to keep your strokes straight. The standard-toothed files have less sizes and usually require rolling them from side to side to get a well-fit string.
Next, using a proper-sized file, round over the bottom back half of the nut slots down, toward the face of the headstock and away from the strings. This will allow the strings to move freely during tuning or bending, while still having support from the front half of the slot.
How to File D and G String Slots on Guitar
The D and G nut slots require special attention on 3x3-style headstock configurations.
Photo 18
On guitars with 3x3 headstock configurations, the D and G strings need the back half of the slots feathered out away from the center, so the string has a direct path to the tuner post. Using a file that is one size bigger than the string and rolling it side to side on the back of the nut slot will give the string a straight path to the tuner post. Photo 18 is my illustration showing which slots need feathering.
Additionally, use pencil lead to lubricate the slots. Just get in there with the point of a pencil and mark the slot with its graphite. You might also put a drop of Tri-Flow on the front of the string tree. Tri-Flow will run down the string, so take a cotton swab or cloth to clean up any excess. Tri-Flow has Teflon in it, so you don’t need much.
Adjusting String Action
First, find your string height by measuring the string action at the 17th fret on a Fender-style guitar and at the 15th fret on a Gibson-style instrument.On electric guitars, action can range from 3/64" to 3/32", depending on the player’s comfort. My preferences are 1/16" on the treble side and 5/64"on the bass side on both Fender- and Gibson-style guitars measured at the appropriate fret.
How to Adjust Guitar Action
Here’s a look at how our author adjusts the action.
Photo 19
Always loosen the string tension before making action adjustments. This will save wear and tear on the small bridge components. Take either a 6" ruler or a string action gauge and set it on the frets. Measure from the top of the fret to the bottom of the string [Photo 19].
If the action is high, you will lower that string’s saddle or that side of the bridge. If it is low, you will raise it. Make sure the individual saddles are sitting square and upright to the face of the bridge. You do not want them sitting at an angle or leaning over. This will cause buzzing.
Photo 20
The bottom of the strings should match the radius of the fretboard when measured with an understring radius gauge [Photo 20]. Start your adjustment with the outside strings, working toward the center. On Fender-style guitars, set the two outside strings to the height you want and have the middle four strings a bit higher than that. Bring the gauge up from underneath and just touch the two outside strings. Then, bring the strings down a little at a time until the radius matches.
On a Gibson-style Tune-o-matic, the saddles are not individually adjustable. So, if the radius doesn’t match, the saddles will need to be filed. To do this, I recommend using toothed nut files and a rolling side-to-side motion. Do a little work and check your progress. Remember to slack your strings when adjusting the saddle or bridge up or down.
Changing Pickup Height
Photo 21
Finally, let’s take a look at pickup-height adjustment. First, to check pickup height, use the two outside strings again. Press the top wound string on the last fret and measure the distance from the top of the pole piece to the bottom of the string [Photo 21]. This distance can range from 3/64" to 1/8". My preferences are 1/16" on the treble side and 5/64" on the bass side.
Adjusting Guitar Pickup Height
Dave Helmer walks you through the process of adjusting the height of your guitar’s pickups.
On most styles of pickups, there are height adjustment screws on either side of the pickup to raise or lower it. The closer the pickup gets to the strings, the more present string frequencies become. If you get too close, the magnetic pull can affect the string’s vibration and you may hear some strange sounds as you go into the upper register.
On Strats, the neck pickup is regularly set too close, and at the 12th fret and above, the low E and A can sound choked, honky, and not clear. Lowering the neck pickup with a screwdriver usually solves this issue.
Setting Intonation
Photo 22
If you can’t get your guitar accurately in tune, you might need to check its intonation. Adjust all saddles as far back as possible so every string will play flat at the 12th fret. You will adjust the saddles forward, gradually making the octave play sharper until it’s in tune with the open string [Photo 22].
Adjust Your Guitar's Intonation
With a tuner and a screwdriver, Dave Helmer shows you how to adjust your guitar’s intonation.
Depending on your vibrato style, experiment with intonating the plain strings slightly flat. Use your ear and do what sounds good. Sometimes, the plain strings can have perfect intonation, but playing with vibrato can make them sound sharp.
To fine-tune intonation, the individual bridge saddles must be adjustable. Once the intonation is set, recheck the string radius using the understring radius gauge and adjust as needed. The radius can change as the saddles come forward during intonation.
Tri-Flow is great for lubricating saddle parts. Put a small drop on the saddle-height adjustment screws and capillary action will suck it in. Adjust the saddle up and down a few times to coat the threads. Clean up any excess with a cotton swab or cloth. Put a drop or two onto a cotton swab and apply the Tri-Flow to the top of each saddle where the string rests. This will help strings move freely during tuning and after any bends or vibrato.
And that’s it! For a relatively small investment in tools and time, you’re now ready to supercharge your new guitar—and maybe your long-treasured axes, too.