This 50-watt, dual-channel head conjures everything from ’80s metal to ’90s grunge and acres of heaviness in between. The Premier Guitar Fuchs Mantis 89 review.
Ratings
Pros:
Great build quality. Very convincing ’80s and ’90s Marshall-inspired rock tones. Surprisingly good plexi-style sounds.
Cons:
Switching between channels can make the amp too dark or too bright at some shared EQ settings.
Andy Fuchs’ New Jersey-based amplifier company broke through in the early aughts on the strength of excellent Dumble-inspired designs. But subsequent amps that satisfied the thirsts of heavier rockers were hits, too. The original Mantis 100 of the early 2010s was one such creation: a fierce, fire-breathing beast that ranged from gut-thumping, American-voiced sounds to all-out scorch-and-burn.
The new 50-watt, EL34-powered Mantis 89 reviewed here roars with equally raucous attitude, yet it takes its sonic cues from the other side of the Atlantic. The “89” refers, obliquely, to its primary inspirations—the Marshall JCM 800 and 900 series, and it’s configured as a 2-channel amp that can switch between 800 and 900-style sounds.
Panel for Gold
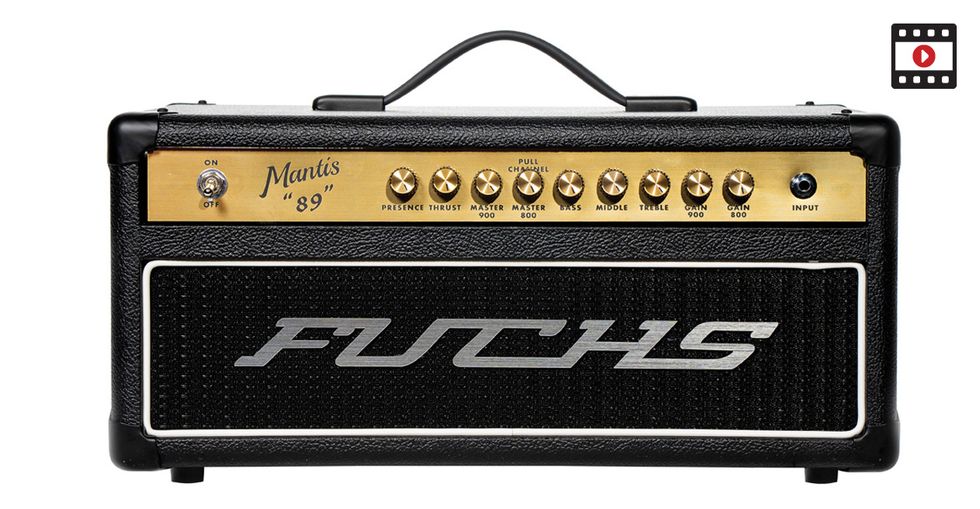
Though its punching power suggests bigness in every respect, the Mantis 89 is a stout and relatively compact bulldog of a head. It measures 18.5" x 11" x 8.5" and weighs 38 pounds. The black vinyl, brushed-gold control panel, gold-tipped knobs, and white piping all nod at Marshall’s influence. But the circuit isn’t just a slavish reproduction of the British heads that inspired it.
A shared 3-band EQ stage keeps the multi-functional control panel down to a tidy nine knobs, which admirably perform the two-amps-in-one duties required here. The 800 and 900 channels each have dedicated gain and master volume knobs, but they share controls for thrust (a bass frequency control often known as “depth” or “resonance” on other amps) and presence, which tweaks the high and high-mid frequencies at the output stage.
The back panel is home to a few essential features. Three speaker outs offer options for 4-, 8- and 16-ohm cabinet configurations. There’s a TRS effects loop send/return jack (meaning you’ll need a TRS Y-cable to tap it), and a jack for the included two-button footswitch, which also features a preset boost function. The standby switch is also on the back panel, although the main power switch and indicator light are on the front.
In addition to the EL34s in the output stage, the amp uses three 12AX7s for preamp and phase-inverter duties. The circuit itself is built around quality components hand-mounted on a thick, sturdy PCB. A fan mounted behind the output tubes helps keep the big bottles cool. It can seem a little noisy when you’re up close, but playing at even low volumes obscures the sound of the fan whirring away.
You can easily get sounds that evoke more “classic” Marshalls, like the 2204 Master Model circuit and the 1987 plexi.
Playing Mantis
The Mantis 89 lays down a fast and wide track to a range of arena-rock tones. And while you can summon distinctly ’80s and ’90s-style high-gain tones, there are many available sounds that sound classic and not at all dated.
Fuchs doesn’t specify which JCM800 the 800 channel is derived from, but it sounds great. It’s no one-trick pony either: You can easily get sounds that evoke more “classic” Marshalls like the 2204 Master Model circuit and the 1987 plexi. In general, when you reduce the gain and roll the master volume up, you get chunky edge-of-breakup plexi tones. Crank the gain, though, and the classic-rock lead tones get sizzling quick.
The 900 channel, on the other hand, is all fire and brimstone, and an utter blast when those moods strike you. It can be dialed back for mild crunch, but that’s not where the 900 channel feels most natural. Instead, it’s happiest cranking out hair-metal saturation, classic ’90s shred tones, and more contemporary high-gain grunge textures. And there’s plenty of crispy high-end crackle, midrange grind, and low-end thump on tap that you can use to tailor those textures for your own creative needs.
I found the boosted setting particularly delectable on both channels. In addition to the added gain (or perhaps because of it), it delivers an increased sense of size and saturation at the same time that never collapses into a compressed mess. The very effective EQ section gives you a lot of frequency shaping power, too—which is enhanced by the capable presence and thrust controls. And to my ear the thrust control actually helps the Fuchs generate more low-end oomph than either of the models that inspired it. The master volume controls work well on each channel, too. And it’s not inconceivable that you could use the amp in a 50-seater club, if necessary. The powerful EQ does make the otherwise convenient act of channel switching tricky at times. Identical settings that are ideal for one channel may not be completely suited for the other. And a few settings I liked either made the 800 channel too dark or the 900 too bright for my tastes. A bright switch for the lower-gain 800 side might be a good fix.
The Verdict
Like every Fuchs creation I’ve experienced, the Mantis 89 is extremely well built and well thought-out. It’s a super-functional reinvention of two heavy-rock-staple amps, and there’s more than enough power here for big gigs. But the extremely usable master volume controls keep it sounding fat and fierce at club volumes. And while I’d love to see some footswitchable means of brightening up the 800 channel independent of the hotter 900, there is, otherwise, very little to fault in this superb amplifier.
Luthier Dave Helmer shows you how to cure buzzy strings, bad intonation, gnarly frets, high action, and other common troubles with off-the-shelf axes.
Guitars are the best. We love them. It’s fun to fall in love with a guitar at a store, buy it, and proudly bring it home. But we’ve all been there … where after a month that new guitar is just not playing as good as it was before. As guitar players, we know what feels good and what feels bad when it comes to playability. Maybe you have setup preferences that you like on all your guitars, or maybe you want to experiment with changes to your setup?
With a few tools, you can perform a handful of tasks that will make your new axe play better and stay in tune. This article is for folks who already know how to tighten loose parts, raise and lower string saddles or bridges, and adjust their truss rods—though I’ll share a tip on how to check it with even more accuracy.
Is that big bulky stock nut uncomfortable on your hand? Let’s trim it down and reshape it. If the action feels high and the neck looks straight, I’ll show you how to lower the action. And haven’t we all swapped out pickups and wondered, “Do they really sound better, or do I think that just because they’re new?” Before you swap your pickups, I’ll share some pickup-height measurements that might make you change your mind.
But wait! There’s more. With everything feeling and playing great, does moving into the upper register start to sound out of tune? Intonation is very easy to check and adjust. When you go to vibrato or hold a note, do the frets feel “sandy”? Are the fret ends rubbing against your hand while you play? Let’s flush and polish those up.
To be clear, we’re not swapping out anything on your new guitar: We’re simply refining the setup. Be sure to go online to see eight videos I made showing various processes covered in this story.
Begin the Beguine
There is an order of operations for best results. Neck relief is the first item to dial in, followed by getting the nut slots cut to the proper depth. After that, setting your string and pickup heights is in order. The final step is setting intonation.
Fret polishing is its own event and can happen anytime between string changes. Getting the frets feeling comfortable and well-polished will take some time and attention. You’ll also need some specialized tools as well as some that can be found in most households. Check the box for my list.
Tools You’ll Need
All of the specialized tools in this list are available through online suppliers, including StewMac and Amazon.
6" Ruler with measures in 64ths
String action gauge [Photo 1]
Miscellaneous screwdrivers
Allen wrenches
Radius blocks
Understring radius gauges (with the radius on the bottom and the top)
Fret-end dressing file
Micro-Mesh sticks [Photo 2]
Tape (low tack)
Cotton swabs
Paper towels (blue shop towels preferred)
Clean cotton rags
Nut files [Photo 3]
Stikit sandpaper
Tri-Flow lubricant
Capo
Feeler gauges
Simichrome polish
Polishing the Frets
Let’s start with the most Zen of these tasks: fret polishing.
Tape off the fretboard using low-tack tape, exposing only the frets. De-tack each piece of tape on your clothing or maybe a rag—I use my jeans or my sweatshirt. Making it less sticky helps prevent pulling finish off a maple fretboard or the neck. Taping the fretboard also prevents putting any cross-grain scratches into it while you file and polish. You can choose to tape off the entire fretboard or work your way down one fret at a time. Dealer’s choice.
One thing to note about tape, any tape: Even when you de-tack it, you do not want to leave it on overnight. If that happens, rub the tape with your finger, which will break the surface tension. Then carefully pull the tape off from a corner, making sure you’re pulling it off at an angle and not at a straight line with the fretboard edge.
Photo 4
Every fret end has a small burr on the corner from the initial fret job. The fret-end dressing file has a non-marring smooth side for rounding the fret end, and a safe square edge for getting into the corner of the fret end. So, take the fret-end dressing file, use the squared off-side, and file both corners of the fret end [Photo 4].
How to Polish Frets
Here’s how easy it is to polish and smooth frets.
Photo 5
One or two strokes is all you’ll need. Then, using the non-marring side of the file, slightly round off the fret ends. [Photo 5].
Photo 6
With the file positioned vertically, file downward to make the fret end flush with the edge of the fretboard [Photo 6].
Photo 7
For a nice, rounded-off look, polish the frets using the same rounding motion from the previous step, working through all three grits of the Micro-Mesh stick [Photo 7].
Photos 8 (top) & 9 (bottom)
Then, polish both the sides and the top of the frets [Photos 8 and 9]. Using a soft cloth and Simichrome, buff every fret. This will give you a great shine and help prevent oxidation. Now it’s time to remove the tape and condition the fingerboard if it needs it.
Note: Every fret has two fret ends to clean up and polish along with the fret itself. This is a fair amount of handwork. If you’ve never done it, you will get tired and need a break. Take that break. Take multiple breaks. Let the process take however long it requires without rushing. If you’re new, do all the fret polishing over a weekend or a few days. It should be fun, not painful. If it is difficult, call your local luthier and hire them to do it for you.
Adjusting Neck Relief
Neck relief refers to the slight amount of concave bowing intentionally created in the neck of a guitar or bass by adjusting the truss rod. For the safety of the guitar, be sure to slack the strings before doing any adjustments to the truss rod. Neither you nor your guitar needs to be tense during this process.
Photo 10
Before whipping out an Allen wrench for the truss rod, start by sight-checking the neck’s straightness. You can sight the neck with the guitar on its back, but I like to put it on edge and look at it that way. It’s easier to see how much curve there is when the guitar is on its side. I feel like gravity plays tricks on my eyes when I sight the neck with the guitar on its back. When I play the guitar, it’s on its side anyway, so looking at it from this vantage point is best [Photo 10].
Photo 11
Tune the guitar to pitch, put a capo on the first fret, and press fret 15 with your left hand. With your right hand, take a feeler gauge and check the gap at frets 7 through 9 (left-handed players, flip your hands around) [Photo 11].
From the top of the fret to the bottom of the string, the gap is usually anywhere from .003" to .012", depending on the feel you are going for. The feeler gauge should fit just between the top of the fret and the bottom of the string. The string shouldn’t move. This will tell you how much “relief” is in the neck. If you find this challenging, keep going—this will take some practice.
When dialing in the relief, I go back and forth between adjusting the truss rod and the string action. Getting the strings low and playing clean on a budget axe can be a challenge. Usually the fretwork isn’t that great, and in the upper register the frets can be unlevel, causing buzzes and clanks. If you need to raise the string action to get the notes to play clean, some fret leveling may be in order. (For more on fret leveling, go online to our article “About Fret Leveling,” from the December 2007 issue.) For good energy transfer, the neck should be as straight as possible. If the neck is straight and the frets are not level, the strings will buzz with low action.
In general, the flatter the radius on the fretboard, the straighter you can get the neck with the truss rod adjustment. On a fretboard with a 12" radius, you should be able to get .005" relief, and on a vintage 7.25" radius board you may need as much as .014" relief. The only way to get better at checking and setting relief is practice.
Refining the Nut
String buzzes, pinging noises when you tune, strings sticking in the slots, and too much string motion in the nut slots are all indicators of trouble. Before getting out the sandpaper and Micro-Mesh sticks, be sure you know if your guitar’s nut is TUSQ or bone. TUSQ is softer, so you should leave TUSQ nut slots a little higher. This leaves room for the TUSQ to wear without causing buzzing on the first fret. With bone, you can cut the slots lower, because it holds up to string wear.
How to Shape Your Guitar's Nut
Watch as Dave Helmer sands down the back half of a nut and creates a smooth finish.
The back side of the nut is usually very bulky and could often stand to lose some material to be more comfortable on your hand. So, let’s start there. Tape off the neck and headstock around the nut using a few layers of tape to protect the headstock face and fretboard. Then, slack the strings and pull them to either side of the nut.
Photo 12
Sand a bevel into the backside—the side closest to the headstock—of the nut using P320 and P400 grit Stikit sandpaper on a flat sanding stick. The bevel should start at the back of the nut and come forward about one-third to one-half the thickness of the nut [Photo 12]. Use P320 for most of the sanding and switch to P400 for the last 5 to 10 strokes.
Photo 13
Next, take a fresh Micro-Mesh stick and work through the various grits to buff/round over the bevel you’ve sanded into back of the nut [Photo 13], so it looks and feels good.
Photos 14 (left) & 15 (right)
TUSQ nuts are often tall, and the strings sit deep in the slots. Wound strings require 50 percent of the diameter of the string to sit in the nut slot, with the other 50 percent above the top of the nut surface. The plain strings should be flush with the top of the nut. Take a look at the wrong appearance [Photo 14] and the correct look [Photo 15] for properly seated strings.
How to Sand Your Guitar's Nut
Our luthier shows you how to use a radius block and sand down a nut.
Photo 16
Use a radius block that matches the radius of your fretboard. With P320 and P400 grit Stikit sandpapers, use mild pressure to sand down the top of the nut. Sand a bit and check your progress by setting the strings in the slots and putting a little tension on them. Tuning to pitch isn’t necessary. Use the P320 for most of the sanding, and switch to P400 when you are close to the 50/50 height for the wound strings. The radius block sanding will leave a flat, sharp edge on each side of the TUSQ nut [Photo 16]. To round over the sharp edge, use the sanding block and Micro-Mesh stick.
Use the coarse grit of a Micro-Mesh stick to round over and blend the bevel from the back into the top of the nut. Work through the grit gauges until it’s smooth. There is a fine balance between the bevel at the back of the nut and the top radius of the nut. Go back and forth between the two steps to get a nice, finished look and a nut that functions at optimal levels.
… And Refining the Nut Slots
Nut height is the distance from the top of the first fret to the bottom of the string. A good height on the wound strings is about .020", and for the plain strings about .015". Measuring this gap with a feeler gauge can be tricky because of the fretboard radius. Many repair folks do this by eye and feel, based on experience. It takes some practice. A good check: At pitch, fret the third fret and check for a small gap between the string and the top of the first fret.
How to Widen Your Guitar's Nut Slots
A diamond file can make quick work of deepening and widening nut slots.
Photo 17
The bottom of the string should be sitting on the bottom of the front half of the nut slot [Photo 17]. File down each nut slot to its proper depth using the corresponding nut file. There are diamond nut files on the market in multiple sizes to accommodate many string gauges. Make sure to keep your strokes straight. The standard-toothed files have less sizes and usually require rolling them from side to side to get a well-fit string.
Next, using a proper-sized file, round over the bottom back half of the nut slots down, toward the face of the headstock and away from the strings. This will allow the strings to move freely during tuning or bending, while still having support from the front half of the slot.
How to File D and G String Slots on Guitar
The D and G nut slots require special attention on 3x3-style headstock configurations.
Photo 18
On guitars with 3x3 headstock configurations, the D and G strings need the back half of the slots feathered out away from the center, so the string has a direct path to the tuner post. Using a file that is one size bigger than the string and rolling it side to side on the back of the nut slot will give the string a straight path to the tuner post. Photo 18 is my illustration showing which slots need feathering.
Additionally, use pencil lead to lubricate the slots. Just get in there with the point of a pencil and mark the slot with its graphite. You might also put a drop of Tri-Flow on the front of the string tree. Tri-Flow will run down the string, so take a cotton swab or cloth to clean up any excess. Tri-Flow has Teflon in it, so you don’t need much.
Adjusting String Action
First, find your string height by measuring the string action at the 17th fret on a Fender-style guitar and at the 15th fret on a Gibson-style instrument.On electric guitars, action can range from 3/64" to 3/32", depending on the player’s comfort. My preferences are 1/16" on the treble side and 5/64"on the bass side on both Fender- and Gibson-style guitars measured at the appropriate fret.
How to Adjust Guitar Action
Here’s a look at how our author adjusts the action.
Photo 19
Always loosen the string tension before making action adjustments. This will save wear and tear on the small bridge components. Take either a 6" ruler or a string action gauge and set it on the frets. Measure from the top of the fret to the bottom of the string [Photo 19].
If the action is high, you will lower that string’s saddle or that side of the bridge. If it is low, you will raise it. Make sure the individual saddles are sitting square and upright to the face of the bridge. You do not want them sitting at an angle or leaning over. This will cause buzzing.
Photo 20
The bottom of the strings should match the radius of the fretboard when measured with an understring radius gauge [Photo 20]. Start your adjustment with the outside strings, working toward the center. On Fender-style guitars, set the two outside strings to the height you want and have the middle four strings a bit higher than that. Bring the gauge up from underneath and just touch the two outside strings. Then, bring the strings down a little at a time until the radius matches.
On a Gibson-style Tune-o-matic, the saddles are not individually adjustable. So, if the radius doesn’t match, the saddles will need to be filed. To do this, I recommend using toothed nut files and a rolling side-to-side motion. Do a little work and check your progress. Remember to slack your strings when adjusting the saddle or bridge up or down.
Changing Pickup Height
Photo 21
Finally, let’s take a look at pickup-height adjustment. First, to check pickup height, use the two outside strings again. Press the top wound string on the last fret and measure the distance from the top of the pole piece to the bottom of the string [Photo 21]. This distance can range from 3/64" to 1/8". My preferences are 1/16" on the treble side and 5/64" on the bass side.
Adjusting Guitar Pickup Height
Dave Helmer walks you through the process of adjusting the height of your guitar’s pickups.
On most styles of pickups, there are height adjustment screws on either side of the pickup to raise or lower it. The closer the pickup gets to the strings, the more present string frequencies become. If you get too close, the magnetic pull can affect the string’s vibration and you may hear some strange sounds as you go into the upper register.
On Strats, the neck pickup is regularly set too close, and at the 12th fret and above, the low E and A can sound choked, honky, and not clear. Lowering the neck pickup with a screwdriver usually solves this issue.
Setting Intonation
Photo 22
If you can’t get your guitar accurately in tune, you might need to check its intonation. Adjust all saddles as far back as possible so every string will play flat at the 12th fret. You will adjust the saddles forward, gradually making the octave play sharper until it’s in tune with the open string [Photo 22].
Adjust Your Guitar's Intonation
With a tuner and a screwdriver, Dave Helmer shows you how to adjust your guitar’s intonation.
Depending on your vibrato style, experiment with intonating the plain strings slightly flat. Use your ear and do what sounds good. Sometimes, the plain strings can have perfect intonation, but playing with vibrato can make them sound sharp.
To fine-tune intonation, the individual bridge saddles must be adjustable. Once the intonation is set, recheck the string radius using the understring radius gauge and adjust as needed. The radius can change as the saddles come forward during intonation.
Tri-Flow is great for lubricating saddle parts. Put a small drop on the saddle-height adjustment screws and capillary action will suck it in. Adjust the saddle up and down a few times to coat the threads. Clean up any excess with a cotton swab or cloth. Put a drop or two onto a cotton swab and apply the Tri-Flow to the top of each saddle where the string rests. This will help strings move freely during tuning and after any bends or vibrato.
And that’s it! For a relatively small investment in tools and time, you’re now ready to supercharge your new guitar—and maybe your long-treasured axes, too.