So you thought all modern guitar cabinet simulators were pieces of software that were loaded onto the computer and launched with your favorite Digital Audio Workstation? Well, that’s certainly not the case here. Aimed squarely at the guitar-player-meets-pro-audio market, SPL’s Transducer Model 2601 is an all-analog cabinet and mic'ing simulator. No need to worry about installation discs, operating systems, or the latest updates with this bad boy. Just plug it in and get to work.
The Real Deal
Designed in cooperation with German guitar amp specialists Tonehunter, the Transducer is an active (not passive) power soak that essentially replaces your cabinet in both a studio and/or live situation. Accepting heads up to 200 watts, you simply take your speaker output, plug into the Transducer, then run it to your recording device. It will act as your speaker cabinet, allowing you to achieve the sound of a cranked guitar amp without cranking up wars with your neighbors. But it’s far more flexible than that. When the Transducer first arrived, I was quite pleased to lift it out box and feel a truly solid piece of gear. It’s a hefty 2U (rack unit) 19-inch piece with fewer controls than I expected. This was obviously not built to be complex -- just to deliver sound.
Up Front
The front of the unit is quite simple and straightforward. There are three large knobs, starting on the left with a level control called Speaker Action. Set on a scale of 0-100, with 100 being fully on, it simulates various levels of speaker cone characteristics. According to the manual, anything past 35% will add additional overtones, producing a ‘rasping’ distortion effect. It’s utilized in combination with the output gain of the Miking Level knob (more on that shortly). Moving left to right, there is a Signal LED indicating input signal (anything above –20dBu at input), followed by a Speaker Cabinet toggle switch. With choices of Open or Closed, it can switch between a direct, more defined/present sound with Open and a punchier Closed setting. Next to that sits another switch labeled Sparky and Mellow for Speaker Voicing. Sparky offers the choice of lively alnico speakers, whereas Mellow is for those of a British ceramic construction. The next large knob is another form of gain control, the Miking Level. Again, set from 0-100, it produces a stronger, denser sound of compression as you increase the level. Lower level settings provide a cleaner, refined sound that also features reduced midrange tonality. The Microphone Selection switch is next, with the varied tonal options of Condenser or Dynamic microphone characteristics. You can also choose between Close and Ambient miking with the final toggle switch, whereas Close has the more direct, up front sound and Ambient adds a sense of depth and softness. There’s an Overload LED that illuminates 3dB before the internal preamp stage is overloaded and finally, an Output Gain knob (0-100) controls the Line Output 1 and 2 levels without affecting the Mic-level output.
From Behind
Turning the Transducer around, it quickly becomes obvious that people who actually use gear designed this. The first small indication is that each I/O is labeled both on the bottom, and upside down on the top (for when you’re leaning over the rack to read the unit). Also, it’s clear that this is not just a one trick pony. Aside of the usual Power Switch, Voltage Fuse, Ground Lift and Mains Input for power, there’s the 1/4” unbalanced Power Input, where you connect your amp’s speaker out. The manual wisely recommends using cables with a maximum length of 3 meters/10 feet for lossless signal transmission. The Speaker Thru is an output used for connecting a 4, 8, or 16-ohm speaker cabinet. This is used in live applications, so you can choose to have a traditional amp/speaker setup while still routing the Mic or Line Output to the Front Of House (FOH) for live mixing. The XLR balanced Mic Level Output is next, controlled by the Miking Level knob on the front of the unit. Since the Output Gain Control has no effect on it, this signal can be sent to an external mic preamp, just like a conventional mic'ing setup. A nice touch. That’s followed by an XLR balanced Line Output 1 and Line Output 2, which also includes a 1/4” TRS connector with +4dB output. The manual notes to use only one (either the XLR or 1/4) output at a time with Output 2, as using both can cause impedance mismatches). Line Output 2 also wisely includes a phase switch, which can really come in handy both in the studio and onstage. Finally, there’s an unbalanced, 1/4” Pre Simulator Out, which is independent from Transducer adjustments. This is a line level output of the power-reduced amp signal, which can feed effects or even a separate amp.
Plug It In
As you can tell from above, there are many ways to set up a Transducer. Once again, the manual becomes invaluable, as they provide clear diagrams of 7 different setup examples.
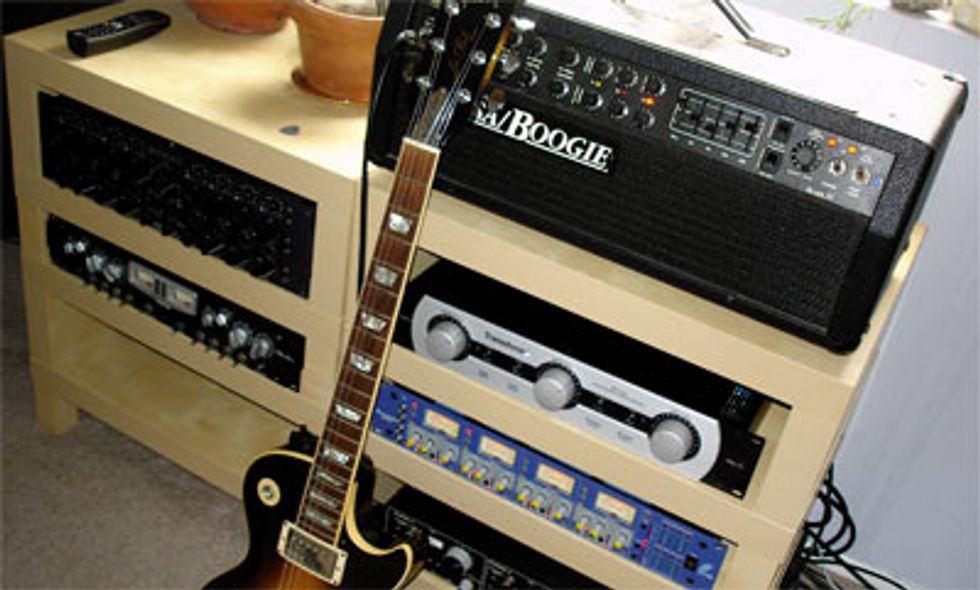
This varies from a simple recording to recording live to a full stereo effects setup. For my application, I wanted to see how I could use my trusty old Mesa Boogie MK IV head to get some savage tones at midnight, especially since my studio is in a condo with neighbors above and below.
| Download Example 1 | |
| Recorded with a Les Paul direct with Monster Cable into A Mesa Boogie MK IV head into the Transducer then fed to Pro Tools HD directly. Recorded in two passes to thicken the guitar. | |
I set up the session with a nice Echo Boy delay and an impulse response of a guitar amp spring from Altiverb. I wanted a real aggressive sound, so I pushed the Speaker Action knob up over 50%, chose an open-backed cabinet with the Sparky setting. I then played with the Miking Level, chose Dynamic and Close with the next toggle switches, and adjusted the output gain. I was pleasantly surprised to hear the familiar sound of my Boogie/Les Paul come through the speakers. As important to me as the sound was the spongy feel of playing MY guitar through MY amp – something I’ve been familiar with for almost 20 years. This was not a piece of software, and I could tell by my performance.
While I did enjoy the tone very much, I felt the Speaker Action knob was subtle in its effect, figuring it was because the sound was already so saturated. It was also very helpful to have my amp right in front of me and to be able to tweak the sounds instantly, as needed. Trying a clean sound, I switched the Boogie to Rhy 1 and dialed in less Speaker Action. I also changed the toggle switches to Mellow, Condenser and Ambient. I then plugged in my old Tele and got to work. Now I could hear a little more Speaker Action in effect, and Ambient gave me a sense of depth. Impressive for a fully analog unit with no DSP. The overall tone was softer but again, it was still that sound of my amp.
Wrap One Up
Would I replace a mic’ed up 4X12 with this setup? Yes and No. If I was in a full studio setup, no I would not. If I was recording at night or in a smaller studio, yes I would. The sound is not exactly that of your amp and cabinet, but it’s quite close. Joe Satriani, Mark Knopfler and super producer Trevor Horn use the Transducer. I certainly feel all three of them are tonemonsters with big ears. Aside of the fact that its not cheap and the speaker output is attenuated –8dB, the Transducer is definitely an effective tool that’s exceedingly easy to use. I can also see how this would be killer onstage, allowing players to feel their guitar sound and skip on the big cabinets. Overall, it’s a very nice piece of gear.
Buy if...
you want to record or reproduce the mic’ed up sound of your favorite guitar amps without a cabinet.
Skip if...
you’re happy with software emulations or don’t mind miking your cabinets.
Rating...
Street $1349 - SPL- soundperformancelab.com |


