Do you want to play like Pat Metheny? Me too. But truth be told, I have no idea how to do so, though I’ve really tried. It was very difficult to wrap my head around writing a lesson on Pat because the elements that make up his style are so varied and complex—the result of decades of investment on his part. Since he’s one of my very favorite musicians, the thought of writing a lesson about him seemed even more daunting. Of course, if it was easy, we’d all sound like our heroes.
So, where do we start? When studying great artists, it’s usually a good idea to study their process—not necessarily their final products. I’ve found that when you study the creative process, you can apply it to your own music and come up with your own individual style, rather than just resorting to mimicry and copying licks. Pat has a few signature licks, but mastering those don’t really get you that close to sounding like Pat. One thing we can say about Pat Metheny with confidence is that the man knows his guitar, music theory, and fretboard at a higher level than 99.9 percent of guitarists. I recently stumbled upon a video that proves this. It’s a rare glimpse into how Pat practices that will serve as the creative spark for this lesson. Maybe we can learn to practice like Pat.
The story goes that Pat was doing a clinic in Italy and had just answered a question from the audience. While the interpreter was translating Pat’s response for the audience, Pat started to practice. (Why not practice when you get a few spare minutes?) What an amazing glimpse we get into his mind during this time. The audience knew it was something special as they sat in stunned silence and let Pat play for nearly eight minutes. And the resulting music is incredible in its own right. I mean, who on earth practices this musically? There’s a lot of music in those eight minutes and we could study it for years at a time, but let’s focus on one aspect. It’s striking that what Pat is practicing sounds nothing like how he plays when he is improvising. And this is the central concept to our lesson and the key question to answer. What building blocks do great players study and practice that allow them to create? We’re going to focus on just the first element that Pat played: major 7 arpeggios.
You can and should study the rest of the video—it’s full of amazing ideas you can spin out into amazing things to practice. A great companion to this lesson would be Pat’s book, Guitar Etudes: Warmup Exercises for Guitar.
If you’re an improvising guitarist, major 7 arpeggios are one of the central building blocks you’ll need to improvise. Learn these really, really well. Jazz is largely made up of three arpeggios that serve as building blocks: major 7, minor 7, and dominant 7. Let’s tackle just part of the arpeggio puzzle here. In Ex. 1 you can see a simple Gmaj7 arpeggio (G–B–D–F#).
Ex. 1
We’re lucky that not only do major 7 arpeggios sound good, but we can easily take this particular fingering pattern and move it up the 6th string to transpose it. For example, shift Ex. 1 up three frets and you have a Bbmaj7 arpeggio (Bb–D–F–A), as shown in Ex. 2.
Ex. 2
Now, to make this much more interesting, we’re going to link the arpeggios together and follow the cycle of fourths to keep jumping from key to key. The pattern is going to go as follows: Ascend two octaves in 16th-notes and then descend until reaching the end of the measure. You’ll end up playing 16 notes and at the end of the measure, you stop on the 3 (B) of the Gmaj7 arpeggio (Ex. 3).
Ex. 3
Ending on the B is awesome, because the next arpeggio in the cycle is Cmaj7. And wouldn’t you know it that C is just one fret higher than B. We can now elegantly jump from the Gmaj7 arpeggio to the Cmaj7 by moving only one fret. Let’s do the same thing we did before: ascend and then descend, again stopping on the 3 (Ex. 4).
Ex. 4
We end the example on the 3 of Cmaj7 (E), which is yet again one fret below our next arpeggio of Fmaj7. We now have a quick little pattern that we can loop around the neck (Ex. 5).
Ex. 5
At this point, we have traversed from the 2nd position to the 10th position. We are not only learning about arpeggios, but we’re also getting a chance to explore the upper regions of the fretboard.
Now, we can’t keep looping like this indefinitely. We’re going to run out of room if we take the Bbmaj7 arpeggio up the neck like this, so we’re going to have to be flexible with the pattern. We still want to keep the cycle of fourths going, but we can’t continue the exact pattern. Thankfully, we can just drop one half of the arpeggio pattern down an octave and keep moving (Ex. 6).
Ex. 6
Now that we moved to a lower place on the neck, we can use the earlier pattern to take us from Fmaj7 to Bbmaj7. You basically have only a few shapes: one with a 6th-string root and two with roots on the 5th string.
Now it’s time for you to learn to fish. I’m not going to write out any more of the patterns—you have enough building blocks to complete this. What I will provide is the full pattern of the cycle of fourths, so you can play the right arpeggios in the right sequence to loop this around. Here it is:
G–C–F–Bb–Eb–Ab–Db–Gb–B–E–A–D
The pattern of fourths is symmetrical. The goal is to be able to start anywhere, in any key, and loop your arpeggios through the cycle of fourths. Once you get the hang of it, you should be able to loop this endlessly.
Beyond just learning the examples above, there are a couple of things to take away from this set of exercises.
Ditch the Patterns
If you watch the video a few times, you’ll quickly realize that Pat isn’t playing a set pattern. It’s not a specific etude that he’s practicing, but rather he’s generating music within some simple boundaries. Pat has created an algorithm for generating practice material: Play a measure of a major 7 arpeggio, smoothly transition to another major 7 arpeggio in the cycle of fourths, and repeat.
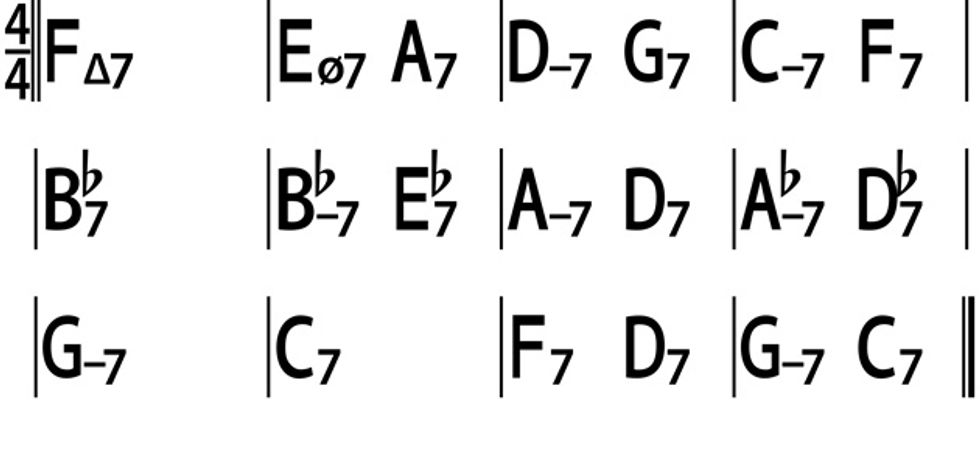
He’s jumping around the neck, changing octaves, sometimes playing some scales to connect. It doesn’t matter that it’s morphing and changing a little over time. What matters is that he’s sticking within the harmony for some set period of time and being creative about how he generates materials. And that’s the trick. The building blocks allow for tons of flexibility, especially in jazz. Next time, instead of thinking about this as a strict practice exercise, imagine this is a jazz standard that only has one chord per measure, but the tune is just major 7 chords that ascend in fourths. How can you take these arpeggios and add some passing tones to make them into jazz lines? (Hint: “Autumn Leaves” has two major 7 chords a fourth apart in the changes.)
It’s the Notes, Not the Shapes
You have to learn the notes in the arpeggios. To players at Pat’s level, they’re not just fingering patterns—they are collections of notes. It’s totally fine to start with shapes and refine as you go, but if you want to operate at this level, you’re going to have to know the names of the notes on the fretboard and the notes that belong in any arpeggio, chord, scale or key. This is just a single exercise to help you get there.
Move Beyond Major
You can now easily take the major 7 arpeggios and morph them in minor 7 and dominant 7 concepts to generate additional material to practice with. This lesson is just one example of arpeggios you can move in the cycle of fourths; dominant 7 arpeggios work exceptionally well in this context.
Your Job
Now it’s up to you to generate your own musical materials. This lesson was just a single example. But go back to the video for inspiration. Could you just play freely for seven minutes like Pat did? Could you play in a structured enough way that you’re improvising ways to practice and generating material like he can? Not everyone can do this for that long, but you’ll hear Pat joke that he could continue for hours ... and I totally believe him.
Find the elements that make up your own style and find interesting ways to apply them to the neck. Constraining yourself to a single measure per key and shifting in the cycle of fourths is a super fun way to give yourself just enough structure to follow, while staying loose enough to create something. Pat has been doing this for over 40 years, so we all have a lot of catching up to do!


