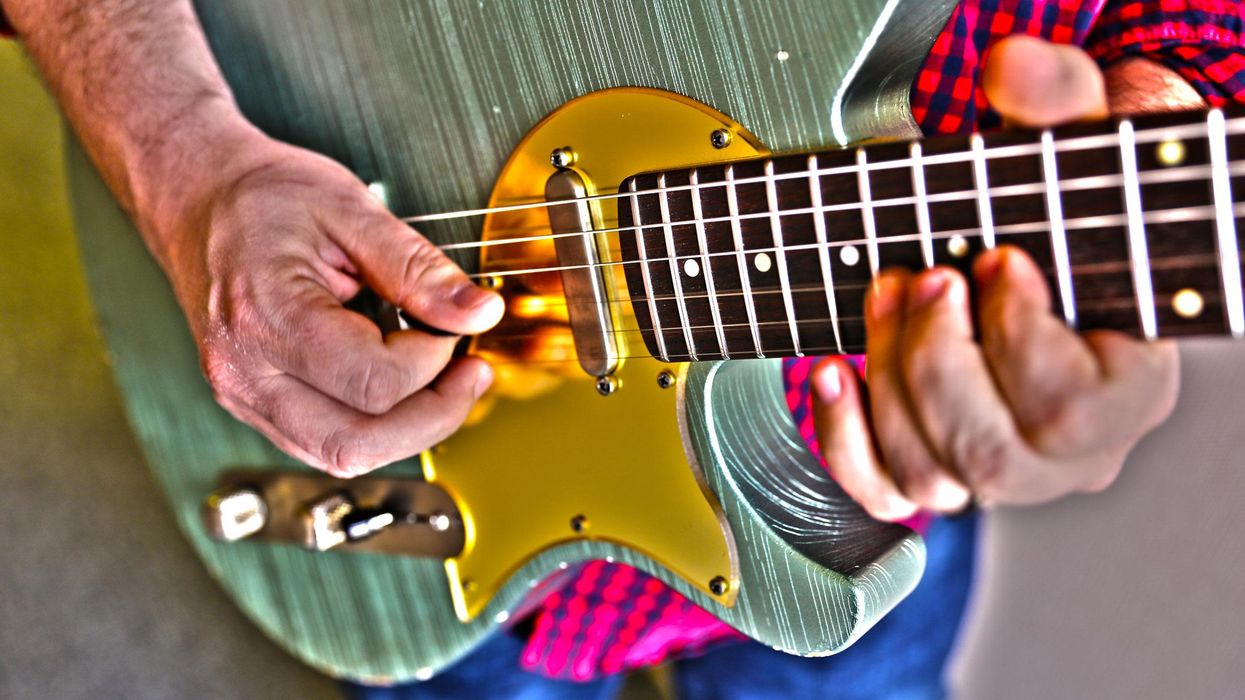
There's a lot of musical gold inside the scales.
Intermediate
Intermediate
ā¢ Develop a deeper improvisational vocabulary.
ā¢ Combine pentatonic scales to create new colors.
ā¢ Understand the beauty of diatonic harmony.Improvising over one chord for long stretches of time can be a musician's best friend or worst nightmare. With no harmonic variation, we are left to generate interest through our lines, phrasing, and creativity. When I started learning to improvise, a minor 7 chord and a Dorian mode were the only sounds that I wanted to hear at the time. I found it tremendously helpful to have the harmony stay in one spot while I mined for new ideas to play. Playing over a static chord was crucial in developing my sense of time and phrasing.
The following is the first improvisational device I ever came across. I want to say I got it from a Frank Gambale book. The idea is that there are three minor pentatonic scales "hiding" in any given major scale. If we're in the key of C (CāDāEāFāGāAāB) we can pluck out the D, E, and A minor pentatonic scales. If we frame them over a Dm7 chord, they give us different five-note combinations of the D Dorian mode. In short, we are building minor pentatonic scales off the 2, 3, and 6 of the C major scale.
Viewing this through the lens of D minor (a sibling of C major and the tonal center for this lesson), D minor pentatonic gives us the 1āb3ā4ā5āb7, E minor pentatonic gives us 2ā4ā5ā6ā1, and A minor pentatonic gives us 5āb7ā1ā2ā4. This means you can use your favorite pentatonic licks in three different locations and there are three different sounds we can tap into from the same structure.
If you smashed all of them together, you would get the D Dorian scale (DāEĀĀāFāGāAāBāC) with notes in common between the D, E, and A minor pentatonic scales. Ex. 1 uses all three scales, so you can hear the different colors each one creates over the chord.
Ex. 1
Ex. 2 is how I improvise with them, usually weaving in and out using different positional shapes.
Ex. 2
The next idea is one I stole from a guitarist who often came into a music store I worked at. On the surface, it's very easy: Just take two triads (in our example it will be Dm and C) and ping-pong between them. The D minor triad (DāFāA) gives us 1āb3ā5, which is very much rooted in the chord, and the C major triad (CāEāG) gives us the b7ā9ā4, which is much floatier. Also, if you smash these two triads together, you get 1ā2āb3ā4ā5āb7, which is a minor pentatonic scale with an added 2 (or 9). Eric Johnson uses this sound all the time. Ex. 3 is the lick I stole years ago.
Ex. 3
Ex. 4 is how I would improvise with this concept. Many different fingerings work with these, so experiment until you find a layout that's comfortable for your own playing.
Ex. 4
If two triads work, why not seven? This next approach will take all the triads in the key of C (CāDmāEmāFāGāAmāBdim) and use them over a Dm7 chord (Ex. 5). Each triad highlights different three-note combinations from the Dorian scale, and all of them sound different. Triads are clear structures that sound strong to our ears, and they can generate nice linear interest when played over one chord. Once again, all of this is 100% inside the scale. Ex. 5 is how each triad sounds over the track, and Ex. 6 is my attempt to improvise with them.
Ex. 5
Ex. 6
If we could find all these possibilities with triads, it's logical to make the structure a little bigger and take a similar approach with 7 chords, or in this case, arpeggios. Naturally, all the diatonic chords will work, but I'll limit this next idea to just Dm7, Fmaj7, Am7, and Cmaj7. I love this approach because as you move further away from the Dm7 shape, each new structure takes out a chord tone and replaces it with an extension. I notice that I usually come up with different lines when I'm thinking about different chord shapes, and this approach is a decent way to facilitate that. Ex. 7 is a good way to get these under your fingers. Just ascend one shape, shift into the next shape on the highest string, then descend and shift to the next on the lowest string.
Ex. 7
Ex. 8 is my improvisation using all four shapes and sounds, but I lean pretty heavily on the Am7.
Ex. 8
This last concept has kept me busy on the fretboard for the last five years or so. Check it out: You can take any idea that works over Dm7 and move the other diatonic chords. The result is six variations of your original lick. In Ex. 9 I play a line that is 4ā1āb3Āā5 over Dm7 and then walk it through the other chords in the key. These notes are still in the key of C, but it sounds drastically different from playing a scale.
Ex. 9
In Ex. 10, I try to think about the shapes from the previous example, but I break up the note order in a random but fun way. The ending line is random but felt good, so I left it in.
Ex. 10
While all these concepts have been presented over a minor chord, you can just as easily apply them to any chord quality, and they work just as well in harmonic or melodic minor. Rewarding sounds are available right inside the harmony, and I am still discovering new ideas through these concepts after many years.
Though the above ideas won't necessarily be appropriate for every style or situation, they will work in quite a few. Developing any approach to the point that it becomes a natural extension of your playing takes considerable work and patience, so just enjoy the process, experiment, and let your ear guide you to the sounds you like. Even over just one chord, there is always something new to find.
- Beyond Blues: The Mixo-Pentatonic Scale - Premier Guitar āŗ
- Fretboard Workshop: Revisualize the Pentatonic Scale - Premier ... āŗ
- Cram Session: Pentatonic Power - Premier Guitar āŗ
Our columnist takes a good look at his guitarsāand a stroll down memory laneāvia famed luthier Joe Glaserās new, free Gearcheck service.
I started buying gear in junior high and Iām still using some of it. My organizational skills have not really improved since then, so the inventory looks like a stamped-on ant pile. The daily 6-strings are stuffed on racks in my room and in gig bags or cases near my door, good-to-go. The less-used guitars are hidden in closets, stashed under couches/beds, and loaned out to friends. Then there are six or seven old battle axes that Iāve played for years that have grown so valuable that they now spend most of their time locked in a huge gun safe in the guest room. Iāve tried several times to catalogue the tools using a notebook, and then a few different long-since-dead computers. I had no idea how many guitars I owned ... until now, thanks to my friend Joe Glaserās Gearcheck.
Glaser, a famed luthier here in Nashville, started Gearcheck as a software platform for cataloging instruments. Gearcheck gives you a personal and private digital gear room where you can list instrumentsā basic model details (year, wood, pickups, etc.), then document them with photos, receipts, Reverb listings, reputable repair records, appraisals, insurance details, as well as your setup specs, string gauge, action, and relief. I even track who I loaned them out to or where they are stored. This is not static information, and tracking the life of a guitar this way gives insight and builds the stories that we care about. All of this establishes provenance, which is a difference between just something and something collectible.
If youāre interested in how this works, go to gearcheck.com. The free membership gets you 1 GB of memory to list your instruments. You can subscribe to get more memory should you need it. To give you some idea of what 1 GB worth of gear looks like, I have 55 instruments listed (49 guitars, 2 mandolins, 3 pedal steels, 1 lap steel) with between three to 12 photos per instrumentāsome with short descriptions and some with long war stories of modifications, accidents and gig abuse, as well as high points of the instrumentās history. So far, Iāve used .93 of my free gigabyte. Iām setting a limit now: My gear gluttony ends at .999 GB of storage.
The listing process was good for me. I spent my free time over the past 10 days, working late into the night, tracking down all my guitars. I discovered a few I had not seen in years and thinned the herd a bit. I also found some guitars that were great but had some glitch that kept me from playing them, like this killer Kiesel Custom Shop T-build whose middle pickup was wired out of phase, so I finally got off my ass and rewired it, and while I was at it, I swapped the original pickups that were a bit too hot with some Pete A. Flynn ābuckers that Iād been holding.
āMy favorite instruments have had a Red Violin-style odyssey.ā
Once I decided who made the cut, I started taking photos and uploading guitars starting with my favs. At first, I just listed the main details and basic photos, but then I thought, āWhy not make it more about the stories?ā Stories are always more interesting than things.
My favorite instruments have had a Red Violin-style odyssey. Their pasts before I got them are mostly guesswork and imagination, but I can document the highlights of my short time in their history. For instance, my 1954 Les Paul has a second jack input in the body that was later refilled. No idea what that was about, but Michael Wilton of QueensrĆæche, who sold me the guitar, documented what happened during his time with it. Wilton played it on QueensrĆæcheās albums Promised Land and Hear in the Now Frontier. Wilton replaced the bridge pickup wire in the cavity (because the original disintegrated) and replaced a dead potentiometer. Since Iāve had it, Glaser refretted and Plekād the neck, and added his Stud Finder bridge. Iāve also played it on a ton of gigs. Now Iāve got all these details safely documented on Gearcheck, along with some photos of me playing that goldtop with Lainey Wilson on her first awards show.
Similarly, my 1969 Fender Thinline had some mysteries when I bought it from Chicago Music Exchange. Iāll never know why somebody added a second input jack, but I did document my adding a Glaser B-bender and a 22-fret sweet, flat neck that Fenderās Chip Ellis built to replace the original neck that never really fit in the neck pocket.
Antonio Stradivari made 960 violins between 1666 and 1737. At least 282 still exist and are potentially being played. I imagine, with some basic care, that at least several guitars I live with today will still be rocking 350 years from now. Iām glad I can document our brief time together. You donāt really own legacy instruments, you just keep them for the next player, all the while adding to their legacy.
Blackstar Amplification unveils its new AIRWIRE i58 wireless instrument system for guitar and bass.
The AIRWIRE i58 enables wireless connection for guitars, basses and other musical instruments with Ā¼ā audio outputs and delivers low noise and less dropouts. The majority of wireless systems on the market operate within the 2.4 GHz range whereas the AIRWIRE i58 operates within the 5.8 GHz which is a less crowded frequency band that is immune to WiFi interference.
The AIRWIRE i58 also has an optimised antenna design and anti-interference algorithm ā this gives players a robust, reliable and most importantly worry-free performance. The low latency and accurate frequency response ensures authentic tone and feel without the need for cables.
Never worry about running out of battery or losing your signal; AIRWIRE i58 offers up to 9 hours play time at full charge and features a transmission distance of 35 metres. Up to four AIRWIRE i58s can be used simultaneously for a full band setup without interference.
AIRWIRE i58 offers wireless high-res signal transfer, so there is no treble loss which can occur when using a long cable. However, the system offers a switchable CABLE TONE feature to simulate the tonal effects of a traditional instrument cable if players desire that sound.
AIRWIRE i58 is the ideal wireless system for every musician ā for cable-clutter-free home use or freely roaming on stage.
AIRWIRE i58 Wireless Instrument System
- Wireless Instrument System
- Frequency Band: 5.8GHz
- Transmission Channels: 4 independent channels
- Transmission Distance: Up to 35 metres (100 feet)
- Latency: <6ms
- Frequency Response: 20Hz~20kHz
- Output Impedance: 1kĪ©m
- Connectors: Ā¼ā mono
- Power: Rechargeable lithium-ion battery
- Charging: USB-C 5V input (cable included)
- Charging Time: <2.5 hours
- Operation Time: 9 hours when fully charged
- Illuminated star logo
- Dimensions: L 67.0mm, W 37.2mm, H 20.5mm
- Weight: 45g (each transmitter or receiver, single unit)
Blackstarās AIRWIRE i58 carries a street price of $169.99.
Note the cavity cover on the back, which houses the components of Andy Summersā mid-boost system.
Weāve covered Andyās iconic guitar and what makes it so special, so now weāll get to building our own.
Hello and welcome back to Mod Garage for the second installment of the Andy Summers Telecaster wiring. We covered many of the details of this unique guitar last time, so now weāll jump right in to assembling your own.
In general, you can use any Telecaster and convert it to Andy Summersā specs. If you want to stay as close as possible to the original guitar, the way to go is an alder bodyājust like Andyās, which is 2-pieceāwith a 3-tone sunburst finish and white double binding.
The neck should be quarter-sawn, 1-piece maple with a C profile, 21 vintage-style frets, and a 7.25" fretboard radius. Of course, you can choose your own specs here, too. The original guitar has a brass nut rather than bone or plastic, and it should be no problem to find a brass nut blank for a Telecaster. You will need different tools to work on it compared to bone, plastic, or graphite, so keep this in mind. If you do not have the right tools or donāt feel comfortable making nuts, you should leave this task to your local guitar tech. Summersā guitar has Schaller M6 tuning machines, which are still available from the German Schaller company, and two chrome butterfly string trees. You may not really need two of themāusually one for the B and the high E string will do the trick, especially with a well-made nut.
The original has a heavy brass bridge plate with six individual brass saddles, which will increase overall weight significantly. You can still buy this type of brass bridge from several companies, but there are much lighter bridges on the market.
The stereo output jack is installed in a rectangular chrome plate, like on a Les Paul, which I think is superior to the typical Telecaster jack cup. Interestingly, the plate on Summersā guitar is only held by two of four screws, but do yourself a favor and use all four to make this spot as strong as possible. You should attach the plate really tight, especially when you use an output jack with a tight grip for the plug.
āElectronically, there is nothing too specialized that you will need for the controls.ā
The rest of the hardware is chrome and standard: two regular strap buttons, a standard Telecaster control plate, ā60s Telecaster flat-top knobs, a black ā60s-style top-hat switch knob on the 3-way pickup selector switch, and two flat-lever mini-toggle switches. You should have no problem getting all of these parts from any guitar shop. The pickguard is a 3-ply mint green pickguard with a standard humbucker routing for the neck pickup.
Electronically, there is nothing too specialized that you will need for the controls: a standard 3-way pickup selector switch, two 250k audio pots for master volume and master tone, a gain control pot for the booster, and two additional mini DPDT on-on toggle switches for switching the booster on and off and for the phase control of the bridge pickup. The resistance of the gain control pot depends on the booster you want to use: e.g. for the Fender Clapton mid-boost kit, a 500k type will work great.
For the bridge pickup, there is a standard early-ā60s-style Telecaster single-coil pickup, and every pickup company will have something like this in their catalog. Because the bridge pickup is installed to an out-of-phase mini-toggle switch, your pickup will need three conductors, with the metal base plate separated from the pickupās common ground, and a third wire that connects the bridge plate individually to ground. If you have a regular two-conductor model, you need to break this connection, soldering a third wire directly to the base plate.
Interestingly, the bridge pickup on Summersā Tele is installed directly into the wood of the pickupās cavity. I see no reason why you shouldnāt install it the regular way on your guitar.
Hereās a close-up of the bridge on Summersā historic Tele.
Photo courtesy of Ten-Guitars (https://ten-guitars.de)
In the neck position, there is a ā59 PAF humbucker with a conventional two-conductor wiring installed directly into the pickguard in the standard way, with the open pole pieces facing towards the neck. The choice of late-ā50s PAF copies has never been better than it is today. You can buy excellent versions from a lot of companies, just make sure to choose the correct string spacing, which is usually called āF-spacingā or something similar, and is usually 2.070" (52.6 mm). (Gibson spacing, or G-spacing, is 1.930" or 49 mm.)
Youāll need humbucker routing on your body to make it fit. If you donāt have a body with humbucker routing and donāt want to get your Tele body re-routed, you can consider one of the numerous stacked humbuckers that will fit into a standard Telecaster neck pickup cavity. My experience is that there is a noticeable difference in tone compared to a full-sized humbucker, and it will be a compromise.
Next is the active booster. Finding a good booster module and wiring it up is much easier than fitting it into the tight space of a Telecaster body. There are a wide range of available booster options. There are complete DIY sets available that include the PCB and all of the necessary parts to build your own, and there are also drop-in PCBs that are already populated, like the well-known Fender mid-boost circuit kit. You can also find mini-sized booster modules using high-quality SMD parts, which only require a fraction of space compared to the regular PCBs.
āFinding a good booster module and wiring it up is much easier than fitting it into the tight space of a Telecaster body.ā
The available options include treble boosters, mid-boost circuits, full-range boosters, etc. Choose what you like best. The problem will be that you need to stuff it into a Telecaster body. As you know, there is not much space inside a Telecaster, and you need to add the booster itself, the 9V battery, an additional pot for controlling the booster, and two additional mini-toggle switchesāone for turning the booster on and off, and the other to get the bridge pickup out of phase. This is a lot of stuff! On Summersā guitar, this problem was solved by adding a large cavity on the back and closing it with a plastic back plate, as on a Gibson Les Paul.
A look inside the cavity for the mid-boost unit.
Photo courtesy of TeleManDon from Vancouver Island, BC (https://tdpri.com)
You can clearly see the two big routings for the boosterās PCB and the 9V battery, plus the additional pot to control the amount of boost as well as the mini-toggle switch to turn the booster on and off. If you are not afraid of routing two big chambers into your Telecasterās body, this is a suitable way to go.
On a Telecaster, there are not many alternatives I can think of to fit all these parts. One possible way of saving space would be to use a stacked pot with two 250k pots for volume and tone, so you have the second hole in the control plate available for the gain control pot of the booster. Between the two pots, it should be no problem to place the two mini-toggle switches. Or you use a push-pull pot for the gain control to save one of the mini-toggle switches. The guitar will look much cleaner, at least from the front side. But you still have to put the booster PCB and the battery somewhere. A customer of mine did this by completely routing the area under the pickguard. But even with only a regular single-coil neck pickup, it was a really tight fit, so with a regular-sized humbucker, it will be close to impossible. So, you or your luthier will have to be creative, and I wouldnāt be surprised if a company offers Andy Summers Telecaster bodies with all chambers already routed.
Here we go for the wiring. Wherever possible, I tried to keep the diagram as clean as possible. The wiring of the booster is only an example and depends on the booster you want to use, but the basic wiring is always the same.
Hereās a helpful schmatic of the Andy Summersā Telecaster wiring.
Illustration courtesy of SINGLECOIL (www.singlecoil.com)
Thatās it. Next month, we will take a deep look into guitar cables and wires, what really makes a difference, and how you can use this to reshape your guitar tone. So stay tuned!
Until then ... keep on modding!
PGāsJohn Bohlinger caught up with Moak at his Nashville studio known affectionately as the Smoakstack.
Grammy-nominated session guitarist, producer, mixer, and engineer Paul Moak stays busy on multiple fronts. Over the years heās written, played, produced and more for TV sessions (Pretty Little Liars, One Tree Hill) and artists including Third Day, Leeland, and the Blind Boys of Alabama. But most recently heās worked with Heart and Ann Wilson and Tripsitter.
Time Traveler
Moak is most loyal to a 1963 Stratocaster body thatās mated to a 1980s-vintage, 3-bolt, maple, bullet-truss-rod, 1969-style Fender Japan neck. The bridge has been swapped as many as four times and the bridge and neck pickups are Lindy Fralins.
Cool Cat
If thereās one guitar Moak would grab in a fire, itās the Jaguar heās had since age 20 and used in his band DC Talk. When Moak bought the guitar at Music Go Round in Minneapolis, the olympic white finish was almost perfect. He remains impressed with the breadth of tones. He likes the low-output single-coils for use with more expansive reverb effects.
Mystery Message Les Paul
Moakās 1970 L.P. Custom has a number of 1969 parts. It was traded to Moak by the band Feel. Interestingly, the back is carved with the words ācheatā and āliar,ā telling a tale we can only speculate about.
Dad Rocker
Almost equally near and dear to Moakās heart is this 1968 Vox Folk Twelve that belonged to his father. It has the original magnetic pickup at the neck as well as a piezo installed by Moak.
Flexi Plexis
This rare and precious trio of plexis can be routed in mix-and-match fashion to any of Moakās extensive selection of cabsāall of which are miked and ready to roll.
Vintage Voices
Moakās amps skew British, but ā60s Fender tone is here in plentitude courtesy of a blonde-and-oxblood Bassman and 1965 Bandmaster as well as a 2x6L6 Slivertone 1484 Twin Twelve.
Guess What?
The H-Zog, which is the second version of Canadian amp builder Garnetās Herzog tube-driven overdrive, can work as an overdrive or an amp head, but itās probably most famous for Randy Bachmanās fuzzy-as-heck āAmerican Womanā tone.
Stomp Staff
While the Eventide H90 that helps anchor Moakās pedalboard can handle the job of many pedals, he may have more amp heads on hand than stompboxes. But essentials include a JHS Pulp āNā Peel compressor/preamp, a DigiTech Whammy II, DigiTech FreqOut natural feedback generator, a Pete Cornish SS-3 drive, Klon Centaur, and Electro-Harmonix Deluxe Memory Man.