Blazing double-stop licks and a unique picking style are hallmarks of one of today’s most underrated guitar pickers.
Theory: Intermediate
Lesson Overview:
• Dive deep into hot-rod double-stops.
• Strengthen your CAGED vocabulary.
• Learn to outline chords using fast-moving intervals.
Click here to download a printable PDF of this lesson's notation.
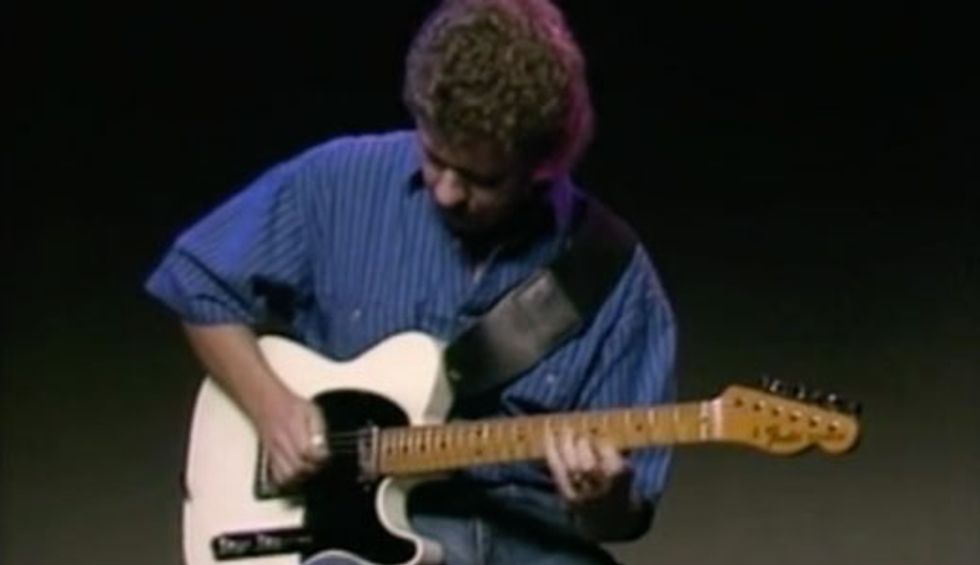
Scotty Anderson is, without doubt, one of country guitar’s best-kept secrets. Despite having a long career in the business, releasing some great albums and videos, and playing out regularly, he’s largely unknown outside the Cincinnati music scene.
Anderson has a beautiful chord vocabulary that’s heavily inspired by pedal-steel voicings, amazing Travis-picking technique, a mastery of jazz harmony, and speed to die for. However, his blazing-fast double-stops are the most head-turning aspect of his playing.
Scotty Anderson isn’t just another country guitarist. Here, on Duke Ellington’s classic “Take the ‘A’ Train,” he demonstrates his deep knowledge of jazz vocabulary.
Harmonized leads in country music have been around for decades. Guitar greats Eldon Shamblin and Jimmy Bryant would often play harmonized solos with fiddle or steel players, and Jerry Reed’s “Eastbound and Down” has a memorable dual-guitar lead break. Scotty threw all of this out the window by becoming a one-man harmonizer.
I’ve recorded each of these examples using my Fender Telecaster with Joe Barden pickups and added some rather heavy compression to keep the double-stops even in volume.
To play this like Scotty, you’ll need to use a thumbpick and maintain a nail on the index finger to pluck the string adjacent to the one being played by the thumbpick. In Ex. 1, I’ve fretted notes on both the 4th and 3rd strings and attacked them using this technique. Use the pick on the 4th string and, as you pluck that string, use your index fingernail to pluck the 3rd string. The upstrokes (which occur in measures 2 and 4) are executed the same way, with the index fingernail plucking the 3rd string as the pick hits the 4th string with an upstroke.
Click here for Ex. 1
At this point, you might be considering giving up on this lesson. I don’t blame you—this double-stop technique is difficult to get right, especially at the speeds that Scotty plays. But there are other options: While it’s not ideal, you can play these double-stops with a flatpick. Because the notes aren’t attacked at exactly the same time, this will give you a slightly different sound, but it will get you close.
Another option is hybrid picking, where you use the flatpick and middle finger in a traditional pinching motion. This will severely hamper speed, but that’s not the end of the world because Scotty’s vocabulary is just as cool when played slowly. That’s actually how I do all these licks.
Ex. 2 is a simple single-note melody as played on “Boog’s Boogie.” This is played over an E chord using a flatpick and alternate picking.
Click here for Ex. 2
Next, let’s add a lower harmony to turn the melody into a double-stop groove (Ex. 3). As far as choosing the harmony notes for these double-stop ideas, there are no rules. Where a rock player might just play a fixed harmony three notes higher, Scotty’s harmonies are based on sound. Some notes will be a third apart, others a fourth. One approach is to think of the chord you’re playing over, and then use the major pentatonic scale as your palette, rather than the full seven-note major scale.
Click here for Ex. 3
To further illustrate this concept, here’s a fast-paced triplet lick (Ex. 4) using notes of the E minor pentatonic scale (E–G–A–B–D). This pentatonic approach was common in the Allman Brothers’ dual-guitar harmony, but here, you’re doing both parts on one guitar.
Click here for Ex. 4
Ex. 5 outlines an A7 chord, beginning in the “G” CAGED position and then shifting up through each CAGED position on the top three strings. It’s possible to analyze these 3-string chord patterns as C#dim, Em, and F#m, but in relation to the A chord you’re playing over, that yields an A7, A9, and A6 sound, respectively.
Click here for Ex. 5
Ex. 6 is a great ending lick for a tune in A. It begins with an E6 chord fretted higher up the neck. This shape descends chromatically before reaching an A chord in the “C” shape (measure three) and finally resolving to an A double-stop composed of notes found in the “E” shape even further down the fretboard.
Click here for Ex. 6
Ex. 7 outlines an E7 chord in the “C” shape. Here’s one way to analyze it: We begin by playing notes from the E major pentatonic scale (E–F#–G#–B–C#). Then starting in measure two, we add a chromatic approach to the 3 and 5 before walking down from an E double-stop on the 5th and 4th strings to a D double-stop. This closing “D against E” sound creates a strong E7 vibe.
Click here for Ex. 7
Ex. 8 also shifts between an open A position and a CAGED “E” shape A chord at the 5th fret, but now introduces some diatonic sixths on adjacent strings at the end, instead of the thirds and fourths we’ve played in the licks so far.
Click here for Ex. 8
The final lick (Ex. 9) outlines an E chord with chromatic double-stops a half-step below the chord tones. Beginning in the “C” shape, it quickly shifts up to the “A” shape before resolving to a pleasing sixth. It’s no accident that these notes are G# and E—they’re the 3 and root of the chord.
Click here for Ex. 9
With these licks, we’re just scratching the surface of what’s possible with this hot-rod double-stop style, and I would highly encourage you to check out Scotty’s first two albums on Bandcamp. These LPs were thought to be lost to time, but now you can check them out. If you add them to your library, all the money goes directly to the man himself.
All I’ll say is … hold on to your hat!
Building upon the foundation of the beloved Core Collection H-535, this versatile instrument is designed to serve as a masterpiece in tone.
The new model features striking aesthetic updates and refined tonal enhancements. Crafted at the iconic 225 Parsons Street factory, home to other world-famous models like the H-150, H-157, and H-575 - the H-555 continues to exemplify the very best of American craftsmanship.
The Core Collection H-555 features a set of Custom Shop 225 Hot Classic Humbuckers, meticulously wound in-house with carefully selected components, and voiced to deliver added punch and richness while preserving exceptional dynamics and touch sensitivity. Seamlessly complementing the H-555’s semi-hollow construction, they blend warmth and woodiness with refined, articulate clarity.
The Core Collection H-555’s aesthetic has been elevated with multi-ply binding on the body, headstock, and pickguard. Its neck, sculpted in a classic ’50s profile, delivers effortless comfort and is adorned with elegant block inlays, seamlessly blending style with playability. Gold hardware complements the aesthetic, exuding elegance while presenting the H-555 as a truly premium and versatile instrument for the discerning player.
Available in Ebony and Trans Cherry, each Core Collection H-555 is beautifully finished with a nitrocellulose vintage gloss that features a subtle shine and gracefully ages over time. An Artisan Aged option is also available for those seeking an authentically well-loved look and feel, achieved through a meticulous, entirely hand-finished aging process. The new Core Collection continues Heritage’s tradition of world-class craftsmanship, offering a true masterpiece in tone and design for discerning players. Each guitar is shipped in a premium Heritage Custom Shop hard case.
Key Features
- Finest Tonewoods: Laminated highly figured Curly Maple (Top & Back) with solid Curly Maple sides
- Heritage Custom Shop 225 Hot Classic Humbuckers: Designed and wound in-house
- Headstock: Multi-ply bound headstock, featuring a Kite inlay, 3×3 tuners laser-etched with Heritage graphics
- Neck Profile: Comfortable ’50s C-shape for a vintage feel
- Bridge: Tune-O-Matic with aluminum stopbar tailpiece for enhanced sustain
- Made in the USA: Crafted at 225 Parsons Street
For more information, please visit heritageguitars.com.
Ariel Posen and the Heritage Custom Shop Core Collection H-555 - YouTube
Enjoy the videos and music you love, upload original content, and share it all with friends, family, and the world on YouTube.Watch the official video documenting the sold-out event at House of Blues in Anaheim. Join Paul Reed Smith and special guests as they toast to quality and excellence in guitar craftsmanship.
PRS Guitars today released the official video documenting the full night of performances at their 40th Anniversary celebration, held January 24th in conjunction with the 2025 NAMM (The National Association of Music Merchants) Show. The sold-out, private event took place at House of Blues in Anaheim, California and featured performances by PRS artists Randy Bowland, Curt Chambers, David Grissom, Jon Jourdan, Howard Leese, Mark Lettieri Group, Herman Li, John Mayer, Orianthi, Tim Pierce, Noah Robertson, Shantaia, Philip Sayce, and Dany Villarreal, along with Paul Reed Smith and his Eightlock band.
“What a night! Big thanks to everyone who came out to support us: retailers, distributors, vendors, content creators, industry friends, and especially the artists. I loved every second. We are so pleased to share the whole night now on this video,” said Paul Reed Smith, Founder & Managing General Partner of PRS Guitars. “I couldn’t be more proud to still be here 40 years later.”
With nearly 1,400 of the who’s who in the musical instrument industry in attendance, the night ended with a thoughtful toast from PRS Signature Artist John Mayer, who reflected on 40 years of PRS Guitars and the quality that sets the brand apart. “The guitars are great. You can’t last 40 years if the guitars aren’t great,” said Mayer. “Many of you started hearing about PRS the same way I did, which is you would talk about PRS and someone would say ‘They’re too nice.’ What’s too nice for a guitar? What, you want that special vibe that only tuning every song can give you on stage? You want that grit just like your heroes … bad intonation? The product is incredible.”
Be sure to locate your sample library where it can be quickly referenced on your DAW.
Improve your recordings using your own samples. Bryan Clark, house producer at Nashville’s Blackbird Studio, tells you how to take the final steps in building your own sample library.
Mastering the sample import process in your chosen DAW can significantly enhance your creativity and streamline your workflow. With a clear understanding of the tools and techniques available, you will be better equipped to bring your musical ideas to life and make your productions stand out.
This month, we finish up a three-part series on creating your own sample libraries. In this final installment, I’m going to give you the basic ways to import your samples into various popular DAWs. Each one has its unique workflow and user interface, but the fundamental process remains very similar. This Dojo guide will cover how to import samples into Ableton Live, LUNA, Logic Pro, Pro Tools, and Studio One.
Ableton Live
Steps to Import Samples
Drag and Drop: Simply locate the sample file in your computer’s file explorer, then drag and drop it directly into an audio track in the session or arrangement view.
Browser Window: Use Ableton’s built-in browser (on the left-hand side). Navigate to the sample’s location on your hard drive, then drag it into the workspace.
Create a Simpler or Sampler Instrument: Drag the sample into a MIDI track with Simpler or Sampler loaded. This allows you to trigger the sample using MIDI notes.
Tips: Use the warp feature for time-stretching and syncing samples to your project’s tempo.
Organize your samples into collections using the “Add Folder” option in the browser.
LUNA
Steps to Import Samples
Drag and Drop: Drag the sample from your file explorer directly into the timeline. Then hold the CTRL key down, click on the end of the loop, and drag it to the length it needs to be.
Browser/Workspace: Use the media browser to navigate to your sample’s location on your hard drive. Drag it into an audio track in your session.
Audio Track Import: Right-click on an empty area in the timeline or a track and select “Import Audio” to locate and add your sample.
Tips: Use LUNA’s built-in varispeed capabilities to match your sample to the session’s tempo.Logic Pro
Steps to Import Samples
Drag and Drop: Drag the sample from the Finder directly into an audio track in the workspace.
File Browser: Use the file browser (accessible via the media sidebar or “F” key) to locate and drag samples into the timeline.
Quick Sampler: Drag your sample onto a MIDI track with the Quick Sampler plugin loaded. This lets you play the sample chromatically.
Tips: Use Logic’s flex time feature to sync samples to your project’s tempo. Organize samples into Logic’s library for quick access.Pro Tools
Steps to Import Samples
Import Audio Dialog: Go to File > Import > Audio; then locate your sample and click “Convert” or “Add” to bring it into the session.
Drag and Drop: Drag the sample directly from your file explorer into an audio track.
Workspace Browser: Use the workspace (accessible via Window > New Workspace) to locate your sample. Drag it into your session.
Tips: Use the elastic audio feature for tempo matching and pitch adjustments.
Place your samples into playlists for efficient access during editing.
Studio One
Steps to Import Samples
Drag and Drop: Drag your sample directly from your file explorer into the timeline or browser.
Browser: Open Studio One’s browser (on the right-hand side), navigate to the folder containing your sample, and drag it into your project.
Sampler Track: Drag the sample onto a MIDI track, and use the Sample One sampler for additional manipulation.
Tips: Enable the “Stretch Audio Files to Song Tempo” option in the browser for automatic tempo synchronization. Create sample folders within Studio One’s browser for quick access.General Best Practices
Regardless of the DAW you use, it is important to maintain a smooth and efficient workflow. Organize your sample library with clear folder names and categories to make locating files easy (see last month’s installment for detailed strategies). Where possible, learn DAW-specific shortcuts for importing and editing samples to save time. Always check if your DAW offers a feature to sync the sample’s tempo to your project to ensure seamless integration. Finally, regularly back up your sample collection to avoid losing important audio files and preserve your creative assets! Seriously. Do it now.
Next month, we’re off to “console” land and I’ll be investigating console emulations (hype or not?), summing bus processors, and more to give you a more “studio” sound. Until then, blessings and namaste.
Stretching the boundaries of reverb’s realm through dynamic and pitch control.
Nice core reverb sounds. Invites cool compositional and arrangement directions. High quality.
If you lack patience, it will be hard to unlock its coolest secrets.
$329
Gamechanger Audio Auto Reverb
gamechangeraudio.com
When the first Moog synthesizer appeared, it freaked out a lot of musicians—not least for the way it blurred the divisions between instruments and their roles. Was it percussion? A keyboard? A reed instrument? Many effects makers build from this philosophical foundation. The Latvian company Gamechanger often seems to revel in it—an attitude that’s manifest in the company’s Auto Series pedals, which includes the Auto Reverb.
There’s no reason you can’t use the Auto Reverb in a very straightforward fashion. The plate, spring, and hall settings are all very nice digital representations of their analog inspirations—and I’d be perfectly happy playing an instrumental surf set with the spring mode, for instance. But because you can control the parameters like the reverb’s level, decay, tone, and the filter with changes in pitch and dynamics, the Auto Reverb can function in highly orchestral ways, transforming itself from subtle to outlandish as a musical piece shifts in intensity or rises from low to high keys toward a blurred, hyper-spacious climax. While these attributes make the Auto Reverb a great fit for prepared guitar and conceptual pieces—and invites many themes and compositional ideas within those forms—it can just as easily be configured to create an especially dynamic and dramatic pop song arrangement on stage or in the studio that might otherwise be relegated to automations within a DAW. It’s fun to use, if not always intuitive. But knowing its ways can expand your musical options significantly.