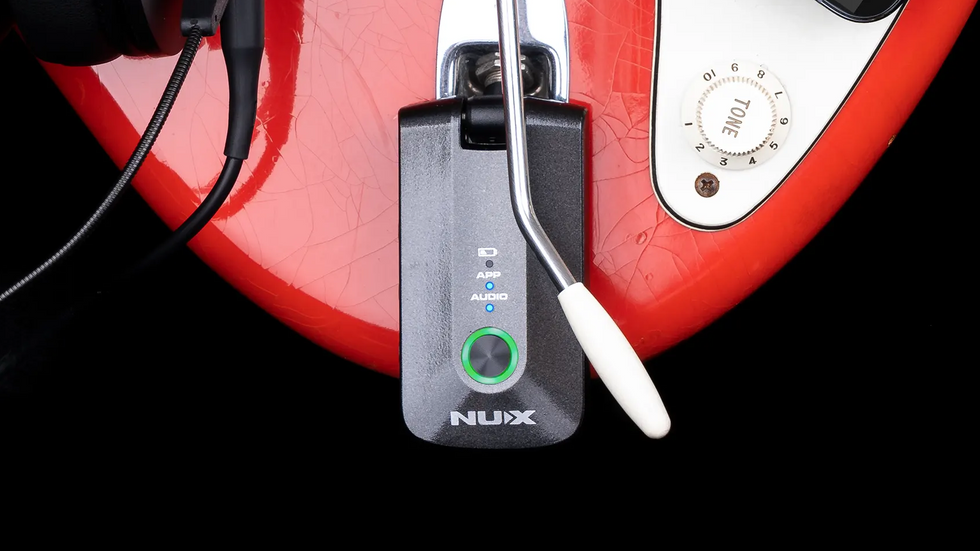
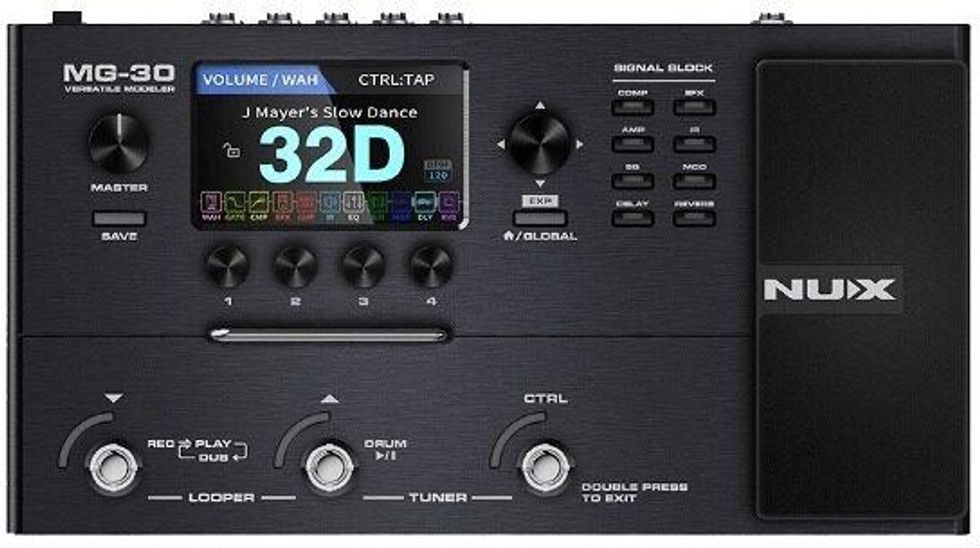
Quality modeling and easy signal-chain manipulation converge in this compact, crazy-affordable multi-effector.
NUX MG-30 Versatile Modeler
Since NUX announced MG-300, the best-budget compact modeler on the market ever, people started noticing our TSAC-HD (White-Box) Modeling Algorithm. It offers you realistic tube amp response, negative feedback and great playability. And now, the newly released MG-30 provides you even better definition from HD to 2K!
What's more, MG-30 is the pioneer that offers power amp BIAS parameter tweaking on valve amp models, which can enhance the warmth and playability.
With 2 powerful NXP® RT processors, MG-30 drives 1024 samples Impulse Response resolution with ultra-low system latency (2ms) to give you tight and fast response. 2 premium AD/DA AKM AK4558EN 32-bit 2 channel audio CODECs realizes "high quality sound performance". MG-30 has a super wide dynamic range ~ 110dB!
"Working musicians don't need hundreds of mediocre amp models." Knowing this, MG-30 focused on 30 classic essentials, and made each and every one live up to the standards of the most demanding players. Included in MG-30's top-shelf collection are: 25 electric guitar amp models, 2 acoustic amp models, 3 bass amp models.
Need to record a bass track? MG-30 offers 3 great bass amp models and 8 bass cab IRs. Simulating an acoustic guitar sound? MG-30 provides 3 acoustic IRs and 2 acoustic amp models for electric guitar to simulate acoustic guitar sound.
Highlights:
- TSAC White-Box Modeling Algorithm from HD to 2K!
- Decent Amp Modeling with Power Amp Bias Tweaking.
- 11 Independent moveable signal blocks with optional parallel post-efx routing.
- 4" large colorful LCD with intuitive UI.
- 1024 samples IR resolution and 3rd party IR loader slot with each user patch.
- Versatile application scenes and global settings.
- Ultra-low system latency(2ms) and 2 powerful DSPs.
- Comes with NMP-2 for external foot control.
- Nu-X Announces the MG-300 - Premier Guitar | The best guitar and ... ›
- Nu-X Releases the MG-30 - Premier Guitar ›
- NUX releases the compact Mighty Bass 50BT and Stageman II amps - Premier Guitar ›
- Nu-X Releases the Mighty Bass 50BT and Stageman II Amps - Premier Guitar ›
Billy Strings' signature dreads are distinguished by a 25" scale and wider nut width.
Why is Tommy’s take on “Day Tripper” so hard? And what song would Adam Miller never play with him? Plus, we get Adam’s list of favorite Tommy Emmanuel records.
We call guitarist Adam Miller in the middle of the night in Newcastle, Australia, to find out what it’s like to play with Certified Guitar Player, Tommy Emmanuel. Miller tells us just how famous Tommy is in Australia, and what it was like hearing him play from a formative age. Eventually, Adam got to open for Emmanuel, and they’ve since shared the stage, so we get the firsthand scoop: Why is Tommy’s take on “Day Tripper” so hard? And what song would Miller never play with him? Plus, we get Adam’s list of favorite Tommy Emmanuel records.
Adam’s newly released trio album, Timing, is out now.
Plus, we’re talking about new recordings from Billy Strings and Bryan Sutton, as well as Brooklyn Mediterranean surf party band Habbina Habbina.
Patterns can be viewed as boring or trite, but a little bit of creativity can turn them into bits of inspiration.
Chops: Intermediate Theory: Intermediater Lesson Overview: • Learn different ways to arrange scales. • Combine various sequences to create more intersting lines. • Solidify your technique by practicing unusual groupings of notes. Click here to download a printable PDF of this lesson's notation. |
I want to offer some food for thought on making sequences musical. Using sequences in our playing helps develop our musicianship in various ways. It can help us tune into the fretboard, develop melodic ideas all around the neck, and further our improvisation and compositional skills. So, spending time with sequences is certainly not time wasted. Please note that I sometimes use the word “rule" in this column, this is only a pointer to keeping on track of our exploration of these concepts. The intellect is very useful, but intuition is where the creativity comes from. When in balance lots of great things can be done. Let's get stuck in!
It's simple to play a scale from bottom to top, or top to bottom, but we can develop a sequence by shuffling these notes around. In Ex. 1 we have a C Major scale (C–D–E–F–G–A–B) played in thirds followed by a sequence highlighting the diatonic triads of the major scale. By following a “rule" we can develop many different sequences. The options are endless and a little overwhelming.
Click here for Ex. 1
Lets start by simply combining an interval sequence with an arpeggio sequence. In Ex. 2, the first two beats of the first measure feature ascending thirds. This is then followed by a triad arpeggio starting from the third note on the string. The next set of thirds then starts on the “and" of beat 4. The entire sequence is a seven-note pattern that is created by combining two thirds and a triad. It gives us a nice bit of rhythmic displacement as the phrase is now starting in a different place in the measure.
Click here for Ex. 2
Ex. 3 is a descending idea in A minor that basically flips the sequence we looked at in Ex. 2. Here, we are starting with two descending thirds before the triad. I'm using pull-offs and economy picking to articulate the triads. This one works well over D minor as well if you want a D Dorian (D–E–F–G–A–B–C) flavor.
Click here for Ex. 3
You can see the effectiveness of combining different sequences and groupings of notes to create interesting runs. It's also really effective for making phrases. In Ex. 4 we take a small fragment from Ex. 3 and change the rhythm. In the sound example I repeat this a few times over some implied chords in my bass line: Am, F, and Dm. It's great to get more from one line by seeing the different chord types you can play it over.
Click here for Ex. 4
In Ex. 5 we're going to start using fourths and fifths. It starts with an ascending A minor triad (A–C–E) before leaping to the 9 (B) and then hitting a G major triad (G–B–D). A similar pattern leads into the C major triad (C–E–G). Throwing in these wider intervals alongside triads is very effective for creating a dramatic sounding runs.
Click here for Ex. 5
For our next example (Ex. 6), we will take fragments from Ex. 5 and space them out a bit. I wanted once again to show how these sequence ideas can also be helpful for developing melodic phrases. Once we have a cool sequence or fragment, all we need to do is be creative with how we play it. We can change the rhythm, harmonic context, dynamic, and much more.
Click here for Ex. 6
Before we move on, it's important to remember that we can add colorful notes to our triads. Let's begin with some seventh-chord arpeggios. Ex 7 features are diatonic seventh arpeggios in G minor (functioning as a IIm chord) to get a Dorian sound.
Click here for Ex. 7
Ex. 8 is a little gratuitous of me. It begins with an idea made of several different concepts. First, we start with an Am7 arpeggio (A–C–E–G), then descend down an A5 arpeggio. I follow that up with diatonic thirds and end with a pedal-point sequence. If that's not enough, we then take this bigger idea and fit it around a chord progression. I move it to G7, Dm7 and then I break my “rule" slightly and outline notes of a C6 arpeggio (C–E–G–A). However, it does keep the same melodic contour of the initial idea. I used my ear and fretboard to guide me. It's always healthy to have a fine balance between intellect and intuition.
Click here for Ex. 8
We dig into C harmonic minor (C–D–Eb–G–Ab–B-C) for Ex. 9's monster two-measure lick. It sounds evil! In composing this phrase, I kept to the basic concept of finding seventh-chord arpeggios within C harmonic minor in the 8th position. I followed my ear as well as my slowly developing intellect. However, if you look closely you can see I was following a mini chord progression through this line. We start out with a CmMaj9 arpeggio (C–Eb–G–B–D) in the first beat, followed by a G7b9 arpeggio (G–B–D–F–Ab). Here we have a very strong Im-V7 movement in C minor. I then move back to our CmMaj9 arpeggio and in the second measure we start descending down an Eb augmented triad (Eb–G–B). This is then followed by more CmMaj9 goodness.
Click here for Ex. 9
Ex. 10 is now taking Ex. 9 and extending it into a cool flamenco-inspired melody. The rhythms in this were inspired by the incredible Paco De Lucia. I follow the sequence from the previous example almost exactly, but I use a bit of artistic license to repeat certain fragments to fit into a “top line" or “head"-style melody.
Click here for Ex. 10
My aim here isn't to give you one rule to follow but instead to encourage you to take the sequences you know and love and start getting more out of them. Enjoy and stay safe!
Neutrik’s Timbre plug, made for toggling between capacitors.
This follow-up to May 2025’s column shows you a few basic techniques to inject some capacitance into your rig.
Hello, and welcome back to Mod Garage. This month, we will dive into the details of how to add additional guitar-cable capacitance—the right way. Time to get started!
Let’s begin with some typical additional capacitance values that certain lengths of cable (or capacitors) can bring to your system:
• 10’ vintage coiled cable (approx. 3 meters) -> 1 nF
• 15’ vintage coiled cable (approx. 4.5 meters) -> 1.5 nF
• 20’ vintage coiled cable (approx. 6 meters) -> 2.2 nF
• 30’ vintage coiled cable (approx. 9 meters) -> 3.3 nF
• Ritchie Blackmore-style, ultra-long vintage coiled cable -> 4.7 nF
I listed standard values here, so you should have no problem getting caps to match them in any local electronics store or online; the type of cap doesn’t really matter and will mostly be dominated by size, but I’ll share more about this in a minute.
Let’s quickly summarize the first installment of this column from last month’s issue: From a technical point of view, added capacitance shifts down the resonance frequency of the pickups, so they sound fatter, especially when using overdrive. This is exactly the reason why a lot of distortion and fuzz boxes with a vintage voicing use an additional cap at the input section; the resulting overdriven tone is fat and warm.
This month’s mod, which involves adding a capacitor to your signal, works best with vintage-flavored single-coil pickups (approximately 2.4 H inductance) or a typical old-school PAF-style pickup (approximately 3.8 H inductance). Modern high-output pickups are often sporting inductances of 6 H to 8 H, and don’t sound very good with this mod—when adding more cable capacitance to such pickups, the result is a dull and wooly tone without any clearness and definition. If you want to make your single-coil guitar sound more Les Paul-ish, you should try a 4.7n capacitor. It will shift the resonance frequency of your single-coil pickups down to the typical PAF ballpark, making for a very cool and usable old-fashioned guitar tone. It might feel a little muffled when playing clean, but ultra fat and punchy when using overdrive! In general, values higher than 4.7n are not recommended.
We have two options for where to install our cap.
On the Guitar Cable
This is the easiest location to add additional capacitance to your system, with several mod options:
1. The lightest mod ever isn’t a mod at all—it’s to simply buy a vintage guitar cable and plug it in whenever you need it! I don’t know of any company that offers modern guitar cables with intentionally high capacitance.
2. The Neutrik company offers a special angled plug, called the Timbre Plug, that you can solder to any guitar cable of your choice. The plug has a 4-way rotary knob on top to toggle between different capacitors. In addition to a bypass setting, the plug offers capacitances of 1nF, 2.2nF, and 3.3nF, letting you simulate different cable lengths on the fly.
3. You can add an additional capacitor to any guitar cable of your choice to convert it into a “longer-sounding” cable. You simply open one of the plugs to solder the cap between the hot and ground—that’s it. Small, 2.5 mm contact spacing ceramic caps are easy to put into a standard plug and are your weapon of choice here. It’s essential to only add the additional cap to one of the two plugs, but it doesn’t matter if you plug this side into your guitar, an effect, or your amp. This method allows you to build yourself some cables that simulate their older, longer relatives.
You can add an additional capacitor to any guitar cable of your choice to convert it into a “longer-sounding” cable.
Photo courtesy SINGLECOIL (https://singlecoil.com)
Inside the Guitar
You can also add a cap (or several) inside your guitar if you only need this mod for one instrument. If you’re looking for added capacitance with all your guitars, you’d be better off choosing one of the techniques mentioned above.
1. The easiest way is to solder your additional capacitor directly to your volume pot; this way it has a fixed value that can’t be changed and is always engaged. This operation is very simple to do, and you can use regular-sized caps for this.
You can add a cap (or several) inside your guitar if you only need this mod for one instrument.
Illustration courtesy SINGLECOIL (https://singlecoil.com)
2. If you want to make the cap switchable, such that you can run it either bypassed or engaged, you can install a SPST mini toggle switch or use half of a push-pull or push-push pot, which usually sport a DPDT switch underneath.
This drawing shows how to make your additional cap switchable.
Illustration courtesy SINGLECOIL (https://singlecoil.com)
3. If you want to use more than one cap to simulate different cable lengths, your weapon of choice is a rotary switch, setting up a kind of Gibson Varitone wiring without the inductor. Because we are switching capacitances, it is essential to run an additional 10 meg resistor in parallel to each of the caps, and to use a make-before-break, not a break-before-make, rotary switch to prevent loud popping noises when using the switch while your guitar is plugged into an amp. Leave the first lug of the rotary switch open for the bypass position without an additional cap.
If you want to use more than one cap to simulate different cable lengths, use a rotary switch.
Illustration courtesy SINGLECOIL (https://singlecoil.com)
4. If you want to make this mod even more flexible, you can add an additional “cable simulator pot” to your system. The pot should have the same resistance as your volume pot, and should be wired to your volume pot. This way, for example, you can add a 3.3nF or 4.7nF cap to the extra pot, and dial in as much cable capacitance as you like.
You can also add an additional “cable simulator pot” to your system.
Illustration courtesy SINGLECOIL (https://singlecoil.com)
On the Pedalboard
The idea of putting a rotary switch or cable-simulator-pot solution into an external unit to create a kind of extra-capacitance stompbox to use with all of your instruments is just around the corner, and yes, it’s possible! However, I don’t recommend this, because it’s physically located after the volume pot in the guitar, which means less volume (no unity gain) and less high end. But don’t worry: If you are looking for a pedalboard solution to simulate different cable lengths (which, as we defined earlier, means to shift the resonance frequency of the pickups), there are some active solutions on the market offering such a feature, usually in combination with a boost or buffer functionality. To name just a few, you should look into the Seymour Duncan Pickup Booster, Stellartone Micro Pedal, or the i2e Audio AG1.0 The PURR. Along with some other brands, these pedals will do the trick, and they’re not difficult to build if you are looking for a DIY solution.
So far, I’ve received several emails from readers asking for some more DIY guitar tools, so next month, we will look into some sustainable and environmentally friendly DIY guitar helpers—all of which you can build yourself easily by upcycling things you already have at home. Stay tuned!
Until then... keep on modding!