
With a very steady hand, luthier Jeff Huss preps a fretboard for its side-position markers.
Building an acoustic guitar may seem like an extremely complicated process, but it can be broken down into a series of chronological steps. While it would take a book (and there are some good ones out there) to describe how to create this fairly simple, yet elegant machine in more detail, I’d like to give you an overview of the process with this month’s column.
Because we build our bodies first, we start by dimensioning the wood for our top, back, and sides. Choosing the top wood for its stiffness-to-weight ratio, we generally make our tops from spruce or cedar. This means these woods are light enough to not act like a “tone sink,” but strong enough to withstand the incredible amount of tension they will be subjected to when the guitar is strung up. While back and side woods color the tone that the top produces, the majority of the sound is the result of the construction choices made for the top.
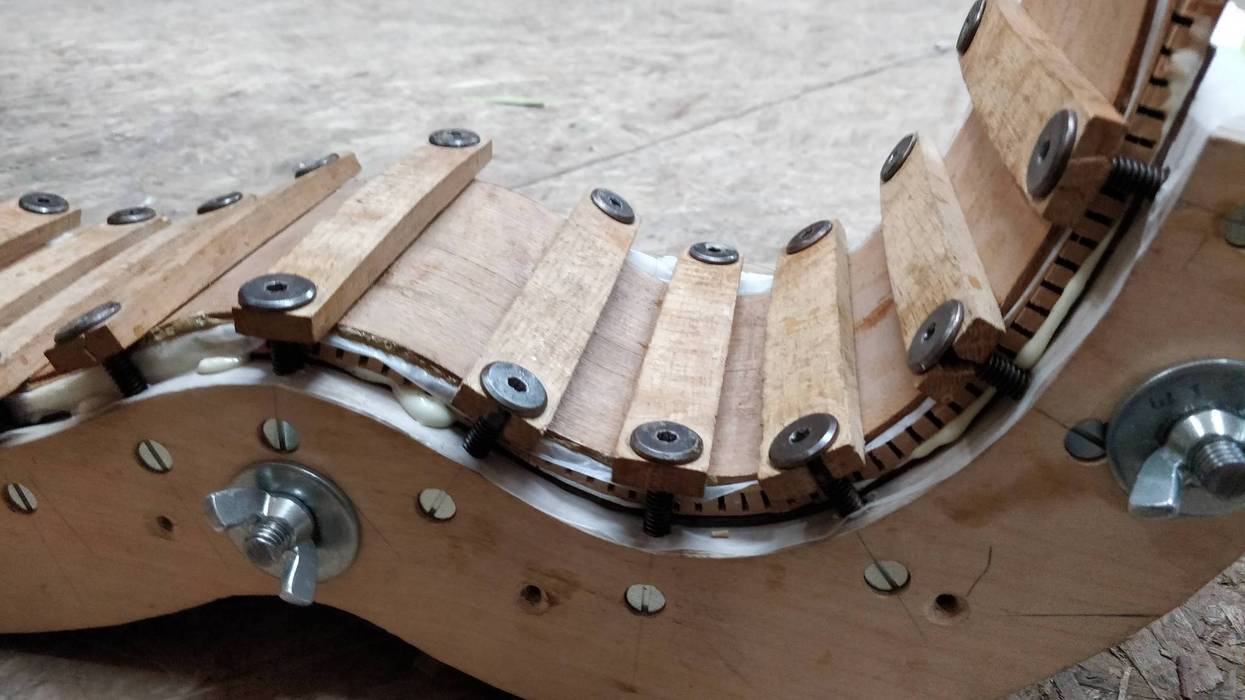
The top and back “plates” are thickness- sanded to dimension after they have been joined in a book-matched pattern. We cut a soundhole into the top, install a rosette, and then profile them—a process that creates a smooth, flat surface where the top meets the rosette. Next, we brace the plates with spruce bracing. We use a traditional “X” pattern for our tops and a simpler, ladder-brace pattern for the backs. At this point, we profile the sides to a uniform thickness and bend them to shape using a bending jig and the help of a little heat and moisture.
After bending the sides, we place them into a mold that will house the body throughout the construction process, and install spreaders to hold the sides firmly against our mold. Now we’ll glue the head block, tail block, and kerfed linings into place to create the rim onto which we glue the top and back. When the glue is cured, we remove the spreader mechanism through the soundhole, pull the rough body from the mold, trim the edges, and finish the decorative purfling and binding work. After the scraping and sanding work is finished, the body is complete and ready to be paired with a neck.
Necks begin as a large plank of hardwood— generally mahogany—that is sawn into smaller billets yielding two, one-piece necks. These are rough sawn into neck blanks on the band saw, routed for a truss rod slot, and cut on an angle for the peghead. After we glue the veneer for the peghead face and shape the peghead, we drill the holes for the tuners. Using a jig, we then measure the angle of the body where the neck will attach, and that angle is transferred to the table saw where the neck heel is cut to correspond to the body. After cutting, we drill and install our corresponding index holes, bolt holes, and inserts in the body and neck heel for the bolt-on neck joint.
Our fretboards—made from ebony or rosewood—are shaped, slotted, radiused, and bound. They are indexed onto the neck blank, and the truss rod is installed and then attached with epoxy. The neck is now shaped, a nut slot is cut, and the neck is final-fitted to the body to ensure proper playability. Inlay work is then done on the fretboard and peghead, and we fit the nut, install side-position markers, and sand out the body and neck and prepare them for the finish work.
At this point, some woods, such as mahogany, are stained, and any open-pored woods are filled with a paste wood-filler that lets us apply a thinner, final finish. Then we spray the topcoats and do leveling work between coats to ensure a flat and thin finish. After it’s cured, the finish is leveled once again before we fine-sand and buff all the finished surfaces to bring out a bright luster.
Once the finish work is complete, the assembly can begin. The neck and body are bolted together, the fretboard extension is glued down, and the bridge is glued on. The guitar is mounted on a workbench that simulates string tension, and the fretboard is prepared for the fretwork. Frets are then installed, trimmed, leveled, and polished.
After the nut has been trimmed, polished, and slotted, we install it. Next, the tuners are mounted, the saddle is shaped and inserted into the bridge slot, and the pickguard is attached. And finally, we string up the guitar, adjust the action, and perform any necessary tweaks. Our guitar is now ready to begin what we hope are many, many years of making music.
 Jeff Huss
 co-owner of Huss & Dalton Guitar Company, moved to Virginia in the late ’80s to play bluegrass. He and his business partner, Mark Dalton, formed their company in 1995. Since then they’ve earned world-wide recognition for their high-end, boutique guitars and banjos.