


For a guitar to play well, its strings must line up straight along the fretboard, all the way from the nut to the bridge. On electric guitars with a 3-bolt neck attachment system—such as many ’70s Fenders or ’70s reissue models—it’s not uncommon for the neck heel to shift laterally in the neck pocket, causing the neck to move out of alignment with the strings. This can be caused by general wear and tear or even improper installation at the factory.
If the neck moves out of alignment, one of the two E strings will lie too close to the edge of the fretboard. Often, the offending string will actually slip off the frets as you play. And that’s not all: When a neck is out of alignment, some strings don’t run directly over the pickup pole pieces, and this affects your string-to-string volume. A misaligned neck is tricky to correct, but for the guitar to function properly, it’s an essential repair.
If you have a guitar with a 3-bolt neck that has shifted out of alignment, the fix is to carefully pivot the neck heel toward either the bass or treble strings, thus re-centering them over the fretboard. This operation involves measuring, drilling, and doweling. If you’re not comfortable with that prospect, it’s time to take your guitar to your local tech.
Let’s walk through this process using a mid-’70s Fender Tele with a 3-bolt neck and Micro-tilt assembly, and then you can decide if it’s a project you want to tackle. On this guitar, the 1st string was almost falling off the fretboard (Photo 1).
Prep work. Before removing the neck, I made sure the Micro-tilt Allen screw was backed off so it wasn’t pressing against the metal disc embedded underneath the neck heel. After confirming that the three neck bolts were snug, I checked the forward neck angle (or tilt) with the guitar tuned to pitch. Fortunately the action was good and the bridge saddles offered a sufficient range of adjustment to control string height. This was good news: It meant I wouldn’t have to shim the neck. This repair would be limited to the neck’s lateral adjustment, not any height adjustment.
Clamping down. Determining the new lateral position is an exercise in trial and error. First remove the inside four strings, leaving only the two E strings on the guitar. Tighten the strings just enough so they run in a straight line between the nut and saddles. The E strings will provide a visual reference and indicate how much to the left or right you’ll need to pivot the neck heel.

Photo 2
Next, place a grip clamp on the neck where it meets the body (Photo 2). Important: Make sure your clamp has rubber covers so it won’t damage the frets or body.
Remove the neck screws. With the clamp still in place so it’s holding the neck to the body, shift the neck heel from side to side in its pocket, watching how the strings align with the edge of the fretboard.
At this point, you’re simply doing reconnaissance. The goal is to determine if the neck pocket offers enough room to shift the heel into proper alignment. If the neck doesn’t have enough play to properly align the E strings to the fretboard, the fix is to remove some wood from the side of the neck pocket. Trust me, that is a job for a pro.
On this project Tele, the neck pocket offered enough wiggle room for me to get the E strings correctly aligned with the edge of the fretboard—cool.
Doweling the neck. Assuming you’re able to manually realign the neck so the strings line up correctly along the fretboard edges, you’re ready for the next step, which is to remove the neck and prepare it for doweling. Many techs use toothpicks to dowel a neck, but I don’t recommend that. Instead, use a 3/16" hardwood dowel.
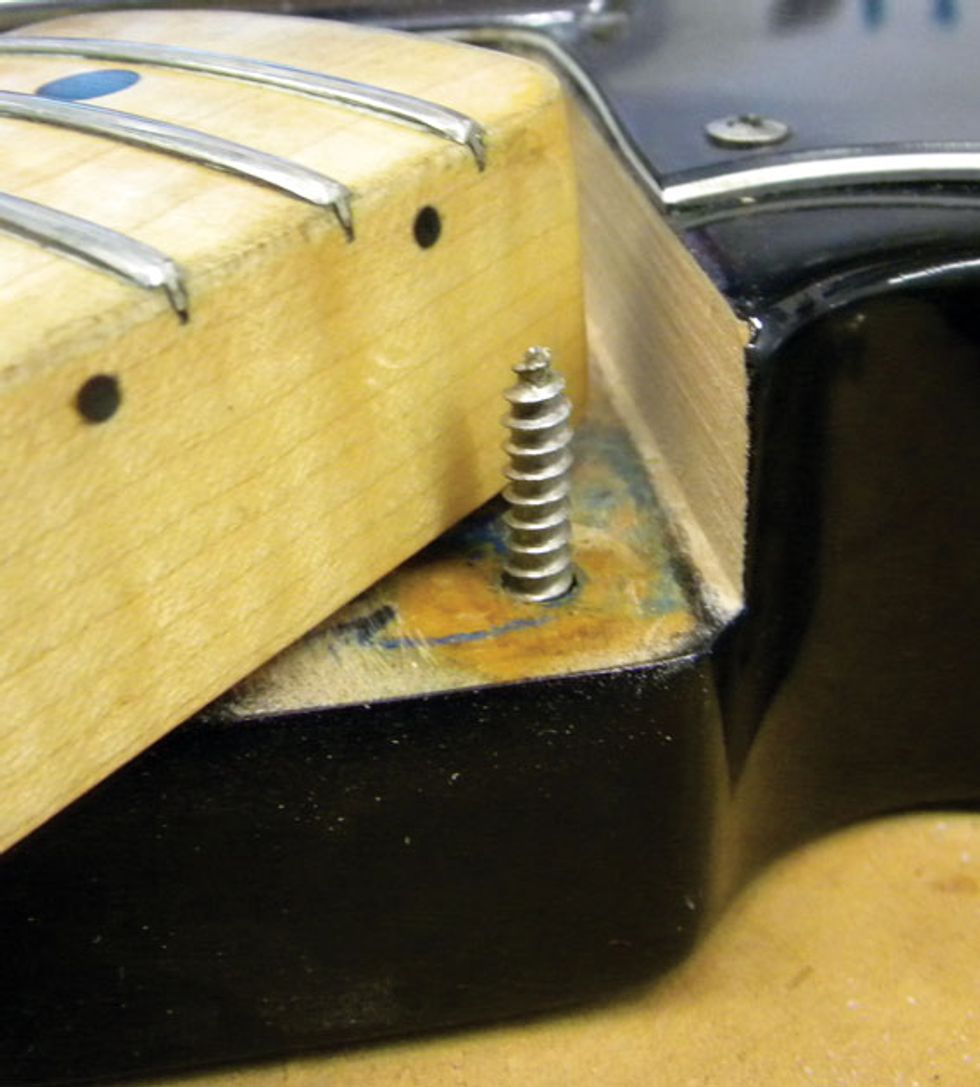
Photo 3
With a 3/16" drill bit, enlarge the two wood screw holes by drilling only to the depth of the screws when assembled. First gauge this depth by inserting one of the neck screws through the body (Photo 3), then place your bit against the screw where it protrudes through the body and use a marker to indicate the depth on the drill bit.
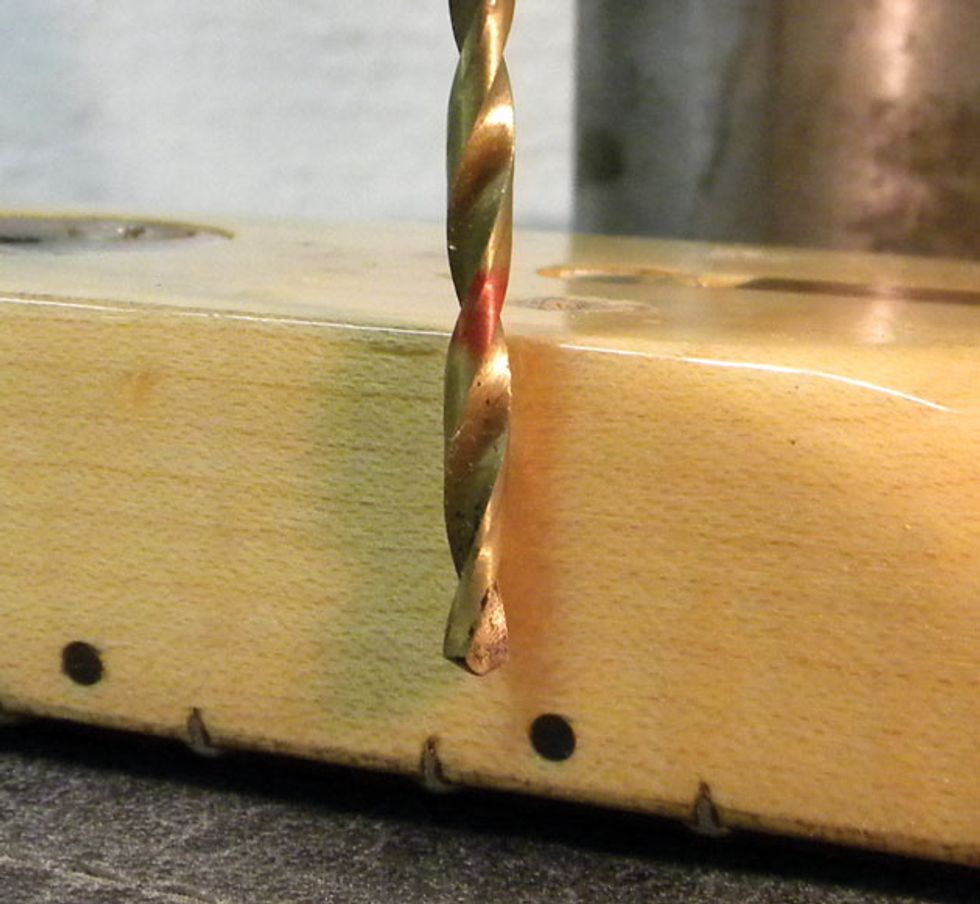
Photo 4
Double-check your depth mark against the neck itself (Photo 4).
Now carefully expand the screw holes with your 3/16" bit. It’s a good idea to use a drill press for this so your holes remain completely perpendicular to the neck.
Next, cut two pieces of dowel to plug the enlarged holes. Make sure the dowel pieces are a bit longer than the depth of the screw holes (you’ll trim down the dowels later).
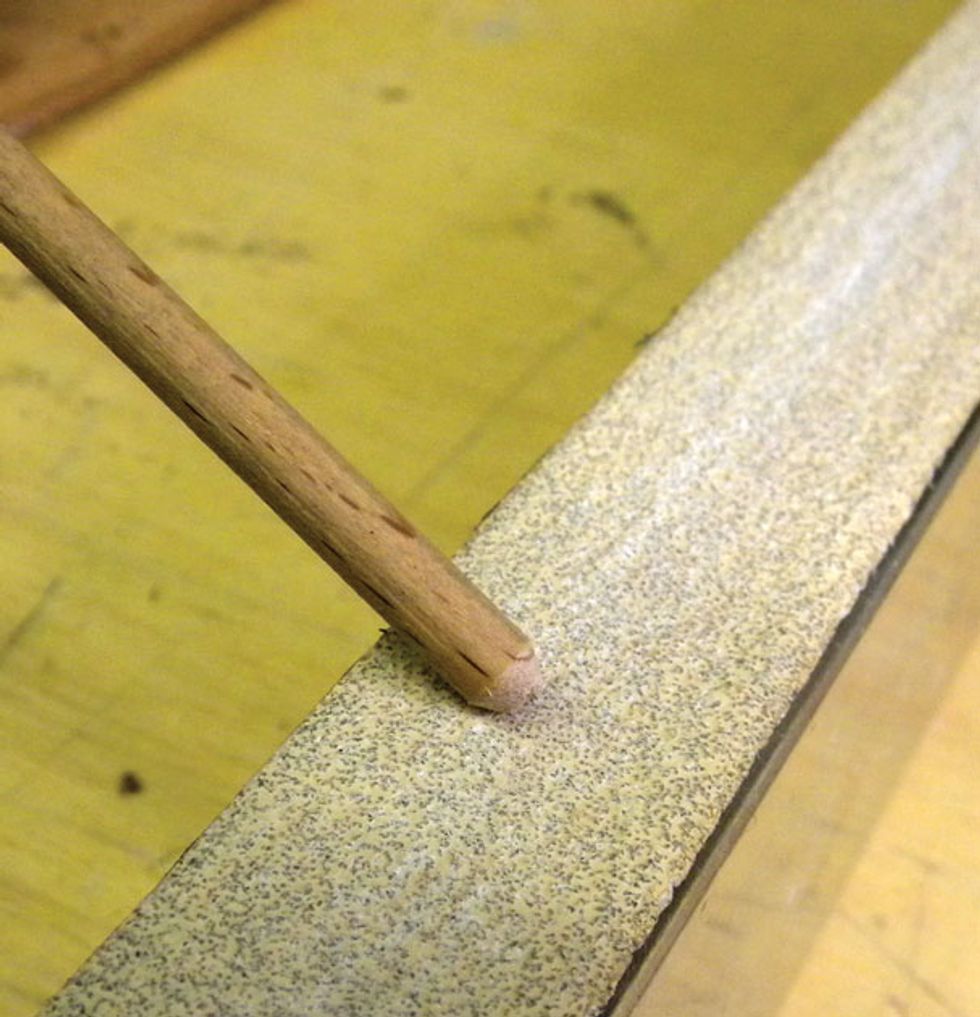
Photo 5
Use sandpaper to round the tip of each dowel so it matches the end of your drill bit (Photo 5). This way the dowels will completely fill the holes you just drilled into the heel. Nice, huh?
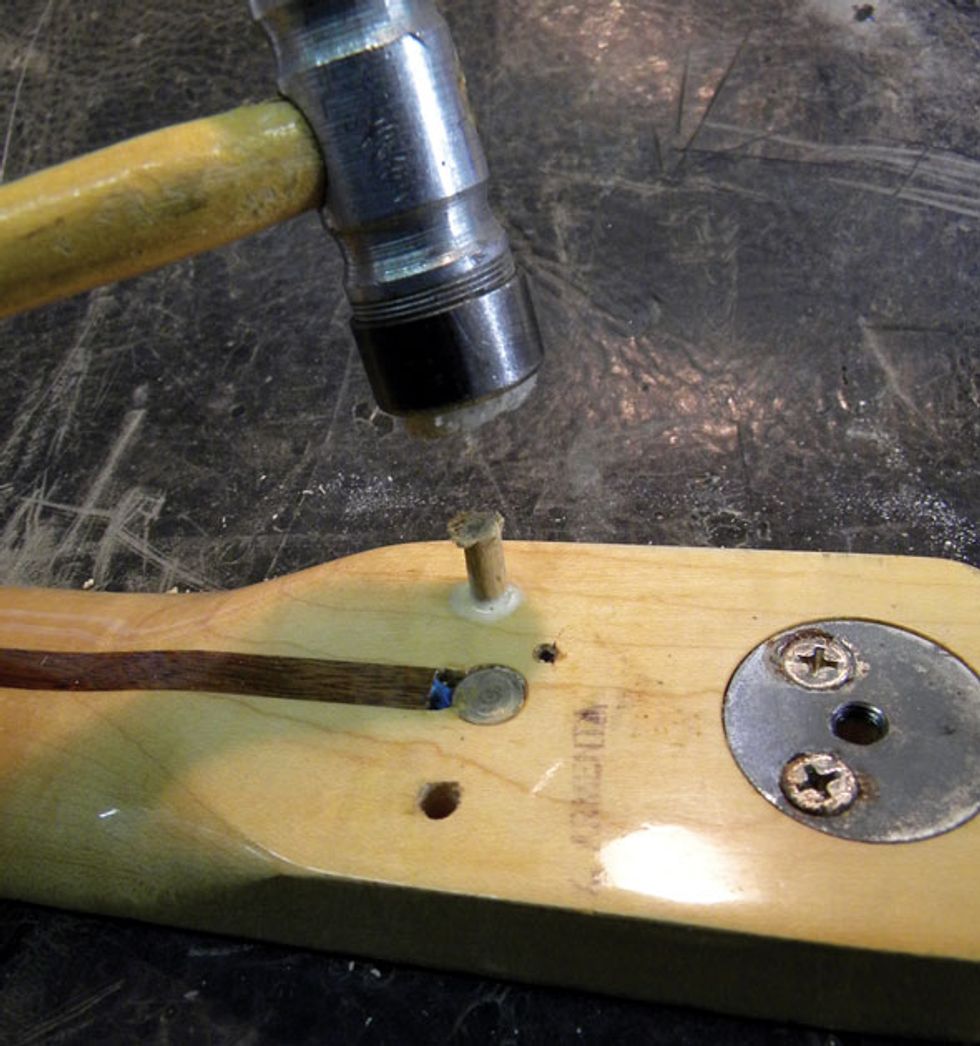
Photo 6
Dip a dowel in wood glue—I recommend Titebond II—and press it into the screw hole in the neck. Using a small hammer, tap the dowel down to make sure it penetrates the full depth of the hole (Photo 6). Repeat this process with the other dowel.
To ensure a solid bond, it’s a good idea to let the glue dry for several hours or even overnight. When the glue is completely dry, cut the dowel flush to the heel using a small, flexible saw.
Marking the dowel. With the neck dowels installed, glued, and trimmed flush to the heel, set the neck back in the pocket and install the third neck screw (this is the one that screws into the metal insert mounted in the neck). Tighten the screw just enough to seat it against the neck plate—don’t torque it down yet.
Gently clamp the neck onto the body and add a little tension again to the two E strings. With the neck pivoting on the third screw, shift the neck from the bass to the treble side until the strings are properly aligned. When there’s an equal distance from the outside of each E string to the edge of the fretboard, stop and tighten the clamp.
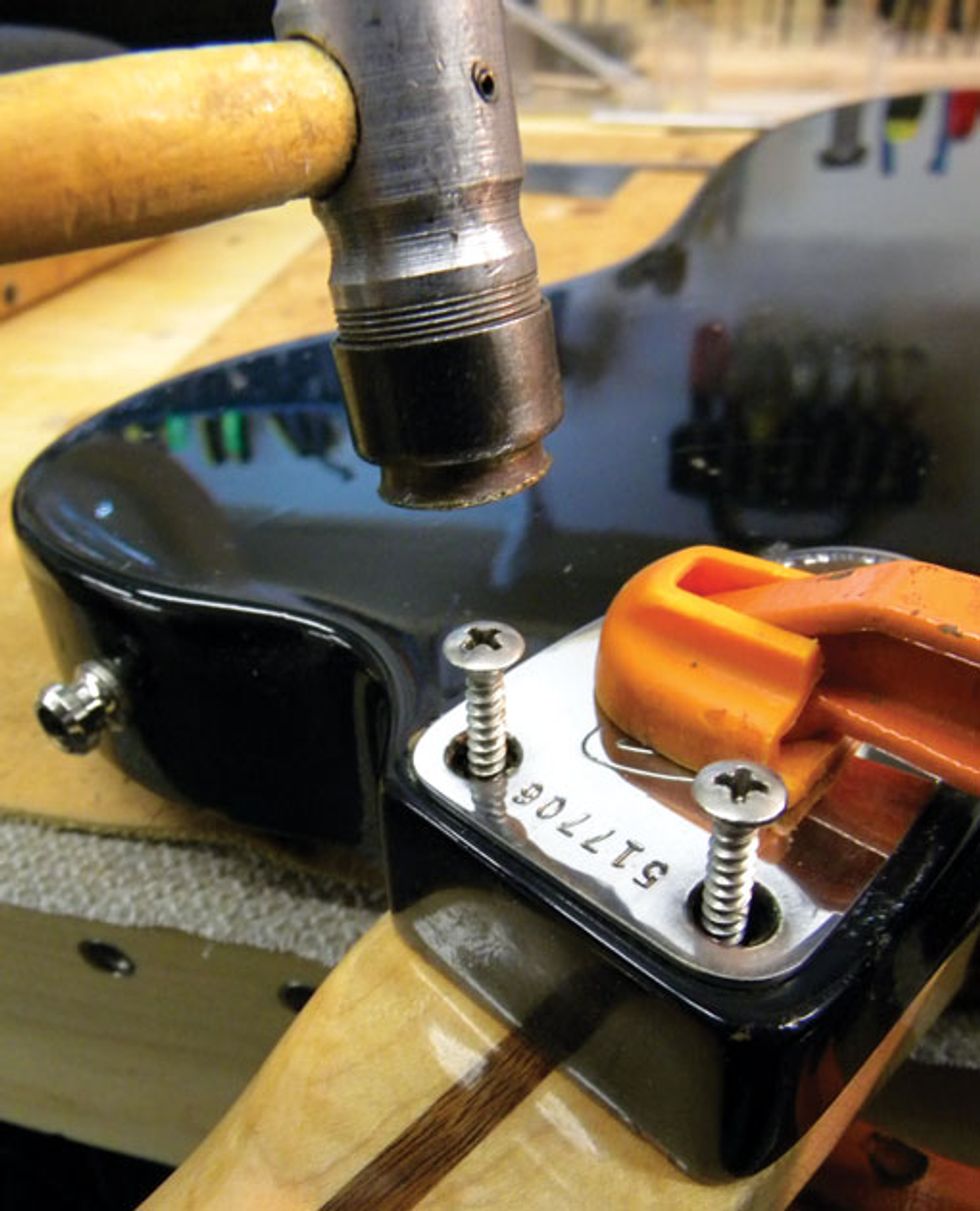
Photo 7
Being careful to preserve your alignment, flip the guitar over. Insert the two upper neck screws into the body and gently tap them with a small hammer (Photo 7). The resulting indentations will mark the exact location for the new holes in the neck heel. Now you’re ready to re-drill those holes for the neck screws.
Drilling the new holes. Remove the clamp and neck from the body. Mark a 1/8" drill bit to the proper depth (you can use the 3/16" bit as a reference, or repeat the measuring process you used previously). By the way: The neck screws are 5/32" in diameter, so by using a 1/8" (4/32") drill bit, you’ll be sure the neck screw threads will “tap” the neck enough to hold it tight.
Double-check your drill bit depth: If you don’t drill deep enough you can crack the heel when you bolt on the neck. And I don’t have to remind you what would happen if you drill too deep, right?
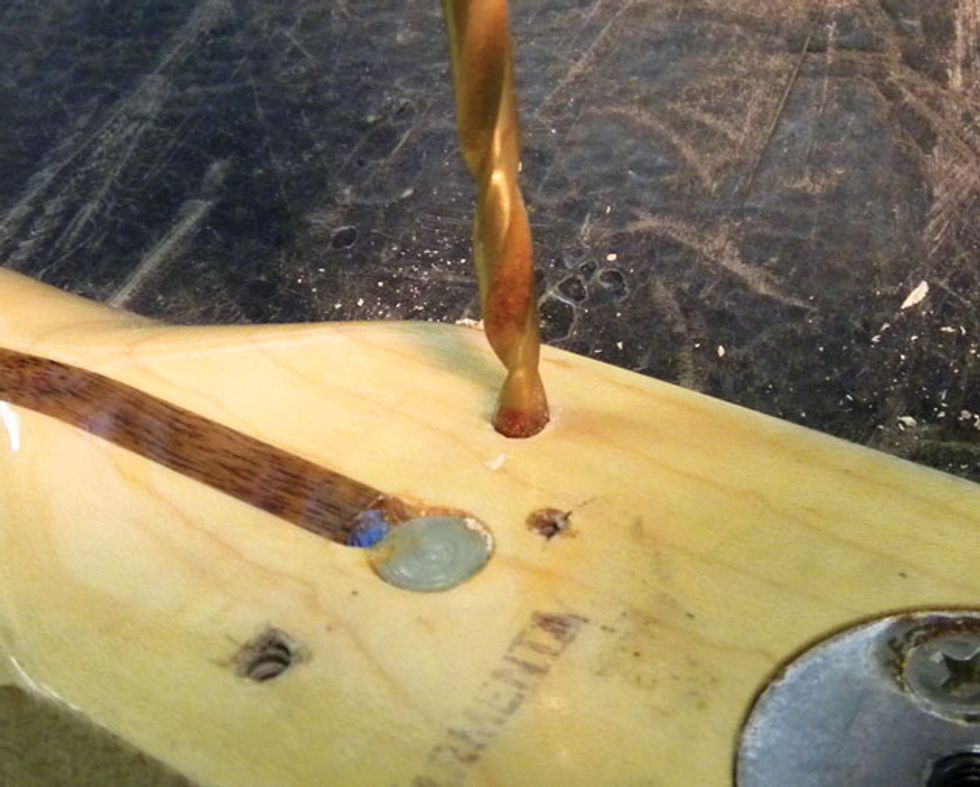
Photo 8
Now, using the indentations you made as guides, drill new screw holes in the dowels (Photo 8). Again, using a drill press is ideal.
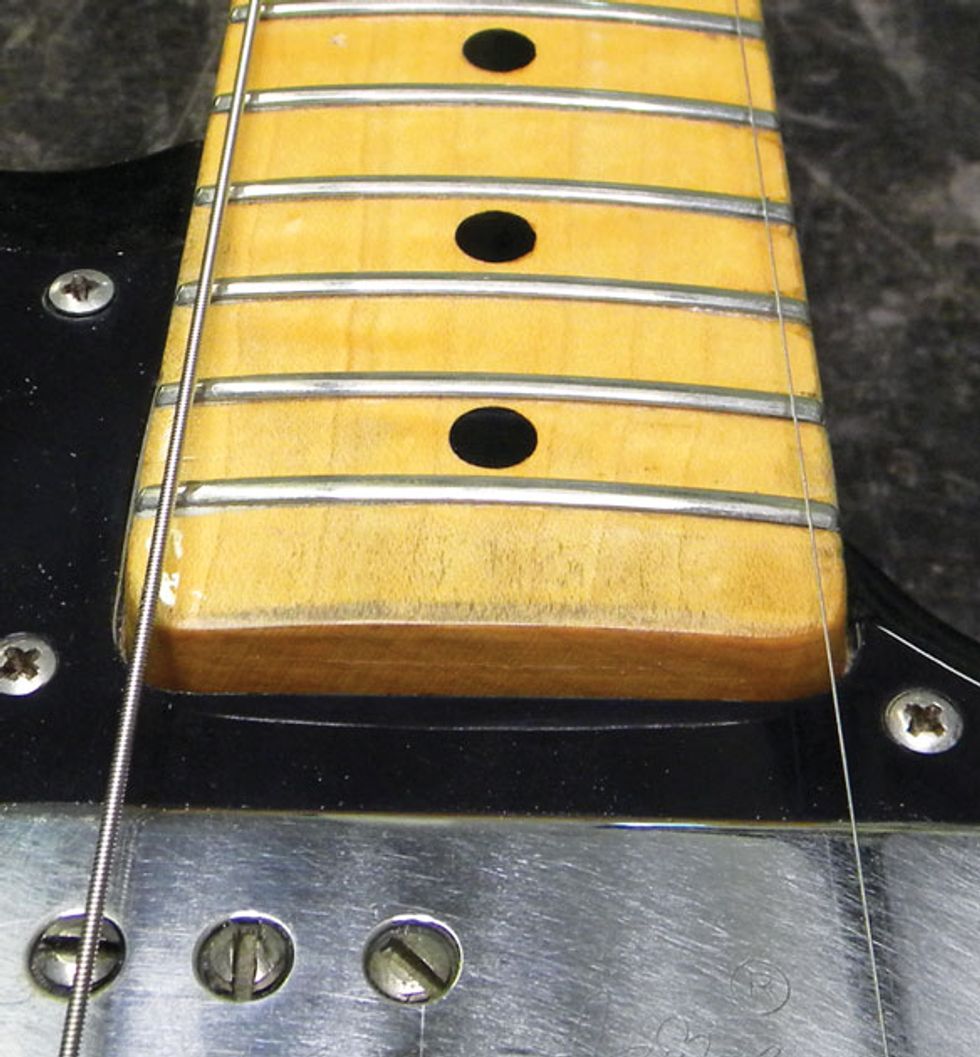
Photo 9
Install the neck screws. With the new holes drilled to the proper depth and diameter, install the neck screws. Check your work to see if the two E strings line up correctly with the fretboard edges (Photo 9). If so, congratulations—you’re now ready to string up your guitar and give it a workout.


