Welcome to another Dojo! This month, I’d like to show you the benefits of creating and using VCAs (Voltage Controlled Amplifiers) when mixing, for added control and nuance. Tighten up your belts. The Dojo is now open.
Diving right in, what is a VCA? Think of it as a glorified volume-only control that uses voltage to adjust the amount of a signal’s/track’s volume when routed to its output.
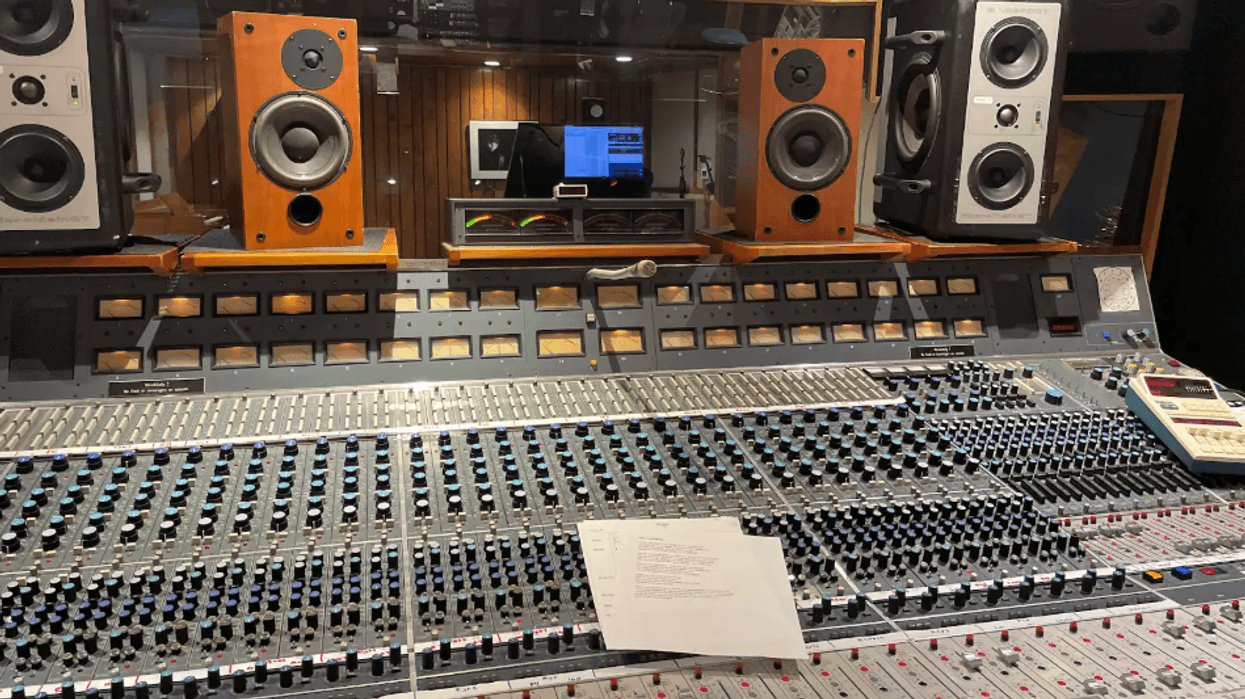
Say you want to easily adjust the overall volume of your drum tracks within your mix. Perhaps you have several drum-loop tracks, drum machine soft synths with MIDI sequence tracks, and a full drum kit with multiple mics spread over multiple tracks (you know, a typical session). Or you might want to combine (sum) four individual rhythm-guitar track outputs into one VCA and be able to control the overall volume of all four from one channel. You can create a single VCA channel for all the drum tracks, another VCA for the rhythm-guitar parts, and then assign the outputs of those grouped tracks to their dedicated VCAs. Now, you can globally tweak the overall volume of all your drum tracks and all your rhythm guitars in your mix without changing the routing, plug-in levels, or effects sends, or the panning of any other tracks or groups.
The benefits of using VCAs really emerge after a mix has come together. For example, you might need to make an “all guitars up” version of the mix, or a “drums down 2 dB” version, etc. You may even want to automate volume rides in certain sections of a song—particular licks and fills, or even solos. You can also do this with vocals, background vocals, synths, etc.
Following the hypothetical example above, I’m going to show you how to create a VCA within Pro Tools and assign it to tracks of your choosing. Remember, every DAW has its own idiosyncratic way of creating and setting up a VCA channel, so be sure to consult your help section and/or read your instruction manual. Key commands may differ, but the process is essentially the same.
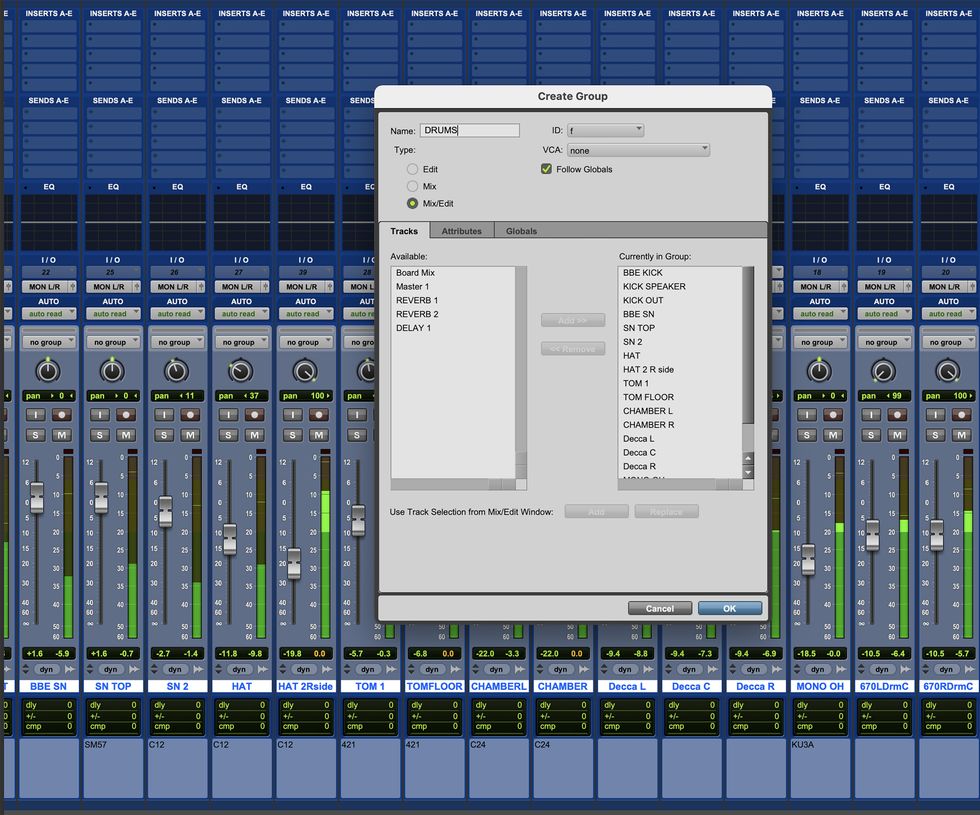
Fig. 1
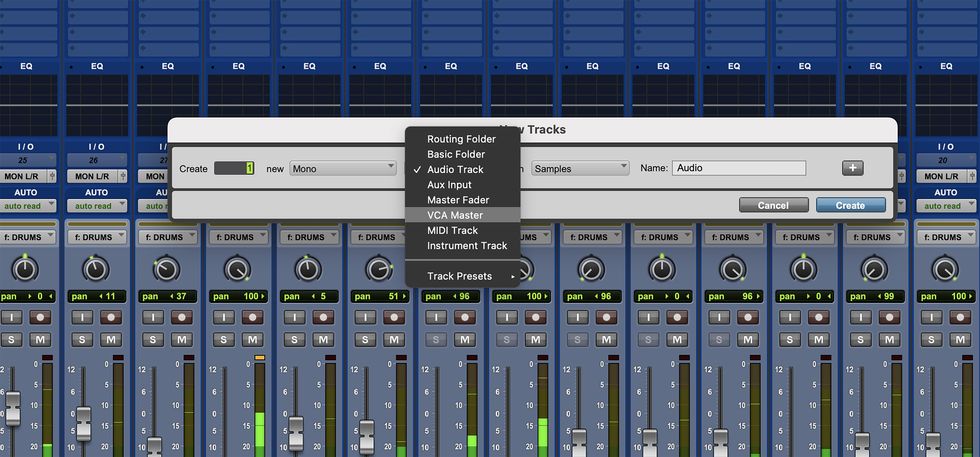
Fig. 2
First, group (Cmd+G) all the tracks you want to be assigned to a VCA and name that group. I’ve named my group “DRUMS” [Fig.1]. Now, I’m going to create a VCA. Cmd+Shift+N, select VCA, and name it. I’ve named this “DRUMS” as well [Fig.2].
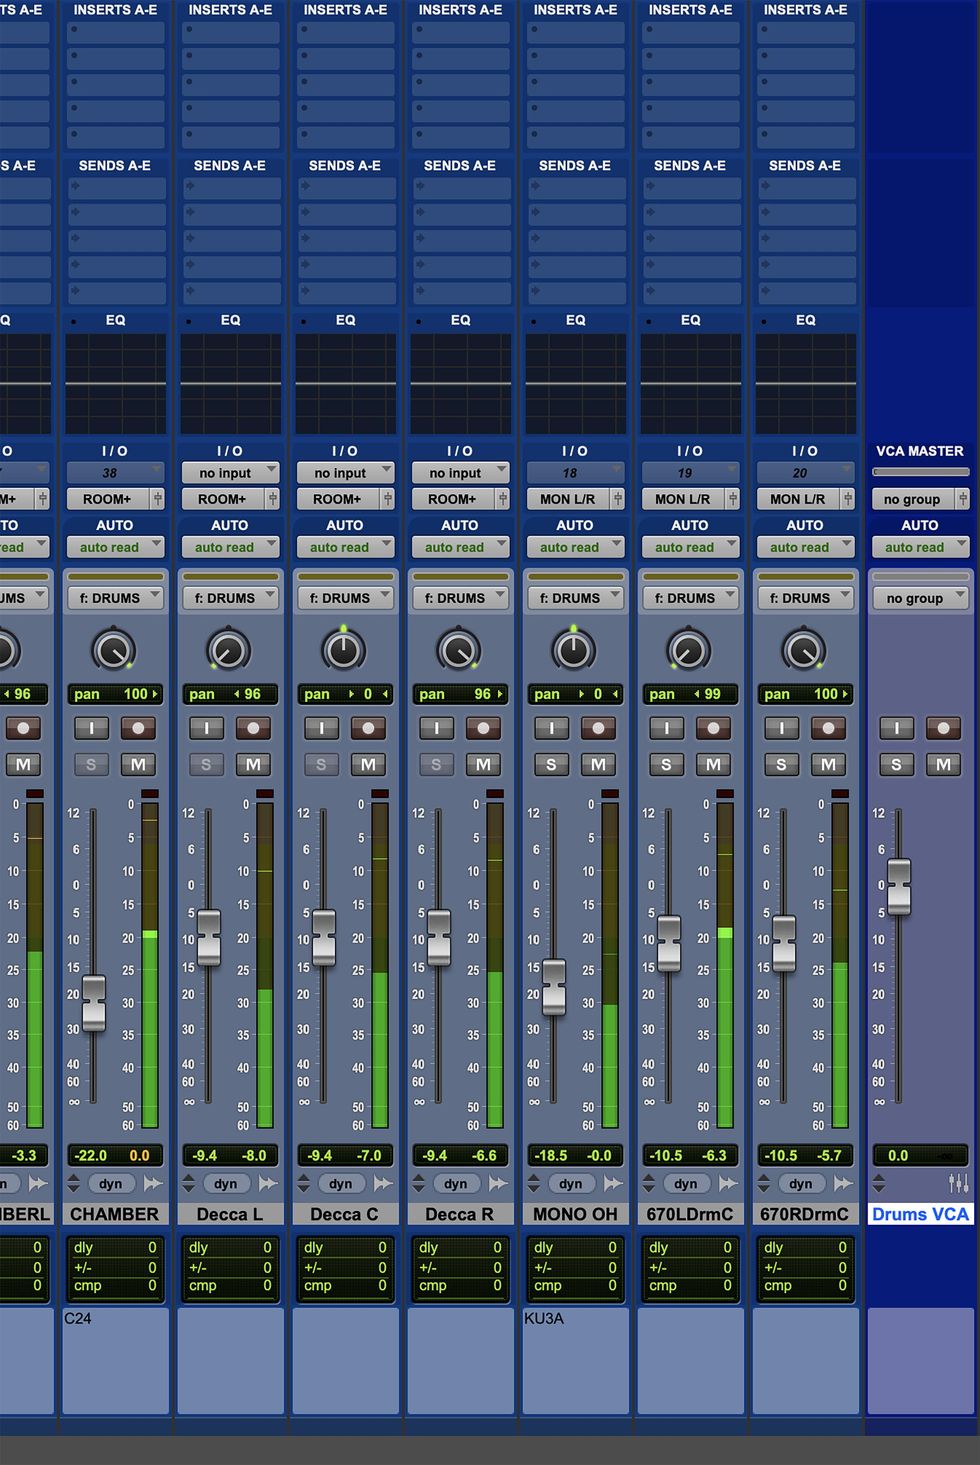
Fig. 3
Notice the new VCA channel and how there are no options for FX inserts, EQ, or panning [Fig. 3]? That’s exactly what we want, and it’s proof that we’ve set it up correctly.
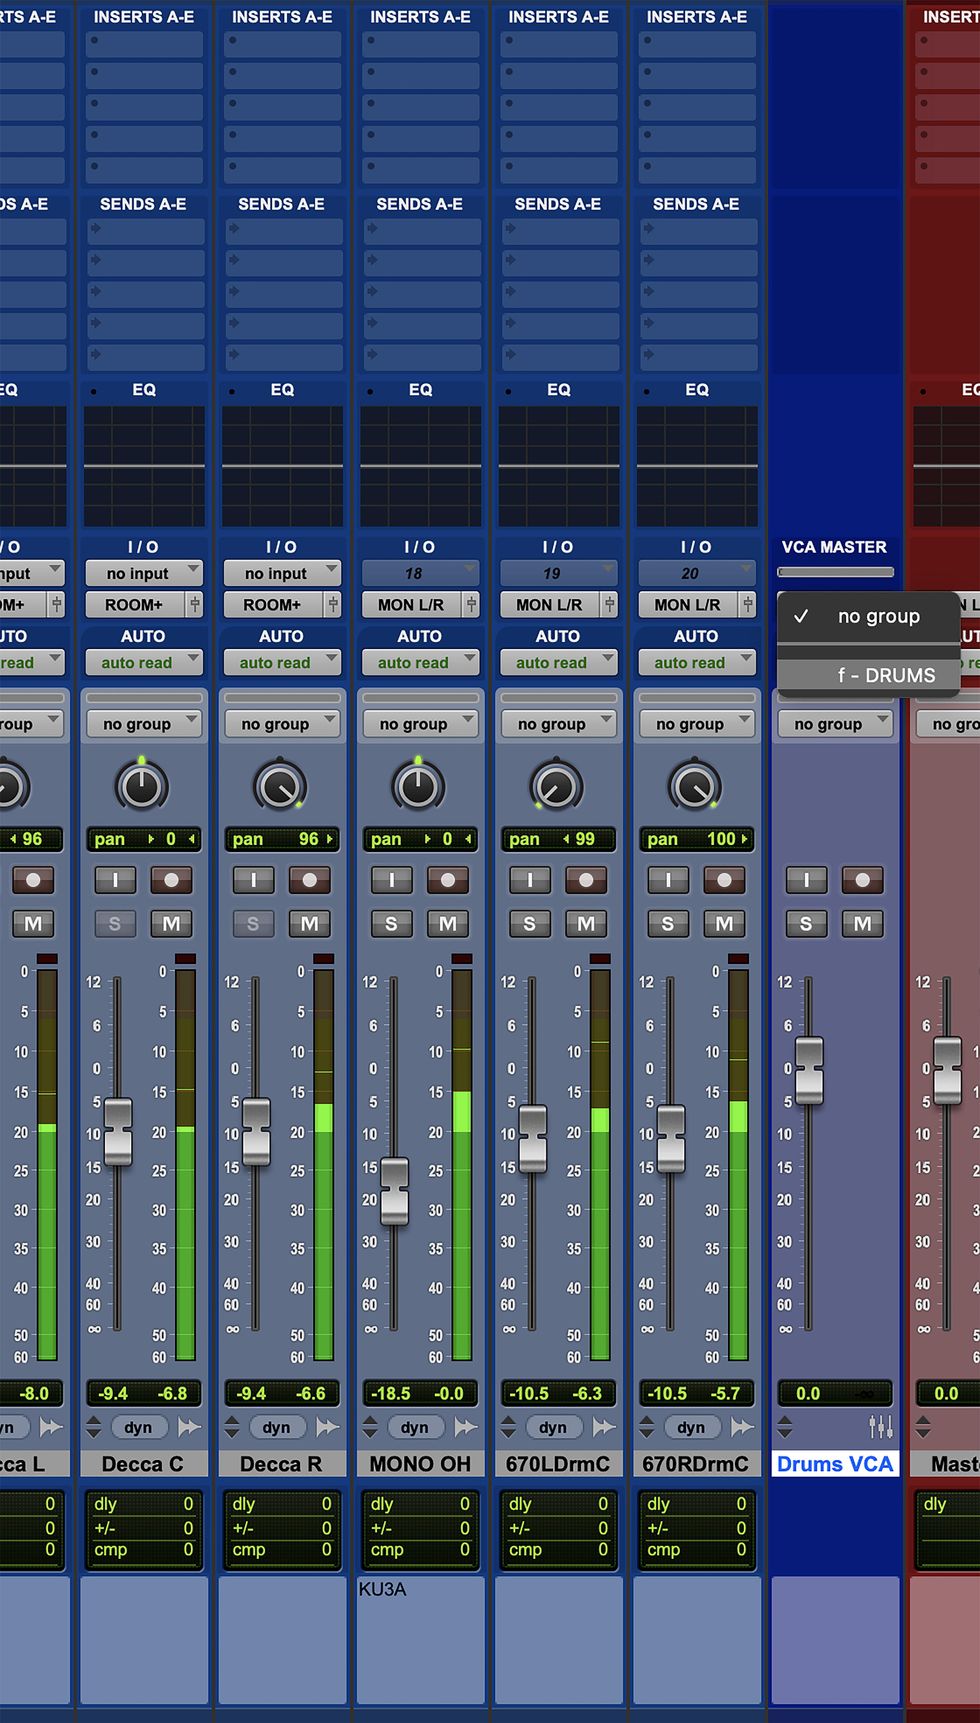
Fig. 4
Finally, I’m going to assign my drums into a single VCA by clicking on the “no group” button and selecting “DRUMS” from the dropdown list [Fig.4]. That’s it!
Now you can rinse and repeat as many times as you like for as many instrument groups as you like. This is where VCAs really shine and can help you fine-tune specific volume relationships of instruments (and groups therein) within the fluid environment of a mix.
If you’re new to using VCAs, allow me to offer some suggestions that will help you get the most out of employing them. I use VCAs after I’ve shed proverbial blood, sweat, and tears obsessing over all aspects of the mix. Only after I feel like I’ve worked out a solid approach to EQ, compression, effects, parallel processing, outboard gear, aux busses, and all automation do I start using VCAs. On a self-judged scale of 0 to 10, my mix should be hitting about a 9. Then, I’ll typically fold all drum tracks into a single VCA, all bass (synth, stringed, etc.), all electric guitars (minus the solos), all synths and keys, all background vocals, and then group the lead vocal(s) and instrument solo(s) if appropriate. In this case, I have six VCAs to control the entire mix from a high level, and I can automate gain (volume) rides as needed to get that extra bit of focus and excitement out of the mix.
Next month, I’ll be guiding you through how to use aux busses to make your mixes better at an earlier stage.
Blessings and keep rockin’! Namaste.