If you have a flattop acoustic or an electric 6-string gathering dust under the bed, here’s a thought: Why not convert it into a lap slide guitar? The project is simple and you can pull it off for about $25, including a fresh set of strings. Best of all, it’s completely reversible, so if you decide lap slide isn’t for you, no worries—you can return your instrument to its original state in a matter of minutes. But once you start exploring swampy lap slide licks and grooves—as well as the open tunings that make them possible—you may not want to turn back. And instead of acquiring yet another overdrive pedal, you might start collecting tone bars. (They’re very addictive, so don’t say we didn’t warn you.) We’ll dive deeper into bars in a moment.
Here’s a bit of background info, in case you’re new to the world of lap slide. This form of slide differs from bottleneck guitar in several important ways. For starters, the hand position for bottleneck resembles standard guitar—your thumb rests behind the neck and your fingers curl up over the strings from the treble side. And most guitarists are familiar with the hollow slide or bottleneck that encircles one of your fretting fingers.
Photo 1 — Photo by Andy Ellis
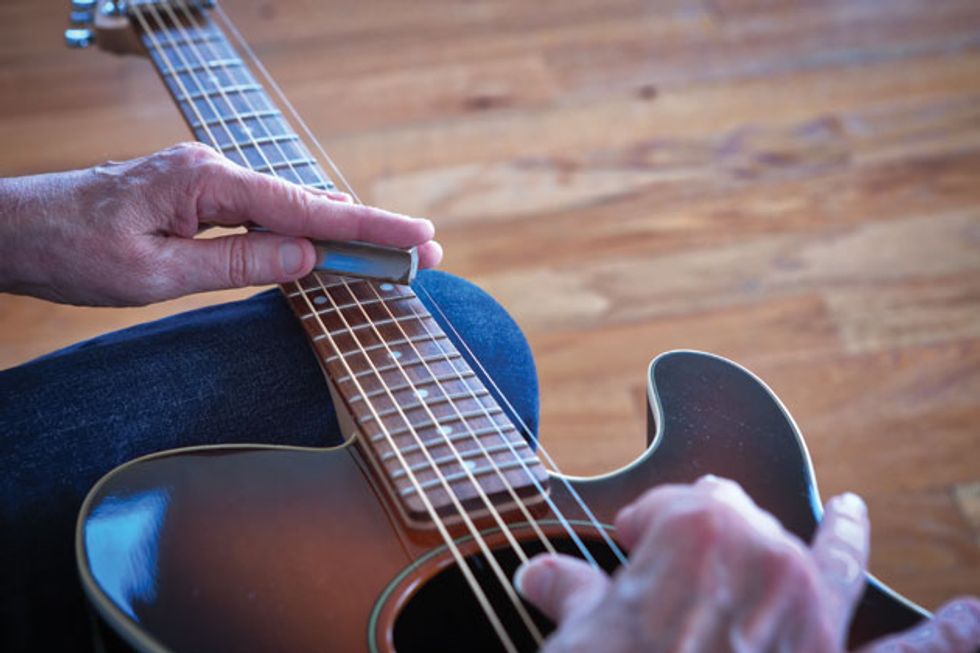
To play lap style, however, you lay the guitar flat and engage the strings from above using a solid cylindrical bar (sometimes called a “steel”) that’s gripped with what we’re used to thinking of as the fretting hand (Photo 1). Because the bar is heavier than a bottleneck slide, the strings are raised high off the neck—too high to allow any fretwork.
This overhand approach offers several benefits, including the ability to slant the bar to hit intervals that are impossible to reach with standard bottleneck slide. For example, with practice you’ll be able to use a slanted bar to play fluid major and minor sixths—a staple of Memphis soul, country, and blues. You’ll also be able to play blazing licks by rapidly alternating between “bar notes” and open strings, à la bluegrass Dobro. Here, speed comes from your wrist, not your fingers, and this opens up a host of possibilities for rapid riffage.
Almost all lap slide guitarists play fingerstyle—some with bare fingertips, some with fingerpicks—and like skilled bottleneck players, they use the picking hand for both plucking and muting the strings.
Photo 2 — Photo by Andy Ellis
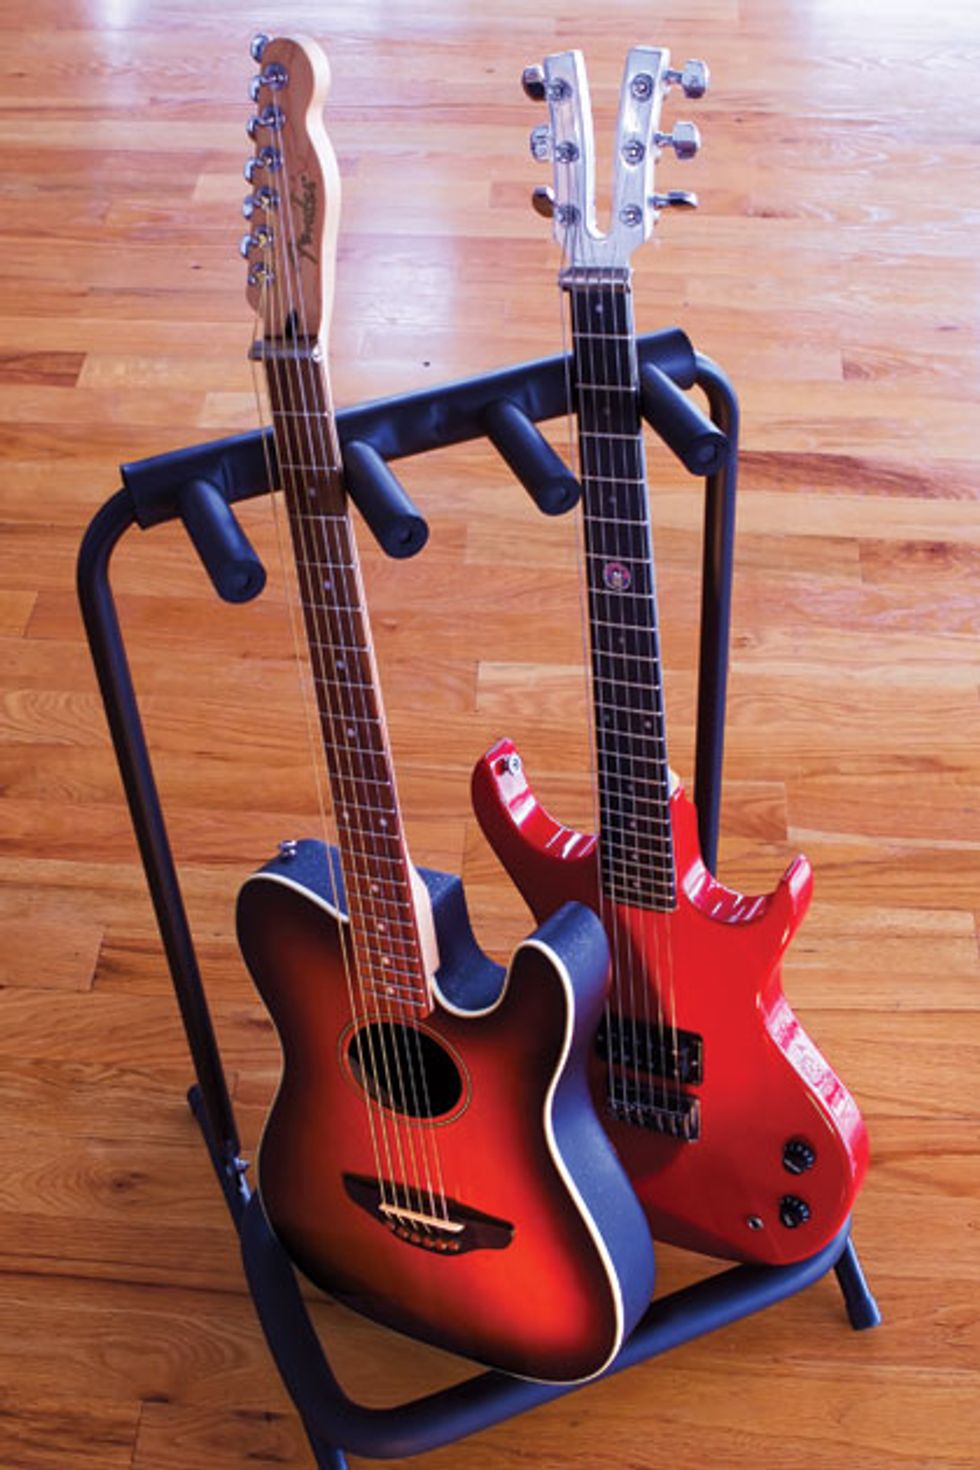
We’ll draft two guitars to demonstrate the conversion process: a Fender Telecoustic with a wood top and one-piece fiberglass body, and an early-’80s Kramer electric with an aluminum neck and Gibson 490T humbucker. Photo 2 gives you an idea of what your guitar will look like after it’s transformed. Notice how high the strings are raised off the fretboard, and also how widely the strings are spaced at the nut. In fact, string spacing is virtually uniform from bridge to headstock.
Photo 3 — Photo by Andy Ellis
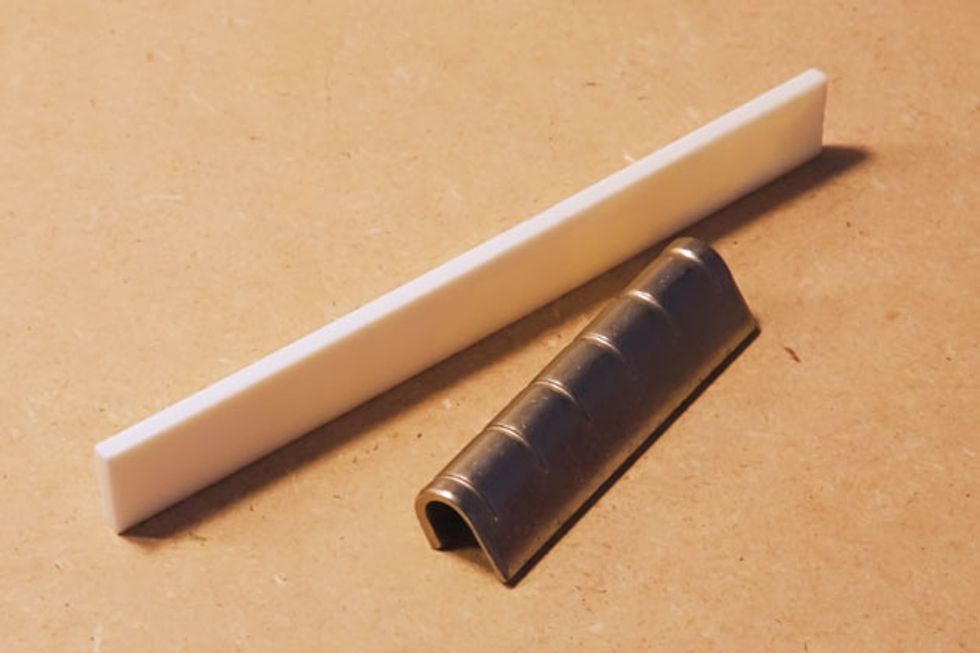
Flattop conversion. We’ll start with the acoustic guitar, which is a bit trickier than an electric. You’ll need two items for this project—an arched metal extension nut and a bone saddle blank (Photo 3). The extension nut sits atop the regular nut and jacks the strings up off the fretboard, and the tall bone saddle accomplishes the same task at the bridge. Your local music store might stock extension nuts, and they’re also available online. You can pick up the type shown here for as little as $4, and Grover makes a deluxe model for around $9.
Photo 4 — Photo by Andy Ellis
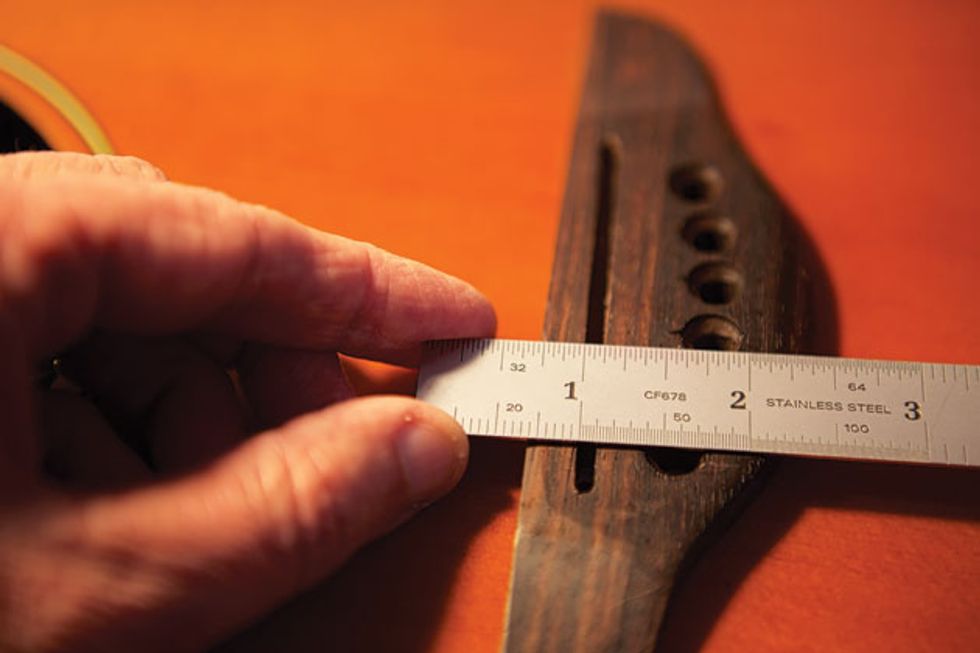
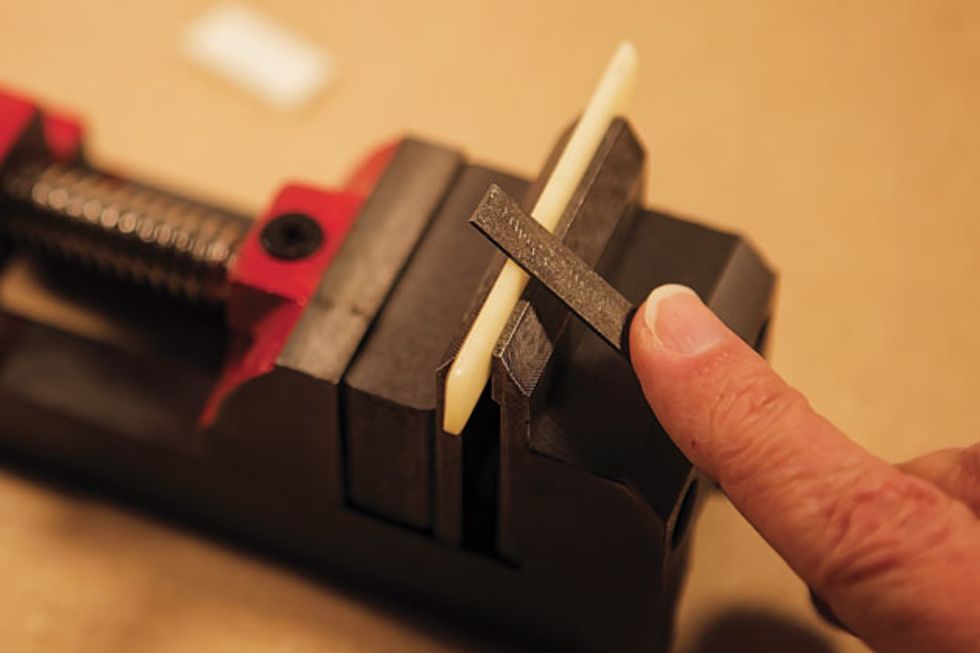
Taking stock. Before you buy a bone blank, you’ll need to do a little homework. Saddle slots are typically 1/8" (almost 3.5 mm) or 3/32" wide, and blanks are cut accordingly, so you’ll need to determine which size is right for your guitar.
First remove the strings and stash the bridge pins where they won’t get lost. Next, carefully lift the original saddle from the slot. If you’re lucky, you’ll be able to coax it out with your fingers, but if the saddle won’t budge, pad your guitar top with a few hand towels and use a small pair of pliers to gently rock the saddle out of its slot. Go slowly and carefully. If the fit is really snug, use an object with a narrow, pointed metal tip (a dental tool works well) to gradually pry the saddle up from one end of the slot. From there, use the pliers to complete the job. Save the original saddle so you can quickly reconfigure your guitar for fretting again in the future.
Now measure the saddle slot width (Photo 4). If the gap falls between 1/8" and 3/32", buy the thicker 1/8" saddle and plan to shave off a little width by rubbing the blank lengthwise along a piece of fine sandpaper or against a large flat file. Most saddle blanks are purposely oversized, so expect to sand down the width a little to fit the slot. A saddle blank will set you back less than $10 and is available from eBay vendors and luthier-supply outfits.
Note: Some blanks are curved on top to match the fretboard radius, but that’s not what we’re after here. Be sure to get a blank with a level top because you want the strings to rest in a flat plane and correctly match the playing surface of your bar.
Photo 5 — Photo by Andy Ellis
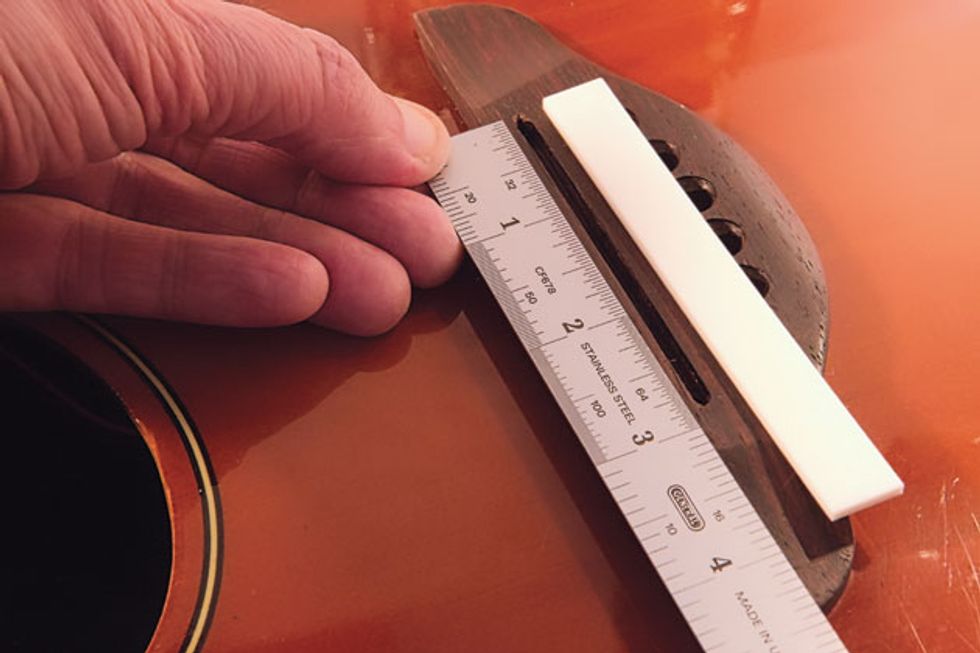
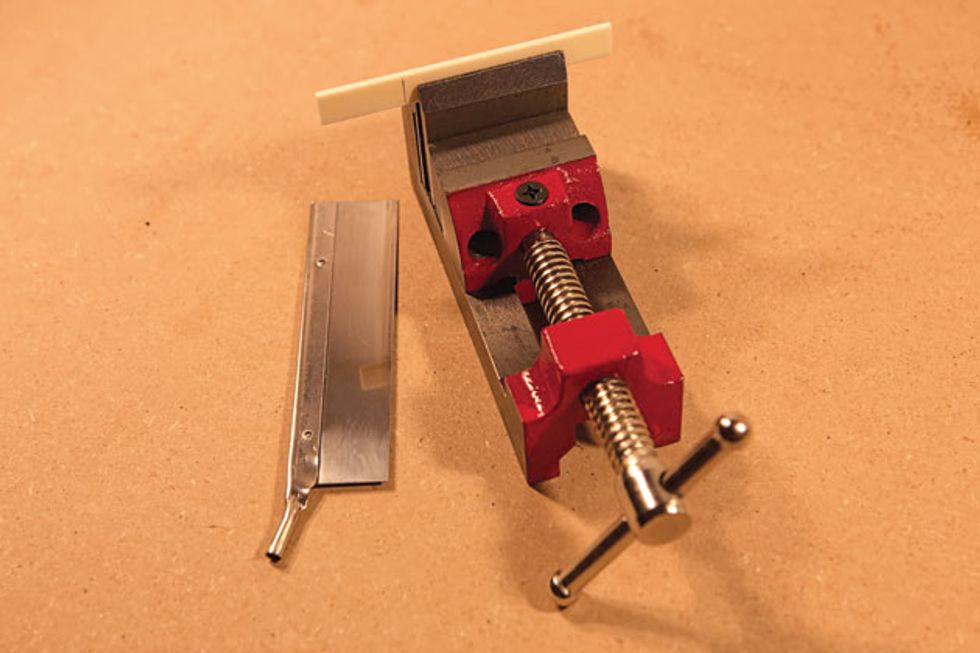
Shaping the saddle. Once you’ve got your saddle blank, you’ll need to trim it lengthwise. Measure the saddle slot (Photo 5), mark the saddle, and use a small hobby saw (Photo 6) to remove the excess length. Take your time and watch your fingers.
Photo 6 — Photo by Andy Ellis
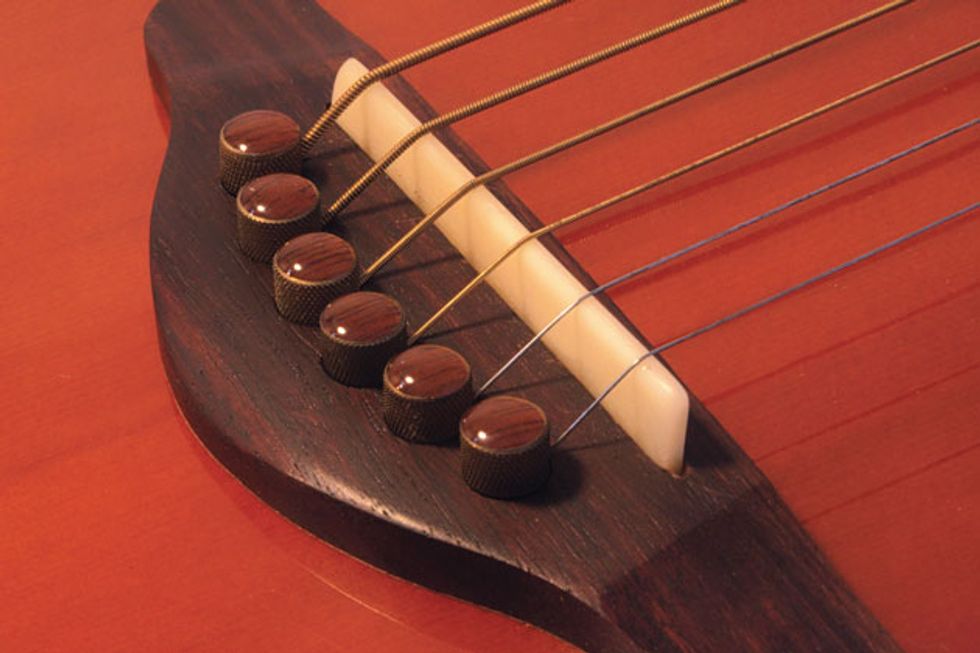
To prevent the string windings from separating and the plain strings from snapping as they emerge from the bridge-pin holes, put a gentle slope in the saddle’s rear side with a small flat file (Photo 7). Easy does it—you don’t have to remove much. Keep the saddle’s top surface level and maintain a crisp right angle on the leading edge where the strings head toward the soundhole.
Photo 7 — Photo by Andy Ellis
Protect your picking hand from any sharp edges by rounding off the two corners that will be exposed when the saddle sits in its slot. When you’re done, polish the saddle with 1500 grit micro-fine sandpaper and slip it into the bridge.
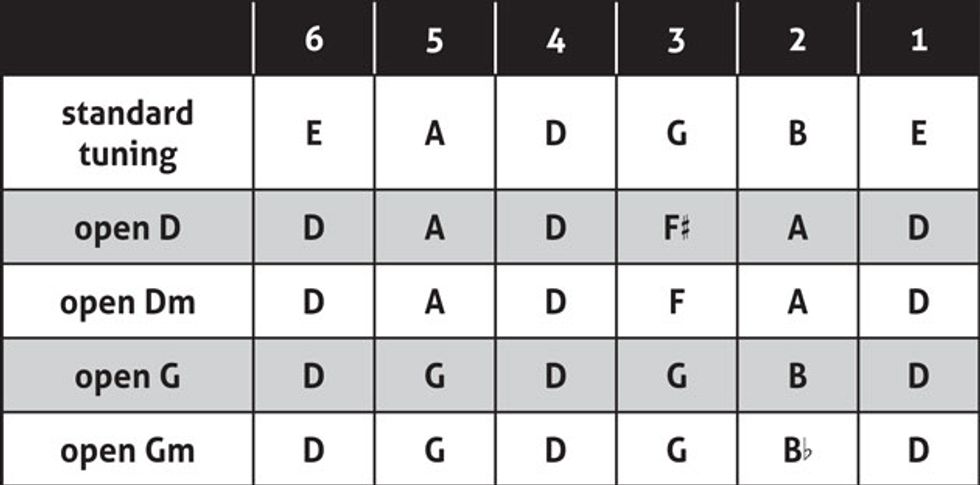
Stringing up. Lap slide guitarists often play in open G or open D (check out this story’s sidebar, which lists major and minor forms of both tunings). Because they’re pitched lower than standard tuning, you can slap a burly set of strings on your acoustic without fear of damaging it. A set of medium-gauge (.013-.056) acoustic strings sound great for these dropped tunings, and mediums do a better job of supporting the bar than a light set—another advantage of going up a gauge.
Photo 8 — Photo by Andy Ellis
Before you install the extension nut, put all six strings on the guitar. Tighten them enough so they align, yet leave some slack so you can lift the strings and slide the arched nut over the original nut. Photo 8 shows a finished saddle installed in the bridge. Notice how the strings hug the rounded back of the saddle as they rise through the top, and how they leave the saddle precisely at its perpendicular front edge.
Photo 9 — Photo by Andy Ellis
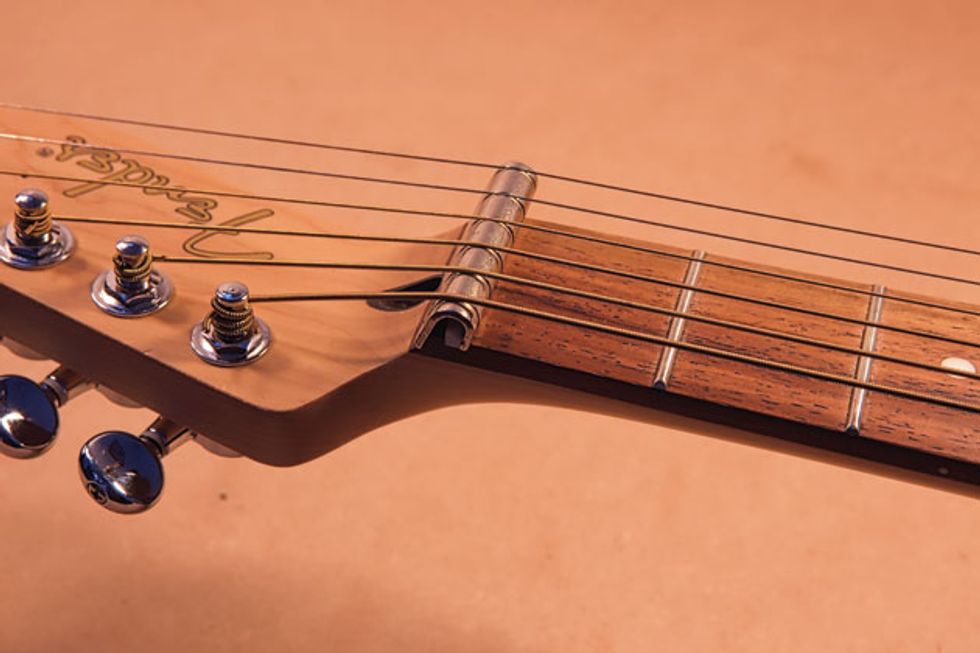
Installing the extension nut. Slip the extension nut in place and center it, drop the strings into their respective slots, and then add tension to both outside strings to hold the new nut in place. It will extend over each side of the fretboard—that’s okay (Photo 9).
Now choose an open tuning and bring the strings to pitch. Don’t worry if string tension shifts the arched nut slightly to one side or the other, that’s normal. Gently tap the sides of the extension nut so the strings run parallel to the fretboard.
Lap slide tunings abound, but a solid place to start is with open D and open G—the classic blues and rock slide tunings—referenced here to standard. It’s easy to transform both these major tunings to their respective minor versions: To turn open D into open Dm, simply drop the 3rd string a half-step from F# to F. Likewise for open Gm, drop the 2nd string from B to Bb.
Yay, we’re done—it’s time to play! For inspiration, check out “The Slide Guitar of Kelly Joe Phelps.” This short video offers highlights from a superb HomeSpun instructional DVD, and it’s a great way to glimpse the potential of lap slide and see how it differs from bottleneck.
Once your guitar settles in for a few days and you sense it can handle a little extra tension, try increasing the gauges of the 1st and 2nd strings—the two plain ones—to .014 and .018, respectively. This increased girth helps support the bar and adds more booty to your melody notes.
Photo 10 — Photo by Andy Ellis
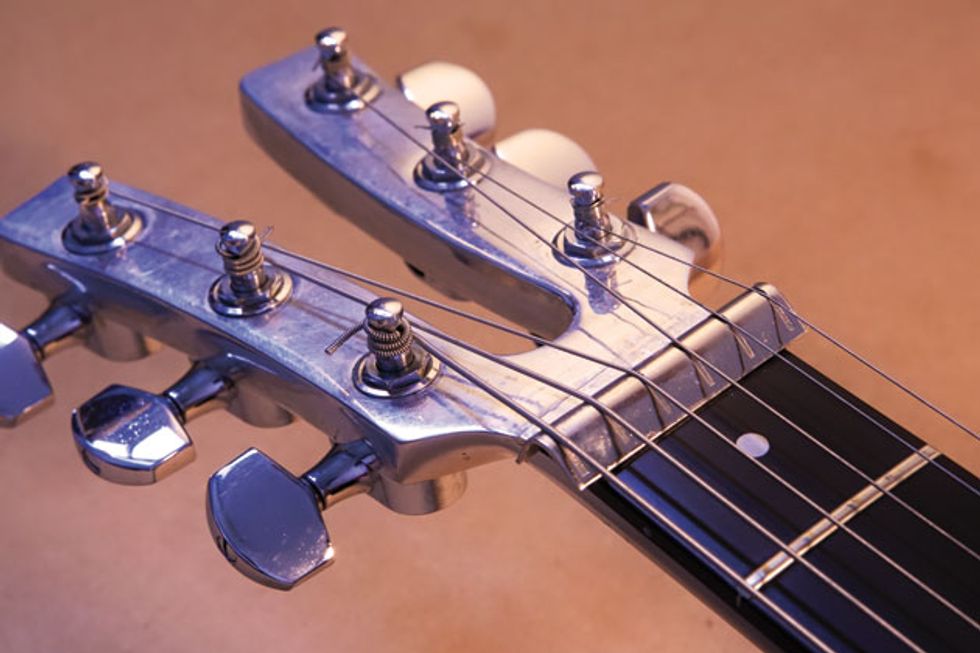
Electric conversion. This is easy, and all you need is the metal extension nut and a tool to adjust your saddles if they offer individual height adjustment. We’ll start by restringing with heavier strings—a .012 or .013 set is ideal. As before with the acoustic, put on all six strings and add enough tension to align them, but leave enough slack so you can slip the arched nut over the original one. Follow the previous instructions for installing the nut. After it’s in place (Photo 10), tighten all the strings to eliminate any slack, but don’t bring them to pitch quite yet.
Photo 11 — Photo by Andy Ellis
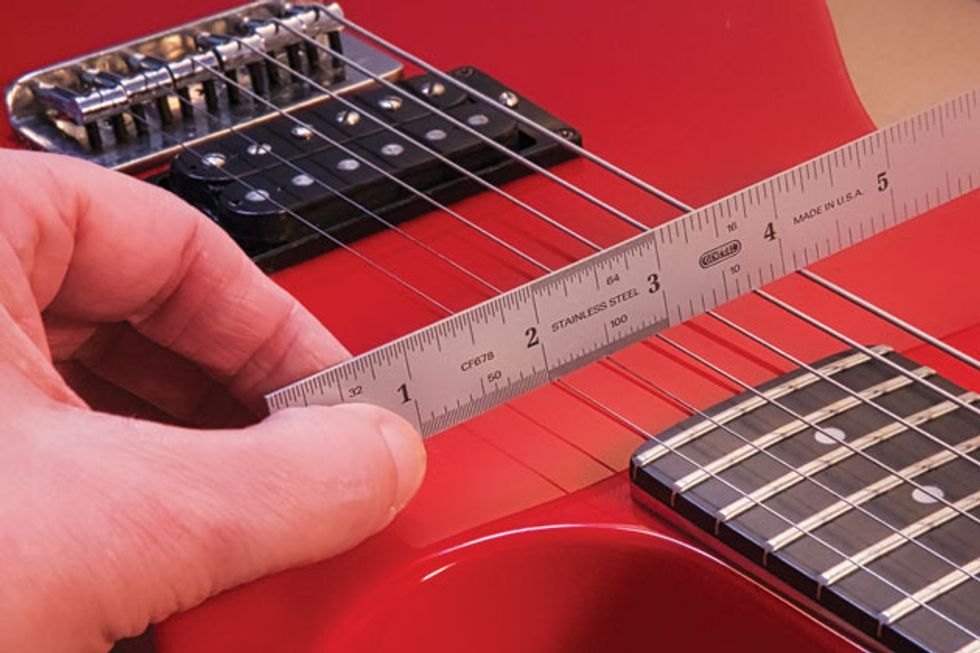
Once the extension nut is secured by string tension, it’s time to focus on the bridge. Like a Strat, our project Kramer has individual height adjustment for each saddle. If your electric has a similar bridge, raise the saddles as high as they can go while still remaining stable. Keep the strings on a flat plane and use a ruler to check your work (Photo 11). As with the bone acoustic saddle, we want to create a level playing surface for the bar.
If you have a Tune-o-matic bridge or a similar unit with fixed saddle height, raise the entire bridge about 1/2" off the body. Keep an eye on the posts—they need to penetrate the bridge enough to keep it stable, so don’t crank it too high. Tune-o-matic bridges are curved to allow their saddles to follow the fretboard radius, and while this is great for fretting, it isn’t ideal for lap slide. However, it won’t be a deal-breaker because the strings will begin to flatten out as they head toward the extension nut.
Tip: If you decide you really love playing lap slide, you can carefully lower the center strings on a TOM bridge to put them on the same plane as the 1st and 6th strings. Using nut slot files, simply deepen the notches holding the center strings. Again, use a ruler to gauge your progress.
After raising the saddles or bridge, you’re ready to tune up and center the extension nut. Finally, raise your pickups a bit to bring them closer to the strings. Choose an open tuning, plug into a grinding amp, and let those licks flow. If you have adjustable pickup pole pieces, listen to the string-to-string balance and tweak accordingly. To see just how gnarly you can get on electric lap slide, watch Ben Harper destroy “Voodoo Chile” before a frenzied festival crowd.
Photo 12 — Photo by Andy Ellis
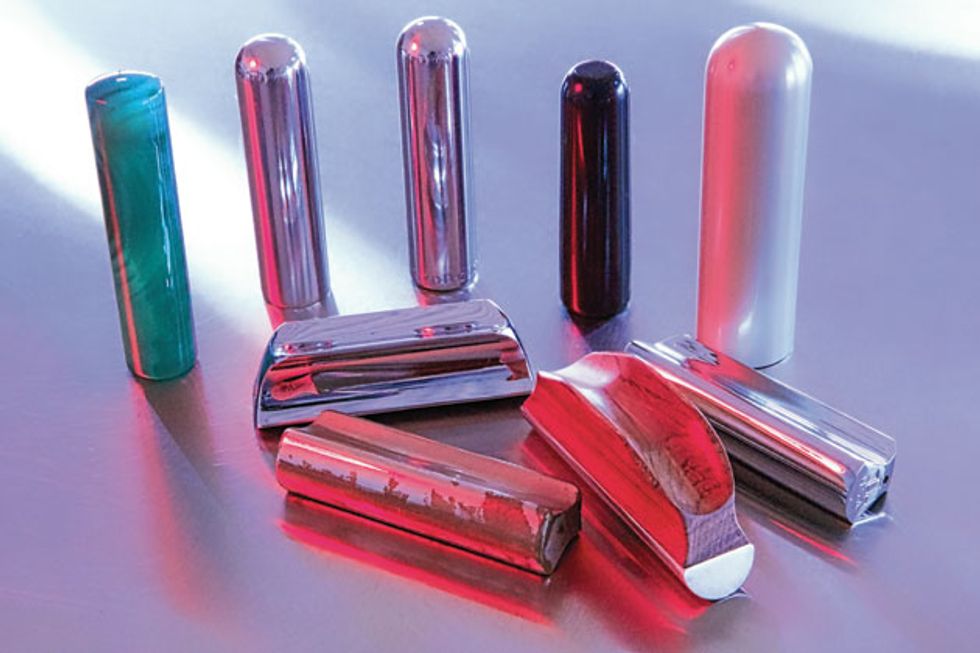
Bar mania! Tone bars come in different shapes, weights, and materials, including chrome-plated brass, stainless steel, glass, ceramic, polished stone, and anodized aluminum, and Photo 12 illustrates some of the many available options. At the center, surrounded by its modern variants, is the venerable Stevens bar. Preferred by most bluegrass Dobro players and many Weissenborn guitarists, it has a rounded playing surface and grooved sides (or “rails”) to facilitate gripping. The back row includes two bullet-nose chromed cylinders favored by pedal steel guitarists. To their right is a vintage Bakelite beauty dating from the Hawaiian guitar craze of the 1920s. Part of the joy of lap slide lies in experimenting with alternative materials, such as the polished agate bar on the left and the massive-yet-lightweight aircraft aluminum bar on the right.
A rule of thumb: The heavier the bar, the more bass and midrange you’ll get from your strings, but you lose agility with increased weight. Glass, ceramic, and polished stone bars are often lighter than their big stainless-steel counterparts, so they can be easier to move quickly along the strings. Glass may not sound as punchy as steel or brass, but it produces singing highs that work particularly well with distortion.
As with strings and picks, settling on a favorite bar requires a lot of trial and error and many hours of playing. But that’s the whole point, right? Just grab one and see where it leads you. A new sonic world awaits.




![Rig Rundown: Russian Circles’ Mike Sullivan [2025]](https://www.premierguitar.com/media-library/youtube.jpg?id=62303631&width=1245&height=700&quality=70&coordinates=0%2C0%2C0%2C0)
