This handy tool can be a guitarist’s best friend.
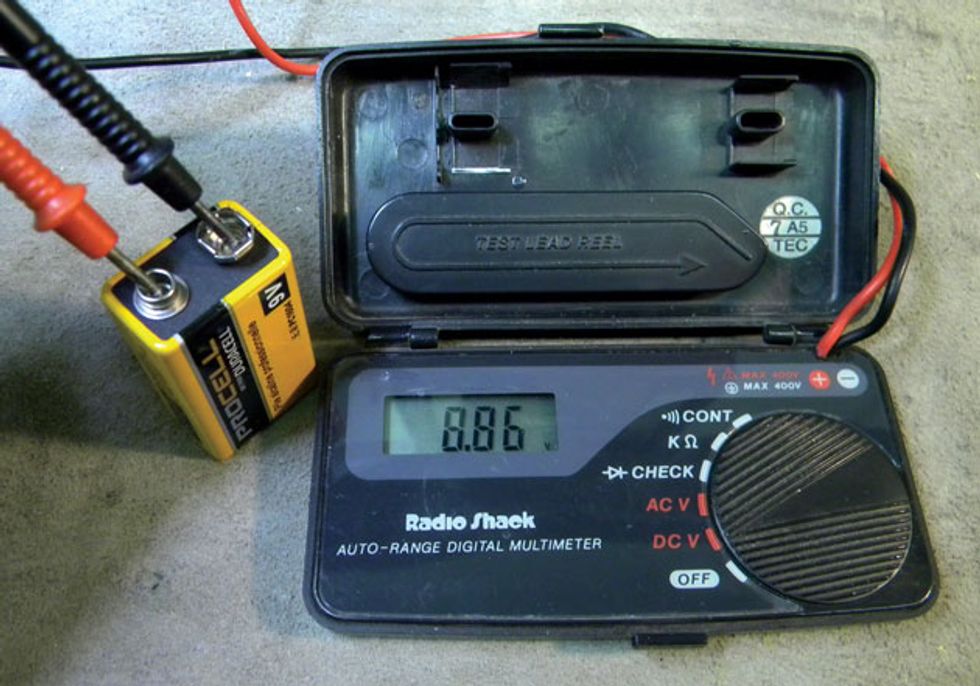
A digital multimeter (Photo 1) is the perfect tool for testing many components on a guitar or bass. We use them in the shop for testing pickups, output jacks, switches, and batteries, and you can also use them for testing cables and wiring harnesses. Best of all, you don’t need to spend a fortune to get a good multimeter. I still use the one I bought at Radio Shack 23 years ago, and such luthier supply companies as Allparts and Stewart-MacDonald have excellent multimeters designed for working on a guitar, priced from $25 to $35.
Let’s explore five ways to use a multimeter:
• Testing pickups (impedance and functionality).
• Mapping out a switch.
• Testing a guitar cable.
• Identifying the lugs on a TRS output jack.
• Checking battery life.
Testing pickups. On many occasions I’ve used a multimeter before buying a used pickup. I learned the importance of this the hard way when I bought a used pickup at a guitar show, only to discover it didn’t work when I got it home. If I’d brought a multimeter with me, I could have tested the pickup on the spot and saved some money.
It’s a simple process to test a pickup. Set the multimeter to the ohm setting and touch its red test lead to the pickup’s primary lead (hot) and touch the black test lead to the pickup’s ground wire.
Photo 2
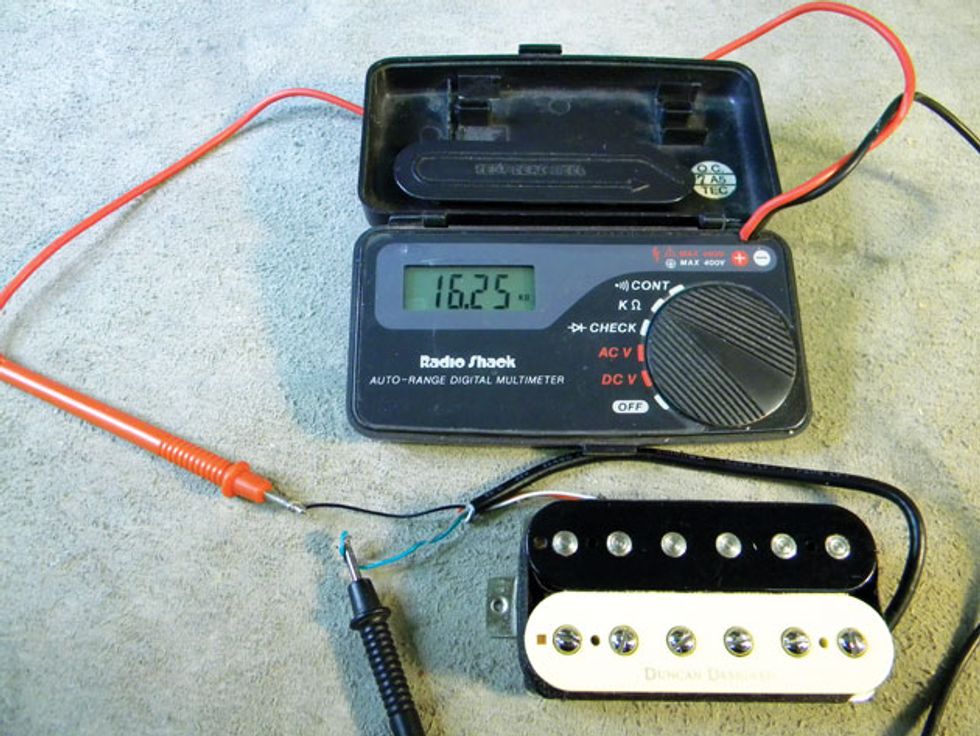
If you’re testing a humbucker with four conductors, make sure that the wires are properly attached to each other. For example, before you try to measure the impedance on a Seymour Duncan humbucker (Photo 2), make sure that the red and white leads are connected to each other and isolated from any other connection, and the green and bare leads are also connected to each other. Touch the red test lead from the multimeter to the black wire—the pickup’s primary lead. Touch the multimeter’s black test lead to the green and bare ground wires on the pickup. This should give you an accurate impedance measurement.
To make sense of a particular model pickup’s reading, check with the manufacturer for its exact impedance. If the impedance measurement you take is significantly lower than the manufacturer’s rating, then you know there’s something wrong with the pickup.
only to find you have no signal?
A multimeter can tell you a lot about a pickup before you wire it up. For example, humbuckers typically measure at around 8k ohms for a vintage-style pickup to as much as 25k for a high-output pickup. The 16.25k reading we see in Photo 2 indicates this is a hot humbucker. Single-coil pickups can range from 6k (vintage) up to 16k (high-output).
Mapping out a switch. If you don’t have a diagram to follow, wiring a new switch can be frustrating. An easy way to save time when tackling a wiring project is to use your multimeter to map out the switch. Simply set your multimeter to the continuity setting, which is marked with a speaker or soundwave icon. This setting will produce an audible tone to let you know when a circuit is closed.
Photo 3
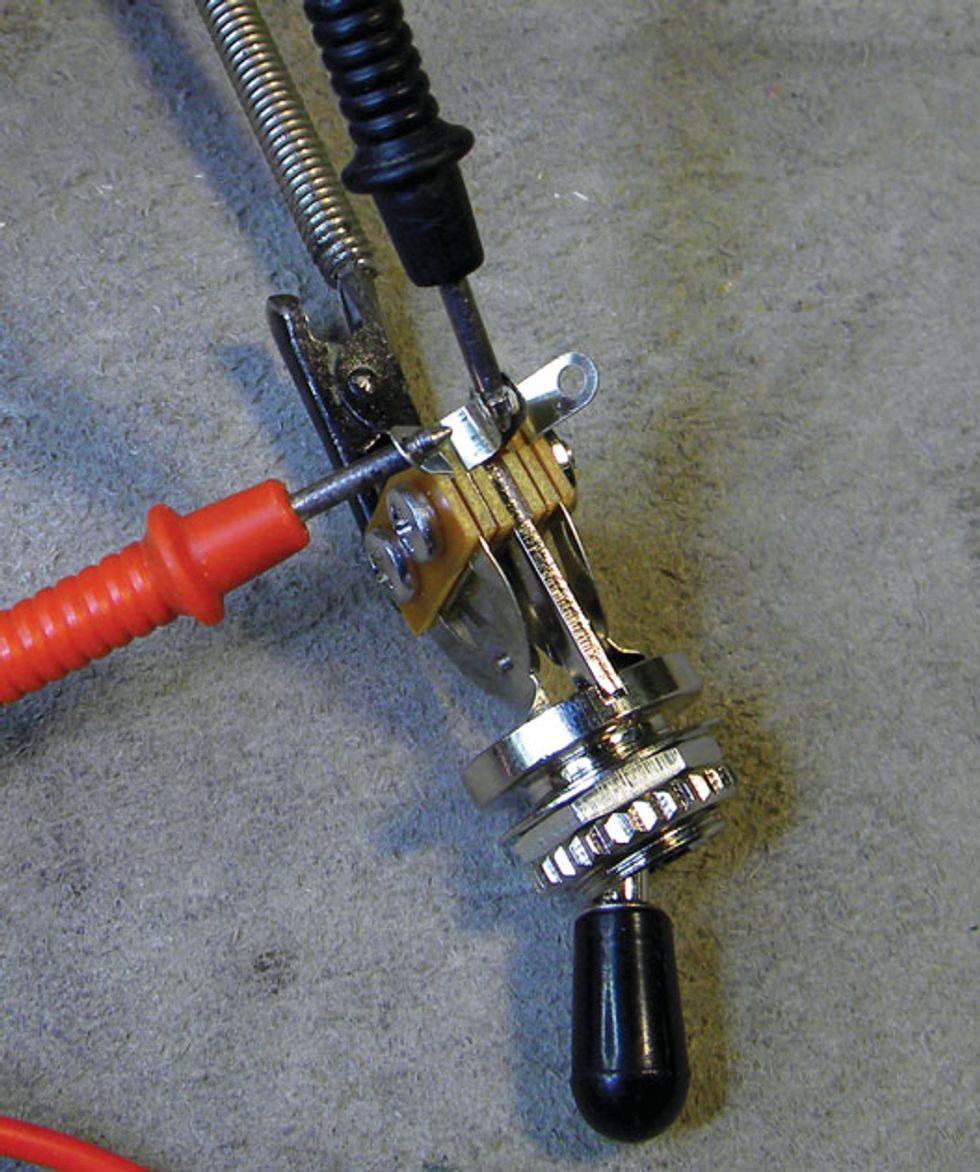
On a 3-way toggle switch, for example, touch either one of the side lugs with one of the test leads from the multimeter, then touch the middle lug—that’s typically the output—with the other test lead (Photo 3). If you hear a tone, then you know the switch is on in that position. If there’s no tone in that position, the switch is off.
Photo 4
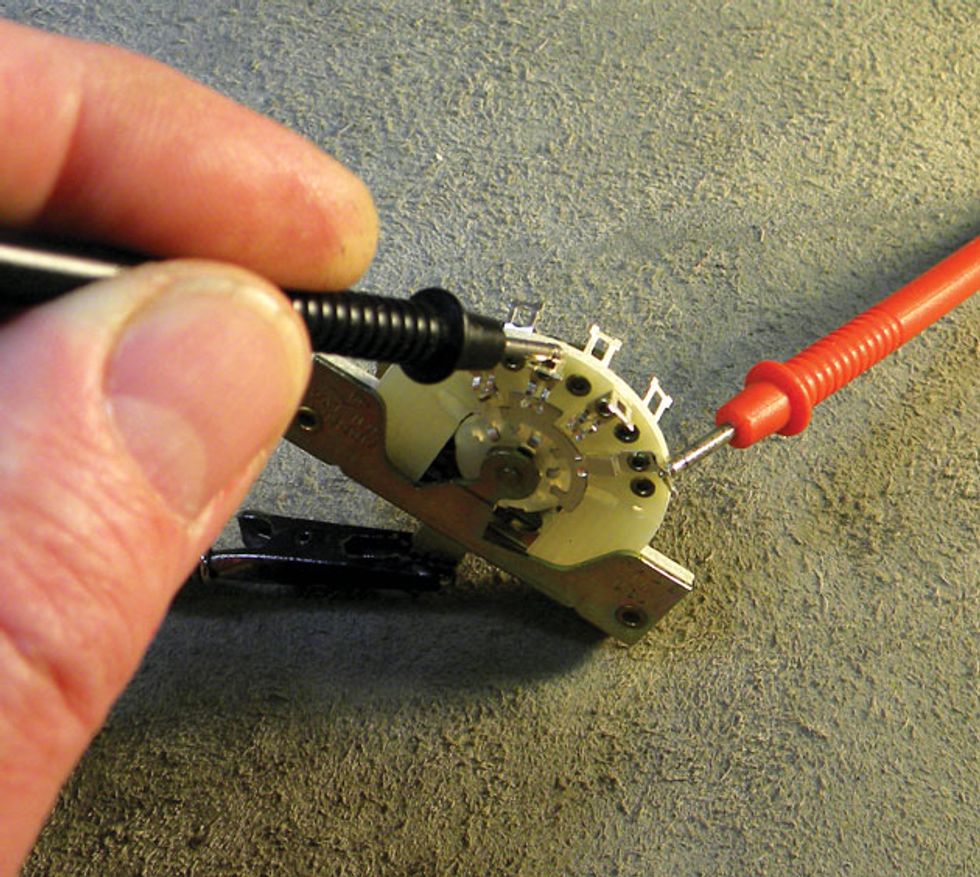
It’s a similar process for a Strat-style 5-way blade switch (Photo 4). Touch the last lug on the switch—this will be the output lug—with one of the test leads from the multimeter. Then touch each of the other lugs with the other test lead and listen for the tone. By carefully working through each switch position, you’ll be able to locate its corresponding input lug. As you map a switch’s connections, draw a diagram so you’ll have something to refer to in the future.
Testing a guitar cable. Have you ever arrived at a gig or rehearsal only to find you have no signal? The worst part is not knowing where the problem lies. Is the amp blown? Does the guitar have a loose output jack? Chances are it’s the guitar cable—that’s the place to start troubleshooting. The good news is, it’s quick and easy to test your cable with a multimeter.
Photo 5
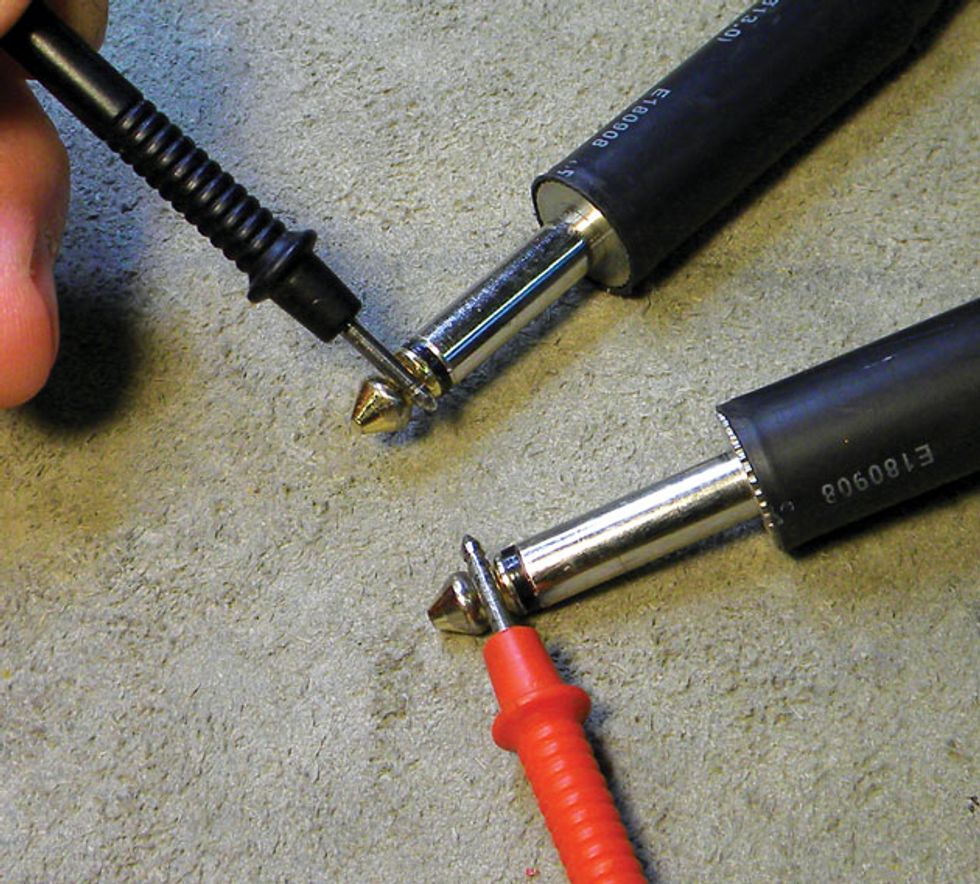
Set your multimeter to test continuity, then touch the tip of both cable plugs with the test leads (Photo 5). If you hear a solid tone, you have a connection. But don’t stop there: Move the cable around a little to see if it has a short, and test it again. If after shaking the cable and testing it several more times you continue to get a solid tone, you can assume the cable is good. However, if the test tone is intermittent you’ll know there’s a problem. You should also test the ground on the cable. Simply touch the shaft of both plugs with the test leads and listen for a solid tone.
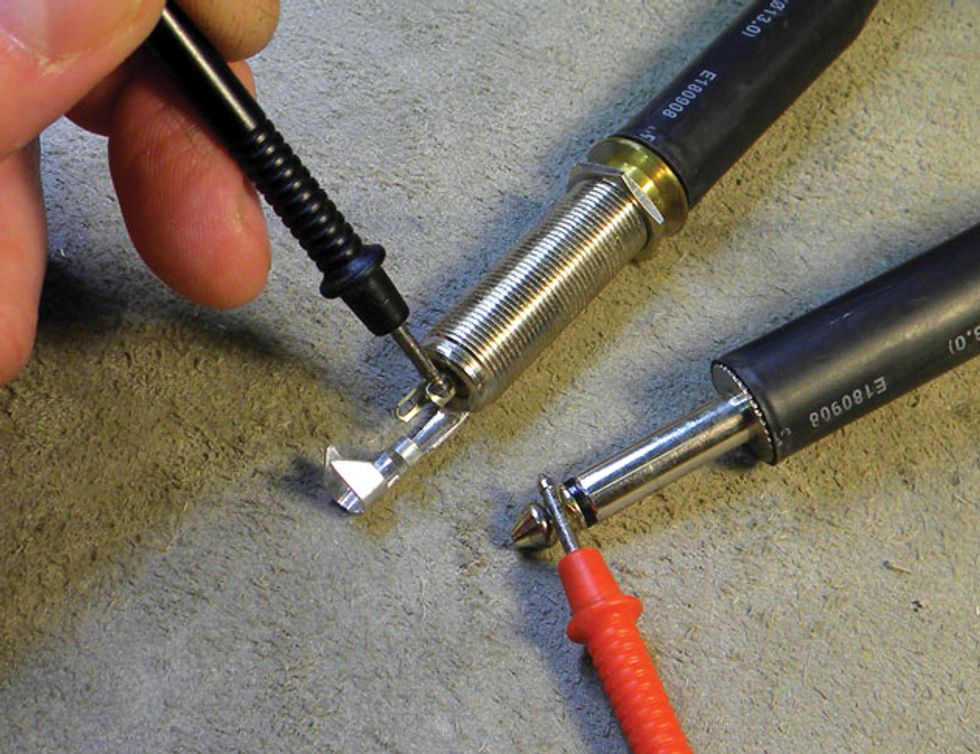
Testing a TRS jack. The output jacks on passive guitars are pretty simple—they have one lug for the primary lead and one for the ground. However, output jacks for an active system have three lugs. Called a tip/ring/sleeve (TRS) jack, these are common in electric guitars with active pickups or onboard circuitry, and are found in most acoustic guitars equipped with an internal preamp. The tip is for the primary lead, the sleeve is for a battery switch that turns the battery on when a cable is plugged into it, and there’s also a ground to complete the circuit for the electronics.
Sometimes the lugs for the tip and sleeve are different lengths, which makes them easier to identify, but many TRS jacks have the same length lugs with no markings to let you know which one is for the battery and which one is for the primary lead. This can be problematic if you’re installing a new pickup system into an acoustic guitar, adding active electronics to a solidbody, or troubleshooting an existing setup. But once again, the multimeter makes it easy to sort this out.
Photo 6
First plug a guitar cable into the output jack and switch your multimeter to the continuity setting. Touch one of the test leads to the tip of the guitar cable’s exposed plug and touch the other test lead to one of the lugs on the TRS output jack (Photo 6). Listen for a tone to identify which lug makes the connection. The lug that gives you a tone while you’re touching the plug tip is where you’ll attach the primary lead from a pickup or preamp.
Next, while still touching the plug’s tip with the test lead, touch the other lug on the jack. There should be no tone. Keep your test lead on that lug and move the other test lead from the plug’s tip to its shaft. You should hear a tone. This identifies the lug you’re currently touching as the battery switch for the active electronics in your guitar.
Testing batteries. Given the amount of battery-operated gear most guitarists have in their rig, it can be a challenge to stay on top of available battery power. You don’t want to arrive at a gig with a dying battery in a stomp, but you certainly don’t want to swap out all the batteries in your gear before every show. Some may still have plenty of life in them, so why not do a battery check to get the facts? (Of course, once you reach a certain number of pedals, it makes economic and ecological sense to get a powered pedalboard and be done with batteries.)
In the early days of rock ’n’ roll, guitarists would test a 9-volt battery by touching its terminals to their tongues—not a very accurate (or sanitary) approach. If you received a mild shock, the battery was deemed gig-worthy. The best way to test a battery is with a multimeter. With it, you can test just about any type of battery: AA, 9-volt, lithium, or even a disc battery.
Photo 7
Set the multimeter to the DC V setting (and if your multimeter offers it, to the appropriate voltage range). Now touch the red test lead to the plus battery terminal and the black test lead to the minus terminal. The multimeter will display the battery’s voltage (Photo 7). If you’re testing a 9-volt battery and the display on the multimeter reads less than 9 volts, the battery is weak. If the battery measures 9 volts or more, you’re good to go.
An amp-in-the-box pedal designed to deliver tones reminiscent of 1950s Fender Tweed amps.
Designed as an all-in-one DI amp-in-a-box solution, the ZAMP eliminates the need to lug around a traditional amplifier. You’ll get the sounds of rock legends – everything from sweet cleans to exploding overdrive – for the same cost as a set of tubes.
The ZAMP’s versatility makes it an ideal tool for a variety of uses…
- As your main amp: Plug directly into a PA or DAW for full-bodied sound with Jensen speaker emulation.
- In front of your existing amp: Use it as an overdrive/distortion pedal to impart tweed grit and grind.
- Straight into your recording setup: Achieve studio-quality sound with ease—no need to mic an amp.
- 12dB clean boost: Enhance your tone with a powerful clean boost.
- Versatile instrument compatibility: Works beautifully with harmonica, violin, mandolin, keyboards, and even vocals.
- Tube preamp for recording: Use it as an insert or on your bus for added warmth.
- Clean DI box functionality: Can be used as a reliable direct input box for live or recording applications.
See the ZAMP demo video here: https://www.youtube.com/watch?v=xJp0jE6zzS8
Key ZAMP features include:
- True analog circuitry: Faithfully emulates two 12AX7 preamp tubes, one 12AX7 driver tube, and two 6V6 output tubes.
- Simple gain and output controls make it easy to dial in the perfect tone.
- At home, on stage, or in the studio, the ZAMP delivers cranked tube amp tones at any volume.
- No need to mic your cab: Just plug in and play into a PA or your DAW.
- Operates on a standard external 9-volt power supply or up to 40 hours with a single 9-volt battery.
The ZAMP pedal is available for a street price of $199 USD and can be purchased at zashabuti.com.
Mooer's Ocean Machine II is designed to bring superior delay and reverb algorithms, nine distinct delay types, nine hi-fidelity reverb types, tap tempo functionality, a new and improved looper, customizable effect chains, MIDI connectivity, expression pedal support, and durable construction.
Similarly to the original, the Ocean Machine II offers two independent delay modules, each with nine different delay types of up to two seconds, including household names such as digital, tape, and echo delays, as well as more abstract options, such as galaxy, crystal, and rainbow. A high-fidelity reverb module complements these delays with nine reverb types, as well as a shimmer effect. Each delay and reverb effect can also be ‘frozen,’ creating static ambient drones, an effect that sounds particularly impressive considering the pedal’s DSP upgrades.
While the original Ocean Machine’s looping capabilities provided just 44 seconds of loop storage, the new addition features an impressive 120 seconds. To experiment with this feature, along with OceanMachine II’s other sonic capabilities, users can use an intuitive LCD screen along with 12 knobs (four for each delay and reverb module) to easily adjust parameters within the device’s ‘Play Mode.’ Three footswitches are also provided to facilitate independent effect toggling, tap tempo control, looper interfacing, and a preset selector.
Once the guitarist has crafted an interesting effect chain, they can save their work as a preset and enter ‘Patch Mode,’ in which they can toggle between saved settings with each of the three footswitches. In total, the Ocean Machine II provides eight preset storage banks, each of which supports up to threepresets, resulting in a total of 24 save slots.
The pedal’s versatility is further enhanced by its programmable parallel and serial effect chain hybrid, a signature element of Devin Townsend’s tone creation. This feature allows users to customize the order of effects, providing endless creative possibilities. Further programming options can be accessed through the LED screen, which impressively includes synchronizable MIDI connectivity, a feature that was absent in the original Ocean Machine.
In addition to MIDI, the pedal supports various external control systems, including expression pedal input through a TRS cable. Furthermore, the pedal is compatible with MOOER's F4 wireless footswitch, allowing for extended capabilities for mapping presets and other features. A USB-C port is also available for firmware updates, ensuring that the pedal remains up-to-date with the latest features and improvements.
Considering the experimental nature of Devin Townsend’s performances, MOOER has also gone above and beyond to facilitate the seamless integration of Ocean Machine II into any audio setup. The device features full stereo inputs and outputs, as well as adjustable global EQ settings, letting users tailor their sound to suit different environments. Guitarists can also customize their effect chains to be used with true bypass or DSP (buffered) bypass, depending on their preferences and specific use cases.
Overall, Ocean Machine II brings higher-quality delay and reverb algorithms, augmented looping support, and various updated connections to Devin Townsend’s original device. As per MOOER’s typical standard, the pedal is engineered to withstand the rigors of touring and frequent use, allowing guitars to bring their special creations and atmospheric drones to the stage.
Key Features
- Improved DSP algorithms for superior delay and reverb quality
- Nine distinct delay types that support up to 2 seconds of delay time: digital, analog, tape, echo,liquid, rainbow, crystal, low-bit, and fuzzy delays
- Nine hi-fidelity reverb types: room, hall, plate, distorted reverb, flanger reverb, filter reverb,reverse, spring, and modulated reverb
- Freeze feedback feature, supported for both delay and reverb effects
- Tap tempo footswitch functionality
- New and improved looper supporting up to 120 seconds of recording time, along withoverdubbing capabilities, half-speed, and reverse effects.
- Customizable order of effects in parallel or series chains
- Flexible bypass options supporting both true bypass and DSP bypass
- Large LCD screen, controllable through twelve easy-to-use physical knobs for real-time parameter adjustments.
- Adjustable Global EQ Settings
- Full stereo inputs and outputs
- Synchronizable and mappable MIDI In and Thru support
- USB-C port for firmware updates
- External expression pedal support via TRS cable
- Support for the MOOER F4 wireless footswitch (sold separately)
- Designed for durability and reliability in both studio and live environments.
The Ocean Machine will be available from official MOOER dealers and distributors worldwide on September 10, 2024.
For more information, please visit mooeraudio.com.
MOOER Ocean Machine II Official Demo Video - YouTube
You may know the Gibson EB-6, but what you may not know is that its first iteration looked nothing like its latest.
When many guitarists first encounter Gibson’s EB-6, a rare, vintage 6-string bass, they assume it must be a response to the Fender Bass VI. And manyEB-6 basses sport an SG-style body shape, so they do look exceedingly modern. (It’s easy to imagine a stoner-rock or doom-metal band keeping one amid an arsenal of Dunables and EGCs.) But the earliest EB-6 basses didn’t look anything like SGs, and they arrived a full year before the more famous Fender.
The Gibson EB-6 was announced in 1959 and came into the world in 1960, not with a dual-horn body but with that of an elegant ES-335. They looked stately, with a thin, semi-hollow body, f-holes, and a sunburst finish. Our pick for this Vintage Vault column is one such first-year model, in about as original condition as you’re able to find today. “Why?” you may be asking. Well, read on....
When the EB-6 was introduced, the Bass VI was still a glimmer in Leo Fender’s eye. The real competition were the Danelectro 6-string basses that seemed to have popped up out of nowhere and were suddenly being used on lots of hit records by the likes of Elvis, Patsy Cline, and other household names. Danos like the UB-2 (introduced in ’56), the Longhorn 4623 (’58), and the Shorthorn 3612 (’58) were the earliest attempts any company made at a 6-string bass in this style: not quite a standard electric bass, not quite a guitar, nor, for that matter, quite like a baritone guitar.
The only change this vintage EB-6 features is a replacement set of Kluson tuners.
Photo by Ken Lapworth
Gibson, Fender, and others during this era would in fact call these basses “baritone guitars,” to add to our confusion today. But these vintage “baritones” were all tuned one octave below a standard guitar, with scale lengths around 30", while most modern baritones are tuned B-to-B or A-to-A and have scale lengths between 26" and 30".)
At the time, those Danelectros were instrumental to what was called the “tic-tac” bass sound of Nashville records produced by Chet Atkins, or the “click-bass” tones made out west by producer Lee Hazlewood. Gibson wanted something for this market, and the EB-6 was born.
“When the EB-6 was introduced, the Bass VI was still a glimmer in Leo Fender’s eye.”
The 30.5" scale 1960 EB-6 has a single humbucking pickup, a volume knob, a tone knob, and a small, push-button “Tone Selector Switch” that engages a treble circuit for an instant tic-tac sound. (Without engaging that switch, you get a bass-heavy tone so deep that cowboy chords will sound like a muddy mess.)
The EB-6, for better or for worse, did not unseat the Danelectros, and a November 1959 price list from Gibson hints at why: The EB-6 retailed for $340, compared to Dano price tags that ranged from $85 to $150. Only a few dozen EB-6 basses were shipped in 1960, and only 67 total are known to have been built before Gibson changed the shape to the SG style in 1962.
Most players who come across an EB-6 today think it was a response to the Fender Bass VI, but the former actually beat the latter to the market by a full year.
Photo by Ken Lapworth
It’s sad that so few were built. Sure, it was a high-end model made to achieve the novelty tic-tac sound of cheaper instruments, but in its full-voiced glory, the EB-6 has a huge potential of tones. It would sound great in our contemporary guitar era where more players are exploring baritone ranges, and where so many people got back into the Bass VI after seeing the Beatles play one in the 2021 documentary, Get Back.
It’s sadder, still, how many original-era EB-6s have been parted out in the decades since. Remember earlier when I wrote that our Vintage Vaultpick was about as original as you could find? That’s because the model’s single humbucker is a PAF, its Kluson tuners are double-line, and its knobs are identical to those on Les Paul ’Bursts. So as people repaired broken ’Bursts, converted other LPs to ’Bursts, or otherwise sought to give other Gibsons a “Golden Era” sound and look ... they often stripped these forgotten EB-6 basses for parts.
This original EB-6 is up for sale now from Reverb seller Emerald City Guitars for a $16,950 asking price at the time of writing. The only thing that isn’t original about it is a replacement set of Kluson tuners, not because its originals were stolen but just to help preserve them. (They will be included in the case.)
With so few surviving 335-style EB-6 basses, Reverb doesn’t have a ton of sales data to compare prices to. Ten years ago, a lucky buyer found a nearly original 1960 EB-6 for about $7,000. But Emerald City’s $16,950 asking price is closer to more recent examples and asking prices.
Sources: Prices on Gibson Instruments, November 1, 1959, Tony Bacon’s “Danelectro’s UB-2 and the Early Days of 6-String Basses” Reverb News article, Gruhn’s Guide to Vintage Guitars, Tom Wheeler’s American Guitars: An Illustrated History, Reverb listings and Price Guide sales data.
An '80s-era cult favorite is back.
Originally released in the 1980s, the Victory has long been a cult favorite among guitarists for its distinctive double cutaway design and excellent upper-fret access. These new models feature flexible electronics, enhanced body contours, improved weight and balance, and an Explorer headstock shape.
A Cult Classic Made Modern
The new Victory features refined body contours, improved weight and balance, and an updated headstock shape based on the popular Gibson Explorer.
Effortless Playing
With a fast-playing SlimTaper neck profile and ebony fretboard with a compound radius, the Victory delivers low action without fret buzz everywhere on the fretboard.
Flexible Electronics
The two 80s Tribute humbucker pickups are wired to push/pull master volume and tone controls for coil splitting and inner/outer coil selection when the coils are split.
For more information, please visit gibson.com.