
Recently a client brought an older Fender Telecaster into the shop for a setup. The action was really high, but the saddles had run out of adjustment and couldn't drop any lower. After careful inspection, I determined that the neck needed a shim to fix the problem. Fortunately, shimming a bolt-on neck isn't too hard. In fact, if you're handy with basic tools you can do this yourself, but you need to understand the process and know what mistakes to avoid. Let's investigate.
Understanding Neck Angle.
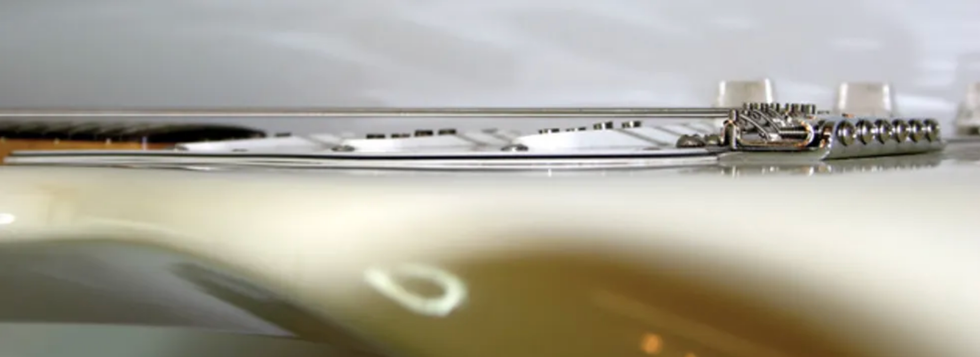
Fig. 1. This neck angle is too low, so even dropping the saddles flush to the bridge plate won't bring the strings close enough to the fretboard to play comfortably.
Our journey begins with neck angle, which is the pitch of the neck relative to the guitar's body and bridge. When the neck angle is set correctly, an electric guitar's saddles can be raised or lowered to create comfortable playing action and optimum tone and sustain.
But when the neck angle is too low (Fig. 1), the saddles can't be moved down enough to bring the strings close to the frets. The guitar is hard to play and the intonation suffers. Conversely, when the neck angle is too high (Fig. 2), you can't raise the strings enough to prevent fretting out or buzzing—even when the saddles are adjusted to their maximum height.
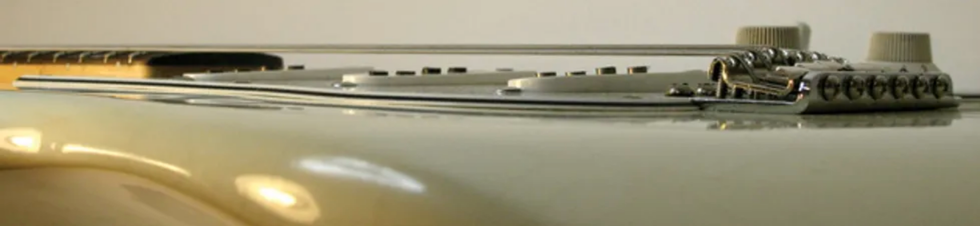
Fig. 2. This neck angle is too high. The guitar is unplayable even with the saddles raised to their maximum height.
In this column, we'll learn how to fix a neck angle that's too low. Typically, this problem can be resolved using a shim (Fig. 3).
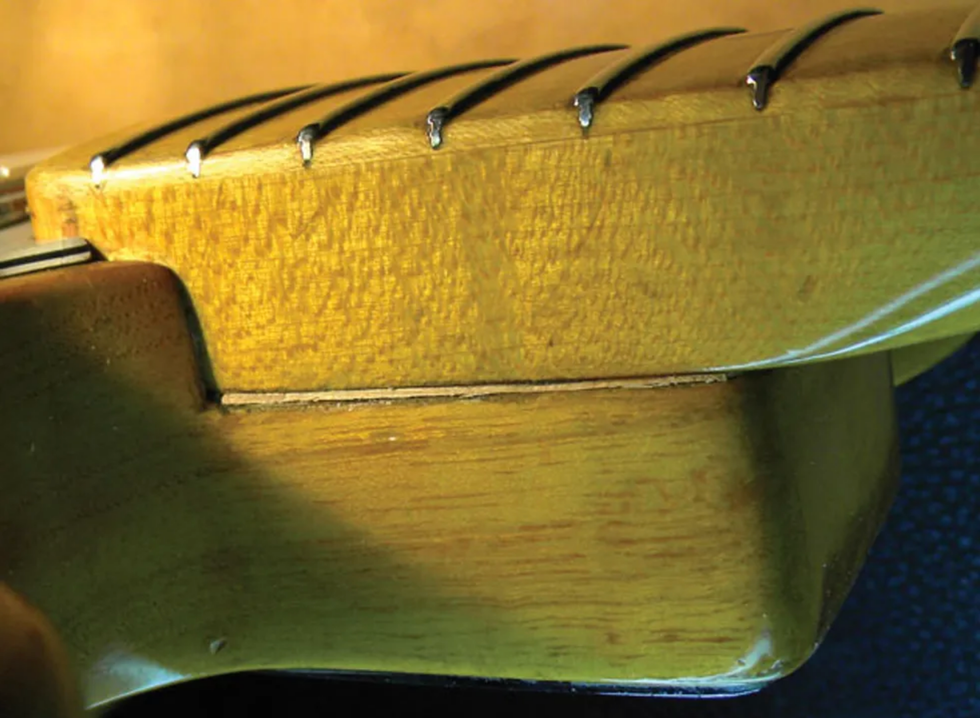
Fig. 3. A full-pocket neck shim can correct a neck angle that's too low.
What causes a neck angle that's too low? Most players don't realize that an electric guitar can compress over time. As an instrument ages, constant string tension can cause the body to become slightly concave, and this changes the neck angle. This doesn't occur with every guitar, but it is common.
Many experts say that the angle for a bolt-on neck should be between zero and five degrees. From my experience, this is correct in most cases. But what I find even more important is how you adjust the neck to its optimal angle. When this is done properly, your guitar will play and sound at its best. When the neck angle is adjusted improperly, it can ruin a perfectly good neck.
If your guitar plays well and the saddles offer enough adjustment range for you to set the action correctly, you don't need to change anything. However, if the angle is too low and you can't move the saddles down any further, the neck needs a shim.
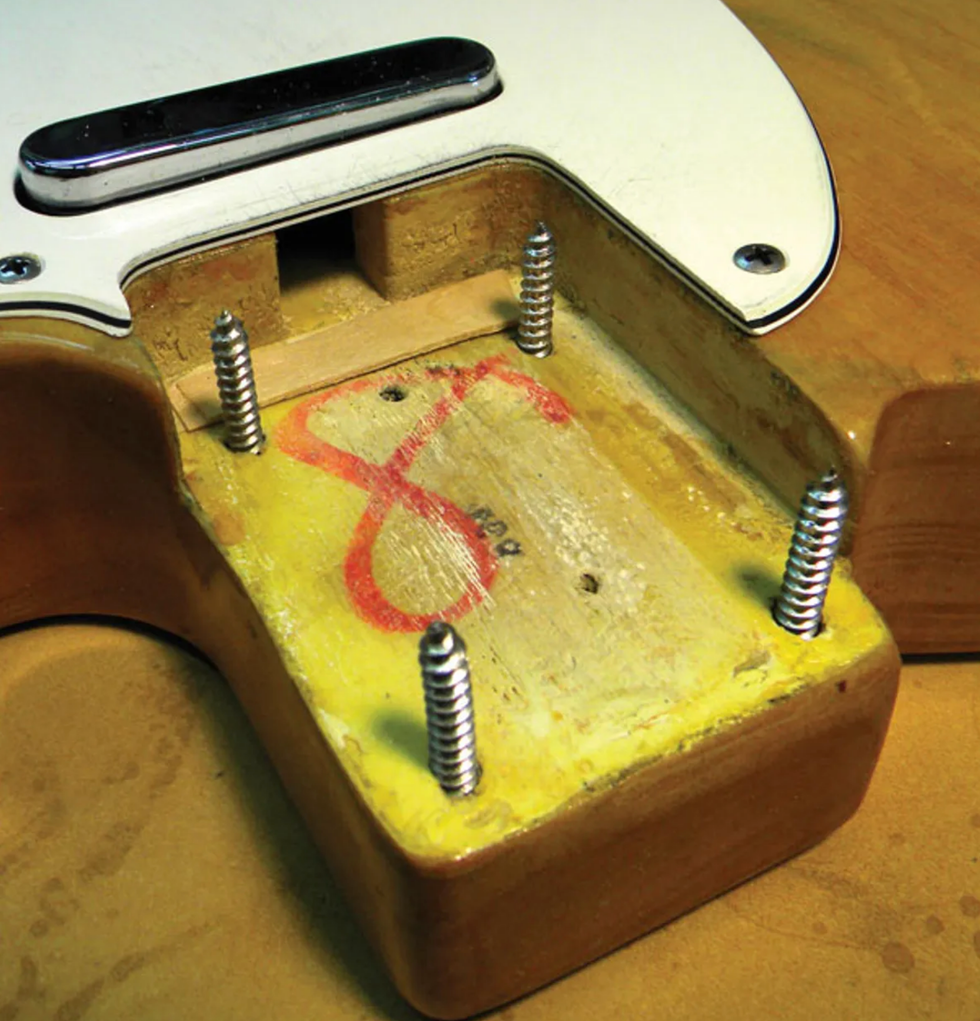
Fig. 4. A shim made from a Popsicle stick or scraps of wood leaves a gap between the neck pocket and neck. Eventually, pressure from the neck screws will warp the neck as it tries to fill the void.
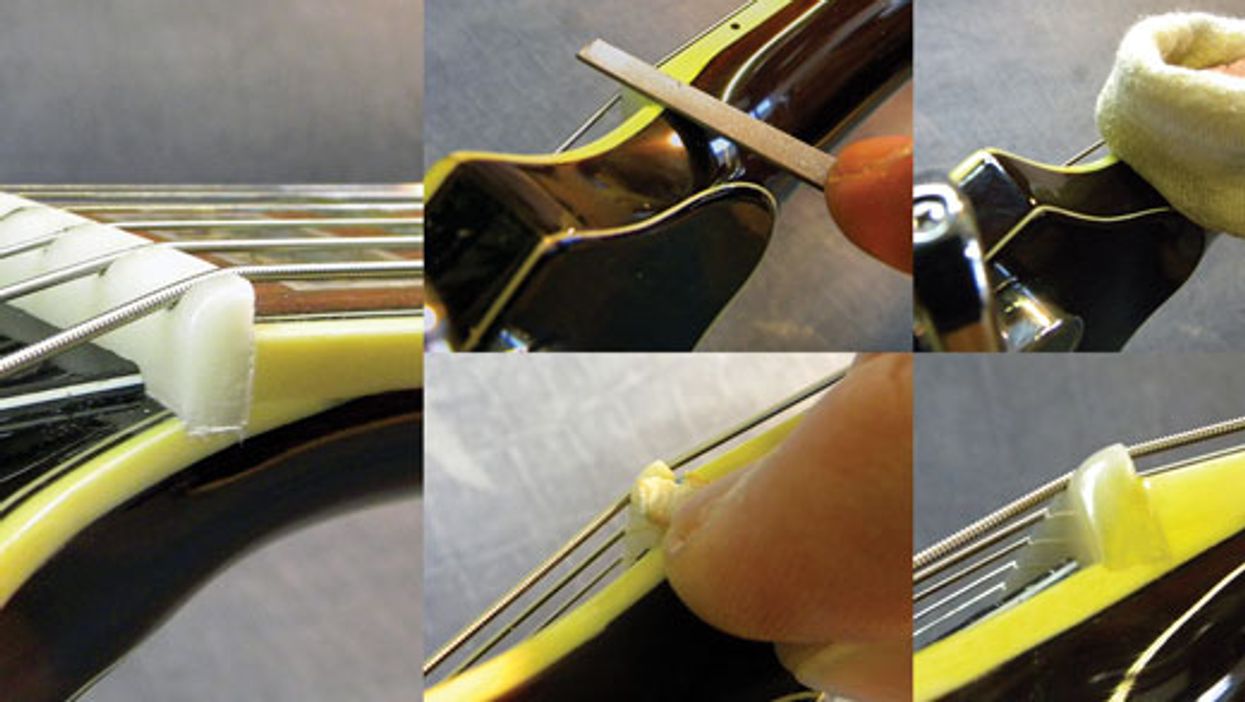
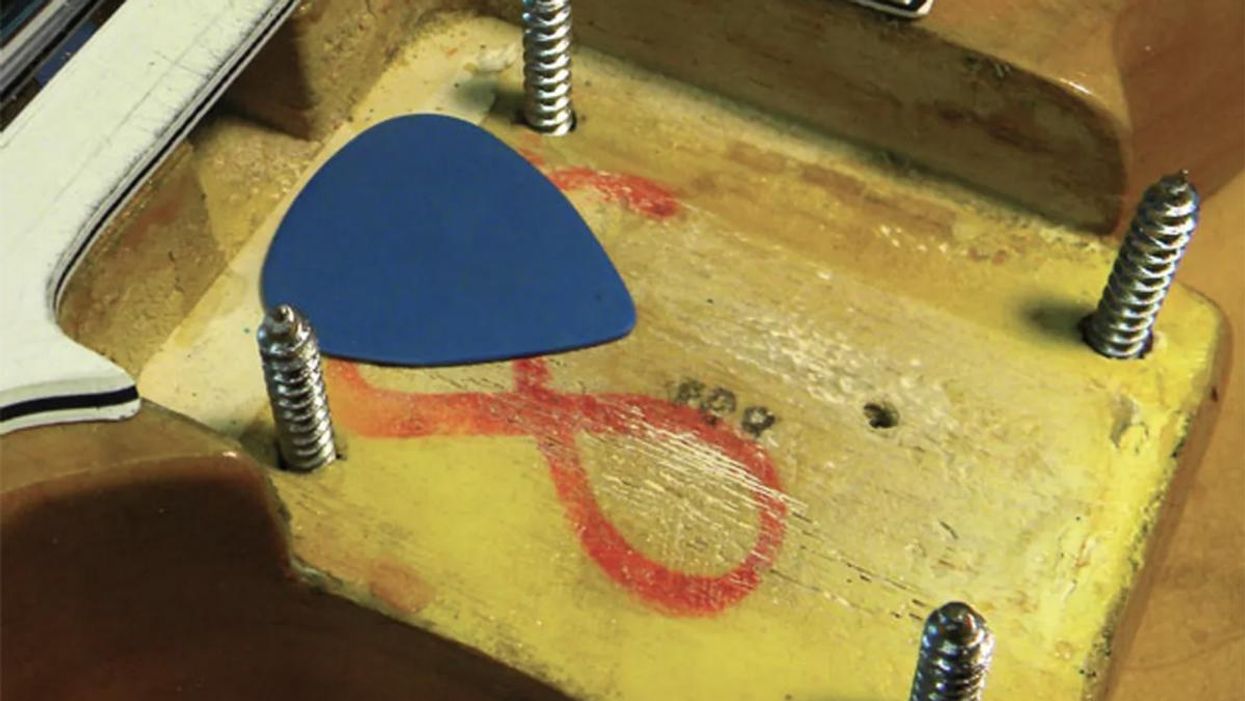
Shimming dos and don'ts. I've seen just about every type of material used to shim a neck, including a matchbook cover, metal washers, a broken Popsicle stick, wood scraps (Fig. 4), and a guitar pick (Fig. 5).
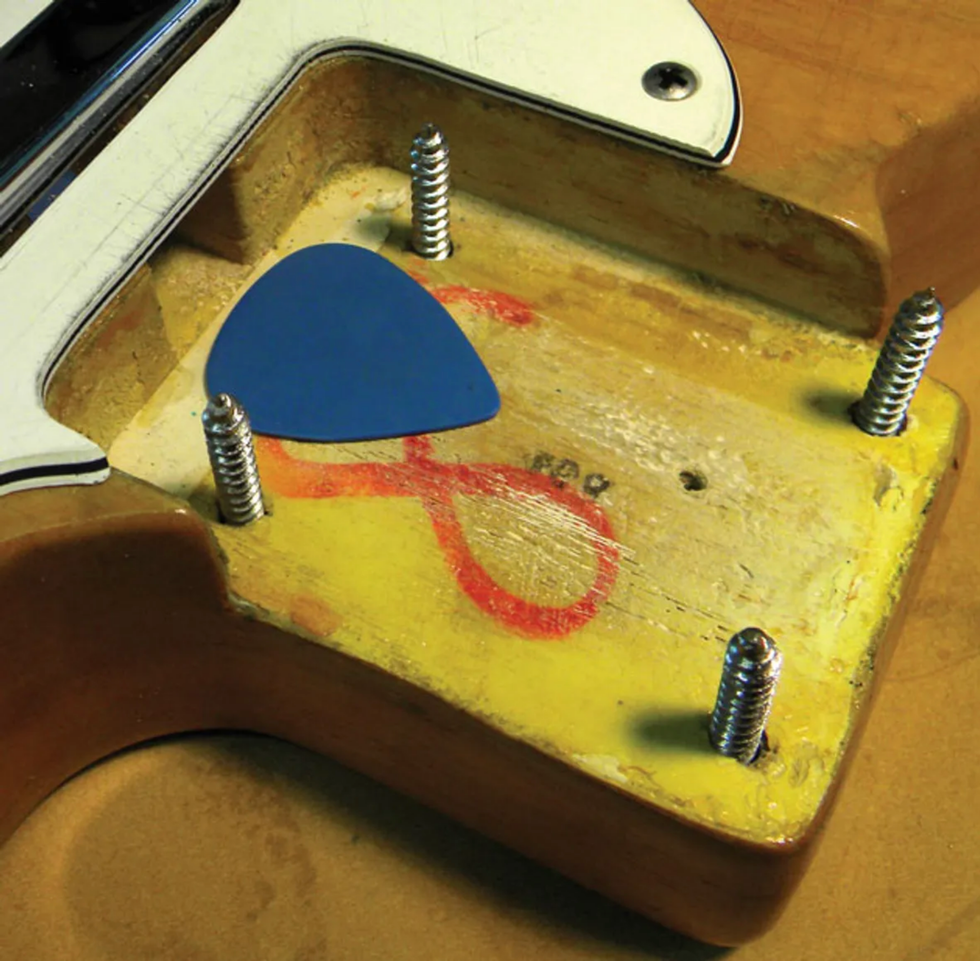
Fig. 5. Another no-no: Using a guitar pick as a shim.
For starters, don't use paper or plastic, and above all, only use a "full-pocket" shim. Here's why a full-pocket shim is essential: When someone uses, say, a matchbook cover or guitar pick, it leaves a gap between the body and neck. Over time, the screws holding the neck force it to fill that void. As a result, the neck warps and the end of the fretboard looks like a ski jump. Next thing you know, the fretboard has to be sanded to remove the warp and then refretted. If you're lucky, the neck will have a thick enough fretboard to allow resurfacing. If not, the neck is a total loss. Either way, it's going to cost you hundreds of dollars.
To avoid these problems, use a full-pocket shim that fits inside the entire neck pocket and is shaped like a thin wedge, with the slightly taller end facing the bridge This raises the end of the fretboard just a bit, which is what you want when correcting a neck angle that's too low.
What You'll Need.
The best material for a shim is a thin piece of maple veneer. Most bolt-on necks are made of maple, so it makes sense to make a shim from the same material. The wood can be easily shaped to fit the neck pocket and angled to the proper degree. I typically start with a piece of maple about .060" thick.
The project requires a small hobby saw, 80-grit self-adhesive sandpaper attached to a flat plastic or wood sanding block, a belt sander, a hole punch, a pencil, and some superglue.
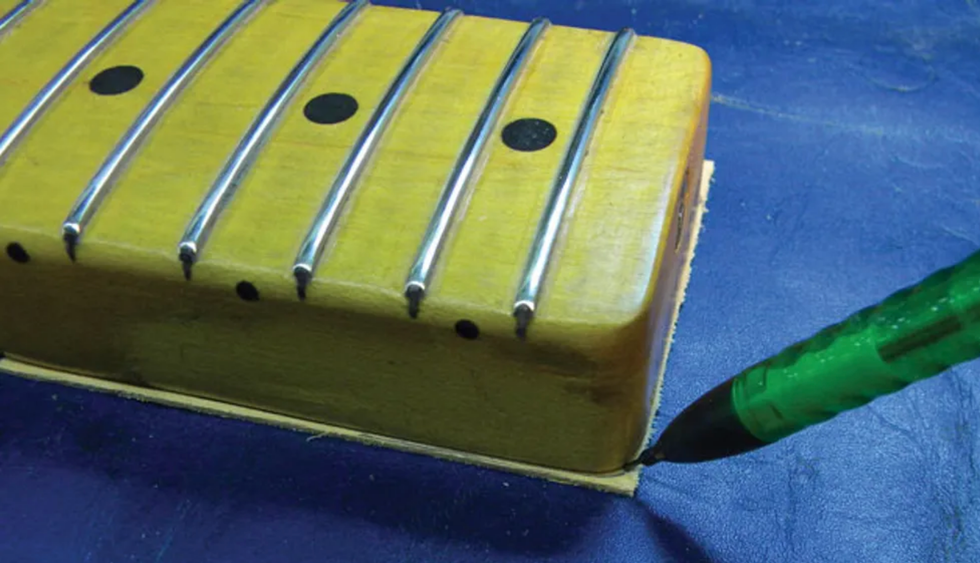
Fig. 6. Tracing the neck heel contours onto a full-pocket maple shim.
Crafting a Shim.
Use a hobby saw to cut out a rectangular piece of wood that's slightly wider and a bit longer than the neck pocket. Begin by tracing the neck heel onto your rectangular piece of maple (Fig. 6). Next, using the 80-grit sandpaper or a belt sander, trim the wood along the neck-heel line. Frequently check your progress to assure a close fit (Fig. 7).
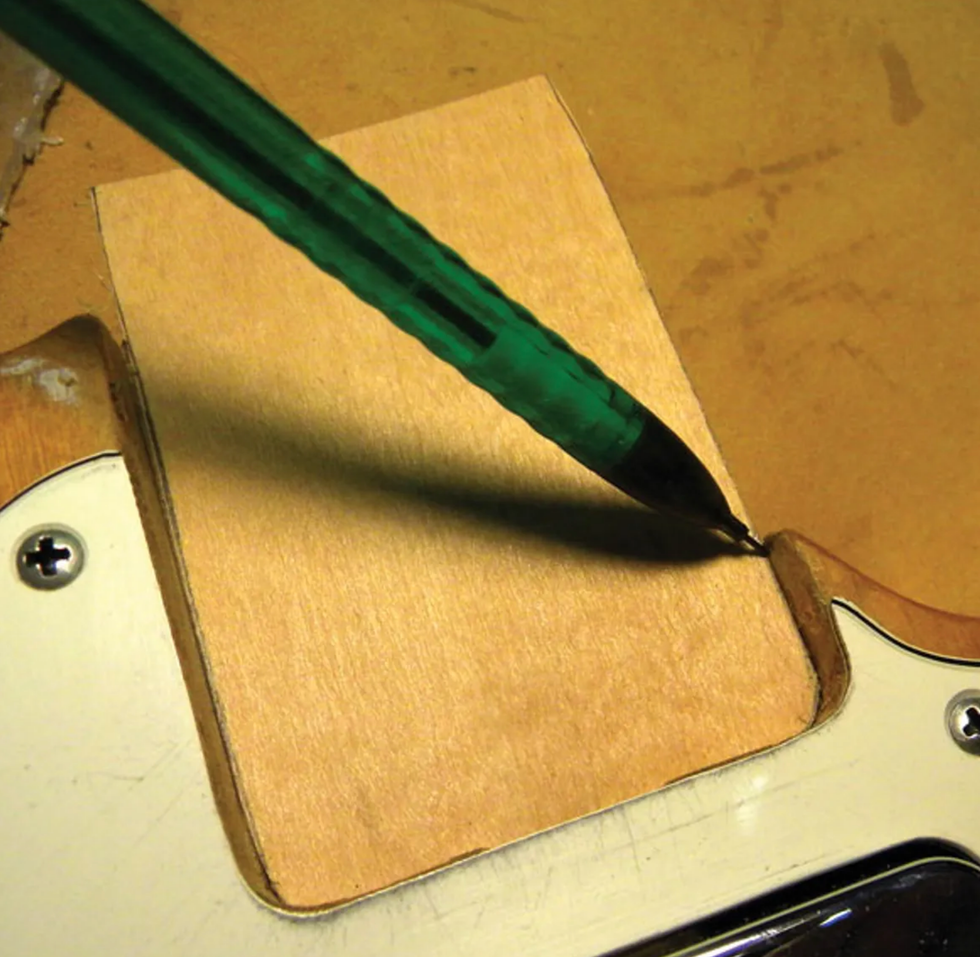
Fig. 7. Checking how the shim fits into the neck pocket.
When you've shaped the shim so it sits securely inside the neck pocket, trim off any excess length. Using the rear edge of the neck pocket as a ruler, mark the trim line on the shim, remove the extra wood with the hobby saw, and then sand the edge smooth.
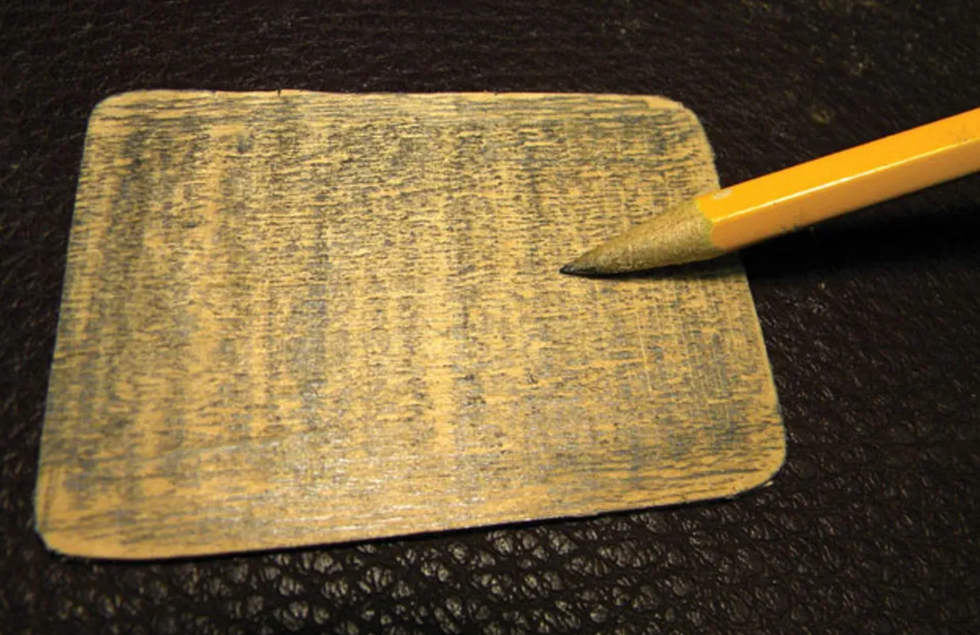
Fig. 8. Using a pencil to mark the bottom of the shim before sanding it into a subtle wedge.
Once the shim fits the neck pocket, the next step is to shade its entire bottom with a pencil (Fig. 8). This will help you know where to sand and how much material to remove.
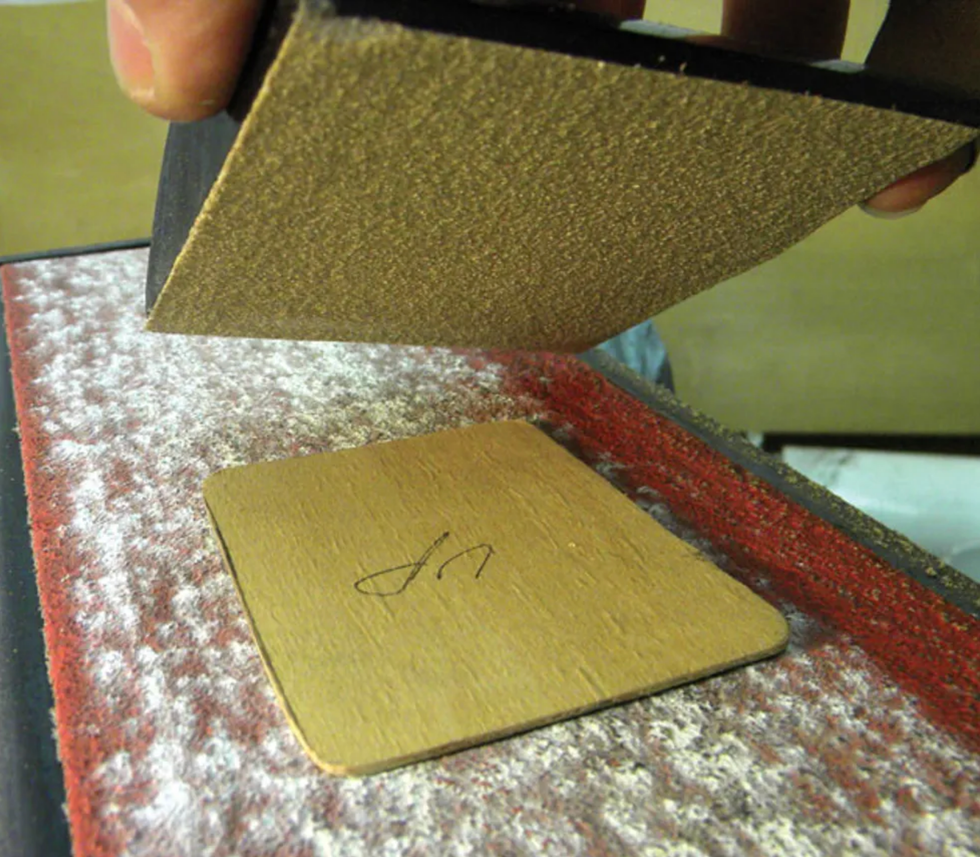
Fig. 9. Getting ready to sand the shim to its proper thickness and angle.
Next, place the shim on the belt sander—make sure it's turned off—with the shaded side face down. Lay your sanding block on top of the shim with the 80-grit paper against the wood (Fig. 9).
Holding the block, turn on the belt sander while keeping pressure on the block. Apply more pressure to the end of the shim that will face the headstock. This will create the subtle wedge shape you need to correct a neck angle that's too low.
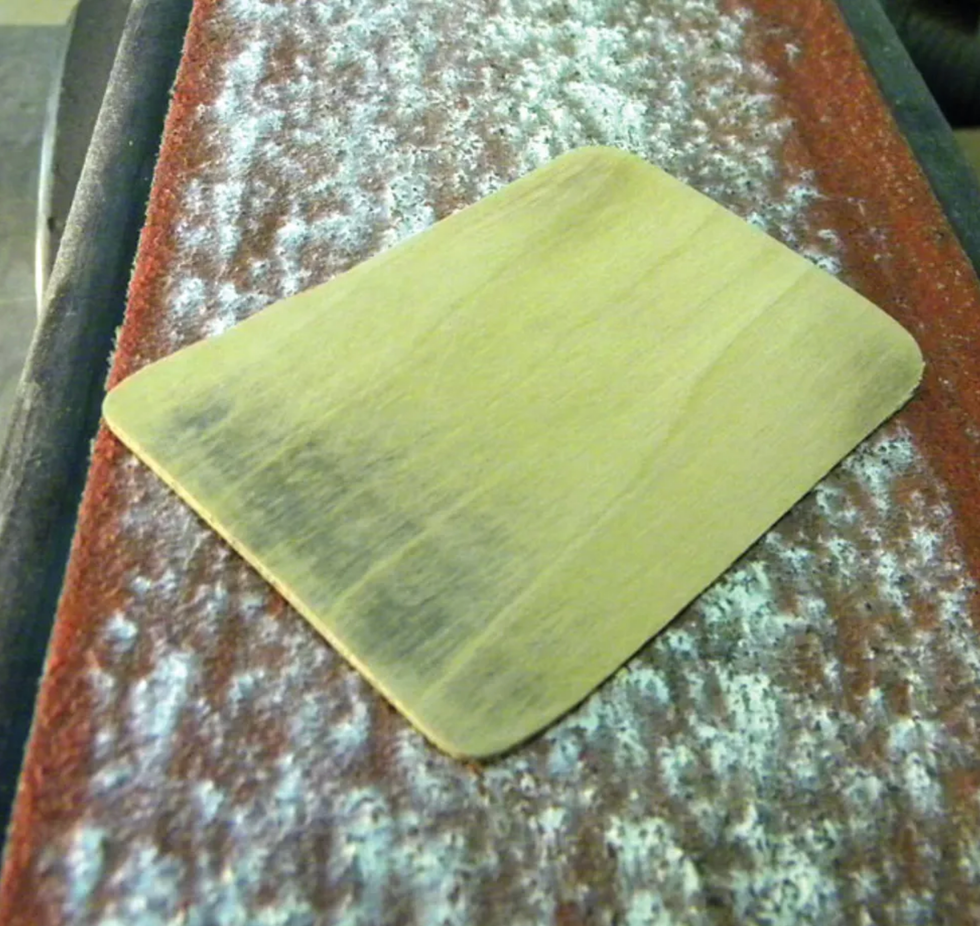
Fig. 10. Checking the bottom of the shim to confirm that the end facing the headstock is sanded a bit thinner than the end facing the bridge. The pencil marks tell the story.
Frequently check the bottom of the shim to make sure it's getting sanded evenly from side to side, but developing a slight front-to-back angle (Fig. 10). This is where the pencil marks come in handy.
Don't sand away too much wood—you'll have a chance to check your shim depth and angle in a few minutes when you string up for the first time. If need be, you can return to the sander to remove a little more wood from the bottom of the shim. By working incrementally, you won't have to start from scratch again.
Once you've sanded the shim into a subtle wedge and smoothed the top, it's time to punch holes to accommodate the four neck screws. Place the shim into the neck pocket with the shaded side down. Be sure it's oriented so the thicker end of the wedge faces the bridge. Insert the neck bolts and gently turn them until they each make a shallow impression in the shim.
Remove the shim and place a few drops of superglue around each screw-tip impression to reinforce the wood where you'll be punching holes for the neck screws.
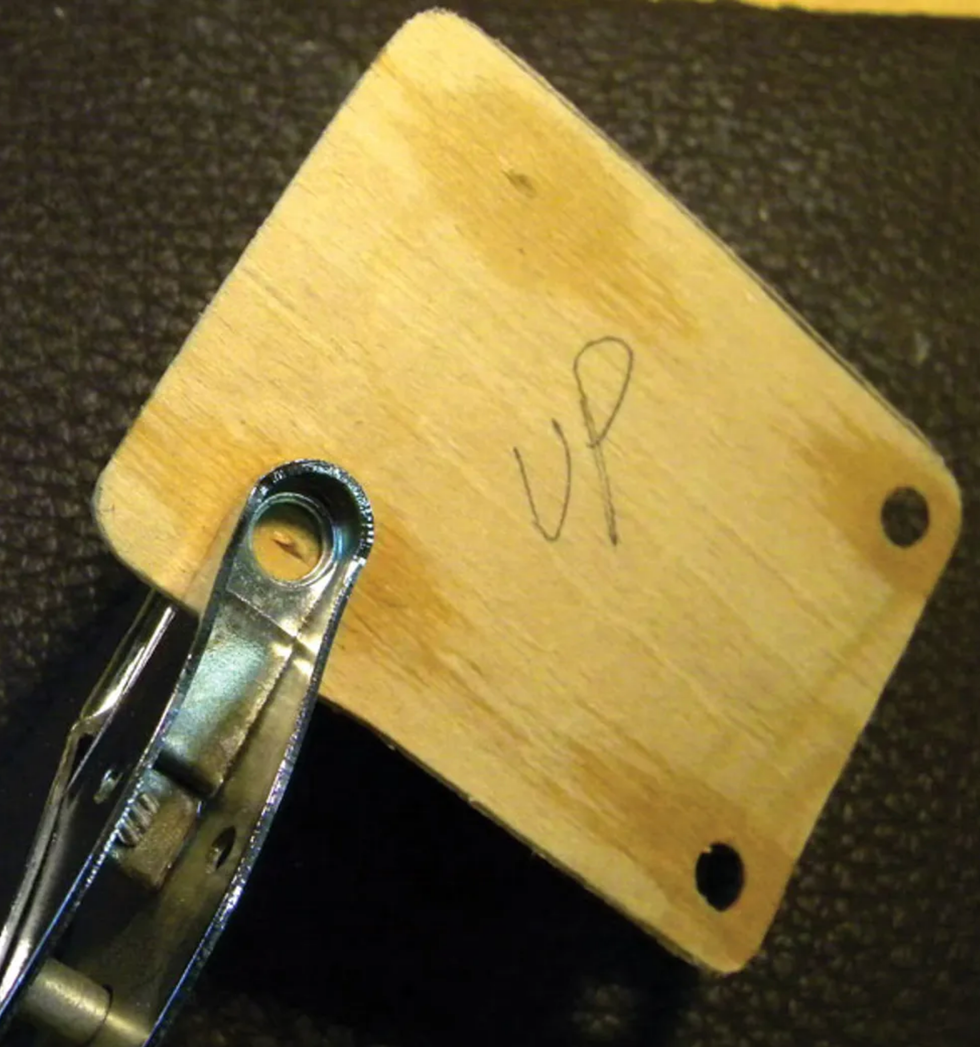
Fig. 11. Punching holes for the neck screws after reinforcing the screw-tip impressions with superglue.
Using the screw impressions to center your punch tool, make four holes in the shim. Work slowly and carefully to avoid cracking the shim as you punch holes in it (Fig. 11).
Following the same orientation described above, reinsert the shim into the neck pocket. Bolt the neck onto the body, string up, and tune the guitar to pitch. From there, measure the action and test playability.
Remember: The problem you're correcting is a low neck angle that prevented you from adjusting the saddles down far enough to create comfortable action. The shim is working properly if you can use the saddle screws to set the action the way you like it. The saddle screws should offer sufficient adjustment range to lower or raise the action.
If the action is too low with the shim in place—even with the saddles raised—you need to remove the shim and sand it thinner. It may take several attempts to achieve the correct thickness and angle. Carving a shim takes time and patience, but the reward is well worth the effort.
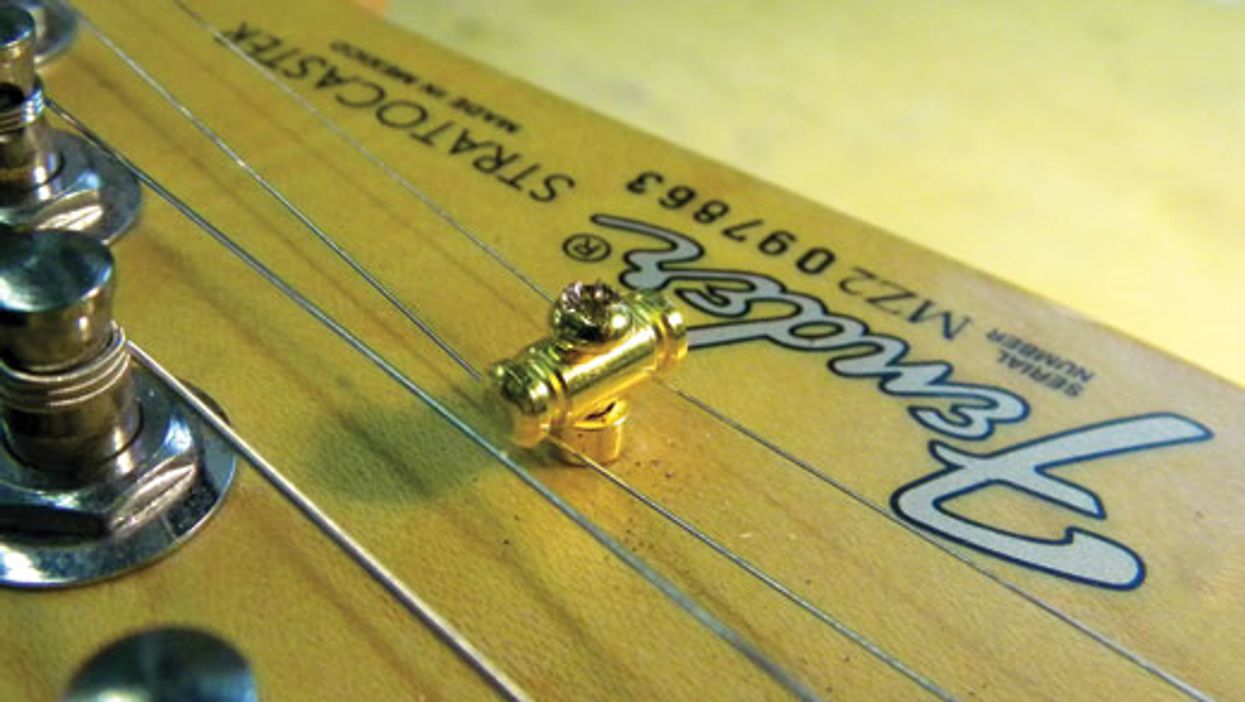
Tilt-Screw Syndrome
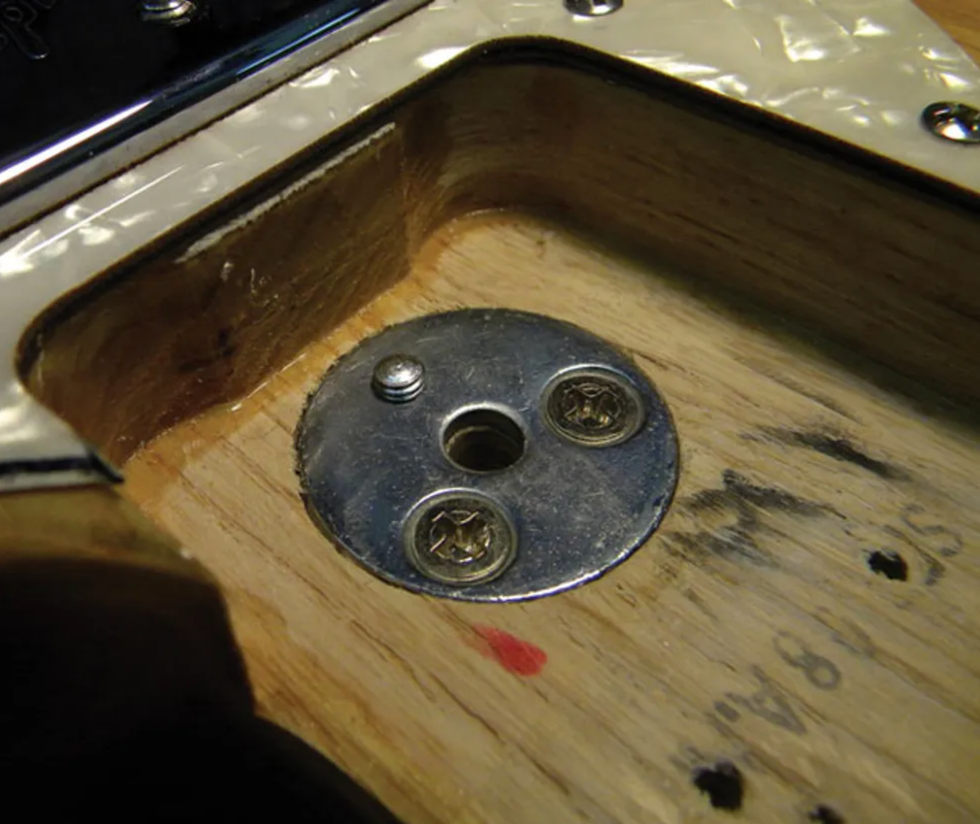
Fig. 12. The micro-tilt neck adjustment system uses an Allen screw to press against a metal disc embedded in the neck heel.
Some electric guitars have a "micro-tilt" assembly in the neck pocket (Fig. 12). By inserting a hex wrench through a hole in the neck plate, you can push an Allen screw against a metal disc embedded in the neck heel and adjust the neck angle without using a shim. This invention, in my opinion, is a great way to force the end of the neck to warp or bow. If your guitar has micro-tilt hardware, I'd remove the Allen adjustment screw from the body and simply bolt the neck flat against the pocket. If the neck angle is too low, use a full-pocket shim to correct the problem.
[Updated 9/1/21]