
Fig. 1. Our project guitar—the Zombie-Caster. Photos by John LeVan
With a few simple tools, you can adjust your neck and be back in business in just a few minutes.
Few things are more frustrating than when you pick up your favorite guitar and discover it's not playing right. Either the action has “magically raised itself " or it's so low that every note rattles. You wonder, “What happened to my guitar?"
At some point, the neck goes out of adjustment on virtually every guitar. The culprit is typically weather, humidity, or changes in altitude. When the weather changes, so does anything made from wood. Likewise, as the humidity changes, the wood in a guitar will contract or expand, and this causes the instrument to drift out of adjustment.
Fear not! With a few simple tools, you can adjust your neck and be back in business in just a few minutes. To illustrate the process, I'll turn to a Fender Stratocaster with a typical modern truss rod and a rather unconventional paint job. I call it my Zombie-Caster (Fig. 1).
There are several types of truss rods: single- action, double-action, and non-adjustable. Though they work in different ways, all truss rods are designed to counteract the tension of a guitar's strings, which are constantly pulling on the neck. Left unchecked, this tension would bow the neck forward.
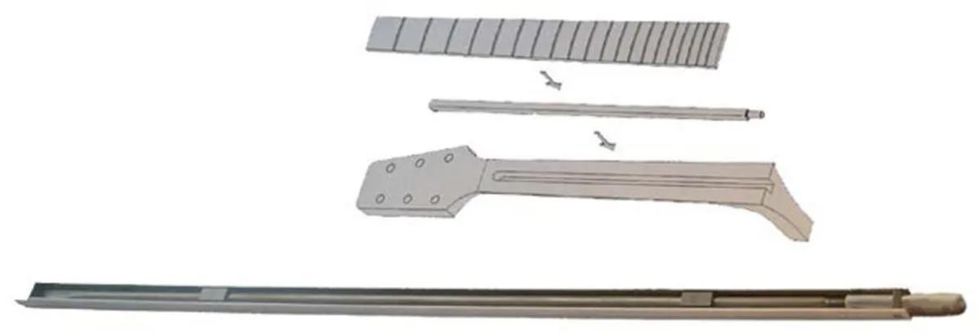
Fig. 2. A single-action truss rod creates back-bow to counteract string tension.
A single-action truss rod moves the neck in one direction (Fig. 2). By tightening the rod, you force the neck into a convex shape known as "back-bow." Conversely, when you loosen the rod, it relieves the tension inside the neck and the strings will pull the neck forward, creating a concave shape called "fore-bow."
The single-action rod will eventually run out of adjustment. Once the rod has reached a fully relaxed position, by itself the neck won't offer any more fore-bow. This limits the adjustability and is a problem if the neck wasn't made properly when the truss rod was installed.
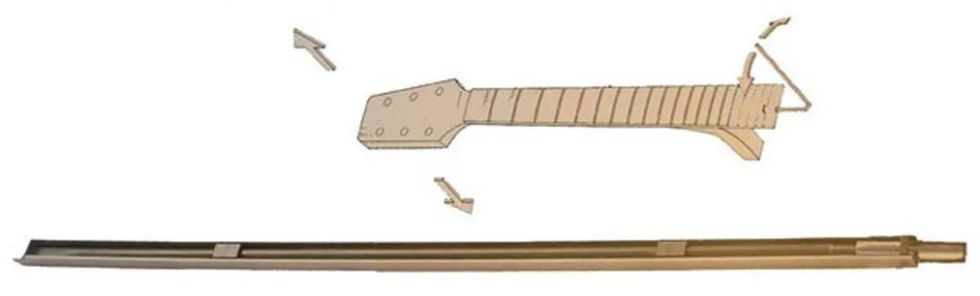
Fig. 3. A double-action truss rod allows both back-bow and fore-bow.
Double-action truss rods force the neck in either direction (Fig. 3). I've used this type of truss rod in several of my guitars and I really like them. You tighten the double-action rod to force a back-bow or loosen it to force a fore-bow. The key difference between a single- and double-action rod is the latter has the ability to create fore-bow. With a double-action rod, you can actually force the neck into either a concave or convex shape.
Non-adjustable truss rods are self-explanatory. Typically composed of wood, graphite, or metal, they cannot be manipulated. They are also referred to as a K-Bar or steel re-enforced neck. These rods are usually found in older archtops, classical, and some flattop guitars.
Step 1: Gather your tools and prepare your workspace.
You only need a few tools for this project, but it's very important to use the correct ones. Here are the three items I use when adjusting a truss rod:
- Action gauge (available from stewmac.com)
- Capo
- Correct neck wrench (typically, this is supplied with the guitar)
The measurements are very small on an action gauge, so you'll need good lighting to read them.
Step 2: Measure current neck relief.
Fig. 4. To measure relief, clamp a capo on top of the 1st fret and then hold down the 6th string at the last fret.
Before you adjust the truss rod, you need to assess the neck's current state. Measuring the amount of "relief "—i.e., intentional fore-bow to provide room for a vibrating string—in a neck can be tricky. I suggest using a light with a built-in magnifier. You'll need the magnifier when taking measurements that vary from 1/64" (.015) up to 3/64" (.045). These are very small increments, but just a few thousandths of an inch can make a big difference in playability.
Here is my process for measuring existing neck relief:
- Tune the guitar to pitch.
- Place a capo on top of the 1st fret (Fig. 4).
- Hold down the 6th string at the last fret.
- Place the action gauge behind the 6th string, resting on the frets (Fig. 5).
- Gently slide the gauge from the 1st to the last fret, taking note of the space between the fret and string as indicated by the gauge's markings.
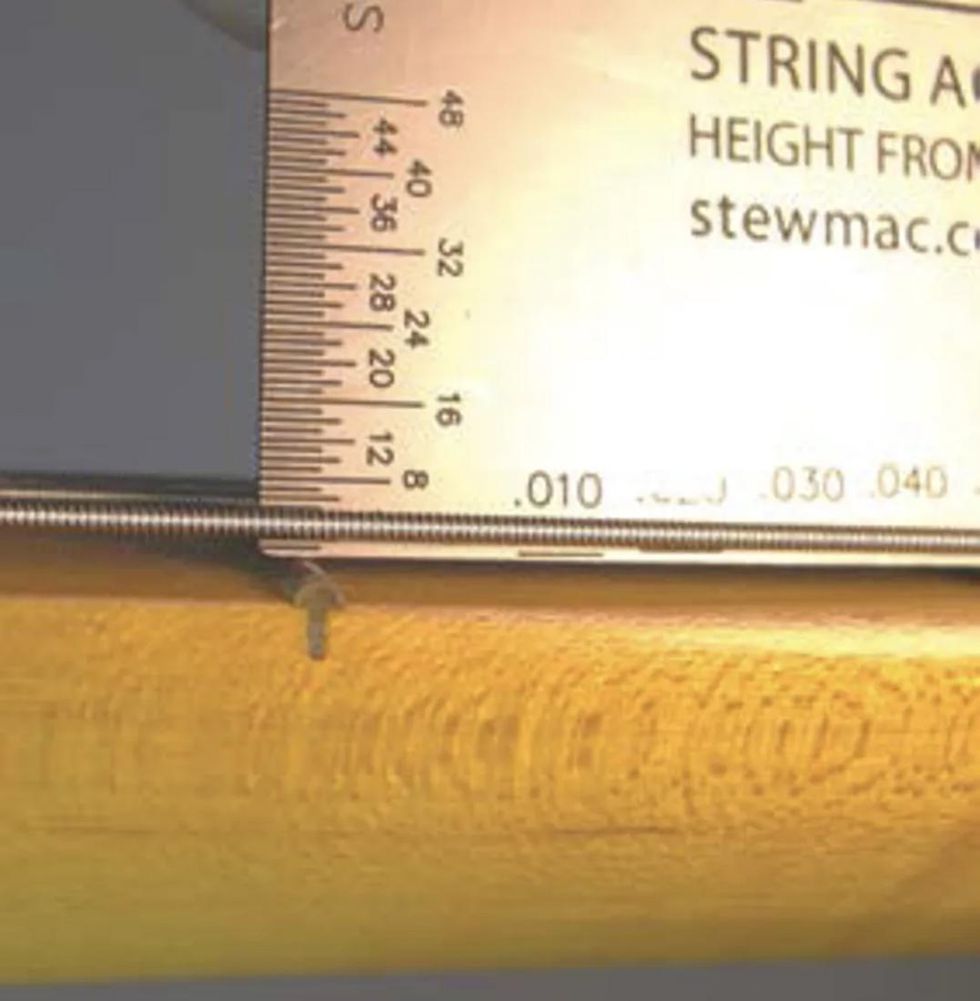
Fig. 5. Using a Stewart-MacDonald action gauge to precisely determine neck relief.
Write down the greatest distance—the biggest gap you encounter—from the top of the frets to the bottom of the string. This distance tells us how much relief or fore-bow the neck has. This measurement can vary dramatically from one guitar to another.
If there is no relief or fore-bow, then either your neck is dead flat or has back-bow. This means you need to loosen the truss rod to add the proper amount of relief.
Step 3: Determine the correct amount of relief.
How much relief do you need? This depends on how you play: If you're a light strummer, you only need the minimum amount of relief. If you strum hard or use a capo, you'll need more relief—a larger gap between the frets and vibrating strings.
For a light-to-medium strummer, relief measuring about .010 is plenty. This will also help keep the action low. For an aggressive strummer (or if you use a capo), .015 to .020 is normal. This will help prevent string rattle and buzzy notes. Keep in mind that these measurements are the distance from the top of the frets to the bottom of the 6th string.
Step 4: Adjust the truss rod.
There are several different ways to adjust a truss rod. Some truss rods require a screwdriver; others use an Allen wrench or even a socket wrench. Make sure you have the correct tool for the job!
As for my Zombie-Caster, it has .020 relief, as you can see in Fig. 5. That's more than necessary for my playing style and explains why the action feels so high.
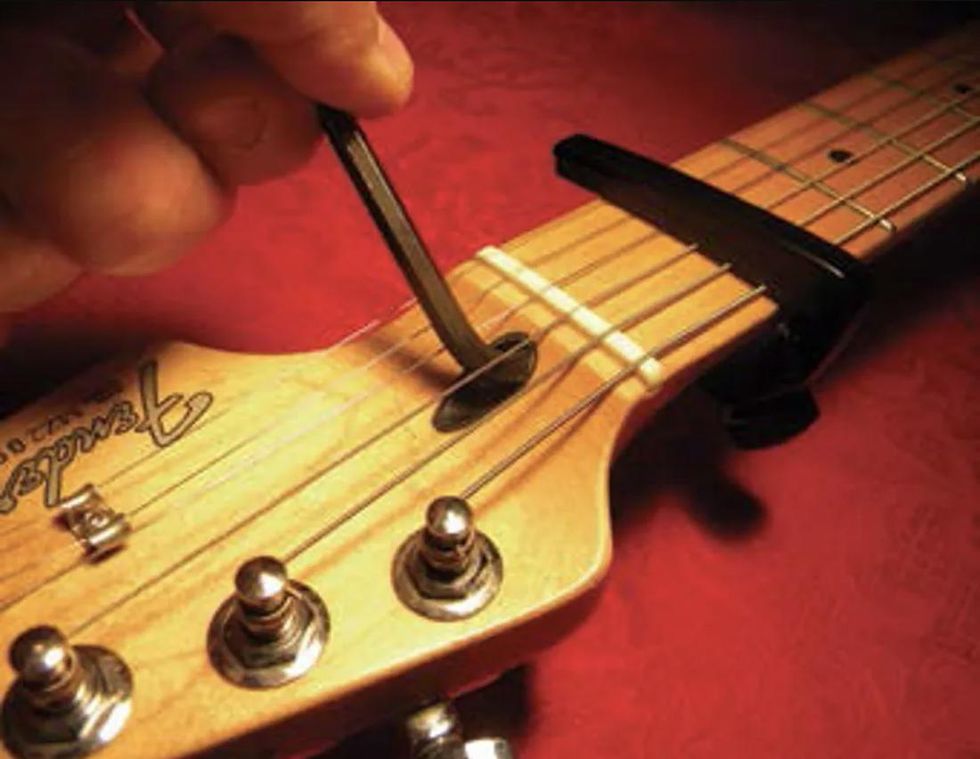
Fig. 6. Adjusting the truss rod with a 1/8" Allen wrench.
Because I don't play hard or use a capo, I'll adjust the relief to be around .010 (Fig. 6). To adjust this truss rod, I need a 1/8" Allen wrench.
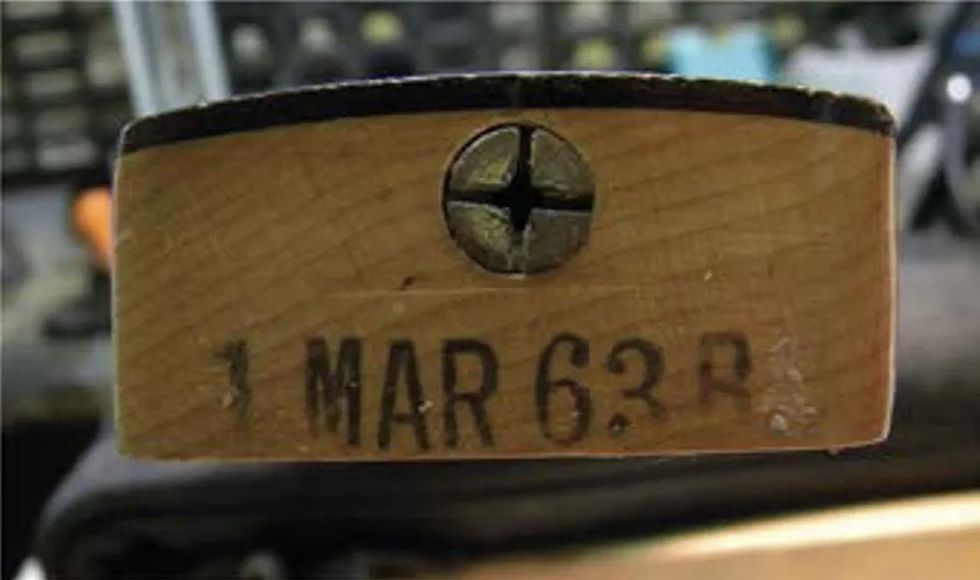
Fig. 7. Some necks need to be removed to access the truss rod.
Sometimes the access for the truss rod is at the heel of the neck. If that's the case, depending on the design, you may have to remove the neck to adjust the rod (Fig. 7). Vintage and vintage-style reissue Fenders, for example, require neck removal. Of course, this means remounting, restringing, and retuning between each adjustment. That's okay—be patient and make small adjustments. It takes time to get this right, but the effort is well worth it.
To add relief or fore-bow, turn the wrench counter-clockwise. If the neck needs less relief turn the wrench clockwise. (If you're looking directly at the truss rod nut, you can think "righty-tighty, lefty-loosey.") Always retune and remeasure after every adjustment.
Tip: If the truss rod won't turn smoothly— stop! There could be a problem with it. Remember, never force a truss rod. If you break it, it will cost a fortune to repair and probably trash the neck. If you're not comfortable adjusting your truss rod, consult a qualified repair technician.
Because my Zombie-Caster has .020 relief, I needed to turn the wrench clockwise to tighten the truss rod and reduce the gap. After turning the wrench about 1/3 of a revolution, the neck was right where I wanted it.
Wrap. If you carefully follow this procedure, you'll be able to adjust your truss rod and keep your guitar playing its best. Don't be surprised if you have to make this adjustment once or twice a year. The frequency really depends on your climate and how much traveling you do. And if you change string gauge, you'll also want to tweak your truss rod to accommodate the increased or decreased string tension.
We'll tackle another DIY project next month, so see you then.
[Updated 7/21/21]
- Guitar Shop 101: How to Shim a Bolt-On Neck - Premier Guitar | The ... ›
- Guitar Shop 101: Curing Sticky-Neck Syndrome - Premier Guitar ... ›
- What's in a Neck? - Premier Guitar | The best guitar and bass ... ›
- DIY: How to Adjust a Truss Rod - Premier Guitar ›
- Guitar Shop 101: Curing Sticky-Neck Syndrome - Premier Guitar ›
- What’s in a Neck? - Premier Guitar ›
- Guitar Shop 101: How to Shim a Bolt-On Neck - Premier Guitar ›
Duane Betts enjoys a control set modification that was preferred by his father, the late, legendary Dickey Betts.
Duane Betts and reader Steve Nowicki join the PG staff to discuss their favorite ways to customize their setups.
Question: What’s your favorite guitar mod?
Guest Picker - Duane Betts
Betts’ 1961 ES-335 has its toggle and volume-dial positions switched.
A: My favorite mod is the one on my 1961 Gibson ES-335. The toggle switch and neck volume knob positions have been switched so the volume knob is more accessible for volume swells using your pinky finger. This is something my dad had done when he obtained the guitar in the ’90s as he loved using the volume swell effect.
A pedal primed for vintage fuzz sounds.
Obsession: My current obsession is this DanDrive Secret Machine fuzz that JD Simo gave me a few years ago. I don’t use fuzz often but I’ve loved it as a way to change things up and give the listener something fresh. My normal tone is very natural with the amp turned up. This is just a great fuzz tone that gives me a new angle that I really enjoy pursuing both live and in the studio.
Reader of the Month - Steve Nowicki
A: A push/pull knob for humbucker coil split. It’s a sneaky little mod I throw on my tone pots. You won’t get amazing Strat tone, but the ability to instantly swap between Les Paul chunk and Fender twang during a jam opens a ton of possibilities tonally. Plus, no extra switches or routing needed—even though it’s fun to hack guitars apart.
Obsession: The EVH 5150 Iconic EL34 amp. Owning an 80-watt half-stack in a Brooklyn apartment might be overkill, but damn this amp is awesome. It delivers insane amounts of gain and distortion, yet every little nuance of your playing comes through crystal clear. I pair it with a Bugera Power Soak so I can crank the head and get that warm “Brown Sound” tone at lower volumes.
John Bohlinger - Nashville Correspondent
John Bohlinger and his Lukather-ized Strat.
A: I’ve hacked up a bunch of guitars over the years, but my favorite mod remains the highly intrusive, expensive, and quixotic B-bender install. It is the equivalent of open heart surgery, and there’s no going back—but the first time you play the Clarence White “You Ain’t Goin’ Nowhere” intro right, it’s totally worth it.
John at work. When it comes to mods, he know the drill!
Obsession: I recently filmed a PG video where we swapped pickups in my ’90s Strat with an EMG Lukather set. I never thought I’d go active, but what gets me is how smoothly the volume and tone work. I’m rethinking all my gear biases. Like maybe there’s been some progress since 1957.
Jon Levy - Publisher
Let it bleed: Jon dials back the treble on his Tele.
A: Installing a treble bleed on my volume pots has changed how I play electric guitar. Previously, I never dialed back my volume knob because it dulled my sound. Now I can fine-tune loudness and gain while retaining tone—it’s a game changer. I still swap pickups and hardware, but one mod always comes first: the humble treble bleed.
Did you know both John Paul Jones and Jimmy Page played on Shirley Bassey’s iconic recording of “Goldfinger?”
Obsession: John Paul Jones. I’ve always loved his bass (and other instrumental contributions) with Led Zeppelin. But after seeing the Zep documentary [Becoming Led Zeppelin] I searched his session work from 1964–1968, which includes Shirley Bassey, Lulu, Donovan and more. What an amazingly versatile and talented artist he is!
Mooer Prime Minimax M2 Intelligent Pedal boasts 194 effects models, 80 preset slots, MNRS and third-party sample file compatibility, an 80-minute looping module, internal drum machine, high-precision tuner, Bluetooth support, and a rechargeable lithium battery.
Over the last few years, Mooer has released several Prime multi-effects devices, including the Prime P1, P2, S1, and most recently in 2024, the Prime Minimax M1. Excitingly, the company is kicking off 2025 with a brand new addition to the Prime family–the Prime Minimax M2 Intelligent Pedal.
Within this small multi-effects device, a whole lot of functionality is packed in, including an impressive 194 effects models, including overdrive, preamp simulators, cabinet models, delays, reverbs, modulation effects, etc., and more. In typical Mooer style, though, the company took things a step further by offering limitless flexibility through the support of its in-house MNRS sample files, as well as third-party IR sample files. Essentially, this means that users can download additional tonal emulations and effects from the Mooer Cloud and third-party sources to the device, which they can then save across 80 preset slots.
As with some past models in the Prime series, the M2 sports a convenient touchscreen design, facilitating easy browsing through the devices banks of presets. However, guitarists are not limited to interfacing with the pedal in this way, as it also features two footswitches, both of which can be used to switch between presets in each bank. There is even a MIDI jack built into the device, enabling users to connect their MIDI controllers to extend the control functions, and the MOOER F4 wireless footswitch support is also supported. Essentially, these augmentation options facilitate additional footswitches to ensure switching preset tones is always as quick and seamless as possible within any workflow.
While the Prime M2 Intelligent Pedal is primarily designed for effects and tonal simulations, it also comes packed with an array of other useful features. For example, it contains a looping module with a hefty 80-minute capacity, in addition to 10 recording save slots to ensure that any looping creations can be kept for future use in performances. Similar to past looper modules in Mooer's products, users are also free to overdub their recordings and even undo or redo their overdubs, offering a lot of real-time flexibility for creating loop-based musical structures.
As if the addition of a looper wasn’t enough, this feature is also synchronizable with an internal drum machine and metronome, a combination that includes 56 drum grooves and 4 metronome varieties. Ultimately, it’s a reminder that Mooer clearly recognizes and wishes to solve the struggles that musicians have when attempting to produce precise loops while staying in time. Upon commencing recording, the drum machine can produce four initial beats to serve as a count-in cue, and of course, this can be combined with the device's tap-tempo control for dynamic use. Best of all, this feature can also be applied to modulation and delay effects, ensuring that they work perfectly in time with any performance.
Extra features are included to complete this all-in-one pedal, including a high-precision tunerwith fully customizable frequency ranges. Guitarists can even leverage the M2’s built-inBluetooth input support, allowing them to practice, jam, and even produce looped musicalstructures over their favorite backing tracks, band prototypes, and musical pieces.
Perhaps unsurprisingly for existing Mooer product users, the Prime M2 also boasts an impressive variety of audio routing systems. As was previously mentioned, that includes Bluetooth input, as well as industry standards such as dual-channel stereo output, perfect for stereo delay and modulation effects. It also supports headphone output for those who wish to practice in silence, and even OTG recording, which means that guitarists can record their creations directly to their smartphone whilst on the go.
Speaking of on-the-go, Mooer is continuing its recent portable-play focus with the Prime M2Intelligent Pedal, as it is fitted with a built-in rechargeable lithium battery with a battery life of up to 6 hours. Ultimately, this means that even a lack of local power sources won’t get in the way of rehearsals and live performances. Combined with the pedal’s lightweight and small build, it truly is an ideal addition to the pedalboard of any traveling musician.
Overall, the Prime M2 Intelligent Pedal is set to be an impressive new addition to the Prime series. It features augmented functionality when compared to past models, yet still in a minimalist and easy-to-use package, keeping the size small and light yet still packing in footswitches, a touch screen, and other flexible control systems.
Features:
- 194 built-in effect models and tonal emulations
- 80 preset slots for storing downloaded MNRS and third-party sample files
- Compatibility with the MOOER Cloud tone-sharing platform
- Built-in 80-minute looping module
- Record, overdub, pause, delete, and playback functions for looping
- Internal drum machine module, stocked with 56 drum grooves
- 4 unique metronomes
- Synchronization between drum machine and looper
- Convenient count-in cue function support from the metronome
- High-precision and customizable tuner module
- 2 multi-function footswitches
- 1.28-inch touchscreen interface
- LED digital display
- LED charge indicator
- Portable USB/OTG recording
- Direct compatibility with the MOOER prime mobile APP and MOOER Studio desktop software for preset management
- Bluetooth 5.0 audio playback
- 3000mAh integrated lithium battery with up to 6 hours of use time
- DC 5V/2A power supply and charging
- 3 hours charging time
- Low weight of 228g
- Compact, at 74mm (L), 125mm (W), and 49mm (H)
- Sample rate of 44.1kHz
- Bit depth of 24bit
- Compatible with MOOER F4 wireless footswitch
- 3.5mm MIDI port
- Mono TS ¼” input
- Stereo TS ¼” output
- 3.5mm headphone output
- Power switch button
The Prime Minimax M2 Intelligent Pedal will be available from the official distributors or retailersworldwide.
For more information, please visit mooeraudio.com.
Kirk Hammett has partnered with Gibson Publishing to release The Collection: Kirk Hammett, a premium hardcover coffee-table photo book where Kirk tells the stories behind his rare and collectible instruments.
“I am thrilled to announce the launch of The Collection: Kirk Hammett. I’ve worked diligently on this curated collection of vintage and modern guitars for the book. I feel the book captures the rich history and artistry behind each of these unique and rare instruments. Every picture tells a story and thanks to Ross Halfin and his exceptional photography, every picture in this book is worth a million words! This book could not be possible without the help of Gibson, so I’d like to thank them for making my passion for Greeny, and guitars a reality. I hope all of you enjoy this journey as much as I did.”
“It’s exciting the time has come to release The Collection: Kirk Hammett by Gibson,” adds Cesar Gueikian, President and CEO of Gibson. “We have been working on this project with Kirk for years now, and I had the opportunity to work closely with Kirk on the composition of the collection for the book. It was a thrill to put this together and it took a village to get it done! I hope everyone appreciates the work that went into this book and enjoys every story behind the guitars.”
The Collection: Kirk Hammett, Custom Edition is limited to just 300 numbered copies signed by KIRK HAMMETT and comes in a huge 19 x 14.5” (490 x 370mm) presentation box featuring custom artwork and an outstanding case candy package. In addition to the large-format 17 x 12” (432 x 310mm) hardcover version of the book with a stunning lenticular cover, the boxset includes a frameable 16 x 11.6” (407 x 295mm) art print of a Ross Halfin portrait of KIRK HAMMETT signed by both Halfin and the Metallica guitarist. Other case candy includes an Axe Heaven miniature replica of Hammett’s 1979 Gibson Flying V with case and stand, an exclusive pick tin complete with six Dunlop® Kirk Hammett signature Jazz III guitar picks, and a Gibson Publishing Certificate of Authenticity.
Explore The Collection: Kirk Hammett book HERE.
The collection includes Cobalt strings with a Paradigm Core, Tim Henson Signature Classical Strings, and the Tim Henson Signature FretWrap by Gruv Gear.
Engineered for maximum output, clarity, and durability, these strings feature:
- Cobalt with a Paradigm Core (not RPS) for added durability
- Nano-treated for maximum lifespan and corrosion resistance
- Gauges 9.5, 12, 16, 26, 36, 46 (Turbo Slinky set)
- Available individually or as part of the Tim Henson Signature Bundle
Tim Henson Signature Classical Strings
Crafted for dynamic, percussive tonality, these strings pair fluorocarbon trebles with silver-plated copper basses to deliver exceptional response and clarity.
- Gauges: 24, 27, 33, 30, 36, 42
- Available individually or as part of the Tim Henson Signature Bundle
Tim Henson Signature FretWrap by Gruv Gear
An essential string-dampening tool, the Tim Henson Signature FretWrap is designed for cleaner playing by eliminating unwanted overtones and sympathetic vibrations.
- Features Tim Henson’s custom ‘Cherub Logo’ design
- Size Small, fits 4-string basses, 6-string electric/acoustic guitars, and ukuleles
- Ideal for live performance and studio recording
- Ernie Ball collaboration with Gruv Gear
- Available individually or as part of the Tim Henson Signature Bundle
The Ernie Ball Tim Henson Accessory Bundle Kit
For players who want the complete Tim Henson experience, the Ernie Ball Tim HensonSignature Bundle Kit includes:
- Tim Henson Signature Electric Strings (9.5-46)
- Tim Henson Signature Classical Strings (Medium Tension)
- Tim Henson Signature FretWrap by Gruv Gear (Small)
- Tim Henson Signature Cable (Exclusive 10ft white dual-conductor cable, only available in the bundle)
The Tim Henson Signature String & Accessory Collection is available starting today, March 19, 2025, at authorized Ernie Ball dealers worldwide.
For more information, please visit ernieball.com.