Learn to solder like a pro in this easy-to-follow demonstration.
Given the DIY nature of this issue, we thought it would be appropriate to address good soldering technique. If you’re willing to invest a few bucks in some modest tools and spend a little time practicing the basics, you can learn to wire up guitars, stomp kits, speaker cabinets, and even do some simple amp mods. Once you understand the fundamentals, you can save money and derive a lot of satisfaction from working on your own gear.
The tools.
You’ll want a decent soldering pencil (a small type of soldering iron) rated at least 25 watts, but no more than 60 watts. (Many guitar techs like a 30-watt soldering iron for working on guitars and amps, and a 15-watt iron for working inside stompboxes and on delicate printed circuit boards.) You’ll also want a stand to hold the hot iron when not in use, a damp sponge, and some rosin core solder made for electronic work (Photo 1).
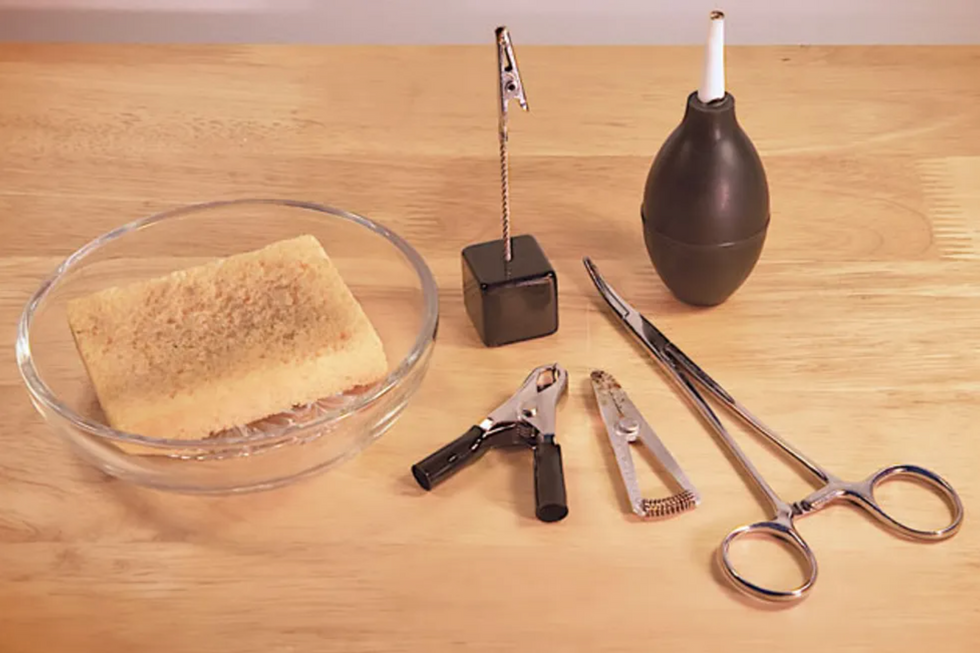
Photo 2 — If your soldering stand doesn’t house a sponge, just put a damp household sponge in a glass or ceramic dish. Other helpful tools: a hemostat and small clamps to hold parts still as you solder them, and a “solder sucker” bulb for removing solder.
You should also have some basic hand tools, such as wire strippers, needle-nose pliers, wire cutters, and something to hold the wire in place while a solder joint cools (Photos 2 and 3).
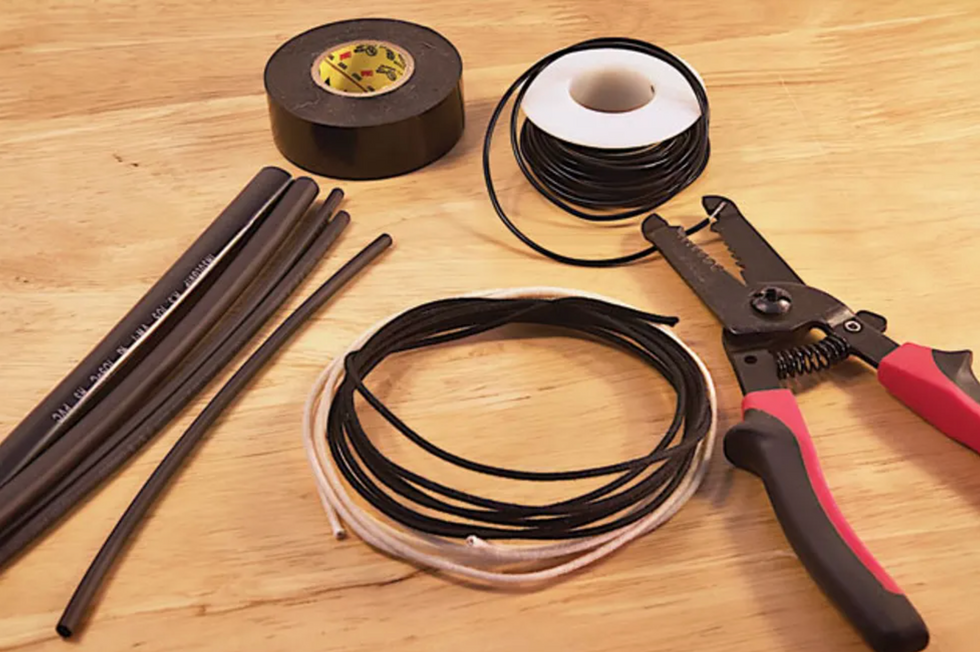
Photo 3 — In addition to hook-up wire, you’ll want wire strippers. Alternatively, luthier suppliers offer old-school “push-back” wire with a waxed cotton jacket (center) that eliminates the need for stripping off the plastic insulation from the end of the wire. Electrical tape and heat shrink tubing come in handy when you need to protect or insulate your work.
There are tools sold specifically for holding wires and parts, available through an electronics supply house.
Step 1: Prepare the Joint
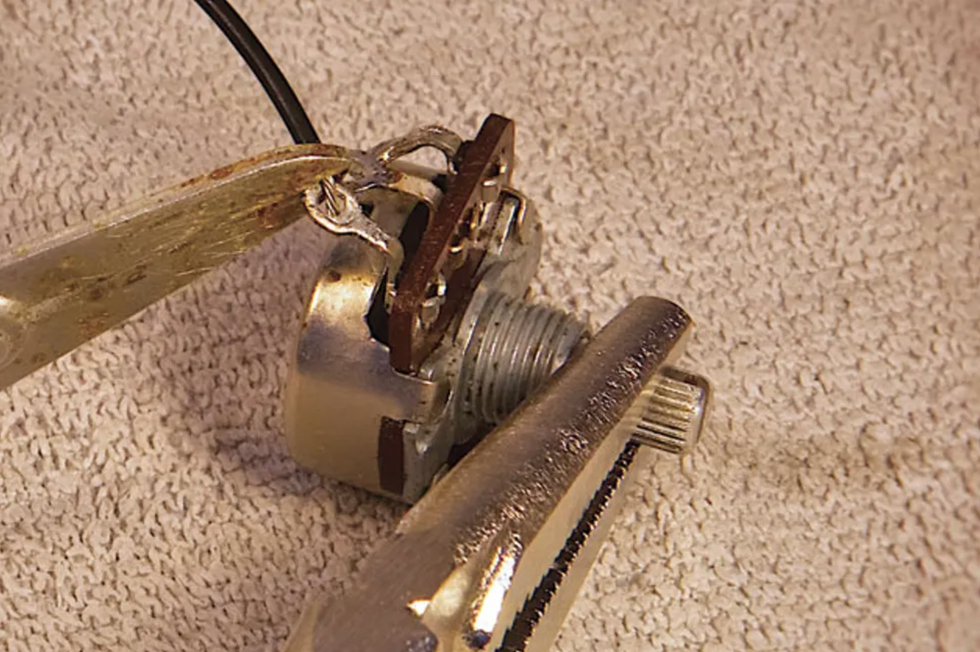
Photo 4 — Before you attempt to solder a connection, the wire and component must be secured to assure they remain absolutely motionless. Here, a spring-loaded heat-sink clamp holds the wire in place while a vice grip gently clamps the pot shaft.
For every joint, you need to find a way to hold the wire in position without using your hands (Photo 4). Wrap the wire through the solder lug once to make it hold tightly on its own, use tape to hold it in place, lay a pair of pliers on the wire to hold it firmly where you want it, or use a mechanical soldering aid to hold it. Use whatever works, except holding the wire manually. When you make a solder connection and rely on your hands to hold the soldered wire steady while the joint cools, you will fail—no human hands are steady enough to hold anything perfectly still, and you want the wire to remain absolutely motionless while it cools. If there is movement, the result will be internal fractures in the solder.
Step 2: Clean the Tip
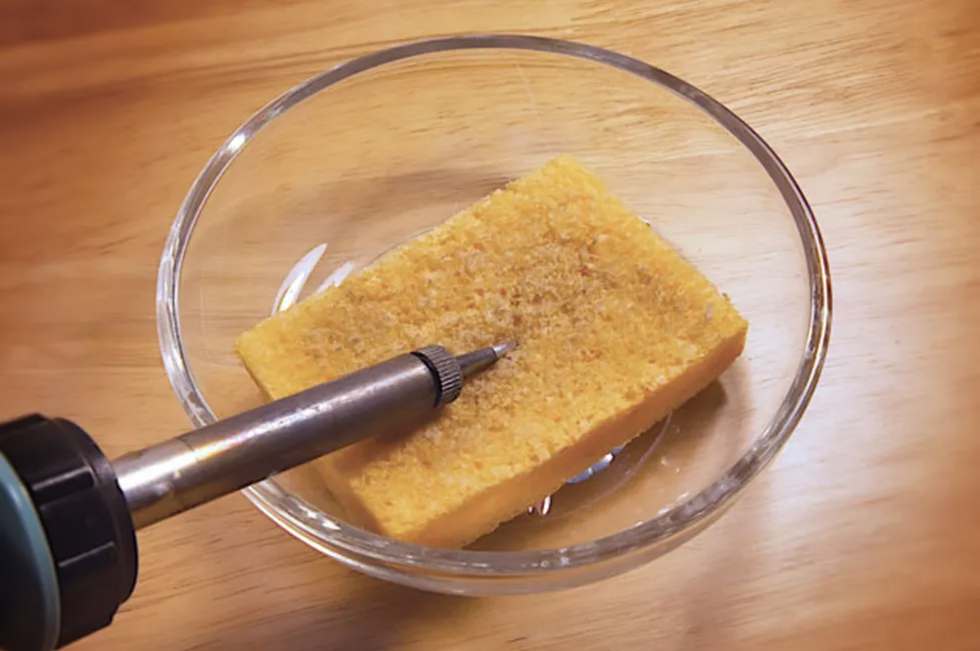
Photo 5 — Wipe the hot tip with a damp sponge to keep it clean.
The tip must be cleaned before each and every joint—you can use the damp sponge for this (Photos 5 and 6).
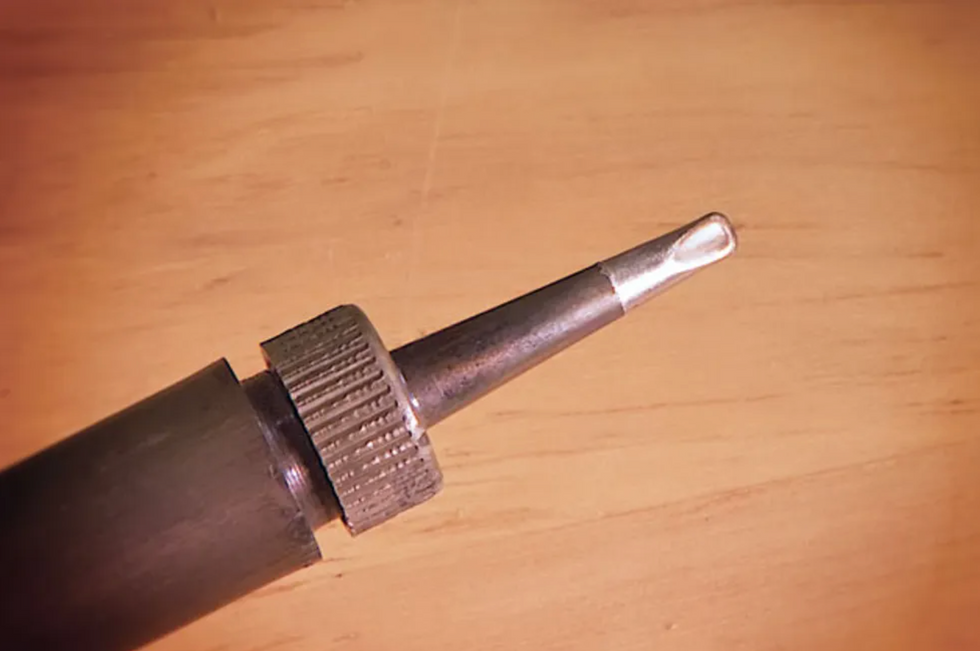
Photo 6 — A clean, dross-free tip looks smooth and shiny.
Solder produces a by-product called dross very, very quickly, and the dross fouls the tip, preventing good heat conduction and introducing waste material into your solder joints.
Step 3: Tin the Tip
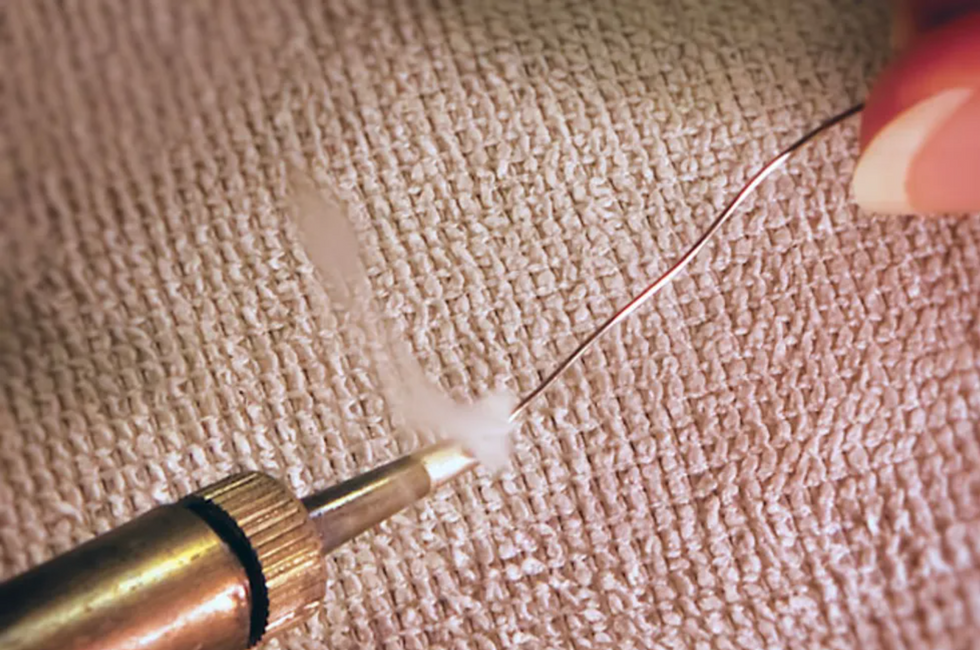
Photo 7 — Add a small amount of solder to a freshly cleaned tip just before you solder a connection. When you see this telltale puff of smoke, pull the strand of solder off the tip, shake off any excess, and then move quickly to the joint.
Immediately before you get on the joint with the heat, add fresh solder to the tip of the iron to “tin” it. Simply feed solder directly onto the tip so it’s completely coated (Photo 7). A tinned tip will provide much better heat conduction than a tip that’s clean but not tinned.
Step 4: Remove the Excess Solder
Shake off the excess solder after tinning—you want the tip coated, but not dripping. I have a fire-resistant container beside my soldering bench, and after tinning I tap the barrel of my iron on the edge of the container to knock excess molten solder into it. You can use any fire-resistant container for this, such as a tin can or ceramic bowl, but use care not to start a fire. Because solder melts at such a low temperature the risk of a fire is very low—molten solder is unlikely to ignite even highly flammable materials like paper—but use care anyway!
Step 5: Get on the Joint Right Away
As soon as you’ve removed the excess solder from the tip, get right on the joint. By “joint,” I mean the wire and the solder lug, or the wire and the back of the pot, or whatever it is you’re soldering. Dross will start to form on the tip very quickly, so as soon as the tip is prepared, get to work.
Step 6: Heat the Joint
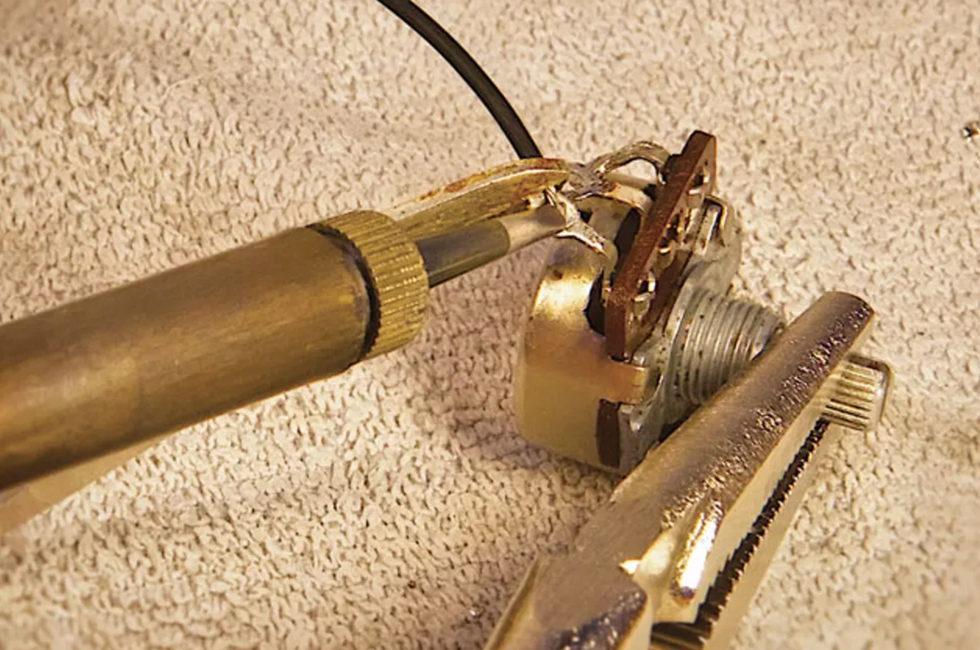
Photo 8 — Gently press the iron’s hot tip against the joint to heat it before you bring the solder into the equation. The goal is to make the joint itself hot enough to melt the solder.
Heat the joint, not the solder (Photo 8). You want the joint to be hot enough to melt the solder. It’s a given that the iron is hot enough to melt it—just feed a little onto the tip and you’ll see—but you also want the joint itself to be hot enough to do the same.
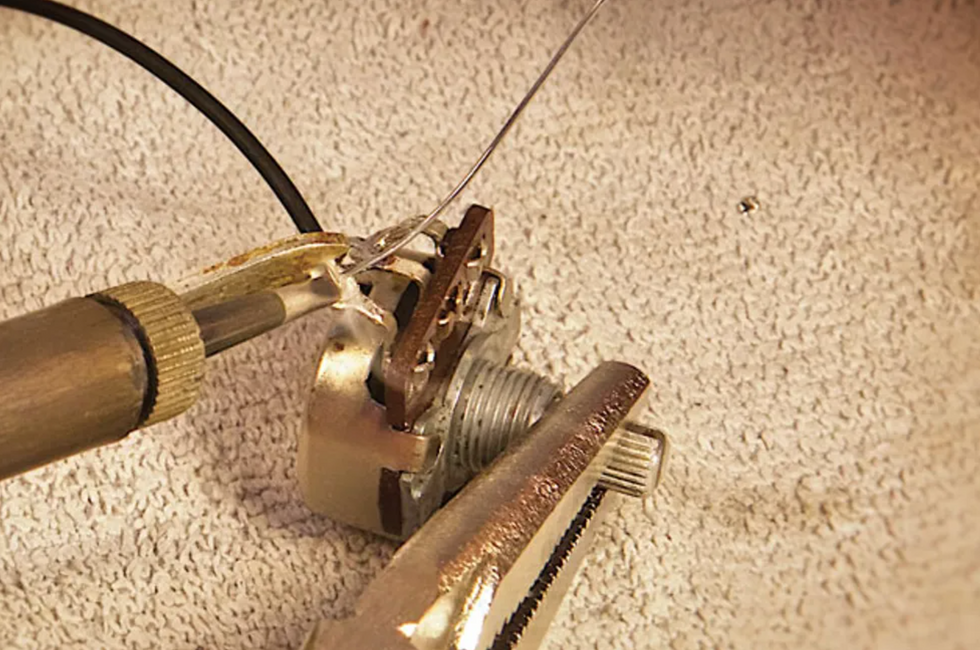
Photo 9 — While holding the tip against the joint, feed the solder onto the heated joint, not the soldering iron tip. Here the emerging puff of smoke indicates the solder is melting.
If you feed solder onto the joint without it touching the iron (Photo 9), the solder will melt and be attracted right to the joint. You can watch the solder actually wick out onto the surface you’re soldering to—this is what you want.
Step 7: Get off the Joint
As soon as the solder has flowed onto the joint properly, remove the heat from the joint. Most components can stand a fair amount of heat, but some are more susceptible to damage than others, so there’s no need to push your luck. Pots are fairly durable (unless it’s a cheap pot), so it’s highly unlikely you’ll damage one by trying to solder a wire to its back. But again, there’s no need to push your luck, so as soon as you’ve completed the joint, pull the iron away and let the joint cool with the components remaining motionless.
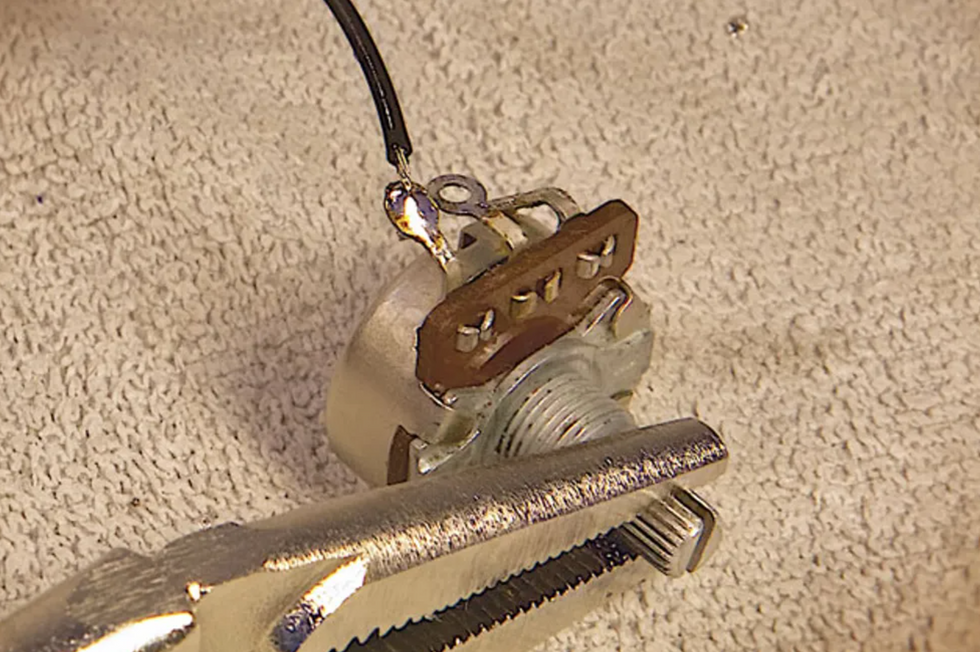
Photo 10 — When the molten solder has flowed into the joint, pull away both the solder and iron. Keep the joint motionless as it cools and don’t blow on it—the moisture in your breath will enter the cooling connection and potentially cause it to fail.
If you’re soldering to a ring-shaped solder lug, then you’ll want to fill it completely with solder (Photo 10). This will maximize the mechanical strength of the joint.
Like most skills, soldering proficiency is acquired through practice. Employing good technique will allow you to become competent all the more quickly, so follow these steps, and you’ll be soldering like a pro in no time. You should probably practice on projects that aren’t expensive or mission critical—you might want to think twice about rewiring your only guitar before that gig with Clapton tonight. But if you keep at it, you’ll be one step closer to being a consummate DIY’er.
Two Ways to Improve Your Soldering Projects
After you master the basics, there are two more skills to add to your bag of tricks: removing old solder and installing heat shrink tubing. There are plenty of occasions where you’ll wish you could remove old solder and re-use a part. For example, you might have rescued a volume or tone pot from a previous mod or project. If it’s a high-quality pot, like those from CTS, why toss it and buy a new replacement when you can put the old one back into service? It’s easy to reverse the soldering process and remove old solder and bits of wire. You simply need a solder removal tool. There are several types, including disposable braided wire that’s designed to wick molten solder away from a joint, and various vacuum pump tools and “solder suckers.” I prefer a simple rubber bulb with a heat-resistant Teflon tip.
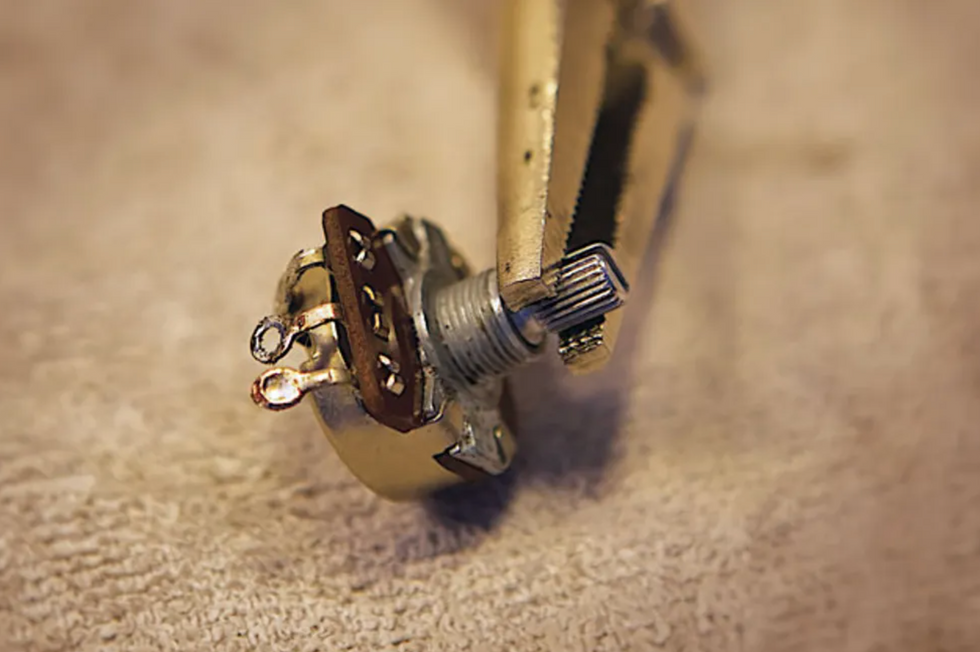
Photo 11
Here’s how it works: Stabilize your component, in this case, a pot (Photo 11). See how one lug is filled with solder? Let’s make that go bye-bye. Apply heat to the lug with a freshly cleaned soldering-iron tip.
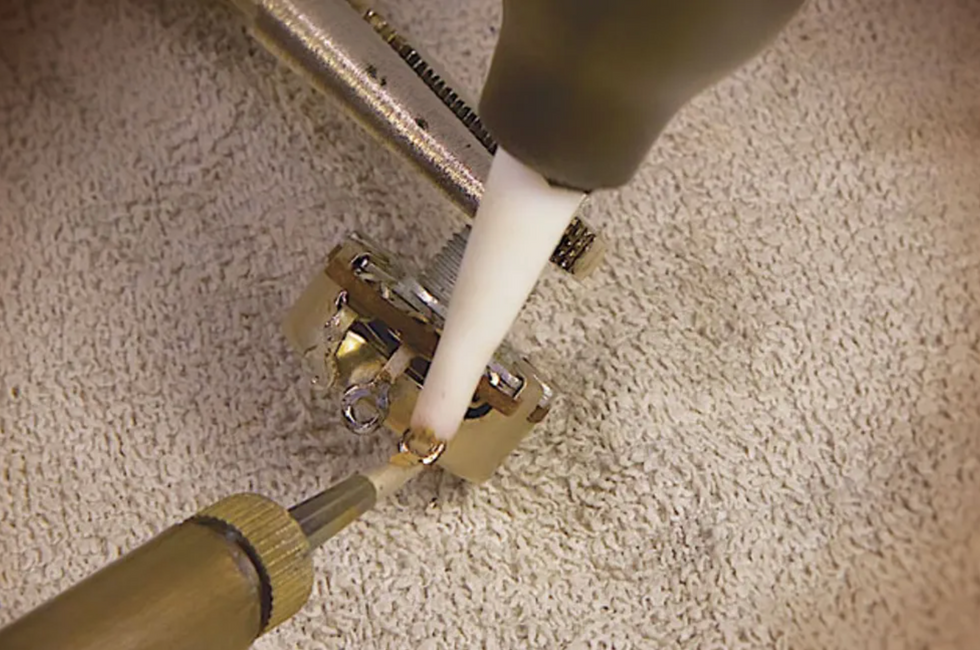
Photo 12
When you see the solder turn shiny and molten, hold the bulb away from the lug, squeeze and hold the bulb, and then bring its tip to the lug and release the bulb. Fffffft! The molten solder goes up the tip and into the bulb (Photo 12).
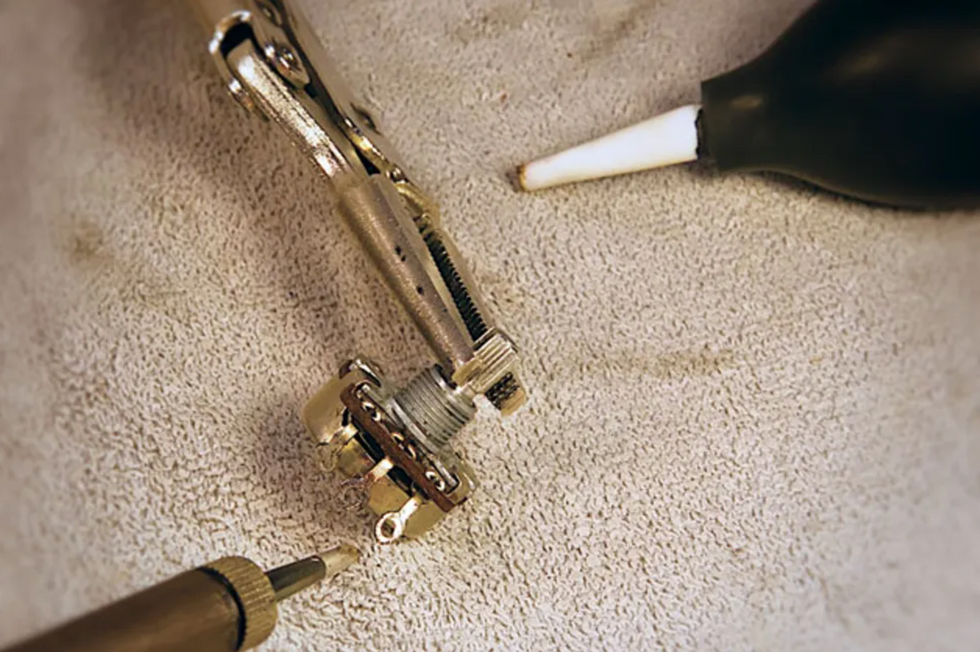
Photo 13
Look at that—a nice clean lug ready for its next mission (Photo 13).
Tip:It’s good to recycle pots and parts, but never try to reuse old solder. Clean it off and start fresh.
In case you’re wondering what happens to the old solder, every few months you simply work the tip out of the bulb, shake the collected cold solder beads into the trash, and reinsert the tip into the bulb. Good to go.
When you’re working with wire and electronics, you’ll often encounter instances where you need to insulate a connection from other wires or components. For example, you want to install a favorite old pickup into another guitar. However, the pickup leads have been cut back over the years and now they won’t reach the intended switch or pot, which means it’s time to splice short extensions to the pickup leads. No problem, except if the exposed wires touch each other or other components, they’ll create a short and you’ll hear only silence (or an annoying hum).
Electrical tape will do the job to insulate the splices, but heat shrink tubing—aka heat shrink—offers a more elegant solution. To make this work, you’ll need a heat source. Some folks use a lighter, but I prefer a heat gun because I like to avoid open flame in my workshop. Heat guns aren’t expensive and they get the job done efficiently and safely.
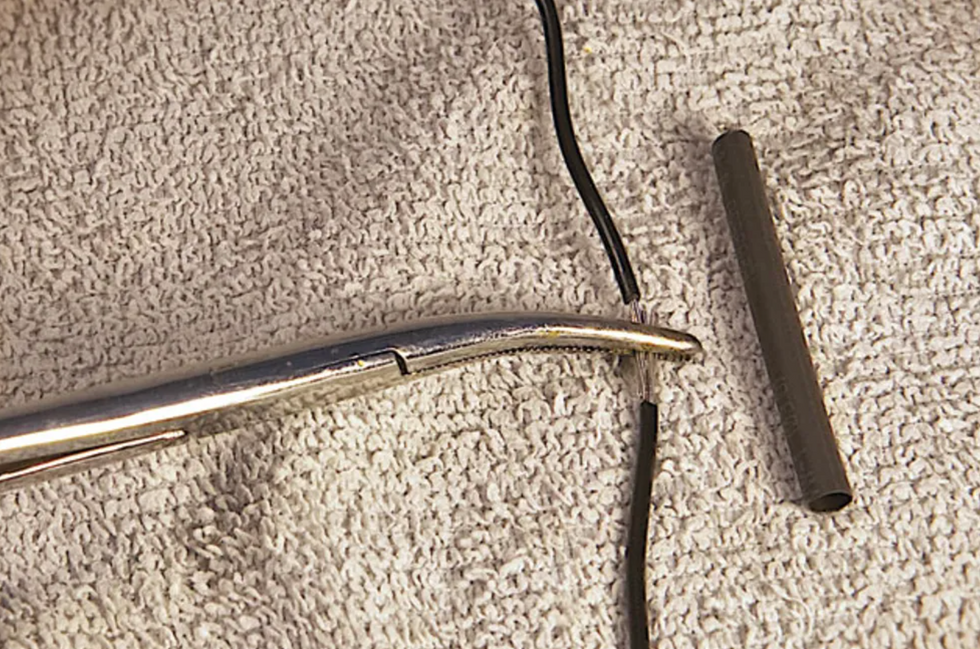
Photo 14
The details: Designed to slide over wire of different gauges, heat shrink comes in various diameters. After you select the right diameter to comfortably slip over your wire, cut off a piece that will straddle the solder splice or joint you plan to cover. The pros suggest a length that’s about three times as long as the exposed section. Use hemostats or a clamp to temporarily hold the ends together while you gauge the length you’ll need to cut (Photo 14).
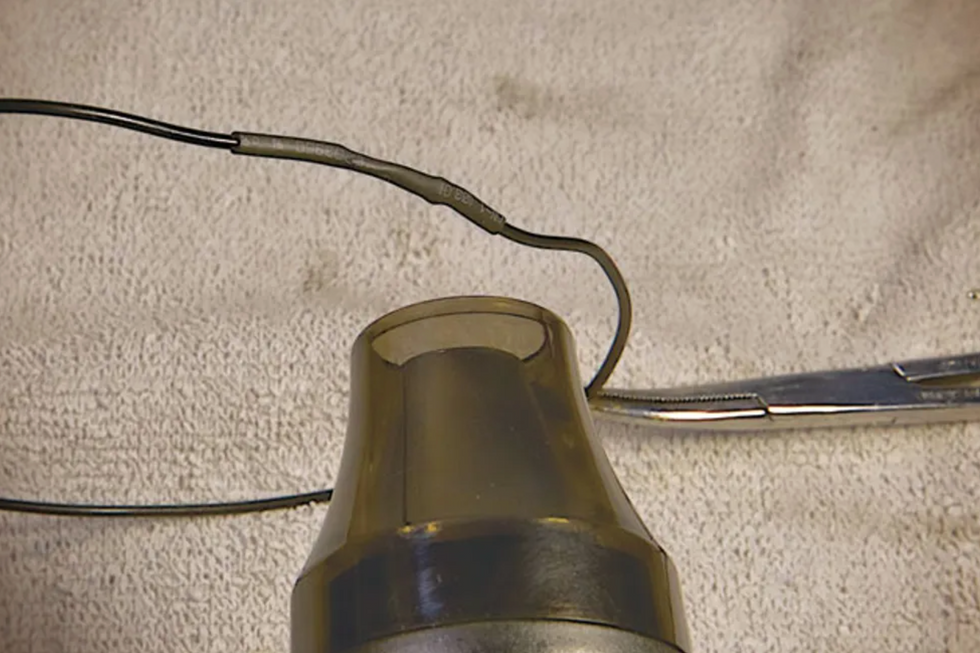
Photo 15
Next, remove the clamp, slide the heat shrink over one end of the wire (keep it far away from your hot iron) and solder the wires. When the solder has cooled, slip the heat shrink over the new joint, center it, and fire up the heat gun. The tubing will start to immediately contract around the joint (Photo 15). Don’t worry, air from the heat gun doesn’t get hot enough to compromise the solder joint. Once the tubing has completely closed up around the wire, you’re done. The joint now has a tough, new skin to protect it. —Andy Ellis
[Updated 1/13/22]
- Three Must-Try Guitar Wiring Mods - Premier Guitar ›
- The ABCs of Output Jacks - Premier Guitar ›
- The Stompbox-Builder's Secret Weapon - Premier Guitar ›
Stompboxtober is rolling on! Enter below for your chance to WIN today's featured pedal from Peterson Tuners! Come back each day during the month of October for more chances to win!
Peterson StroboStomp Mini Pedal Tuner
The StroboStomp Mini delivers the unmatched 0.1 cent tuning accuracy of all authentic Peterson Strobe Tuners in a mini pedal tuner format. We designed StroboStomp Mini around the most requested features from our customers: a mini form factor, and top mounted jacks. |
Many listeners and musicians can tell if a bass player is really a guitarist in disguise. Here’s how you can brush up on your bass chops.
Was bass your first instrument, or did you start out on guitar? Some of the world’s best bass players started off as guitar players, sometimes by chance. When Stuart Sutcliffe—originally a guitarist himself—left the Beatles in 1961, bass duties fell to rhythm guitarist Paul McCartney, who fully adopted the role and soon became one of the undeniable bass greats.
Since there are so many more guitarists than bassists—think of it as a supply and demand issue—odds are that if you’re a guitarist, you’ve at least dabbled in bass or have picked up the instrument to fill in or facilitate a home recording.
But there’s a difference between a guitarist who plays bass and one who becomes a bass player. Part of what’s different is how you approach the music, but part of it is attitude.
Many listeners and musicians can tell if a bass player is really a guitarist in disguise. They simply play differently than someone who spends most of their musical time embodying the low end. But if you’re really trying to put down some bass, you don’t want to sound like a bass tourist. Real bassists think differently about the rhythm, the groove, and the harmony happening in each moment.
And who knows … if you, as a guitarist, thoroughly adopt the bassist mindset, you might just find your true calling on the mightiest of instruments. Now, I’m not exactly recruiting, but if you have the interest, the aptitude, and—perhaps most of all—the necessity, here are some ways you can be less like a guitarist who plays bass, and more like a bona fide bass player.
Start by playing fewer notes. Yes, everybody can see that you’ve practiced your scales. But at least until you get locked in rhythmically, use your ears more than your fingers and get a sense of how your bass parts mesh with the other musical elements. You are the glue that holds everything together. Recognize that you’re at the intersection of rhythm and harmony, and you’ll realize foundation beats flash every time.“If Larry Graham, one of the baddest bassists there has ever been, could stick to the same note throughout Sly & the Family Stone’s ‘Everyday People,’ then you too can deliver a repetitive figure when it’s called for.”
Focus on that kick drum. Make sure you’re locked in with the drummer. That doesn’t mean you have to play a note with every kick, but there should be some synchronicity. You and the drummer should be working together to create the rhythmic drive. Laying down a solid bass line is no time for expressive rubato phrasing. Lock it up—and have fun with it.
Don’t sleep on the snare. What does it feel like to leave a perfect hole for the snare drum’s hits on two and four? What if you just leave space for half of them? Try locking the ends of your notes to the snare’s backbeat. This is just one of the ways to create a rhythmic feel together with the drummer, so you produce a pocket that everyone else can groove to.
Relish your newfound harmonic power. Move that major chord root down a third, and now you have a minor 7 chord. Play the fifth under a IV chord and you have a IV/V (“four over five,” which fancy folks sometimes call an 11 chord). The point is to realize that the bottom note defines the harmony. Sting put it like this: “It’s not a C chord until I play a C. You can change harmony very subtly but very effectively as a bass player. That’s one of the great privileges of our role and why I love playing bass. I enjoy the sound of it, I enjoy its harmonic power, and it’s a sort of subtle heroism.”
Embrace the ostinato. If the song calls for playing the same motif over and over, don’t think of it as boring. Think of it as hypnotic, tension-building, relentless, and an exercise in restraint. Countless James Brown songs bear this out, but my current favorite example is the bass line on the Pointer Sisters’ swampy cover of Allen Toussaint “Yes We Can Can,” which was played by Richard Greene of the Hoodoo Rhythm Devils, aka Dexter C. Plates. Think about it: If Larry Graham, one of the baddest bassists there has ever been, could stick to the same note throughout Sly & the Family Stone’s “Everyday People,” then you too can deliver a repetitive figure when it’s called for.
Be supportive. Though you may stretch out from time to time, your main job is to support the song and your fellow musicians. Consider how you can make your bandmates sound better using your phrasing, your dynamics, and note choices. For example, you could gradually raise the energy during guitar solos. Keep that supportive mindset when you’re offstage, too. Some guitarists have an attitude of competitiveness and even scrutiny when checking out other players, but bassists tend to offer mutual support and encouragement. Share those good vibes with enthusiasm.
And finally, give and take criticism with ease. This one’s for all musicians: Humility and a sense of helpfulness can go a long way. Ideally, everyone should be working toward the common goal of what’s good for the song. As the bass player, you might find yourself leading the way.Fuchs Audio introduces the ODH Hybrid amp, featuring a True High Voltage all-tube preamp and Ice Power module for high-powered tones in a compact size. With D-Style overdrive, Spin reverb, and versatile controls, the ODH offers exceptional tone shaping and flexibility at an affordable price point.
Fuchs Audio has introduced their latest amp the ODH © Hybrid. Assembled in USA.
Featuring an ODS-style all-tube preamp, operating at True High Voltage into a fan-cooled Ice power module, the ODH brings high-powered clean and overdrive tones to an extremely compact size and a truly affordable price point.
Like the Fuchs ODS amps, the ODH clean preamp features 3-position brite switch, amid-boost switch, an EQ switch, high, mid and low controls. The clean preamp drives theoverdrive section in D-Style fashion. The OD channel has an input gain and outputmaster with an overdrive tone control. This ensures perfect tuning of both the clean andoverdrive channels. A unique tube limiter circuit controls the Ice Power module input.Any signal clipping is (intentionally) non-linear so it responds just like a real tube amp.
The ODH includes a two-way footswitch for channels and gain boost. A 30-second mute timer ensures the tubes are warmed up before the power amp goes live. The ODH features our lush and warm Spin reverb. A subsonic filter eliminates out-of-band low frequencies which would normally waste amplifier power, which assures tons of clean headroom. The amp also features Accent and Depth controls, allowing contouring of the high and low response of the power amp section, to match speakers, cabinets andenvironments. The ODH features a front panel fully buffered series effects loop and aline out jack, allowing for home recording or feeding a slave amp. A three-position muteswitch mutes the amp, the line out or mute neither.
Built on the same solid steel chassis platform as the Fuchs FB series bass amps, the amps feature a steel chassis and aluminum front and rear panels, Alpha potentiometers, ceramic tube sockets, high-grade circuit boards and Neutrik jacks. The ICE power amp is 150 watts into 8 ohms and 300 watts into 4 ohms, and nearly 500 watts into 2.65 ohms (4 and8 ohms in parallel) and operates on universal AC voltage, so it’s fully globallycompatible. The chassis is fan-cooled to ensure hours of cool operation under any circumstances. The all-tube preamp uses dual-selected 12AX7 tubes and a 6AL5 limiter tube.
MAP: $ 1,299
For more information, please visit fuchsaudiotechnology.com.
Jackson Guitars announces its first female signature artist model, the Pro Series Signature Diamond Rowe guitar.
“I‘m so excited about this new venture with the Jackson family. This is a historic collaboration - as I am the first female in the history of Jackson with a signature guitar and the first female African American signature Jackson artist. I feel so honored to have now joined such an elite group of players that are a part of this club. Many who have inspired me along this journey to get here. It’s truly humbling.” says Diamond.
Diamond Rowe is the co-founder and lead guitarist for the metal/hard rock band Tetrarch. Since co-founding the band in high school, Tetrarch has become one of the most talked about up-and-coming bands in the world - with several press outlets such as Metal Hammer, Kerrang, Revolver, Guitar World and many others boldly naming Diamond Rowe the world’s next guitar hero. Tetrarch has connected with many fans while performing on some of the world's biggest stages garnering spots alongside several of the heavy music world’s biggest names such as Guns N’ Roses, Slipknot, Lamb of God, Disturbed, Avenged Sevenfold, Sevendust, Rob Zombie, Trivium, and many many others. The Jackson Pro Series Signature Diamond Rowe DR12MG EVTN6 is based on Jackson’s single-cut Monarkh platform and is a premium guitar designed for progressive metal players seeking precision and accuracy.
Crafted in partnership with Diamond, this model boasts a 25.5 “ scale, Monarkh-styled nyatoh body draped with a gorgeous poplar burl top, three-piece nyatoh set-neck with graphite reinforcement, and 12˝ radius bound ebony fingerboard with 24 jumbo frets. The black chrome-covered active EMG® 81/85 humbucking bridge and neck pickups, three-way toggle switch, single volume control, and tone control provide a range of tonal options. The Evertune® bridge ensures excellent tuning stability, while the Dark Rose finish with a new custom 3+3 color-matched Jackson headstock and black hardware looks simply stunning.
To showcase the Pro Plus Signature Diamond Rowe DR12MG EVTN6, Diamond shares her journey as a guitarist, delving into the inspiration behind her unique design specifications and the influential artists who shaped her sound within a captivating demo video. This video prominently features powerful performances of Tetrarch’s latest release, “Live Not Fantasize,” and “I’m Not Right” showcasing the DR12MG EVTN6’s unparalleled tonal versatility and performance capabilities.
MSRP $1699.99
For more information, please visit jacksonguitars.com.