
If you read my column regularly, you know I typically focus on electric guitars and useful ways to mod them. But recently I started throwing some acoustic-oriented topics into the mix (“Conquering Classical Guitar String-Changing Terror" and “Cleaning Up an Acoustic from the Inside"), and since then I've received numerous requests for another column dealing with acoustic guitars.
So this time around we'll look at effective DIY methods for restoring vintage tuners. To illustrate these techniques, I'll use antique brass tuners from a 1924 German classical guitar that came into the shop for a full restoration, but you can apply the cleaning and restoring principles to a variety of guitars with non-sealed tuners, including flattops, old-school electrics, and even basses.
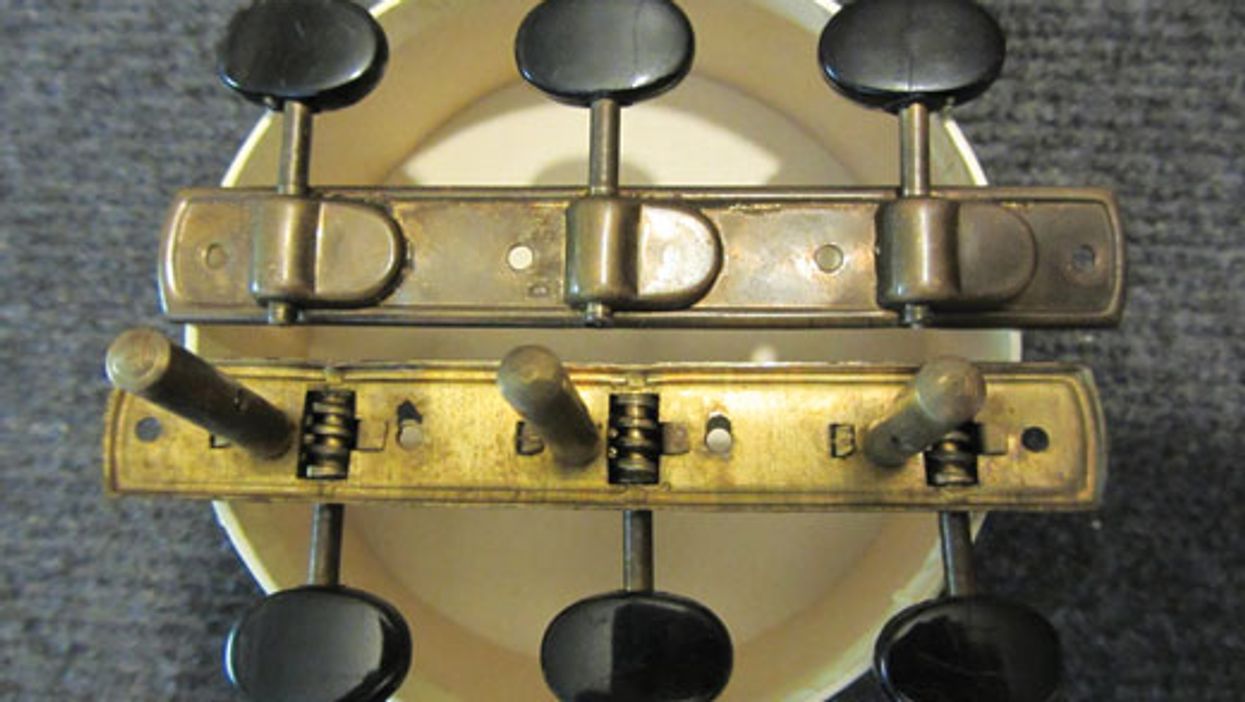
As you can see in Photo 1, these tuners were in pretty bad shape: The brass was really tarnished, the buttons were scratched and covered with dirt, and the gears were so packed with hardened grease they wouldn't turn. Rather than replacing the tuners, the customer wanted them fully restored, so the first step was to make them functional again. I knew once they were working I could make them look nice, too. I'm going to show you how I accomplished these goals, but there are many ways to achieve similar results. If you have other proven techniques, please share them in the comments section.
Initial cleanup. Fill a bowl with warm water mixed with standard dish soap and completely submerge the tuners in the soapy solution. Let them soak for an hour. Then, with the tuners still in the bowl, brush them thoroughly with a soft toothbrush. (You might be shocked by the water's color.) Finally, carefully rinse the tuners under cold running water.
If you have access to an ultrasonic cleaner—a device typically used to clean eyeglasses, jewelry, and watches—put the tuners into it, fill it up with water and some liquid cleaner, and run the device for 90 seconds. You don't need a professional unit for this; any consumer model will do.
Now try turning each tuner to see if its buttons will turn. Often these two steps are all that's required to get the gears moving again. Never force a tuner to turn because chances are good you'll break off its button or damage the gears.
In this case, only one of the six tuners came unstuck—the others remained immobile. So it was time to bring in the big guns.
Dissolving the hardened grease. Get a hair dryer and a can of naphtha, and lay out some newspapers. A chemical pipette will also be very helpful, but if that's not available, a small spoon will do.
A word of warning: Naphtha is highly flammable and you shouldn't inhale its vapors, so wear gloves, goggles, and work outside or by an open window if possible. If not, wear a safety mask or respirator. Oh yeah—keep a working fire extinguisher handy.
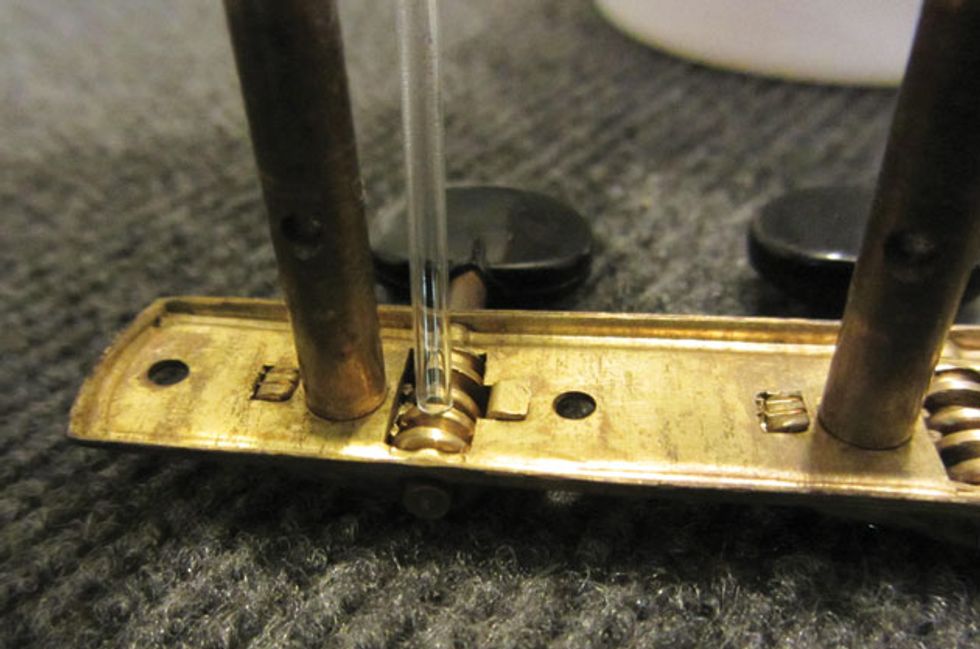
Photo 2 — Photo courtesy of singlecoil.com
Warm up the tuners with the hair dryer—this will speed up the deep cleaning process. Once the tuners are warm, put them on the newspaper with their shafts facing upwards and drip the naphtha into them (Photo 2). If you're working with vintage tuners, be sure to prevent the naphtha from contacting the buttons. Older, pre-plastic materials can disintegrate if they come in contact with naphtha or any other solvents.
Repeat this process several times, and then try to turn the tuner shafts. Sometimes it takes several shots of naphtha to coax tuners back to life. In this case, the remaining five tuners came loose and could be turned again. But if any of your tuners don't budge, grab the bowl you used previously and put the tuners in it with the buttons facing upwards. Now pour naphtha into the bowl until the tuner gears are submerged. Again, if you're working with vintage buttons, don't let the naphtha touch them. Soak the gears for a while, then remove them from the bowl, dry them with a paper towel, and see if they turn.
Old tuners get stuck because, in the past, they were lubricated with grease rather than oil. Over the decades grease solidifies, especially when the tuners aren't in regular use. Naphtha dissolves the hardened grease, allowing the gears to turn freely again.
Look sharp! Once the tuners are back in working condition, it's time to enhance their visual appearance. Brass tarnishes over time (this can range from a little patina to almost black), and you'll likely see some verdigris on brass parts if they've been subjected to moisture. You'll face a similar situation with vintage nickel tuners and hardware because, like brass, nickel can also build up a cloudy patina.
At this point you need to make a decision: Do you like to have some patina left on the tuners or do you want them to shine like new? Remember, if you decide to retain some patina, you can always change your mind down the road and polish them until they shine like new, which is what my customer requested. We'll look at both procedures, starting with how to clean the tuners while retaining some natural patina.
To keep some patina on the brass, you'll need a glass, as well as salt, flour, and vinegar. Put a tablespoon of salt and a tablespoon of flour into the glass and mix them thoroughly. Now pour vinegar into the glass, while stirring the mixture. The goal is to create a creamy paste, so add the vinegar slowly. If the mixture becomes too liquid, it won't work properly. In that case, simply add some flour to thicken the solution and mix it up once more. It's a good idea to wear gloves and goggles and, again, work outside if you can because this paste smells pretty rank.
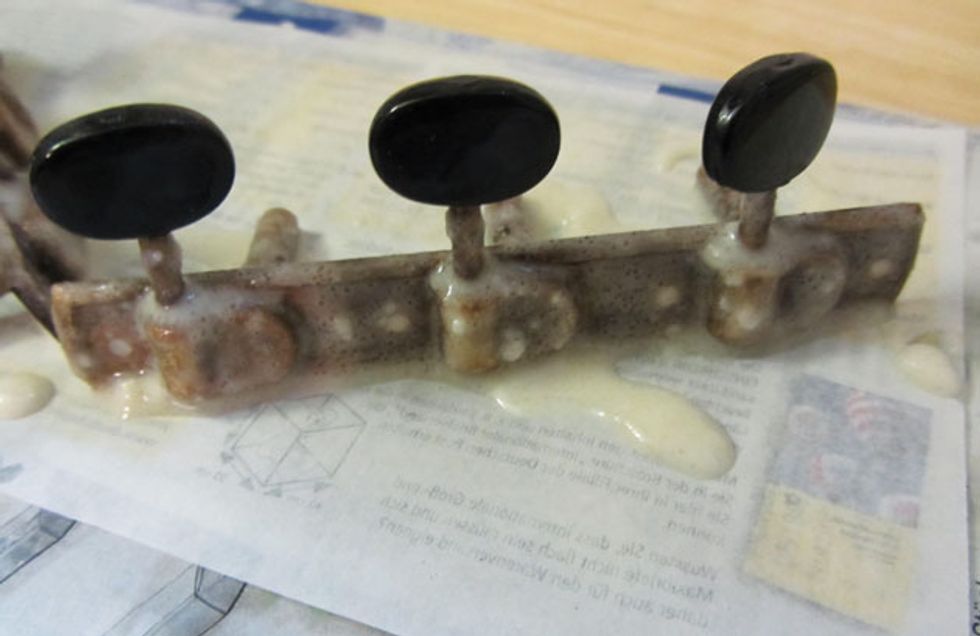
Photo 3 — Photo courtesy of singlecoil.com
Next, set the tuners on several layers of newspaper and spread the paste on the metal with a small, soft brush. Don't apply paste to the buttons, but otherwise smother the tuners (Photo 3). And don't forget the screws, which you can immerse in their own little puddle of paste. Now let the tuners and screws stew in the paste for several hours. For “some patina left," a period of about five hours works well.
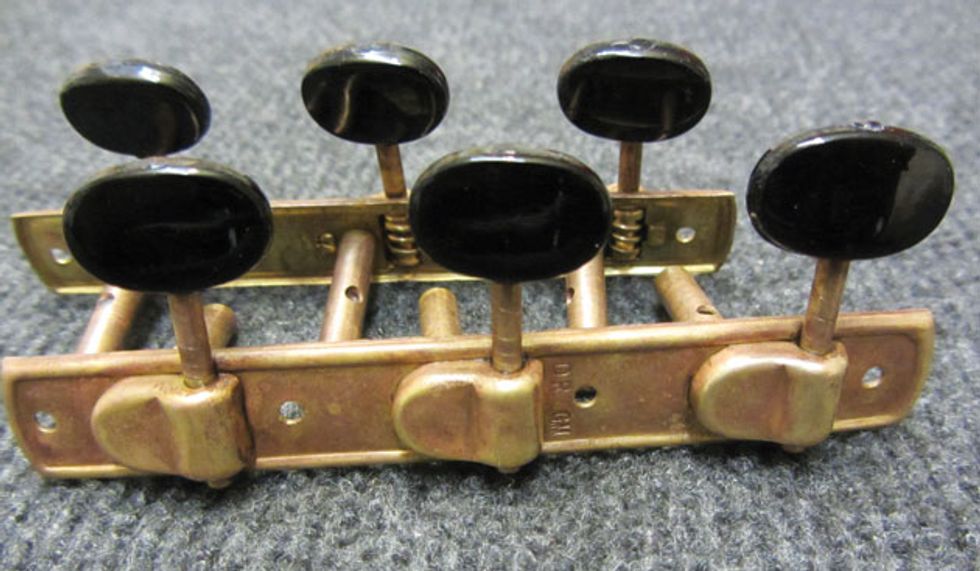
Photo 4 — Photo courtesy of singlecoil.com
After marinating the tuners, put them under warm running water to wash off the paste and then dry them with a soft cloth. (To avoid losing the screws down the sink drain, simply rinse them in a jar.) Photo 4 shows what the tuners look like after soaking for about five hours in the vinegar paste.
If you elect to make them shiny, you can take the short route: Apply some toothpaste to a soft cotton cloth (an old t-shirt works great), drip some water on the tuners, and polish them until they shine. Alternatively, you can also use a soft toothbrush for this or a Dremel tool with a soft polishing bit. Rinse the paste off under running water and enjoy the new glory.

Photo 5 — Photo courtesy of singlecoil.com
Another excellent and easy option is to use a silver polishing cloth—just rub the tuners gently and you're done. If you're working with brass, be sure to buy the cloth intended for silver because the type made to clean gold doesn't work as well. Photo 5 shows what our project tuners look like after two minutes of polishing with the silver cloth.
We're almost finished now. If you have non-metal buttons, buff them with a clean piece of cotton anointed with toothpaste. With little effort, the buttons will look like new.
If you want to protect your tuners from new tarnish, you can use some wadding polish like Eagle One Nevr-Dull, a popular treatment for bikes and cars. Nevr-Dull creates a protective barrier that will last a very long time. Simply rub the tuners with the wadding polish, let them dry for a minute, and wipe them off with a paper towel.
Lube up. The last step is to lubricate the tuners again to ensure they work properly. The professional solution is Teflon-based oil like Tri-Flow, but you can also use chainsaw or machine oil. But stay away from cooking oil; it won't work properly and will eventually turn rancid. Yuck.
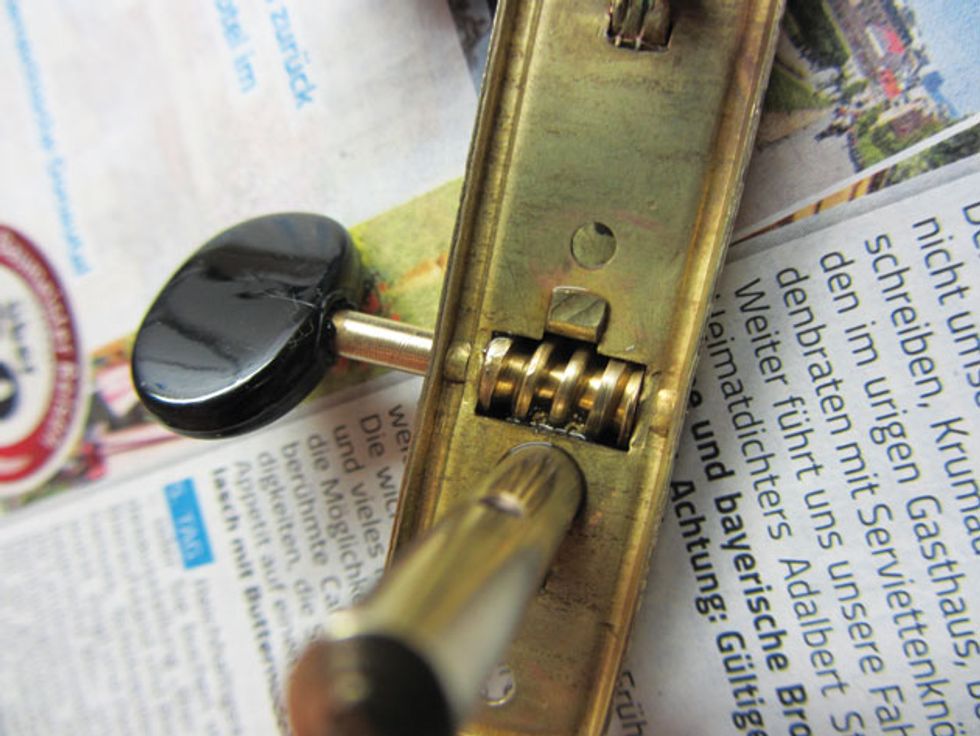
Photo 6 — Photo courtesy of singlecoil.com
Place the tuners on clean newspaper, drip the lubricant onto the exposed gears (Photo 6), and turn each shaft several times. Wait for a minute and then repeat the process. Let the tuners sit on the newspaper for a day, then wipe off the excess lubricant with a paper towel. Your tuners are now ready for decades of service.
Next month we'll explore the Fender Mustang—one of the most underrated guitars ever—so stay tuned. Until then ... keep on modding!